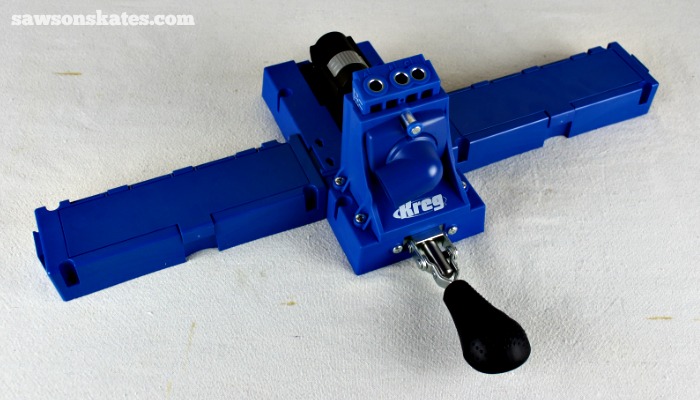
5 Reasons Why the Kreg Jig K5 Will Change the Way You Make Pocket Holes
If you’re in the market for your first pocket hole jig or considering replacing your current pocket hole jig, put the Kreg Jig K5 at the top of your list. I started DIYing with the Kreg Jig K3, but recently I had an opportunity to put the K5 to the test, and the verdict is in… I’m in LOVE! Today I’m sharing 5 reasons why the Kreg Jig K5 will change how you make pocket holes.
You may also enjoy these 9 Solutions to Common Pocket Hole Problems.
Recently I designed and built this attractive, multitasking outdoor coffee table. The coffee table project was sponsored by Build Something and Kreg Jig. Build Something is Kreg’s DIY project plan site. In addition to partnering with them for the project, they also helped me out with the more than 300 pocket holes that I needed to drill for the coffee table. The shiny new Kreg Jig K5 they sent me made quick work of drilling all those pocket holes. I thought I loved my Kreg K3, but I have a new crush… my Kreg Jig K5!!! (Shhh… don’t tell my K3!)
I received the K5 in exchange for my honest review. All thoughts and opinions are my own.
This tutorial contains affiliate links to supplies and tools. Purchases made using these links help support the Saws on Skates website and allows me to share more projects and tips with you. There is no cost to you for using these links. Visit my site policies for more information.
What is a Pocket Hole Jig?
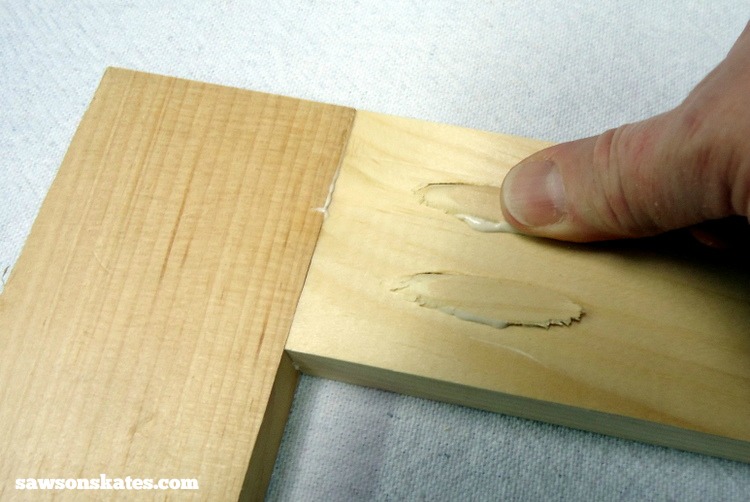
Before I tell you about the awesomeness that is the Kreg Jig K5, let’s review what a Kreg Jig does. A Kreg Jig uses preset holes to drill angled pocket holes in a piece of wood. A pocket screw, specifically designed for use with pocket holes, draws the two pieces of wood together to create a strong joint.
The most common joints made with a Kreg Jig are butt joints or edge joints. A butt joint joins the end of one piece of wood to the edge of another piece of wood. Common uses for butt joints are furniture assemblies and cabinet doors.
Related: How to Make DIY Cabinet Doors
An edge joint joins the edges of two boards. Common uses for edge joints are panels and table tops. I use a Kreg Jig to build nearly all of my DIY furniture projects.
Related: How to Edge Join with Pocket Holes
5 Reasons Why the Kreg Jig K5 Will Change the Way You Make Pocket Holes
Ratcheting Clamp
The clamp on my old K3 worked well, but it took a little turning when using different wood thicknesses. For thinner stock, I would need to rotate the clamp closer to the drill guide. For thicker stock, I would turn the clamp away from the drill guide.
It’s not a difficult process, just a little time-consuming, especially when I’m excited about getting started on a new piece of DIY furniture, and I just want to start drilling pocket holes for my project!

The ratcheting clamp on the Kreg Jig K5 eliminates the need for turning. Not only that, but it adjusts quickly and easily.
To get started, move the clamp to the back of the jig. Lower the front-mounted handle, place your workpiece behind the drill guide, press down on the clamp and push it until it touches the workpiece. Raise the handle and move the clamp forward until you hear it click twice. That’s it. The clamp is set and ready to use. It probably took me longer to type and for you to read this paragraph than it takes to adjust the clamp on the K5!
Another improvement is the clamp material. The surface of my K3 is made of hard plastic. The surface of the Kreg Jig K5 is soft rubber which means there is less of a chance of the clamp marring the face of your lumber.
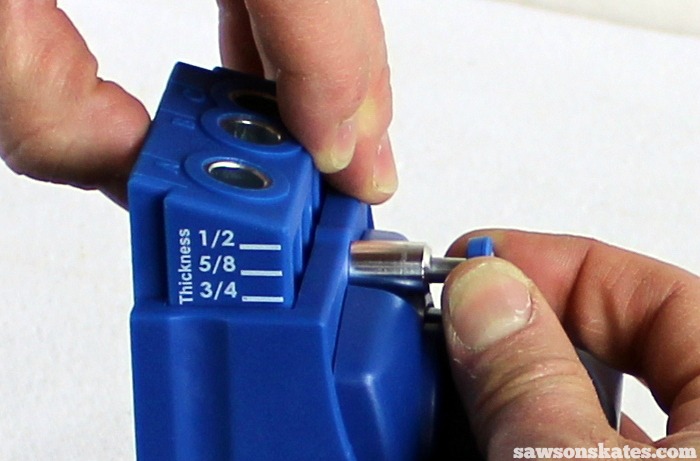
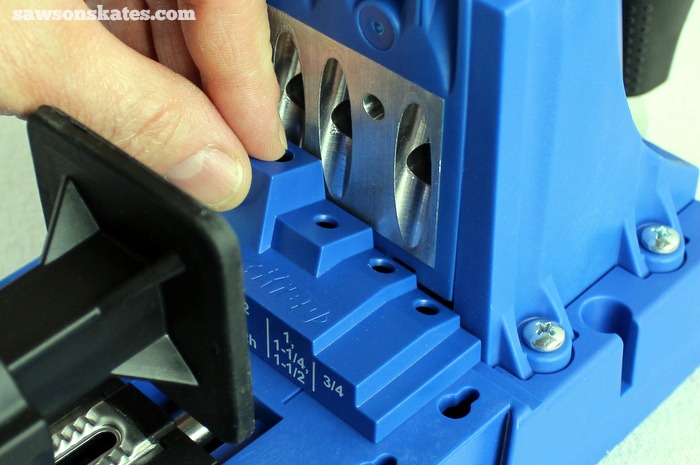
Quick Release Guide Block Pin
The drill guide block on my old K3 took a little turning too. Again, nothing major. To adjust the K3 guide block, first, I would need to loosen the set screw, move the guide block to the correct depth and then tighten it to keep it in place.
The Kreg Jig K5 has a spring-activated guide block pin. Pull the pin, adjust the guide block, release the pin. DONE! Also misplacing the set screw isn’t an option on the Kreg Jig K5 like it was on my K3!
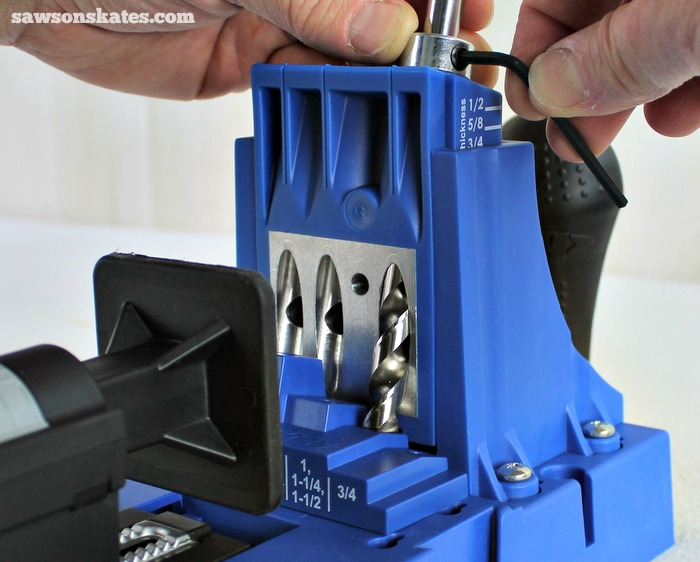
Stop Collar Setting Block
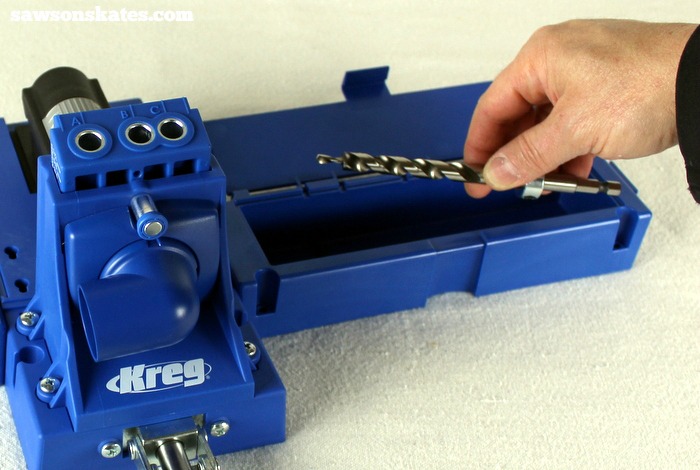
Another time-saving feature of the Kreg Jig K5 is the stop collar setting block. Once you have the guide block depth adjusted, you can use the stop collar setting block to set the depth of the drill bit collar.
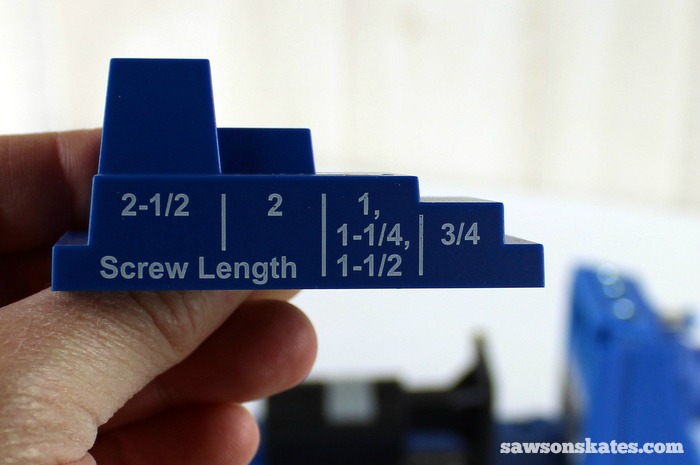
To set the drill bit collar, first, place the stop collar setting block behind the drill guide.
Lower the bit through the drill guide into the corresponding hole in the stop collar setting block and tighten the Allen. The stop collar setting block takes the guesswork out of setting the correct depth of the stop collar.
TIP: When using the stop collar setting block, the drill guide block is adjusted to the thickness of your workpiece, and the stop collar setting block is set to the length of the screw you will be using.
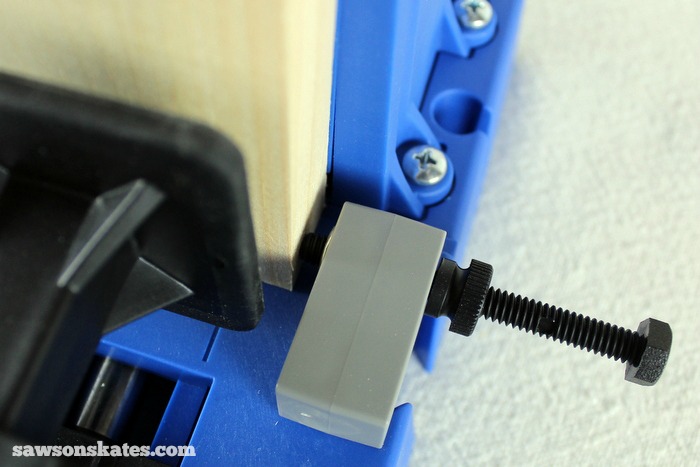
Workpiece Stop
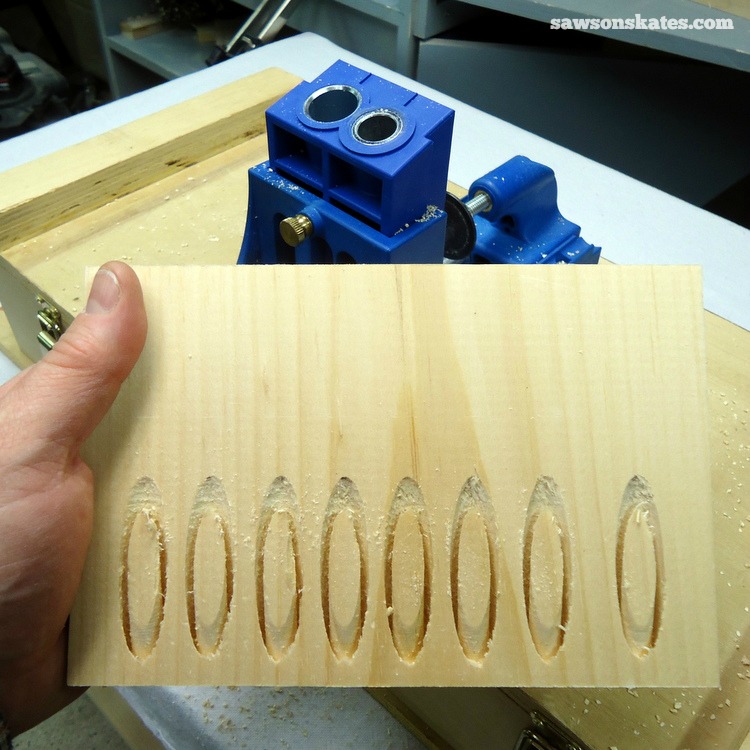
I think my favorite feature of the Kreg Jig K5 is the handy workpiece stop. Once set up, the workpiece stop allows you to insert your workpiece in the jig and drill pocket holes in the same location every time.
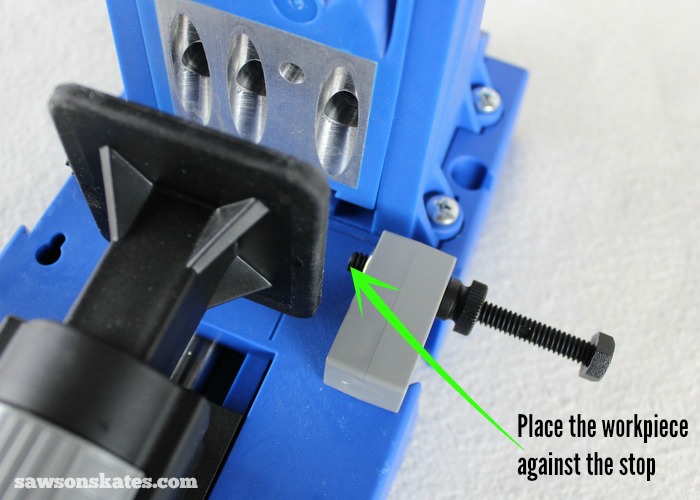
The workpiece stop is great for projects like the outdoor coffee table, outdoor plant stand, and dog gate. These projects each have many parts that need pocket holes drilled in the same location.
Here’s how I use it: I installed the workpiece stop and tested the setup on a piece of scrap wood. Once I was pleased with the position of the pocket holes on the test piece, I was able to drill pocket holes in the same location on every piece, every time. What a time saver!
Storage Wings
For my K3, I built a case to store the driver, Allen key, and other related jig parts. The case also helped keep long boards properly aligned in the jig.
The storage wings of the Kreg Jig K5 serve the same purpose. Wings on either side of the jig open to store the Allen key, drivers, drill bit, etc. When closed the wings help keep long boards aligned correctly in the jig.
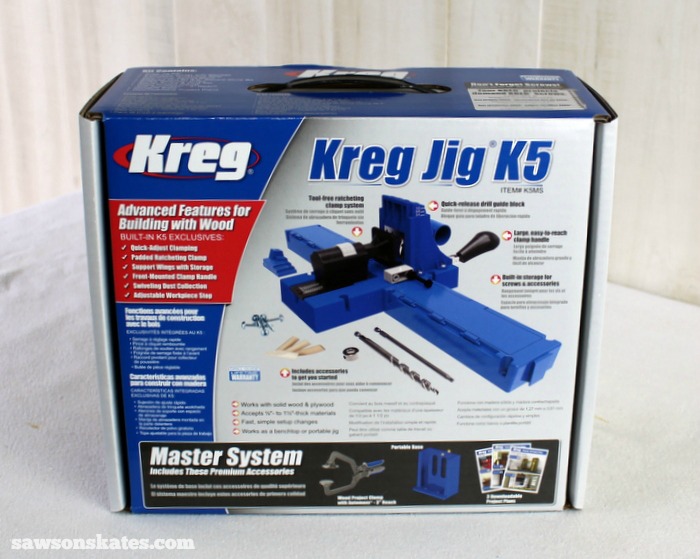
Everything You Need to Get Started
In addition to all of these awesome features, the Kreg Jig K5 Master System also includes a project clamp, the drill bit, the driver, and an assortment of pocket hole screws. The kit includes everything you need to start drilling pocket holes and building DIY furniture projects!
Update about the K5
The Kreg Jig K5 has been retired and replaced by the Kreg Jig 720.
Related: How to Use a Kreg Pocket Hole Jig 720
Make Your Pocket Holes Virtually Disappear
The Kreg Pocket Hole Plug Cutter will take your furniture building to the next level. The plug cutter makes plugs to fill pocket holes. The plugs are cut from leftover scrap wood from your project, so the plugs will exactly match the wood color and wood grain of your project.
The plugs are glued into the pocket holes and then sanded flush. With a Kreg Pocket Hole Plug Cutter, your pocket holes virtually disappear and you’ll make your DIY projects look more professional. This a “gotta have it” tool for the DIYer! Skate over to 9 Secrets to Make the Best Pocket Plugs to learn all of my plug making tricks.
FREE Pocket Hole Mistakes Guide
Master your pocket hole projects with this FREE ten-page Pocket Hole Mistakes You Don’t Want to Make Guide! The guide is overflowing with useful hints and easy tips to help you avoid time-consuming mistakes. Click below, get your FREE guide, and tackle your next pocket hole project with confidence!

Final Thoughts
Whether you’re building DIY furniture or for any DIY project, hands down the Kreg Jig K5 is the pocket hole jig you want. The ratcheting clamp, quick release guide block pin, stop collar setting block, workpiece stop, storage wings and all of the extra items included in the kit make it a winner. Plus, you can’t beat Kreg’s quality and durability.
Thank you for stopping by. If you found this info useful, would you please take a moment and pin it to Pinterest? I’d really appreciate it!
Pin This For Later

Hi there – I’m Scott, a woodworking enthusiast and creator of Saws on Skates, a site I started in 2015 to share easy-to-follow tutorials, space-saving shop tips, and project inspiration for DIYers at any skill level. Learn more about my woodworking journey here.
You did not make mention of the vacuum connection. Without connection wood chips fly everywhere. With vacuum connection not one chip noticed!
I LOVE the vacuum attachment! It’s definitely a much cleaner operation when you use it.
What about adding a hole to an existing piece? Can it come apart to take the jig to the piece if the piece can’t come to the jig? I assume it can but didn’t see it mentioned.
Hi Rob – Yes, the K5 does come apart and you can clamp to the drill guide to an existing piece to drill pocket holes. Depending on the application, like if you’re trying to make a repair, the Kreg Jig Mini is a great option. It’s smaller and can get in tighter spaces.
Can you adapt the K 5 upgrades to the K 4? i hate to turn around now and purchase the 5 having just purchased the 4, but a year or so ago.
Hi Frank – Unfortunately I believe the K5 features are only available with the purchase of a K5.
Thank You, I appreciate your prompt answer.
Hi Scott,
I’m making a hexagon and thinking of using my new K5 to drill the pocket holes. But I don’t know how to set up the jig since my pieces will be on a 30 degree angle. Have you done something like this? Just wondering if it’s doable without a lot of adjusting.
Thanks, Steve
Hi Steve – I’ve never made a hexagon box with pocket holes, so I checked in with my friend Mike at Kreg Tool. Here’s what he said:
“So this is something we don’t have a ton of information on but it can be done. There is a little bit of trial and error in the process but I did find some guidelines in an old K2000 Manual. I’m including the relevant pages from that manual that will hopefully help. The one issue your reader may run into, depending on the diameter of the box, is having enough room the drive the screws. There is the option of using a 90° drill attachment with a 3″ driver.”
Here’s a link to the page Mike referenced. I hope this helps.
Hey Scott, after I asked I wondered if you would think I was off my rocker, and you wouldn’t be totally wrong. But you and your buddy at Kreg steered me to the answer. A simple jig as shown will solve the concern about not having enough wood for the screws. I’m going to use this idea to make a curved piece as well so I got a twofer.
You’re the best,
Steve