3 Reasons Why I Don’t Use Polyurethane
Polyurethane has its place, but for me, I generally don’t use it for my DIY furniture projects. Polyurethane is too finicky, the application is difficult and it doesn’t give the look I want for my projects. These are three reasons I don’t use polyurethane and today I’m sharing what finish I use instead.
For your convenience, this post contains affiliate links to supplies or tools I used to complete this project. Purchases made using these links help support the Saws on Skates website and allow me to share more DIY projects. and DIY tips with you. There is no cost to you for using these links. Click here to visit my site policies.
Properly Prep Your Project
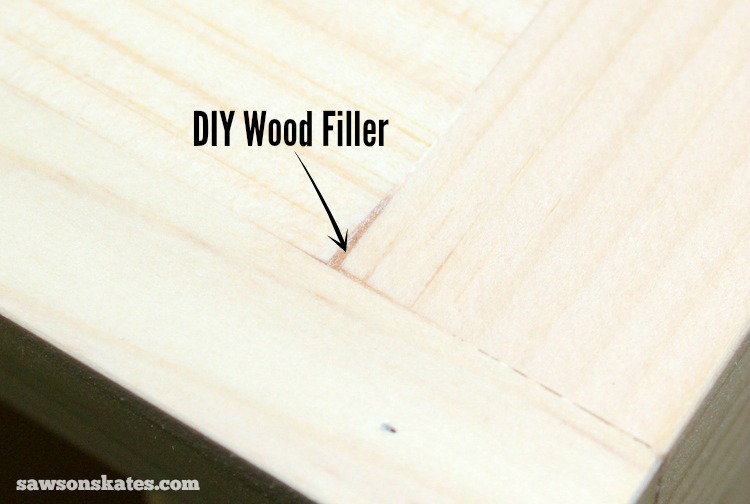
Before I share why I’m not a fan of polyurethane, first I properly prepare my DIY furniture project for a finish coat. The first step to a flawless finish is to properly sand the project. Next, I inspect the piece and fill any nail holes, gaps or cracks with an easy to make DIY wood filler.
My DIY wood filler is made with sanding dust from the furniture project I’m working on, so the filler always perfectly matches the wood color of my project.
If I’m staining the project, first I apply a coat of black tea. Applying tea helps prevent blotchiness and gives my DIY furniture a rich, uniform color when the wood stain is applied. After the tea dries and the piece is sanded, I apply the wood stain. I’m a BIG fan of Rust-Oleum Ultimate Wood Stains. I love the one coat coverage, the quick drying time and Rust-Oleum stains always produce deep, rich stain colors.
What is Polyurethane?
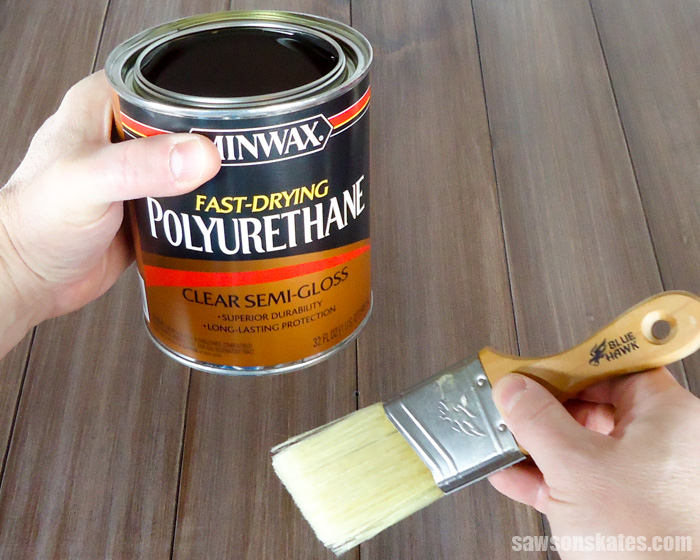
Polyurethane is a product used to seal and protect wood. The durability of a polyurethane film finish depends on how thick the dried film is. Three coats of poly are usually needed to provide an adequate amount of durability.
Polyurethane can be applied with a brush, sprayer or spray can. A wipe-on poly is also available.
There are two types of poly. Oil-based and water-based. Oil-based poly cleans up with paint thinner. Water-based poly cleans up with water.
Oil-based poly slightly darkens and enhances the wood grain. Water-based poly has no depth of finish. In other words, it does not enhance the wood grain.
Poly is available in different sheens like matte, satin, semi-gloss and gloss.
Related: Polycrylic vs Polyurethane: Are They the Same?
What is Polyurethane Used For?
Poly is used to seal and protect wood. It prevents oil, grease, and water from penetrating wood doors, floors, cabinets, and furniture. It’s a durable finish that also protects against heat and scratches.
3 Reasons Why I Don’t Use Polyurethane
Finicky Finish
Polyurethane is way too fussy for me. Just look at the instructions on the back of the container… polyurethane must be applied in a dust free environment. That rules out applying polyurethane in my workshop or applying polyurethane outside. In my small house, that means I’m applying poly to my furniture projects in my kitchen!
Air bubbles are also an issue with polyurethane. Never shake a can of polyurethane or wipe your brush on the rim of the can because you’ll introduce bubbles into the finish. The bubbles will dry in your finish and leave the surface bumpy. The only way to get rid of the bubbles is to sand, which means more time and effort.
Just like air bubbles, drips can be an issue with polyurethane. Drips must be corrected right away while still wet. If drips are allowed to dry they’ll need to be cut out with a razor blade and sanded. Again, this is an extra step that will consume your time and effort
Application is Difficult
Applying polyurethane is difficult. The product must be applied with a brush in long, even strokes. You must also keep a wet edge. If you touch an area with your brush that is dry or drying, you’ll pull the finish which could leave bumps when it finally dries. These bumps will need to be sanded.
To apply additional coats, you’ll need to lightly sand with 220 grit sandpaper or steel wool. Again, this means more time and effort.
The Final Look
While polyurethane provides a clear, durable finish, to me it looks plastic-like. Polyurethane does not become part of the wood. If you look closely, you can see it just sits on top of the surface.
Where to Use Poly
Don’t get me wrong, polyurethane has its place. It’s great for floors, doors, woodwork around windows and doors and furniture that will get lots of abuse like dining tables and kitchen cabinets.
What I Use Instead
For my furniture projects, I use a top coat that is waaaay less finicky, the application is a snap and the finish looks like a hand rubbed finish you might find on a quality antique. I use Bob’s Miracle finish for wood!
Bob’s Miracle finish for Wood is a DIY wipe on top coat you make yourself. It’s three simple ingredients: gloss spar varnish, boiled linseed oil and paint thinner.

Easy Finish
Because Bob’s Miracle finish for wood is a wipe on top coat, you don’t have to worry about applying in a dust free environment. You simply wipe it on, allow it to penetrate the wood for a few minutes, then wipe off. This means you can apply outside with plenty of fresh air and not have to worry about dust or insects getting trapped in your finish.
Air bubbles and drips aren’t a concern either. Again, you’ll wipe it on and wipe it off. So bubbles and drips are virtually impossible.
Easy Application
Did I mention Bob’s Miracle finish for wood is a wipe on top coat? That means the application is sooo easy! Wipe it on with a rag, allow to penetrate and wipe it off with a clean rag. That’s it! No brushes, no worrying about keeping a wet edge and no sanding in between coats.
Final Look
Because Bob’s Miracle finish for wood actually penetrates into the wood, it becomes part of the wood itself. It doesn’t have that plastic, floating on top of the wood look that poly has. For me, Bob’s Miracle finish for Wood has the exact look I want for my furniture projects. A timeless, not too shiny, hand rubbed look you might find on a quality antique.
Where to Use
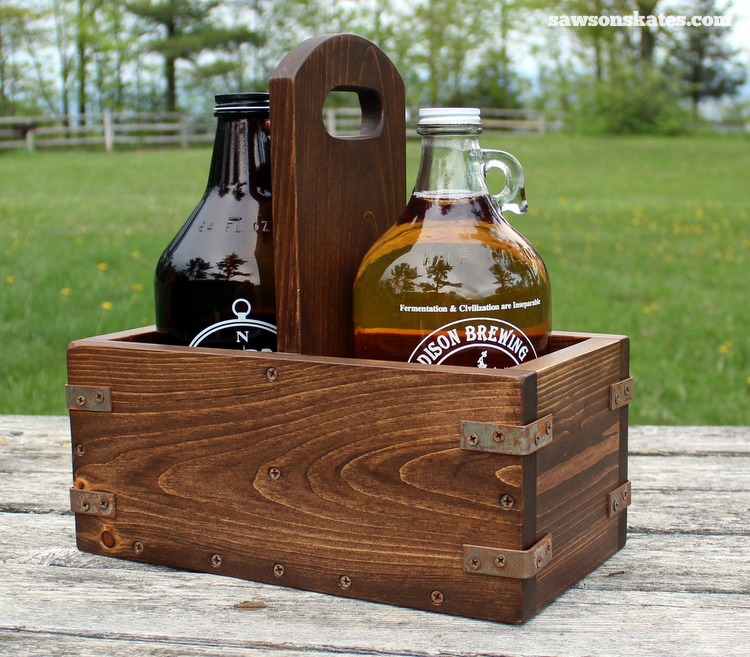
I’ve used Bob’s Miracle Finish for Wood on many of my DIY furniture projects. I’ve used it on my bar cart, vintage industrial chalkboard shadowbox, craft beer growler carrier, air conditioner dresser, knockoff chalkboard shelf, electric fireplace mantle, knockoff stool, wine cabinet and apothecary cabinet. So yes, I’ve used it on quite a few projects!
UPDATE: My Polyurethane Change of Heart
Earlier this year I was getting ready to paint the outdoor coffee table and estimated it was going to take me SEVEN HOURS to paint the pieces with a brush! That’s when I decided to buy a HomeRight Super Finish Max paint sprayer. Thanks to the sprayer I was able to spray a coat of primer and spray two coats of paint in only a few hours. WHAT A TIME-SAVER!
Since buying a paint sprayer I’ve been sprayin’ like crazy! I started with the outdoor coffee table. Then I sprayed the cedar clapboard siding of my house, updated the look of my air conditioner dresser with a coat of paint, and freshened up a pair of Adirondack chairs. I’ve also primed and painted a new project I’m working on.
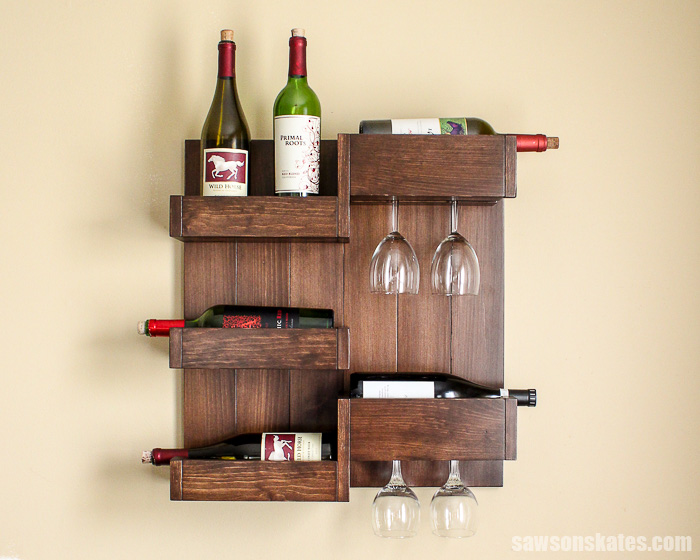
While reading the HomeRight Super Finish Max paint sprayer instructions I noticed it could be used to spray polyurethane. Really? I never thought of spraying poly. Could this be the way to solve the poly pitfalls I mentioned earlier? I had to test it out and my DIY wine bar was going to be the test project.
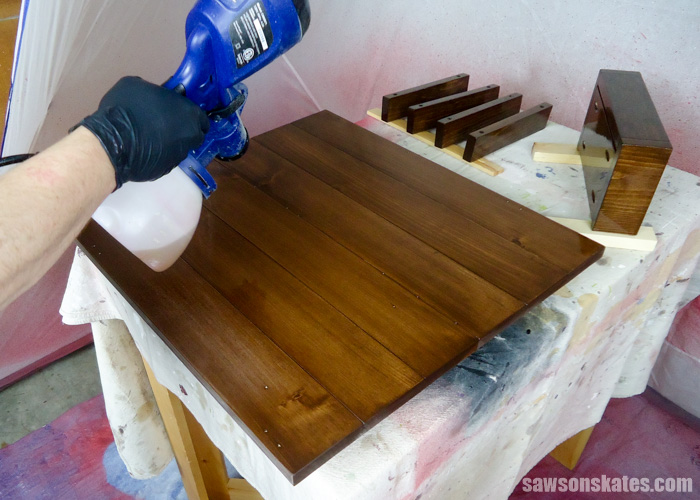
The results are in and I’m totally convinced… I will NEVER apply poly with a brush EVER again! The finish on the wall-mounted wine bar is amazing. The poly was quick to apply and the piece looks like it came from a factory.
There was no need to worry about bubbles, the application was sooo easy and the because the sprayer applies thin coats the finish didn’t look like plastic. If I’m going to apply poly I’m going to do it with a sprayer! Learn how easy it is to spray polyurethane here.
Final Thoughts
Poly has its place on floors, doors, trim and table tops, but for me, I prefer a hand rubbed look on my furniture projects. Who has time for finicky, difficult to apply finishes when you can make your own DIY finish that is easy to apply and gives amazing results? Make a batch of Bob’s Miracle finish for wood today!
If you found this information helpful, would you please pin it to Pinterest? I would really appreciate it!
More Like This:

Hi there – I’m Scott, a woodworking enthusiast and creator of Saws on Skates, a site I started in 2015 to share easy-to-follow tutorials, space-saving shop tips, and project inspiration for DIYers at any skill level. Learn more about my woodworking journey here.
I’m surprised as a woodworker you’ve never thought of spraying poly. It’s sold in spray form, and I use the spray whenever possible. Obviously on large projects spray cans are not practical. I’m going to get a Homeright sprayer for larger projects. Thanks for the tips.
I’m going to be finishing some shelves with live edges this weekend…would you recommend spray poly? I was thinking Danish Oil would look good, but I don’t know if it would hold up.
An oil finish would really enhance the wood grain and should be durable enough if you’re just using the shelves for displaying decorative items. If the shelves will see more use polyurethane would definitely be more durable.
I like to use tung oil for my finish
Just a quick comment about rags and oil based product dangers, NEVER leave oily rags in a wad, they can spontaneously combust and burn down your shop/house!! Always either drop them into a bucket of water or better yet lay them out flat outside to dry before disposal.
That’s good advice Bob – thank you for sharing.
You make good points and I don’t doubt that your favorite finish works best for you and your kind of wood projects, but having tried just about every kind of wood finish, I always come back to oil-based satin poly (preferably Minwax brand) as my default finish for most projects. I almost always use the satin sheen, which I think looks less plasticky and is more forgiving of imperfection than gloss. I do not find it to be any more finicky than others to apply and it is very versatile. If you don’t like the look of a surface coating, dilute poly with mineral spirits or naphtha for a good penetrating wipe-on finish.
I have been using wipe on poly on all of my furniture.. no bubbles, no drips, I have sprayed but don’t really l8ke it. But I am going to give your recipe a try. Thanks
I just mixed up a batch of Bob’s DIY wood finish and I really liked it. I’m doing some projects for a craft fair and most everything is rustic . The wood finish was extremely easy to work with and dry time was quicker. I agree that it isn’t for every application but for the rustic projects that I usually do I am really satisfied with the hand rubbed look . Thanks for posting this.
Hi Mark – Thank you for stopping by and for the compliments. I’m glad you like the finish and that it worked well for your rustic projects.
Scott, I use Minwax Wipe-on Poly and have great results with a hand rubbed look. I apply 2 coats of clear gloss following the directions and after 24 hours apply 2 coats of clear satin with 320 or 400 grit sand paper. However, I am intrigued by the DIY finish you recommend and will give it a try. One final comment, final surface preparation is just as important to finishing success as the finish you use. Thanks for the DIY recipe. Ed
I don’t like polyurethane either for the reasons you mentioned, particularly the slow drying time and plasticky lookingl finish.
I have used it a lot though as it seems like it has been recommended as the latest and greatest for years.
However, I recently worked with shellac.for the first time recently. It is very easy to. Apply and really makes the finish seem to glow like old, well cared for wood.
My latest project will be trying to match some whole room birch veneer paneling in my 50s ranch. I think I will try your formula as it sounds similar to what is on there now, and I don’t want to try to keep dust off 4 x 8′ sheets of birch while it dries.
Hi Greg – Thank you for stopping by. I don’t use shellac very often, but I like it too!
Polyurethane is the most applied finish in electric guitars, and it’s applied with spray. However, I hate to deal with the fumes and all the ritual involved. That’s why I prefer Tung oil finishes, but it’s not as tough as Poly. I would like to know if there are other brushed or sponge finishes harder than Oil.
Shellac would be the next hardest finish compared to a penetrating oil. It can be applied with a brush or rag. It’s a pretty finish, but it does darken over time and it’s sensitive to alcohol. The next hardest finish would be lacquer. It’s usually sprayed, but can be brushed and it’s sensitive to paint thinner. The next hardest finish after lacquer would be poly.