DIY Cake Pop Stand
This wood DIY cake pop stand is an attractive way to display cake pops for any occasion. It’s easy to make with a few common tools and these simple plans.
What Should I Build Next?
That's the question I help answer.
Every week, I send woodworking ideas to 17,000 DIYers who love building things.
You'd fit right in.
DIY Cake Pop Stand
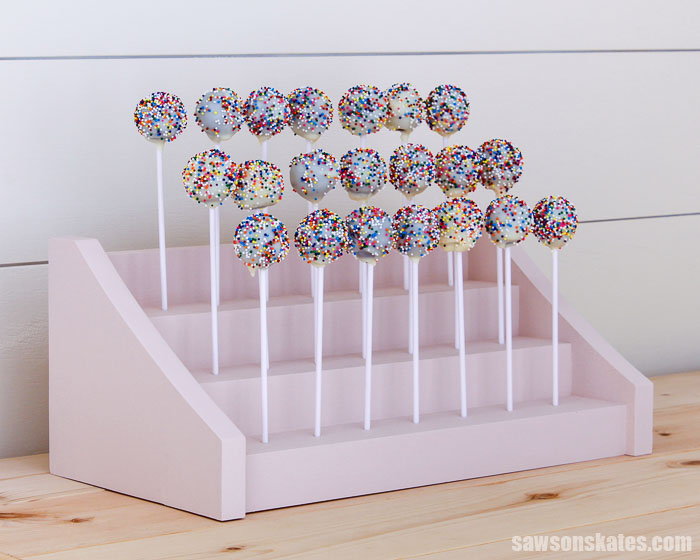
This wood DIY cake pop stand has 3 tiers and the sides feature a subtle curved detail. It’s the perfect way to display cake pops for birthday parties, weddings, baby showers, bridal showers, graduations, Halloween, Christmas, and more.
The stand is easy to make with scrap wood and a few common woodworking tools. The plan includes all of the measurements, detailed instructions, and a template to lay out the curved details.
You may also enjoy this folding DIY cupcake stand.
This tutorial contains affiliate links to supplies and tools. Purchases made using these links help support the Saws on Skates website and allows me to share more projects and tips with you. There is no cost to you for using these links. Visit my site policies for more information.
Table of Contents
- Inspiration for This Project
- How Many Cake Pops Can This Stand Hold?
- What Tools Do You Need to Make a Cake Pop Stand?
- What Wood Should You Use?
- How Do You Draw the Curved Detail?
- How Do You Finish the Cake Pop Stand?
- How to Make a DIY Cake Pop Stand Tutorial
- Get the PDF Plan
Inspiration for This Project
I’ve been thinking about designing a simple cake pop stand for a while. Inspiration struck when I was making this tiered spice rack. The stepped design of the spice rack would be great for displaying cake pops!
With just a few simple tweaks, the spice rack became this adorable cake pop display. The stand has three tiers and subtle curved details on the sides. It’s an attractive way to display cake pops for any occasion.
How Many Cake Pops Can This Stand Hold?
The plan for this stand will hold 24 cake pops. I know what you’re thinking. “Hey, I only see 21 cake pops!” And you’re right.
As I mentioned, this project was inspired by this tiered spice rack. I kept the same dimensions of the spice rack to make the prototype for the cake pop stand that you see in this tutorial. The length of the shelf only allowed for seven cake pops for a total of 21 pops.
I adjusted the length of the shelves in the printed plan to allow for 8 cake pops per shelf for a total of 24 pops.

What Tools Do You Need to Make a Cake Pop Stand?
This cake pop holder is easy to make for DIYers of any skill level. It’s a simple afternoon project that can be made using basic woodworking skills and just a few common woodworking tools.
Tools like a miter saw, pocket hole jig, and a drill. You’ll also need a saw to cut the curved detail on the sides of the holder.
Miter Saw
I used a miter saw to cut all of the parts to length for this project.
Related: 7 Miter Saw Tricks Every DIYer Should Know
Pocket Hole Jig
You can use any pocket hole jig to drill the pocket holes for this project. I used the Kreg Jig 720PRO to drill the pocket holes for my stand. The inexpensive, user-friendly Kreg Jig 320 is also a great choice for drilling pocket holes.
Related: 9 Pocket Hole Mistakes You Don’t Want to Make
Drill
The drill was used to drill the pocket holes, drill the holes for the pop sticks, and to drive the screws that join the parts together.
Related: Impact Driver vs Drill: What’s the Difference?

Right Angle Drill Attachment
It’s also handy to have a right angle drill attachment. The pocket hole locations on this project are tricky to reach with a traditional driver.
A right angle drill attachment is the perfect tool to drill in a tight spot or to drive screws in hard-to-reach places.
Related: How to Screw in Hard-to-Reach Places
Additional Saw
I used a scroll saw to cut the curved details on the sides of the stand, but you might be able to make these cuts with a jigsaw instead.
What Wood Should You Use?
This display stand can be made with just about any type of wood. This project doesn’t require much wood so it’s a great way to use up some scrap wood.
Related: How to Decide What Scrap Wood to Keep
Many times I use common pine to build my projects. Pine is relatively inexpensive and easy to work with.
I had some scrap pieces of pine 1×2s, 1×3s, and 1×6s, so I used those to make my stand.
Related: Beginner’s Guide to Wood Sizes
How Do You Draw the Curved Detail?
The curves on this holder could be tricky to draw if you had to do it by hand. Fortunately, you don’t have to. The printable plan includes a template that takes the guesswork out of laying out this curved detail.
Just get the plan, print the template, trace it on the boards, and then use a saw to make the cuts.
How Do You Finish the Cake Pop Stand?
You can finish your cake pop stand however you like. Leave it natural for a simple look, paint it to match your party’s theme, stain it for a rich wood finish, or even mix paint and stain for a unique touch.
I decided to paint mine. First, I applied a coat of primer, followed by two coats of Behr’s “Life is a Peach.”
DIY Cake Pop Stand
Printed Plan
- Click here to get the PDF plan (includes detailed instructions, measurements, and bonus tips)
Supplies
- Wood (per printed plan)
- 1-¼” Pocket Screws
- 1-¼” Brad Nails
- Wood Glue
Tools
- Tape Measure
- Drill
- Kreg Jig
- Kreg Multi-Mark
- Miter Saw
- Scroll Saw or Jigsaw
- Hammer or Brad Nailer
- Right Angle Drill Attachment
- Drill Bit Set
- Portable Spindle Sander (optional)
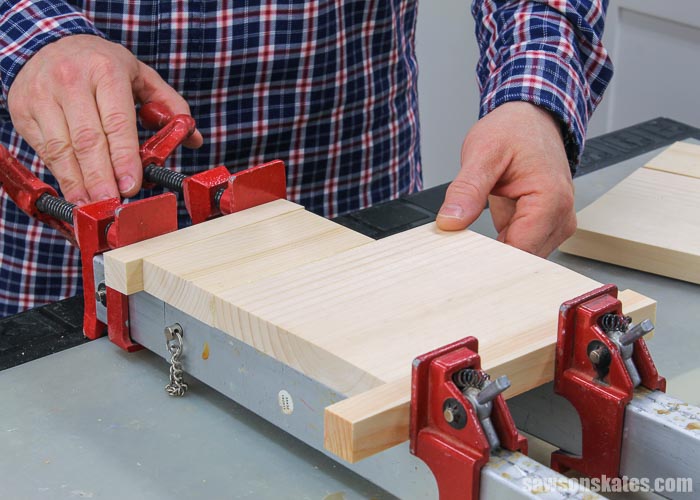
Step 1. Make the Sides
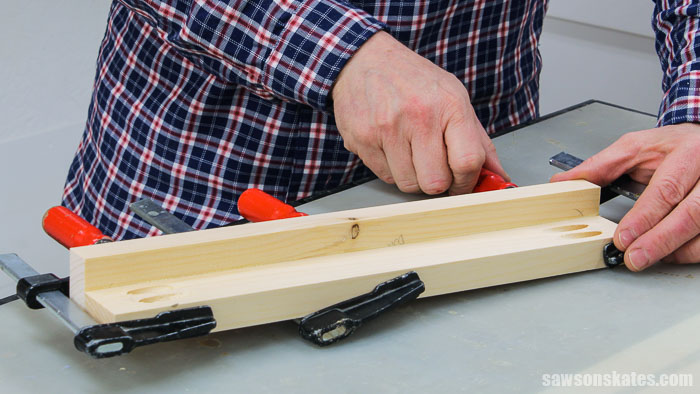
Cut 4 pieces of wood to length for the sides. Apply glue and clamp to form 2 side panels.
While the glue is drying, print the template at the end of the printable plan.
💡 TIP: When printing the PDF template, be sure to set the scale to 100%.
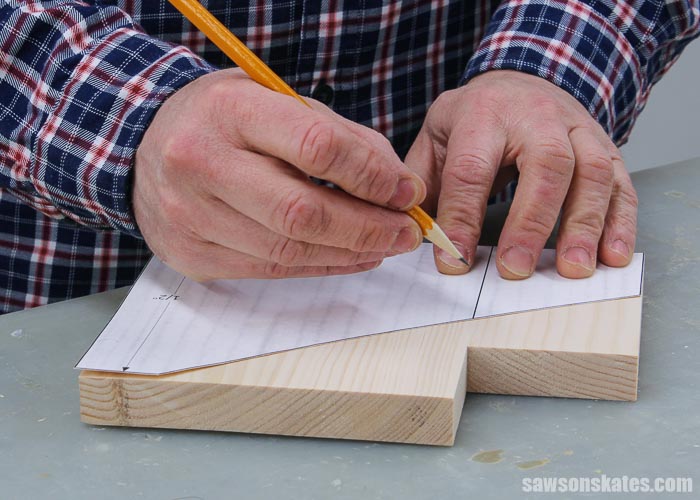
I prefer templates to be rigid. So I applied some spray adhesive to a manila folder and placed the template on top. Then I cut out the template with scissors.
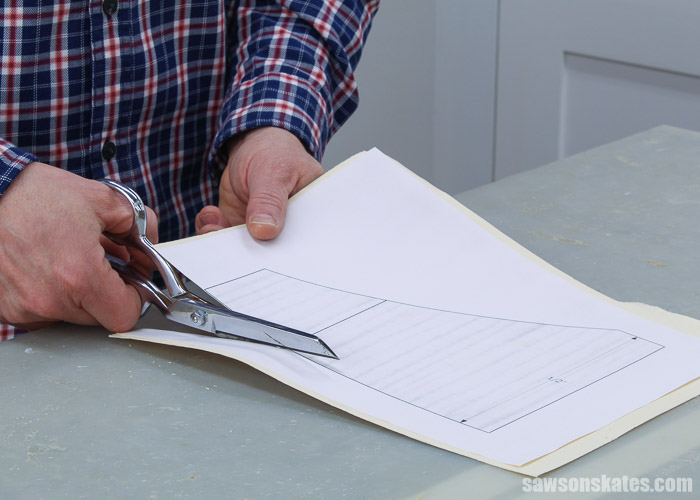
The manila folder provides a lip for the pencil to trace around.
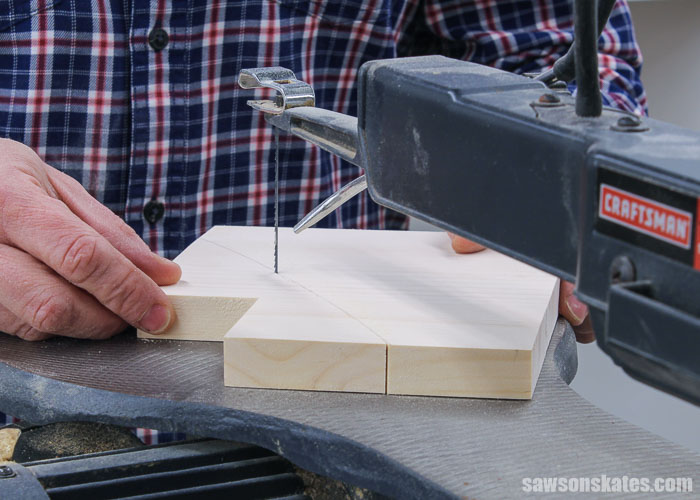
I used a scroll saw with this 10 TPI blade (teeth per inch) to cut out these curved details, but you might be able to use a jigsaw instead.
I made the cuts next to the pencil line. This way, I could sand to the pencil line.
It’s not necessary, but I used this portable spindle sander to smooth the curved edges of the side panels. The spindle sander makes quick work of smoothing any saw marks. If I didn’t have a spindle sander, I would have smoothed the edges by hand with sandpaper.

Step 2. Make the Shelves
Cut 4 pieces of wood to length. In 3 of the pieces, drill pocket holes in each end.
Related: How to Use a Kreg Jig
Bottom Shelf
Apply glue to the edge of a piece with pocket holes, position it on the piece without pocket holes, and clamp for about 30 minutes or until the glue is dry.
Middle and Top Shelf
Cut 3 pieces of wood to length. 2 pieces will be used for the shelves and 1 piece will be used as the back.
Apply glue to the edge of a piece with pocket holes and position it on a piece without pocket holes.
Clamp for about 30 minutes or until the glue is dry.
Repeat for the remaining shelf.

Drill the Holes for the Cake Pop Sticks
Use the diagram in the printed plan to drill the holes for the cake pop sticks in the three shelf assemblies.
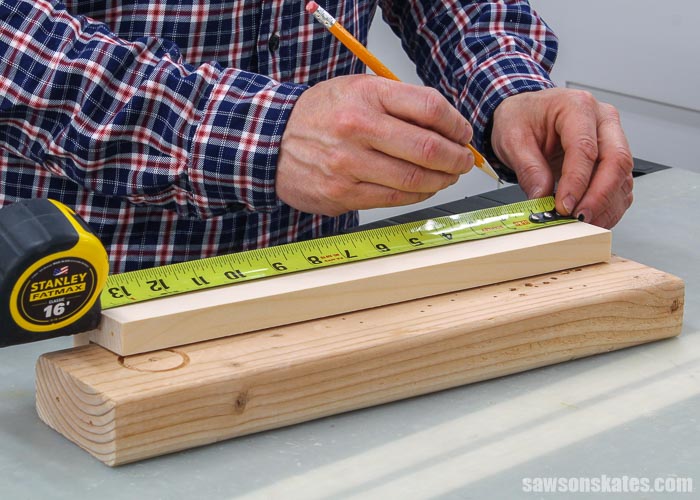
First, I used my Kreg Multi-Mark to draw a line from end to end on the shelf.
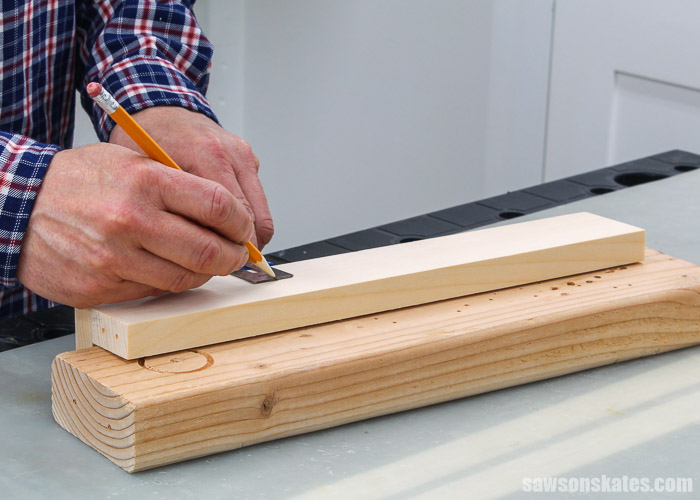
Next, I marked the location for each hole and used an awl to make a starting point for the drill.
Related: What is an Awl?
I didn’t want to drill the holes too deep, so I wrapped painter’s tape around the bit to act as a depth stop.
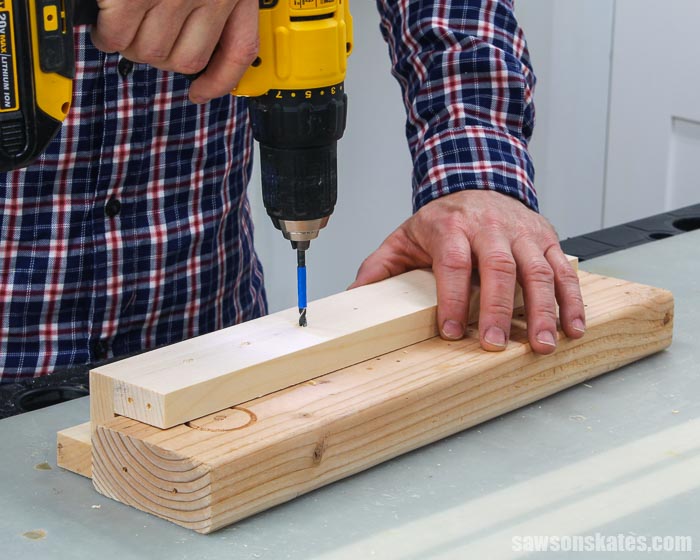
💡 TIP #1: Try to drill the hole as straight up and down as possible. This will help the cake pops to stand straight when displayed.
💡 TIP #2: I ended up with some tearout around several of the holes. I filled the tearout with Ready Patch.
You could try to reduce the tearout by first drilling a smaller hole then drilling the hole with a larger drill bit.
Attach the Shelf Assemblies
To help with positioning, I clamped a piece of scrap wood to the front of the middle shelf. Apply glue to the edge of the bottom shelf, position on the middle shelf, and clamp. Attach using 1-¼” brad nails.
Related: Brad Nailer vs Finish Nailer: Are They the Same?
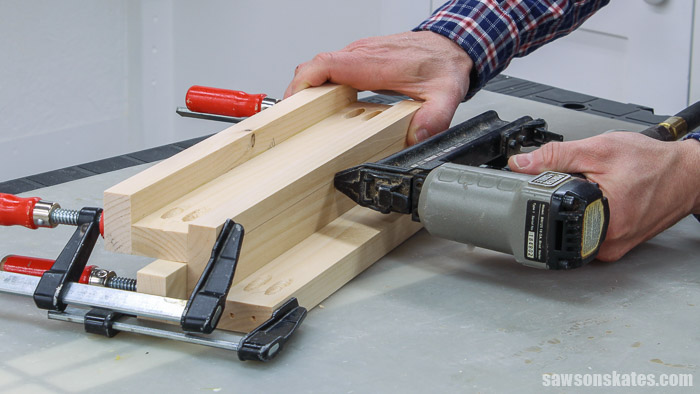
Again, to help with positioning, I clamped a piece of scrap wood to the front of the top shelf. Apply glue to the edge of the middle shelf, position on the top shelf, and clamp. Attach using 1-¼” brad nails.
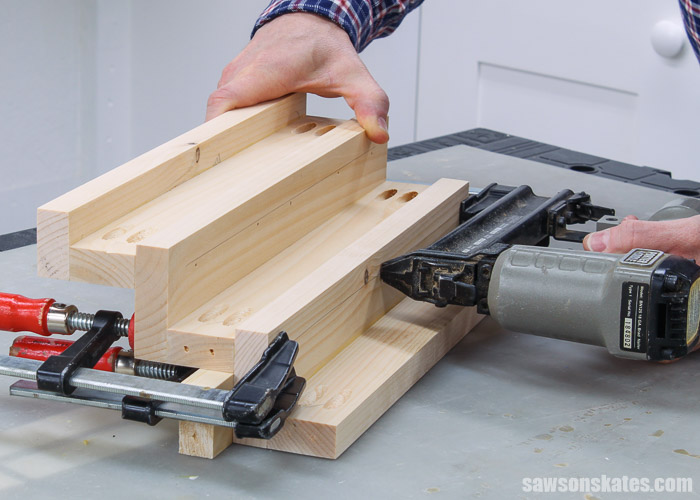
Back
Just like I did with the shelves, to help with positioning, I clamped a piece of scrap wood to the front of the back. Apply glue to the edge of the top shelf, position on the back, and clamp. Attach using 1-¼” brad nails.

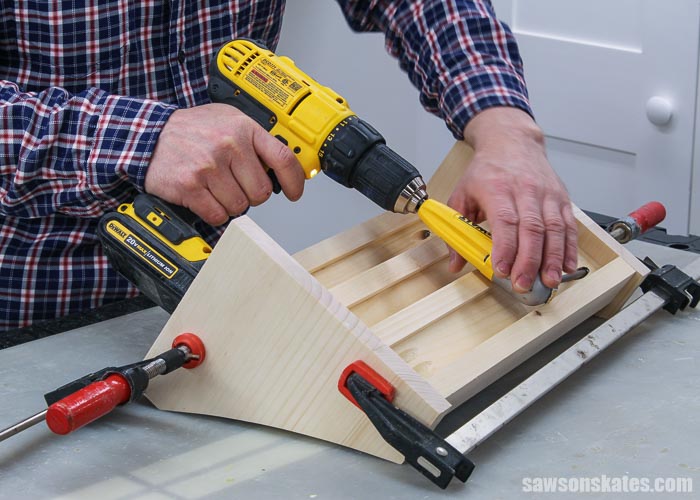
Step 3. Attach the Shelves
Position the shelves on the sides and clamp. Attach using a right angle drill attachment and 1-¼” pocket screws.
Related: How to Screw in Hard-to-Reach Places
Step 4. Finish the Cake Pop Stand
See How Do You Finish the Cake Pop Stand? for more information.
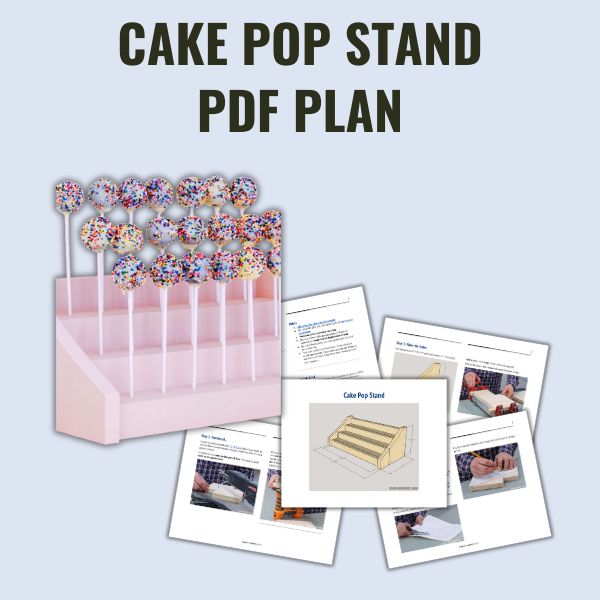
Includes:
- List of tools and materials
- Complete measurements (in inches)
- Easy-to-follow instructions
- Step-by-step photos
- Detailed diagrams
Final Thoughts
This wood DIY cake pop stand has 3 tiers and the sides feature a subtle curved detail. It’s easy to make and the perfect way to display cake pops for almost any occasion.
Click here to get the plan (including the detailed instructions and measurements) now!
Thank you for stopping by. If you enjoyed this tutorial, would you please take a moment and pin it to Pinterest? I’d really appreciate it!
Pin This For Later

Hi there – I’m Scott, a woodworking enthusiast and creator of Saws on Skates, a site I started in 2015 to share easy-to-follow tutorials, space-saving shop tips, and project inspiration for DIYers at any skill level. Learn more about my woodworking journey here.