DIY Wall-Mounted Coat Rack
Is your entryway feeling cluttered? Get organized with this DIY wall-mounted coat rack with a storage shelf. It’s easy to make with this step-by-step plan.
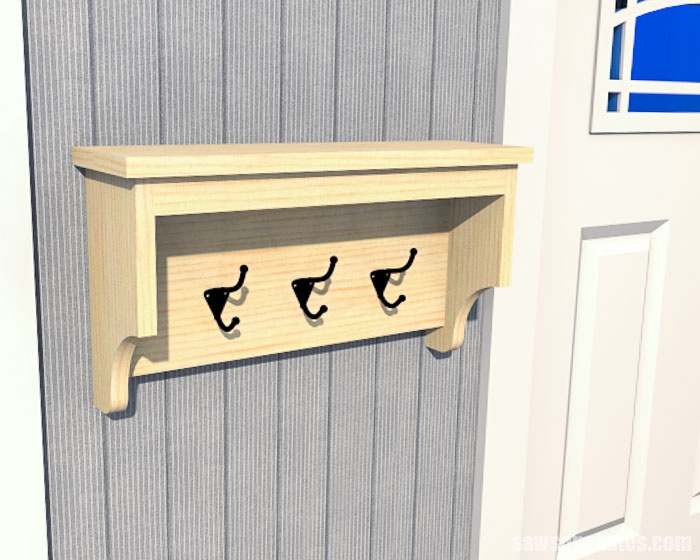
DIY Coat Rack
Are you tired of digging through a big pile to find your coat? Transform your entryway into a functional space with this DIY wall-mounted coat rack. This easy-to-make project offers hanging space for coats and scarves, and there’s also a handy storage shelf for hats, gloves, and more.
The free step-by-step plan includes all of the measurements, easy-to-follow instructions, detailed diagrams, and a template to lay out the curved details.
This tutorial contains affiliate links to supplies and tools. Purchases made using these links help support the Saws on Skates website and allows me to share more projects and tips with you. There is no cost to you for using these links. Visit my site policies for more information.
Table of Contents
- Inspiration for This DIY Entryway Coat Rack
- What Tools Do You Need to Make a Coat Rack?
- What Wood Should You Use?
- How Do You Draw the Curved Details?
- How Do You Finish the DIY Coat Hanger?
- How Do You Hang the Coat Rack on the Wall?
- How to Make a DIY Wall-Mounted Coat Rack Tutorial
- Get the Free Printed Plan
Inspiration for This DIY Entryway Coat Rack
A friend of mine owns two vacation rentals in a popular ski town. One is a first-floor condo, and the second-floor unit overlooks the road leading to the mountain. The kitchen in the second-floor condo was short on cabinet space, so I made these shelf brackets with scrap wood. They’re the perfect place to display drinking glasses, wine glasses, and more.
Related: DIY Wall-Mounted Wine Rack
In the first floor unit, I built these drawers at the bottom of a storage closet. And for the small bathroom, I made this amazing vanity with a hidden toilet paper holder.
He wanted to make sure guests had somewhere to hang their coats and store their winter gloves and hats. I suggested a wall-mounted coat rack by the entryway door.
For the DIY coat rack, I found inspiration in this paper towel holder. The curves on each side of the holder were simple, but they gave the piece a unique and stylish look. Plus, it had a shelf for storage. With just a few easy tweaks, like making it longer and adding hooks, the holder was transformed into the perfect coat rack.
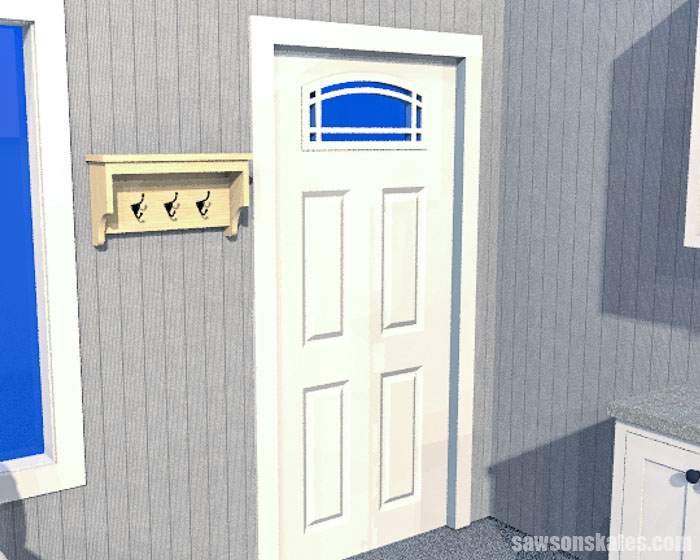
What Tools Do You Need to Make a Coat Rack?
This homemade coat rack is easy to make for DIYers of any skill level. It’s a simple afternoon project that can be made using basic woodworking skills and just a few common woodworking tools.
Tools like a miter saw, pocket hole jig, and a drill. You’ll also need a saw to cut the curved details on the sides of the rack.
Related: Beginner Woodworking Tools: What You Need to Get Started
Miter Saw
You can use a miter saw to cut all of the parts to length for this project.
Related: 7 Miter Saw Tricks Every DIYer Should Know
Pocket Hole Jig
You can use any pocket hole jig to drill the pocket holes for this project.
Related: Which Kreg Pocket Hole Jig Should You Buy?
Drill
You will need a drill to make the pocket holes and drive the pocket hole screws that join the parts together.
Related: Impact Driver vs Drill: What’s the Difference?
Additional Saw
I used a scroll saw to cut the curved details on the sides of the project that inspired this coat rack, but you might also be able to make these cuts with a jigsaw instead.
Back to Table of ContentsWhat Wood Should You Use?
I designed this project so you could make it with off-the-shelf lumber like 1×2s, 1×3s, 1×4s, and 1×6s.
Related: Beginner’s Guide to Wood Sizes
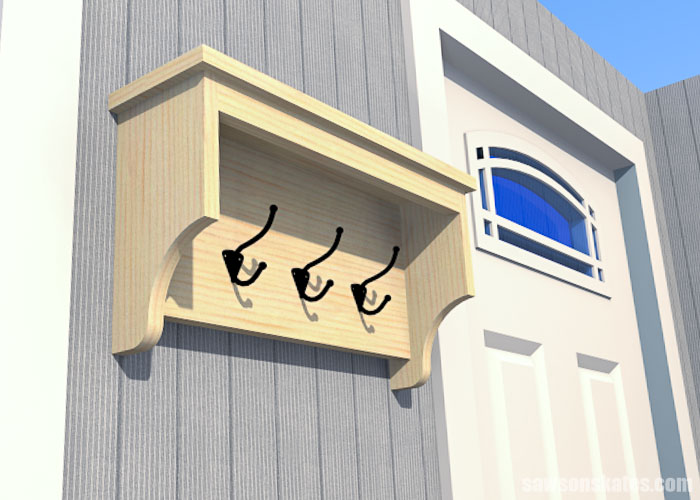
How Do You Draw the Curved Details?
The curves on this coat rack could be tricky to draw by hand. Fortunately, you don’t have to. The free printable plan includes a template that takes the guesswork out of laying out these curved details.
Get your free plan, print the template, trace it on the boards, and then use a saw to make the cuts.
Back to Table of ContentsHow Do You Finish the DIY Coat Hanger?
This coat rack could be finished in a variety of ways. It’s an easy and fun project to customize. The possibilities include leaving it natural, painting, staining, or combining paint and stain for an even more personal look.
Back to Table of ContentsHow Do You Hang the Coat Rack on the Wall?
This rack could become heavy when it’s loaded with coats, so it must be securely attached to the wall. There are several ways you could hang the coat rack.
Attach the Rack to the Wall Studs
First, use a stud finder to locate the studs in the wall. Then, position the rack over the studs and use a level to make sure the rack is level. Next, drill countersink holes through the back into the studs. Attach the rack to the wall with 2-½” wood screws.
Drywall Anchors
If there aren’t any studs where you want to position your coat rack, you can attach it to the wall with wall anchors instead. First, drill two holes in the back. Then, position the holder where you want it on the wall. Make sure the holder is level, and then insert an awl through the holes to transfer the locations onto the wall.
Attach a self-drilling wall anchor at each location on the wall. Then, attach the holder to the wall using the screws provided with the wall anchors.
French Cleat
An easy way to attach the rack to the wall is to use one of these heavy-duty french cleats. You could also make your own french cleat.
Related: How to Make a French Cleat (2 Easy Ways)
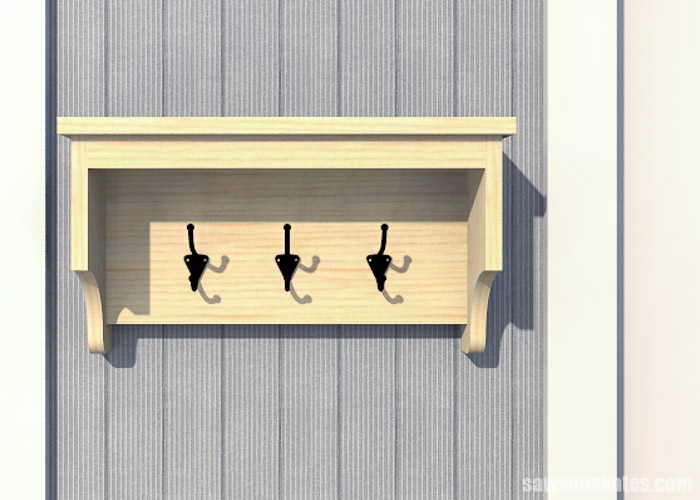
How to Make a DIY Wall-Mounted Coat Rack
Printed Plan
- Get the FREE plan here (includes detailed instructions, measurements, and bonus tips).
Supplies
- Wood (per the printed plan)
- 1-¼” Pocket Screws
- Wood Glue
- 3 Coat Hooks
Tools
- Tape Measure
- Drill
- Kreg Jig
- Kreg Multi-Mark
- Miter Saw
- Scroll Saw or Jigsaw
- Portable Spindle Sander (optional)
Step 1. Make the Sides
Cut two pieces of wood to length for the sides.
Print the template at the end of the plan. When printing the PDF template, be sure to set the scale to 100%. Use tape to join the two sections of the template. The grid pattern helps to align the two sections.
💡 TIP: I prefer templates to be rigid. So when I make a template, I apply spray adhesive to a manila folder and place the template on top. Then I cut out the template with scissors. The manila folder provides a lip for the pencil to trace around.
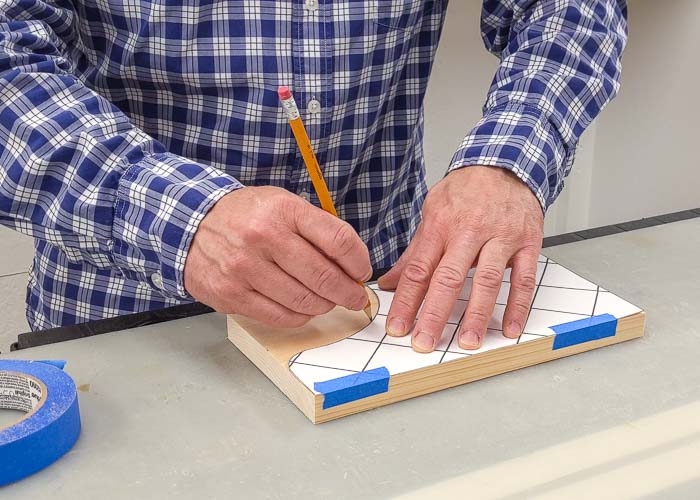
I think a scroll saw with this 10 TPI blade (teeth per inch) is the easiest way to cut out these curved details, but you might be able to use a jigsaw instead.
Make the cuts next to the pencil line. This way, you can sand up to the pencil line.
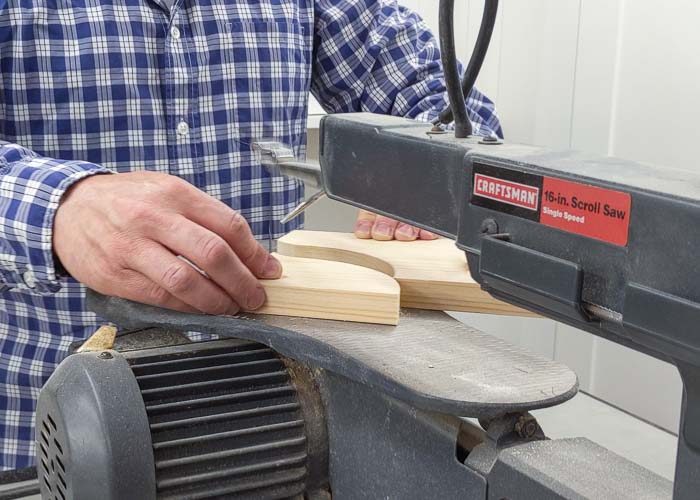
It’s not necessary, but this portable spindle sander makes quick work of smoothing any saw marks. If you don’t have a spindle sander, you can smooth the edges by hand with sandpaper.
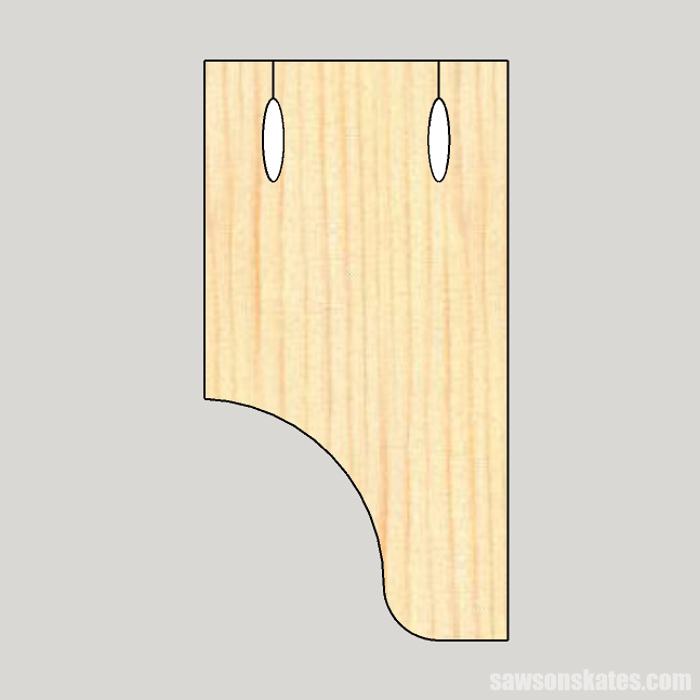
Next, use a Kreg Jig to drill pocket holes at the top of each piece. Be sure to make a right and a left.
Related: How to Use a Kreg Pocket Hole Jig
Step 2. Attach the Front Rail
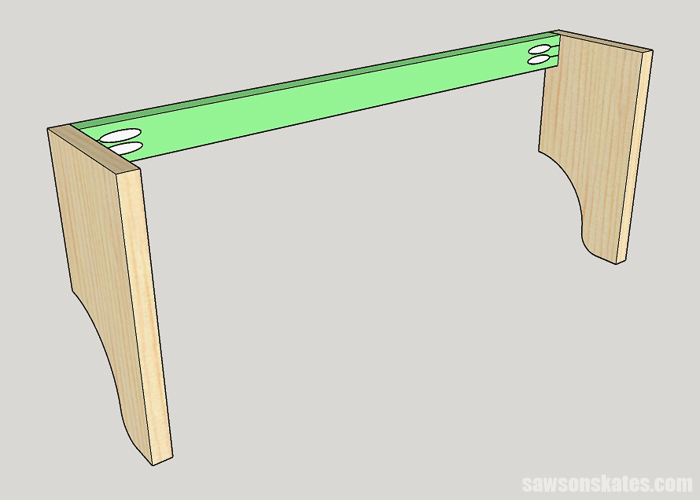
Cut one piece of wood to length and drill pocket holes in each end.
Apply glue to the rail, position it at the front, and clamp.
Attach using 1-¼” pocket screws.
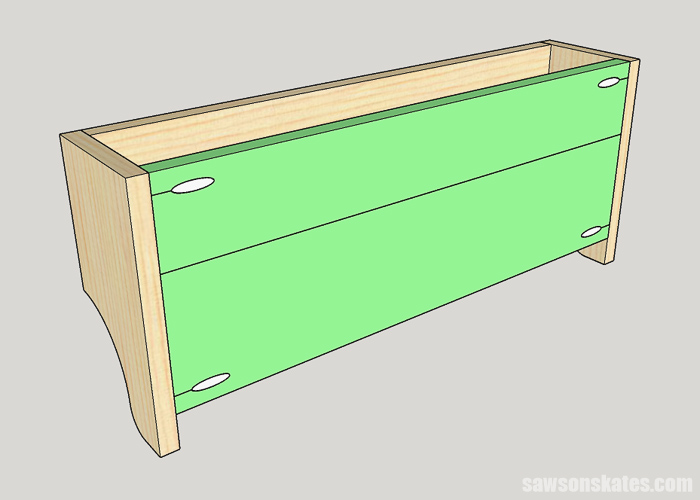
Step 3. Attach the Back
Cut two pieces of wood to length for the back. Apply glue and clamp to form a panel.
When the glue is dry, drill pocket holes in each end.
Apply glue to the ends, position it at the back, and clamp.
Attach using 1-¼” pocket screws.
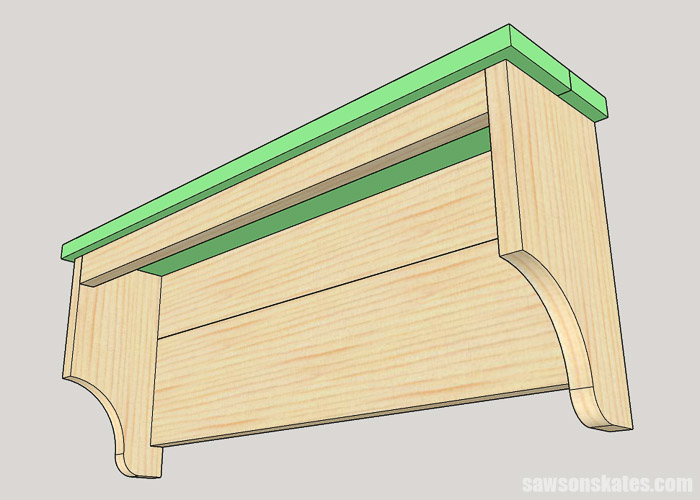
Step 4. Attach the Top
Cut two pieces of wood to length for the top. Apply glue and clamp to form a panel.
When the glue is dry, position the top flush with the back and center from side to side.
Attach using 1-¼” pocket screws.
💡 TIP: I thought it was easier to apply the finish on the inspiration project before attaching the top.
Step 5. Attach the Coat Hooks
This diagram in the printed plan is a suggestion of where to place the hooks. Position the hooks wherever they work best for your project.
Step 6 Finish the Coat Rock
See How Do You Finish the Coat Rack and How Do You Hang the Coat Rack on the Wall for more information.
Final Thoughts
With this easy-to-make wall-mounted coat rack, you can transform your entryway into a functional space for coats, scarves, hats, and gloves.
Get the free printed plan (including the detailed instructions and measurements) now!
Thank you for stopping by. If you enjoyed this tutorial, would you please take a moment and pin it to Pinterest? I’d really appreciate it!

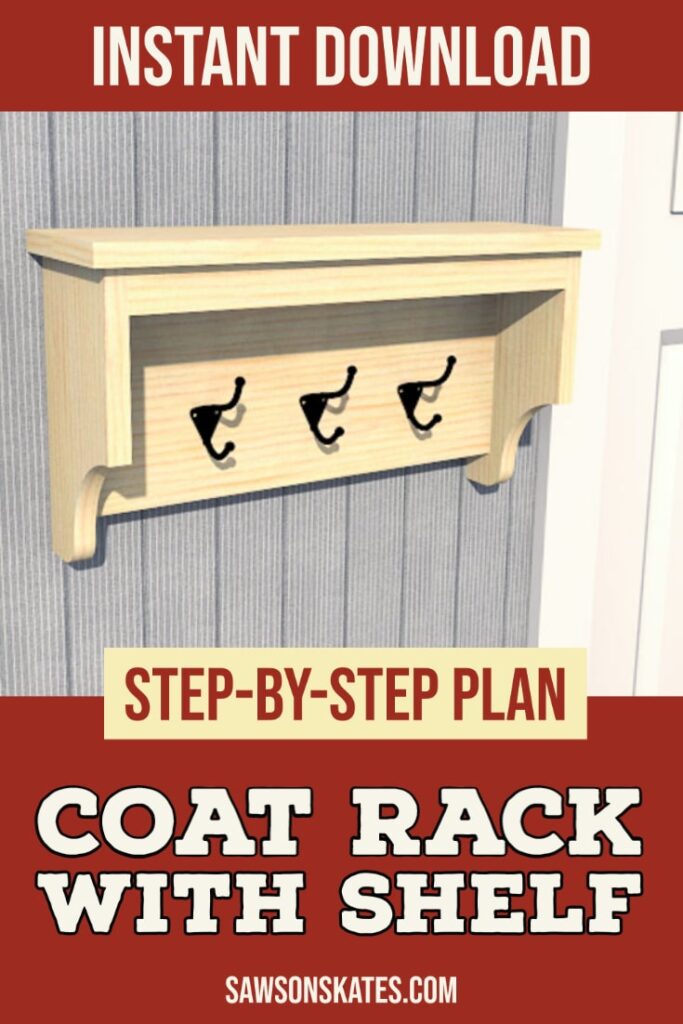
I download the plans for the coat rack. Plans were done well. No problems making it and best part is the wife loves it. Thank you.