DIY Wall-Mounted Kitchen Shelves
Add storage and showcase your kitchen essentials with these charming DIY wall-mounted shelves. No brackets required. Plan and pattern included.
What Should I Build Next?
That's the question I help answer.
Every week, I send woodworking ideas to 17,000 DIYers who love building things.
You'd fit right in.
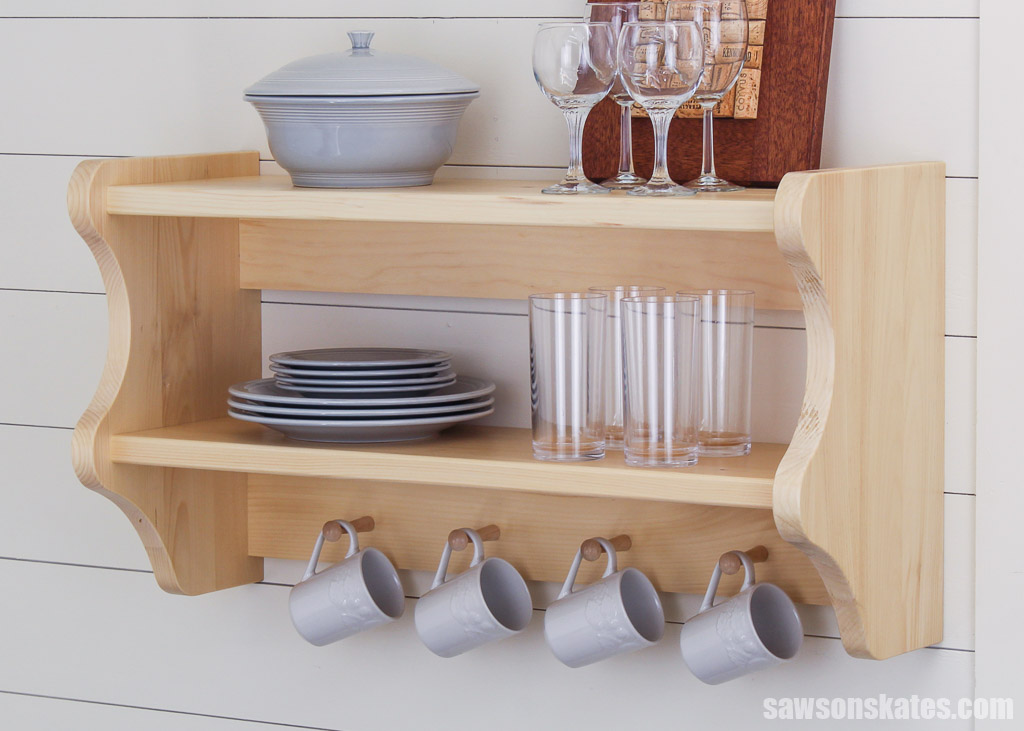
Are you tired of those boring brackets and cookie-cutter shelves everyone has in their kitchen? Step back in time and add a touch of nostalgia to your home with these charming DIY wall-mounted shelves.
With just a few simple tools and materials, you can create these stunning antique-inspired shelves, perfect for displaying your dishes and glassware.
Table of Contents
- What Wood Should You Use?
- What Tools Do You Need?
- How Do You Finish the Kitchen Shelves?
- How Do You Hang the Shelves on the Wall?
- How to Make a DIY Wall-Mounted Kitchen Shelves
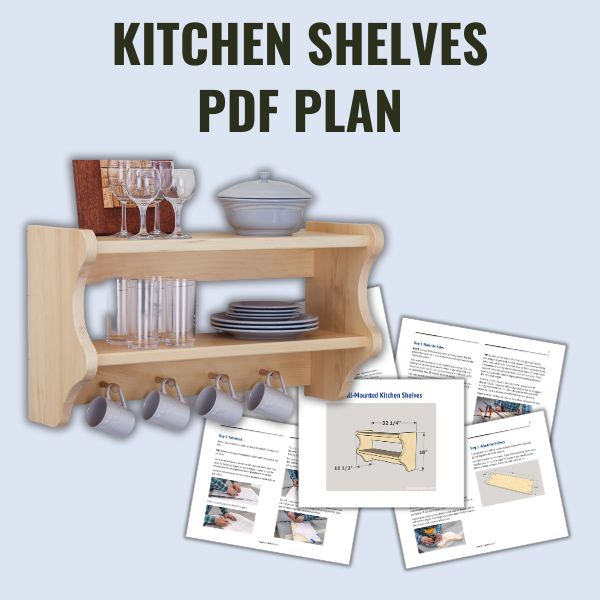
- Get the PDF Plan
This article contains affiliate links. If you purchase from these links, I may earn a small commission at no additional cost to you. Visit my site policies for more information.
Inspiration for These DIY Kitchen Shelves
My friend recently purchased another vacation rental. Ski season was just around the corner, and the place needed a quick makeover before guests arrived.
The kitchen area was a blank canvas, and desperately needed a place for dishes and glasses. My friend wanted to add storage on a budget, and I wanted to avoid those generic store-bought brackets or floating shelves that everyone has.
I made these shelf brackets for one of his other units, but they weren’t the aesthetic I envisioned for this new place. Then, while searching the web for ideas, I stumbled on an antique wall-mounted kitchen shelf. It was the perfect balance of functionality and charm, inspiring me to create something similar.
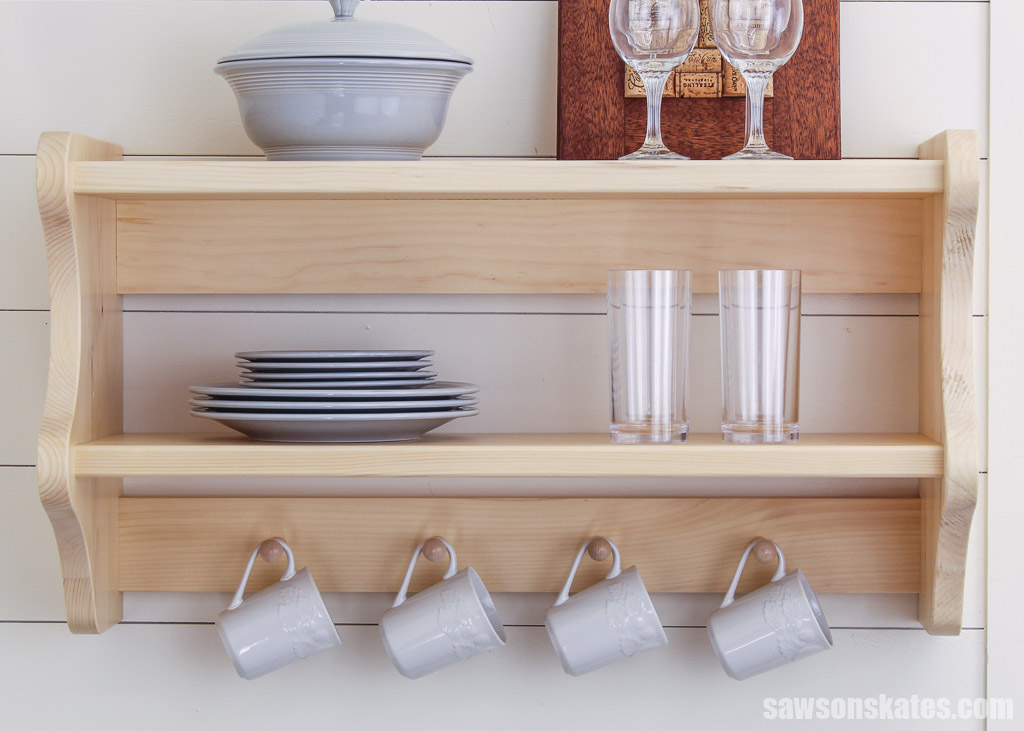
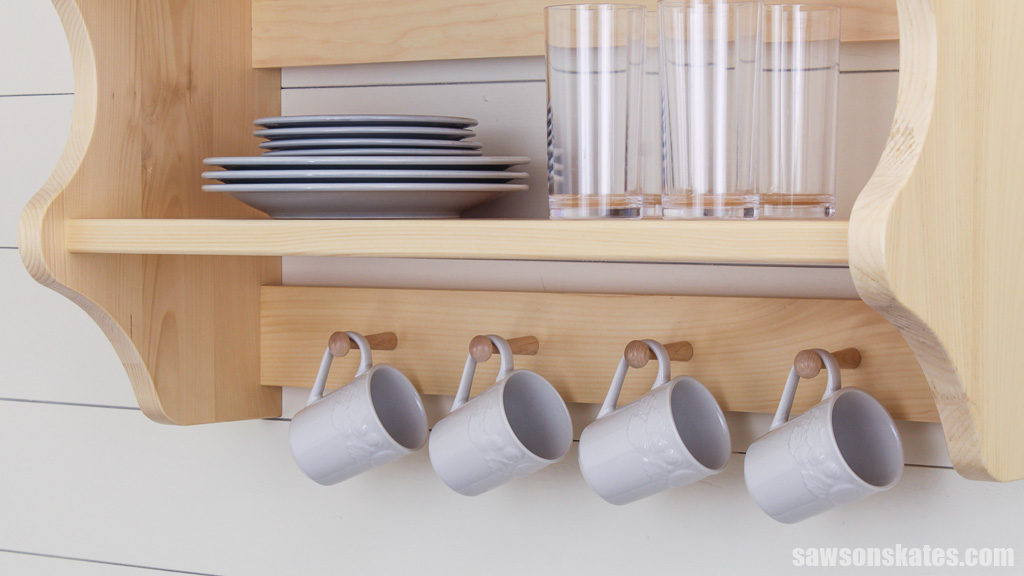
Here’s what I came up with: a wall-mounted kitchen organizer featuring antique-inspired curved details, two deep shelves for storing dishes and glassware, and hooks below for displaying coffee mugs. And the best part? No brackets needed.
What Wood Should You Use?
I chose 5/4 wood (spoken as five-quarter) for this project because its 1-⅛ inch thickness closely matched the inspiration piece. However, I always hesitate to publish plans using it for several reasons.
First, past experiences have shown that this wood dimension can confuse DIYers.
Related: Beginner’s Guide to Wood Sizes
Additionally, I’ve received comments from readers expressing difficulty finding 5/4 in their local stores. While I can easily find it in the pine board section at my local Lowe’s and lumber yard, its availability may be limited in other areas.
Related: How to Buy Wood (Top Tips for Choosing Woodworking Lumber)

What Tools Do You Need?
I used several basic tools to make these kitchen shelves:
- Miter saw to cut the boards to length.
- Table saw or circular saw and Kreg Rip-Cut to rip the wood to width.
- Jigsaw to cut the curved details.
- Pocket hole jig to assemble the parts.
- Drill to make the pocket holes and drive the pocket hole screws.
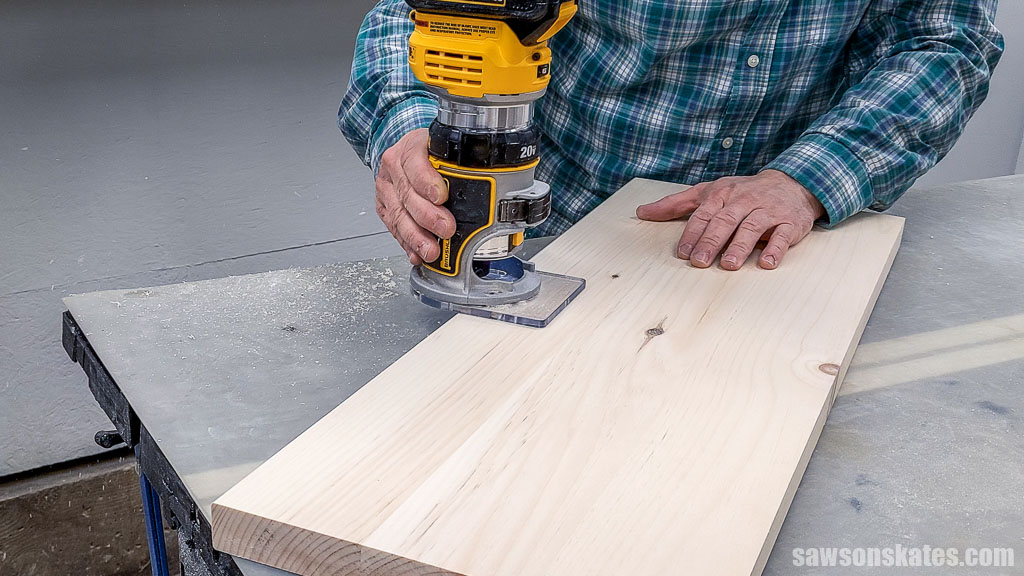
A portable spindle sander is optional, but it quickly smooths the jigsaw’s blade marks and fine-tunes the curved details. I also used a router and roundover bits to soften the organizer’s edges, but you could use sandpaper to get a similar effect.
How Do You Finish the Kitchen Shelves?
I applied three coats of this polyurethane alternative to my kitchen shelves, but I also think this antique-inspired piece would look fantastic with an old-time chippy paint finish. Of course, it’s up to you and your personal style.
How Do You Hang the Shelves on the Wall?
I designed the shelves to attach to the wall with a french cleat, a simple, strong way to hang shelves, cabinets, or anything else you want to mount flush against a wall.
The cleat consists of two pieces of wood that are mitered at a 45-degree angle. One part attaches to the back of the shelves, while the other mounts on the wall. The angled edges slide into each other, creating a secure and hidden support.
Related: How to Make a French Cleat (2 Easy Ways)
You could also attach this project to the wall by drilling holes in the stretcher at the back of the shelves and securing them to the wall studs with screws.
How to Make DIY Wall-Mounted Kitchen Shelves
Printed Plan
Get the PDF plan here (includes detailed instructions, measurements, and bonus tips)
Materials
- Wood (per the printed plan)
- Wood Glue
- 1-¼” Pocket Hole Screws
- 1-½” Pocket Hole Screws
- Screw-On Shaker Pegs
Tools
- Tape Measure
- Kreg Multi-Mark
- Miter Saw
- Jigsaw
- Table Saw (optional)
- Pocket Hole Jig
- Drill
- Portable Spindle Sander (optional)
- Router (optional)
- ⅛” Roundover Bit (optional)
- ¼” Roundover Bit (optional)
Step 1. Make the Sides
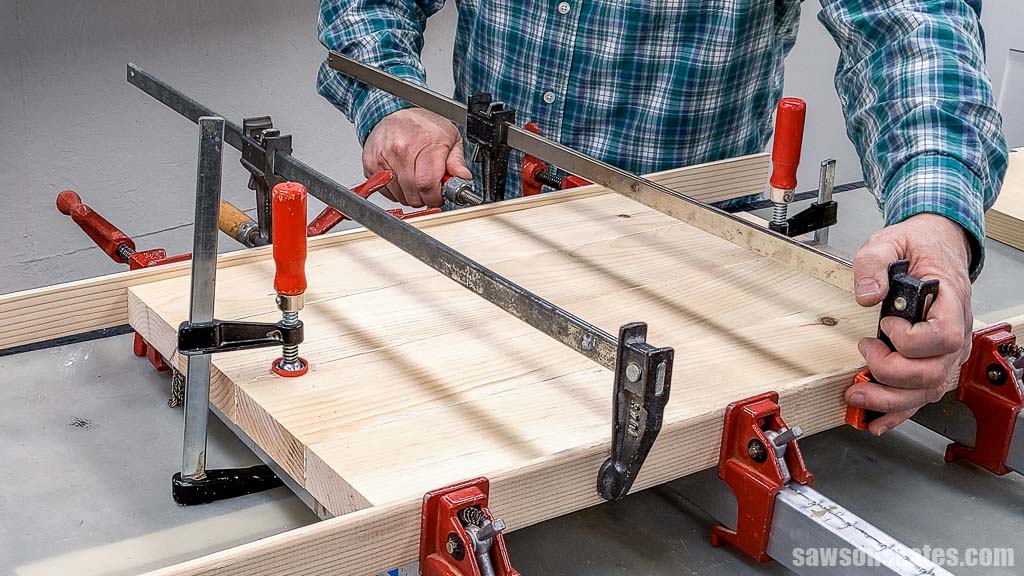
I glued up four boards for the side panels.
TIP: Boards sometimes shift when you glue up panels, resulting in edges that are not square. If you have a sliding miter saw, which can cut wider boards than a standard saw, I recommend cutting the workpieces at least ¼” longer than needed. Once the glue has dried, you can use your miter saw to square the panel’s edges while trimming them to the required length.
However, if you have a standard miter saw (one that doesn’t slide), the panel will be too wide to cut, so I suggest cutting the boards to their required length. Then, do your best to keep the edges as square as possible while doing your glue-up.
Apply glue to the boards, clamp, and allow the panel to dry.
When the glue was dry, I used my table saw to rip the panel to width and my miter saw to trim it to length.
Next, I assembled the side template.
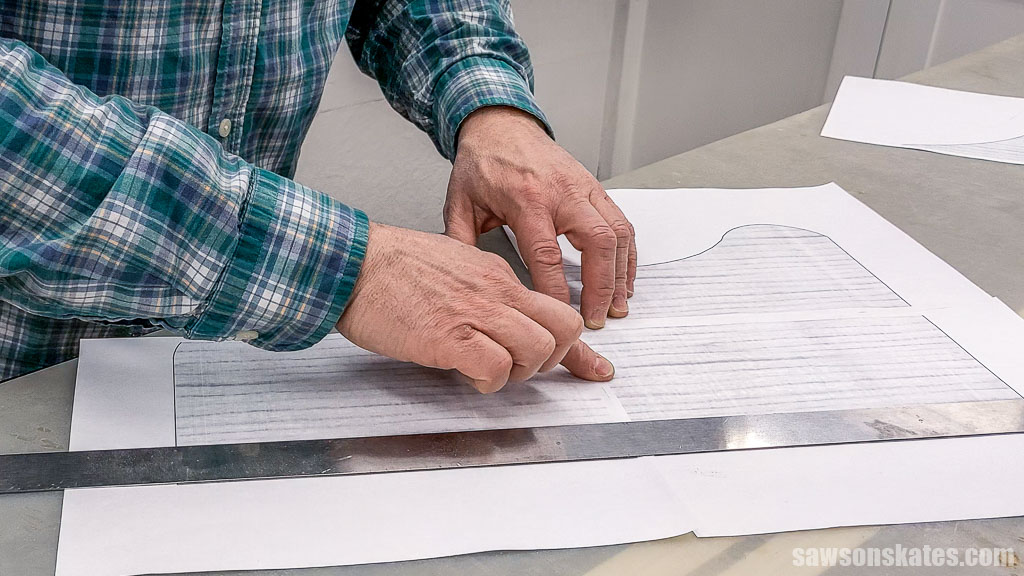
And traced it on the panel.
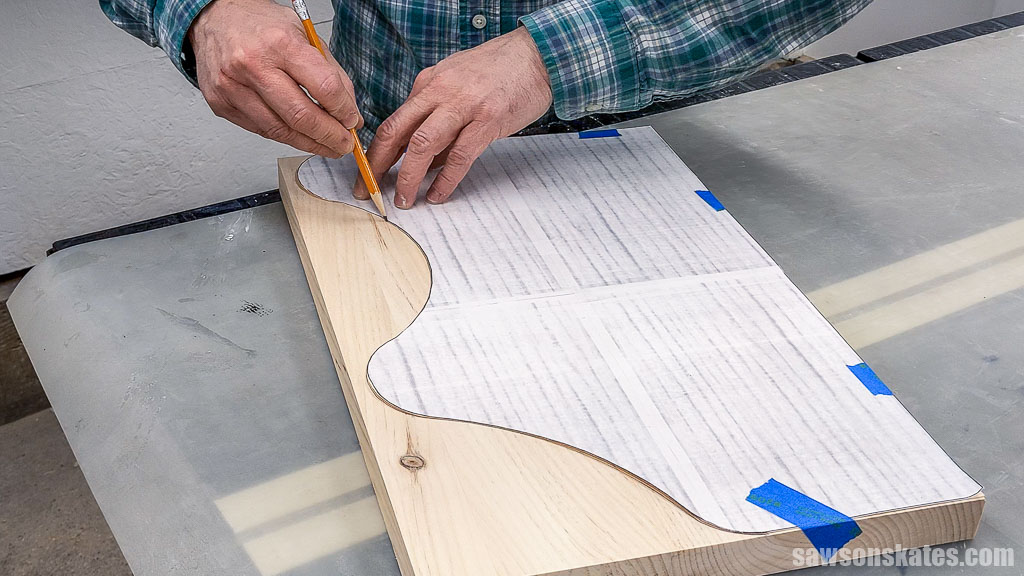
Next, I cut the shape using a jigsaw and a 20 TPI (teeth per inch) blade. What’s my secret for perfect curves? I cut just beyond the pencil line, then sand, removing the saw marks and refining the shape.
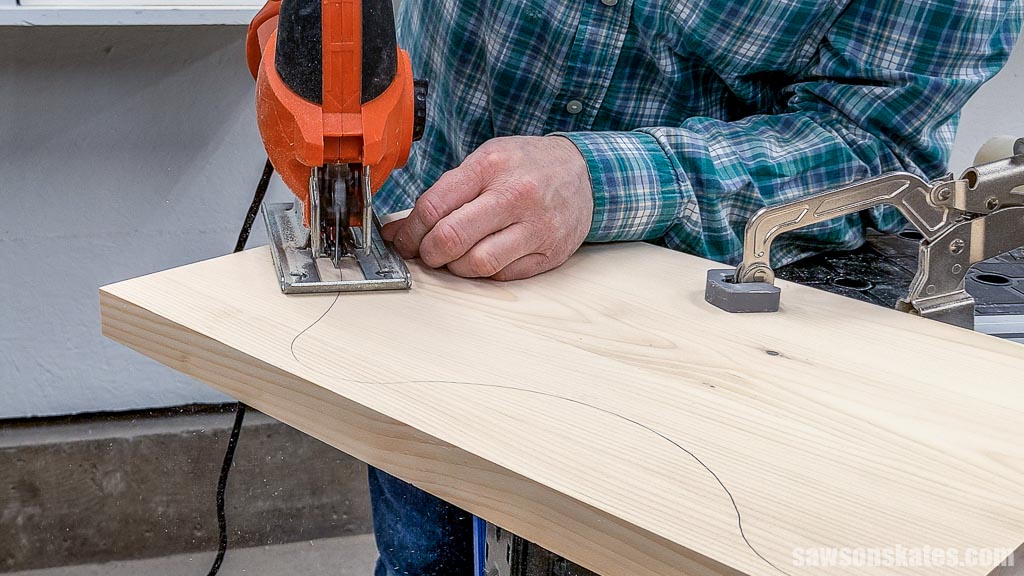
Fine-tuning the panel’s curved edges is the fastest and easiest with a portable spindle sander, but you can also use sandpaper if you don’t have one.
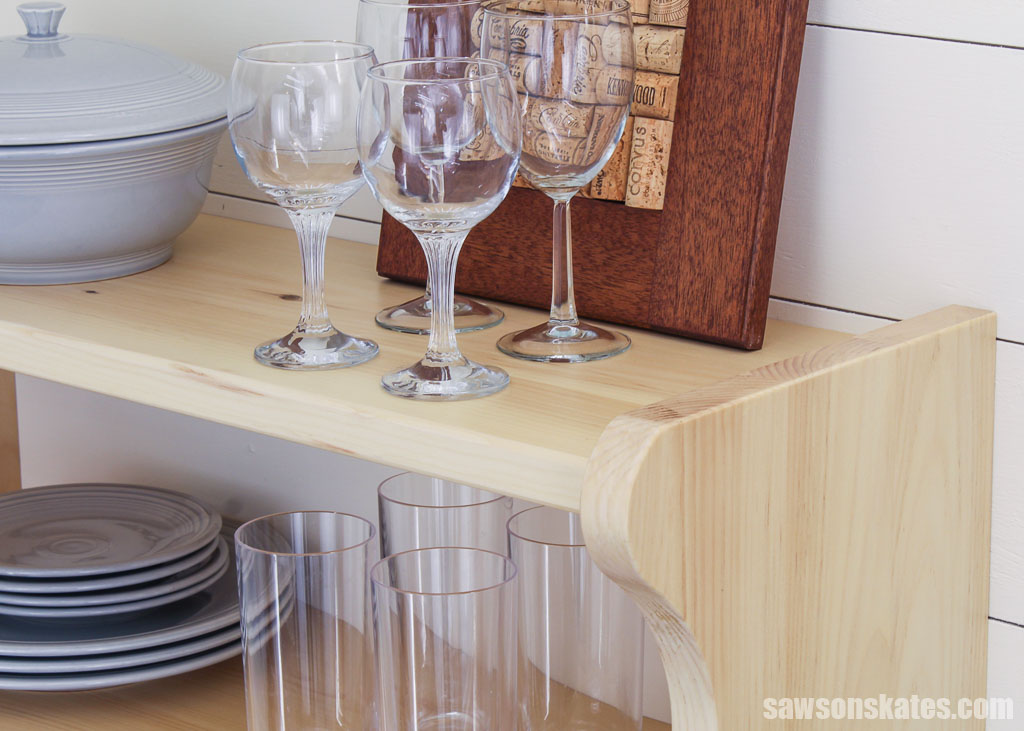
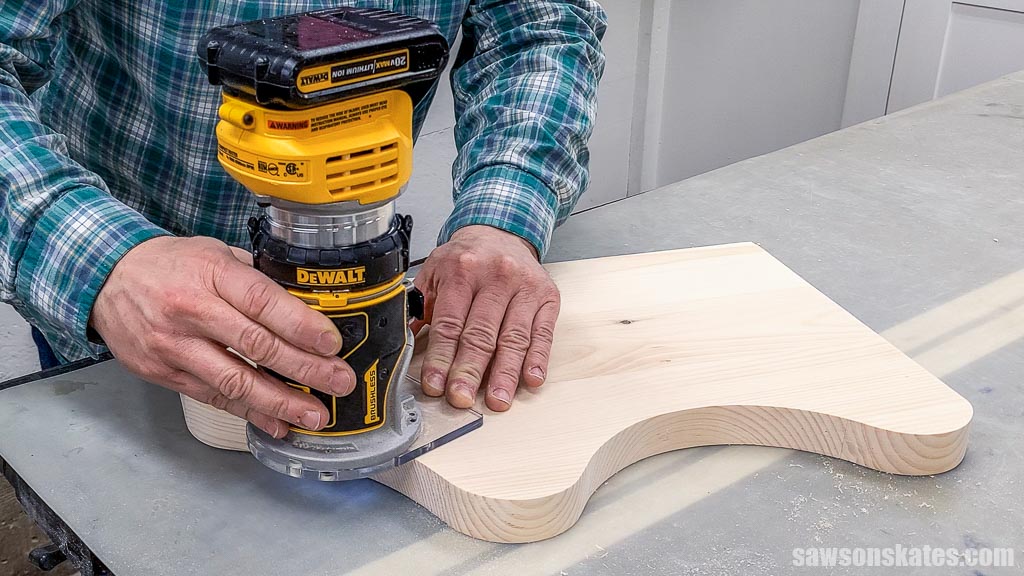
A quick pass with my handheld router and roundover bit softens the edges. This step is optional, but I think it makes the shelves look more professional.
Step 2. Attach the Shelves
I designed the shelf to be made from three boards glued together to form a panel.
As I mentioned for the sides, if you have a sliding miter saw, for the best fit, cut the sides ¼” longer than needed, glue them to form a panel, and then trim them to size.
I softened the shelves leading edge with my router and a roundover bit to accent the side’s curves.
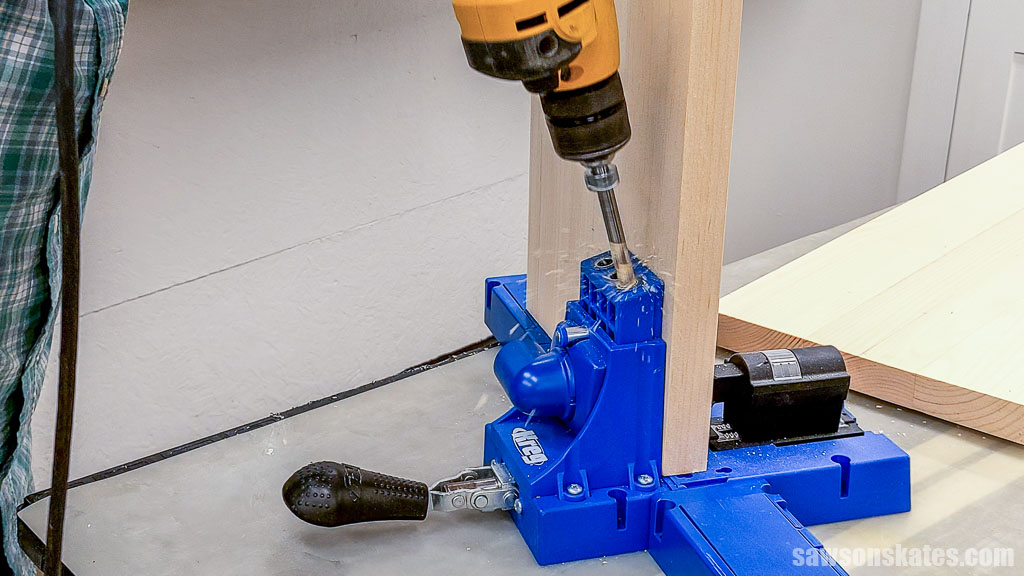
Next, use the diagram in the printed plan to mark the location for pocket holes.
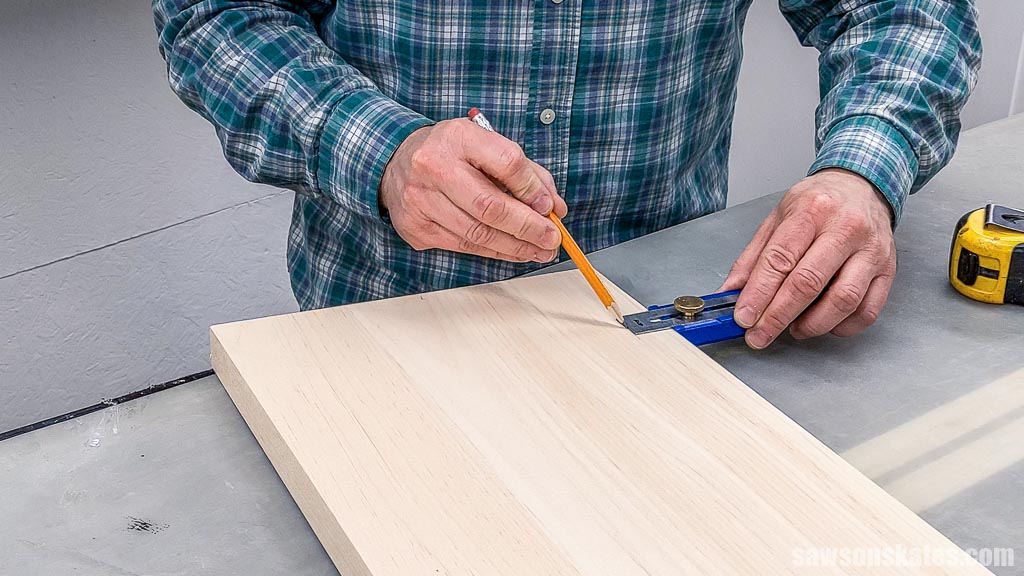
Set your pocket hole jig and drill a pocket hole at each mark.
Related: How to Use a Pocket Hole Jig (Beginner Pitfalls to Avoid)
To help position the shelves, I cut several pieces of scrap wood to length.
I clamped the scrap wood to the top of the sides, positioned the shelf beneath it, and clamped. Attach the shelf using pocket hole screws.
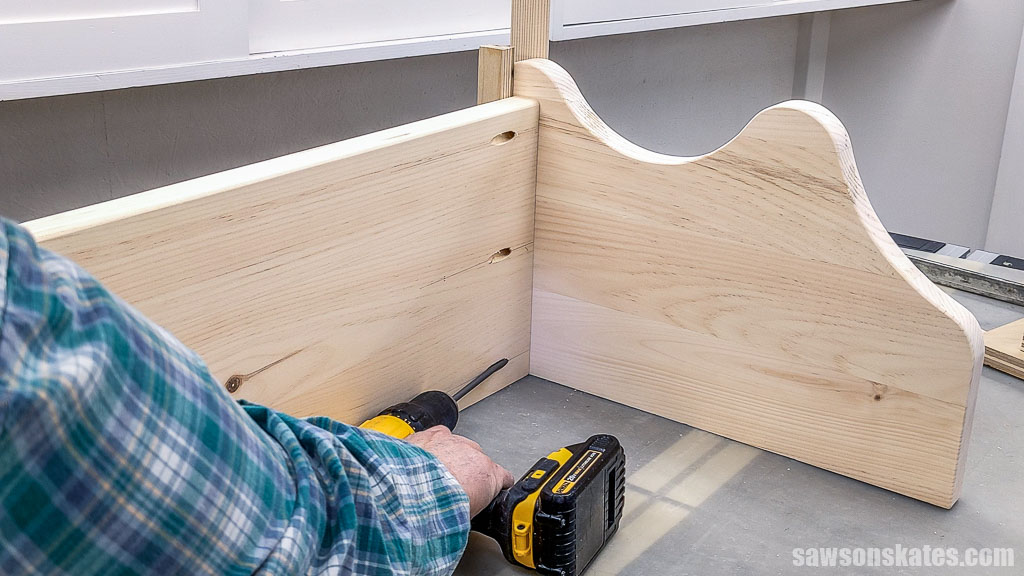
I repeated these steps to attach the bottom shelf.
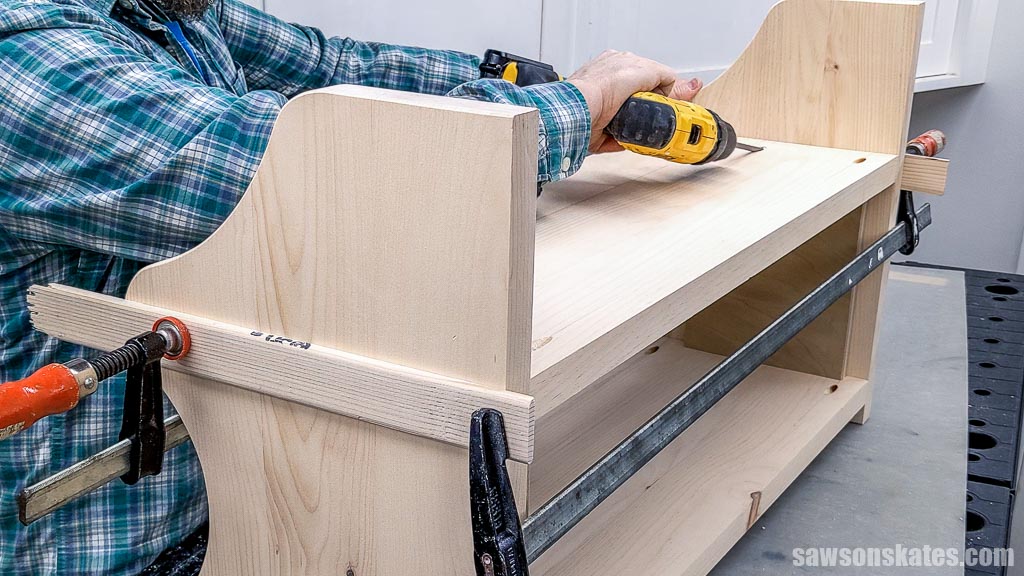
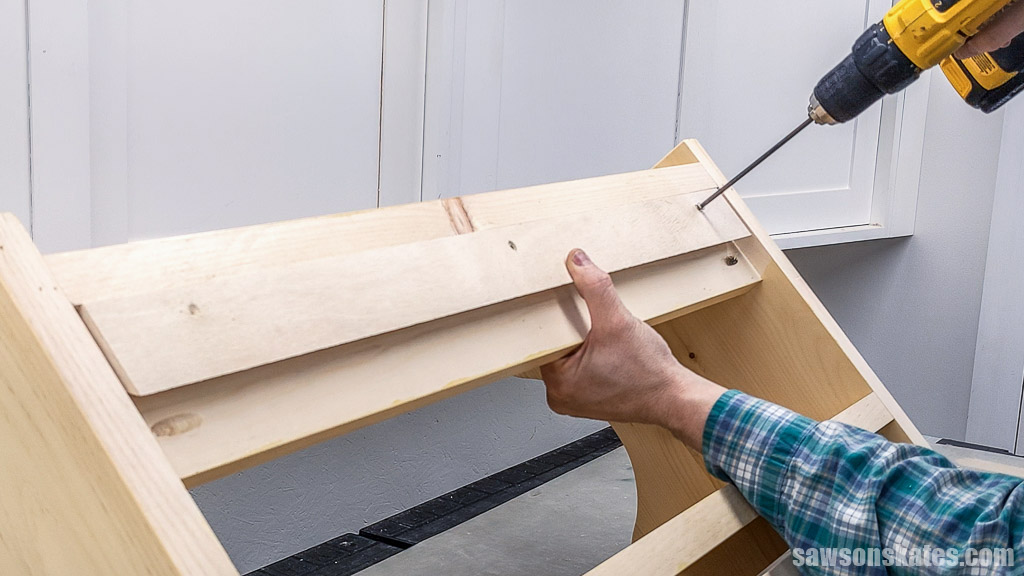
Step 3. Attach the Stretchers
I planned to attach my shelf to the wall using a french cleat, so I used narrow board for the top stretcher that sets in equal to the width of my french cleat.
Related: How to Make a French Cleat (2 Easy Ways)
If you plan to attach your shelf to the wall using another method, you may want to use a 5/4 board instead and mount it flush with the back.
Cut the top stretcher to length and drill two pocket holes in each end.
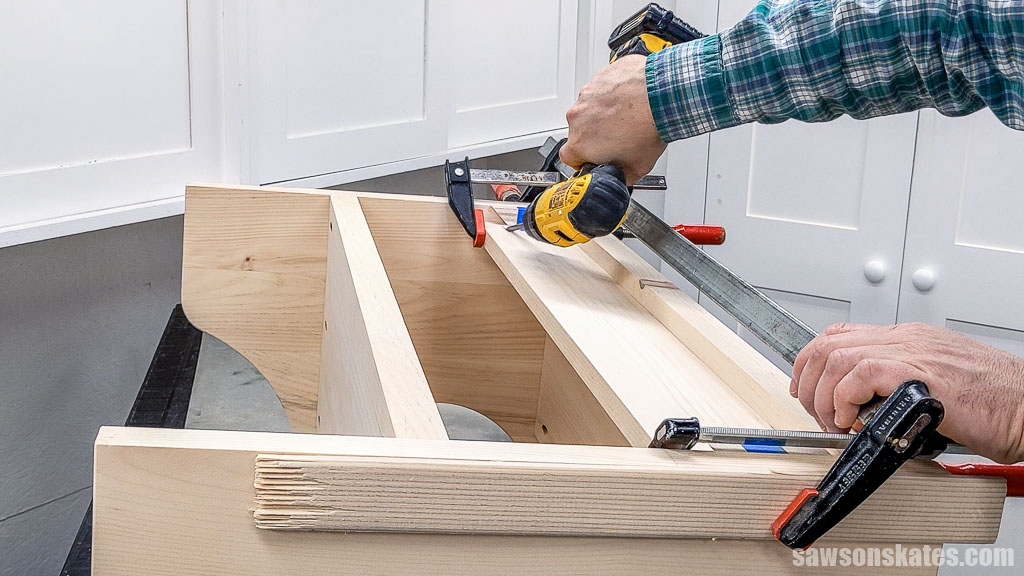
It’s difficult to see in the photo, but to help position the stretcher, I attached two scrap french cleat pieces to the stretcher’s rear at each end using painter’s tape.
I positioned the stretcher below the top shelf, with the french cleat pieces flush with the back.
If you used a narrow as I did, attach it using pocket hole screws; otherwise, use the pocket hole screws recommended for the board you used.
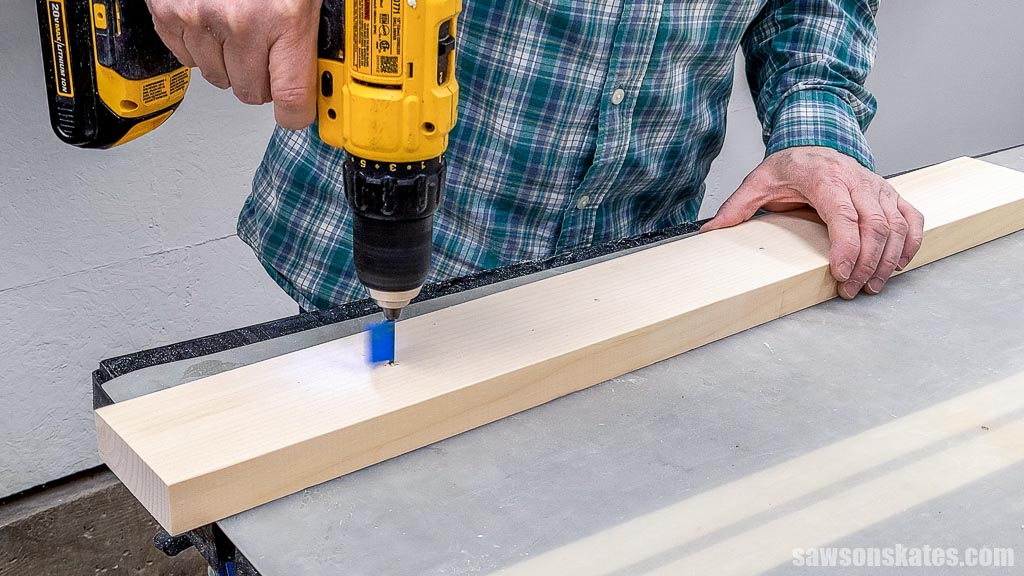
Cut a board to length for the bottom stretcher and drill pocket holes in each end.
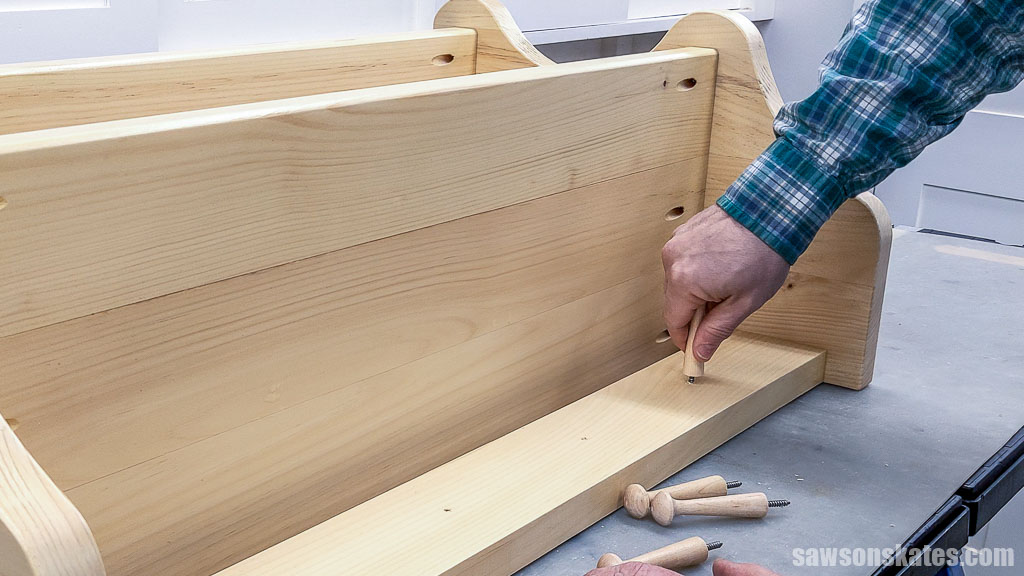
Use the diagram in the printed plan to mark the locations for the pegs.
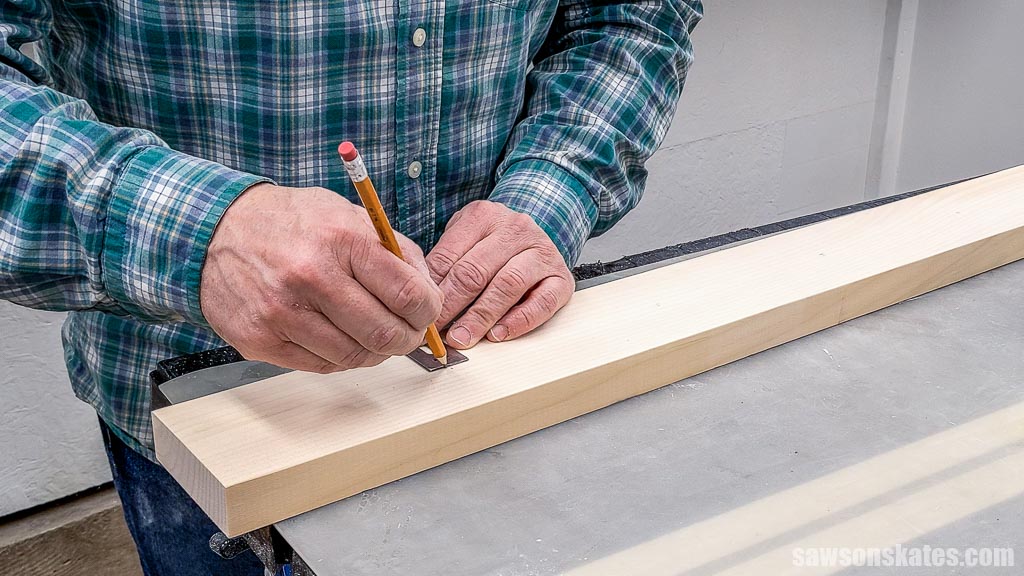
Then, use an awl at each mark to make a starting point for the drill bit.
Related: What is an Awl? (& How to Use It)
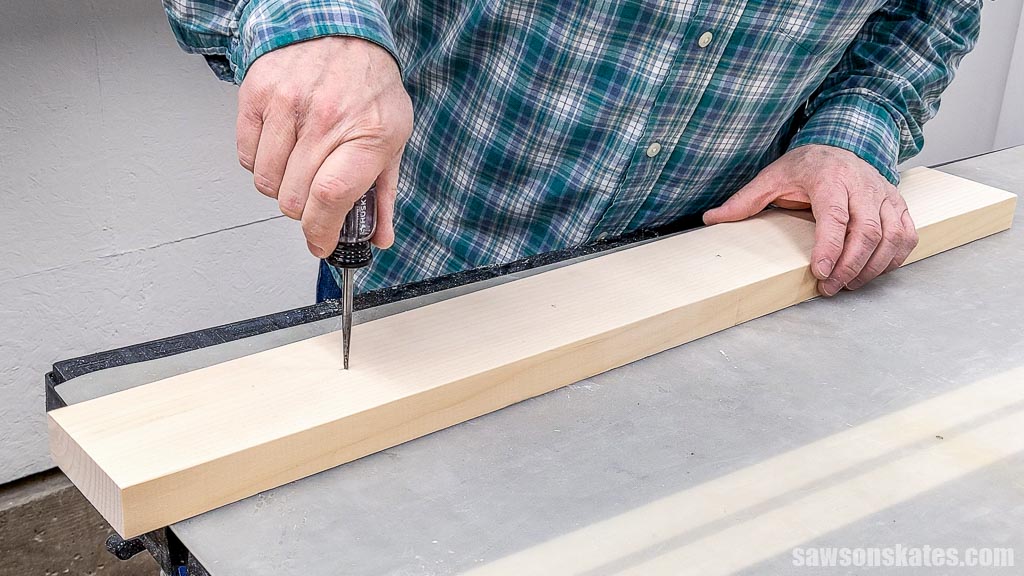
Next, using painter’s tape as a depth stop, I drilled a pilot hole at each location.
Related: How to Drill Pilot Holes (Why, When & Correct Size)
TIP: Depending on how you plan to finish your kitchen shelf, you may want to wait to install the pegs.
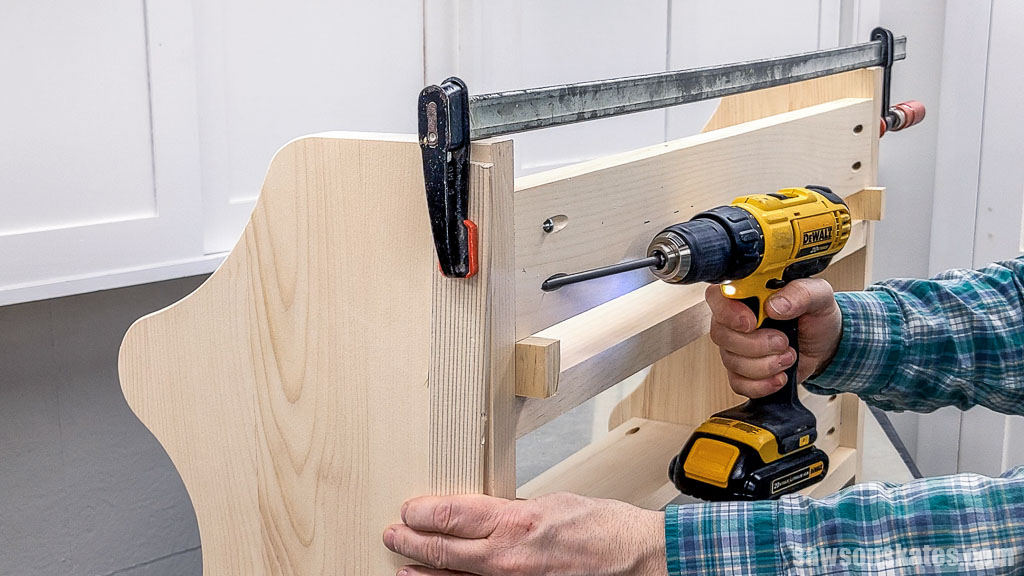
To help position the stretcher, I cut two pieces of scrap wood to length, placing them between the shelf and the stretcher.
Position below the bottom shelf and attach using pocket hole screws.
Step 4. Finish the Kitchen Shelves
See How to Finish the Kitchen Shelves for more details, then screw in the pegs, hang on the wall, and enjoy!
Includes:
- List of tools and materials
- Complete measurements (in inches)
- Easy-to-follow instructions
- Step-by-step photos
- Detailed diagrams
- Shelf template
Final Thoughts
Making DIY wall-mounted kitchen shelves is an easy way to add style and organization to your kitchen.
Don’t wait. Get your PDF plan (including the detailed instructions and measurements) now!
Thank you for stopping by. If you enjoyed this tutorial, would you please take a moment and pin it to Pinterest? I’d really appreciate it!
Recommended For You
Pin This For Later

Hi there – I’m Scott, a woodworking enthusiast and creator of Saws on Skates, a site I started in 2015 to share easy-to-follow tutorials, space-saving shop tips, and project inspiration for DIYers at any skill level. Learn more about my woodworking journey here.