DIY Wall-Mounted Trash Bag Dispenser (Simple & Stylish)
Tired of digging through your cabinet or drawer for a new garbage bag? This easy-to-make DIY wall-mounted trash bag dispenser is the solution!
What Should I Build Next?
That's the question I help answer.
Every week, I send woodworking ideas to 17,000 DIYers who love building things.
You'd fit right in.
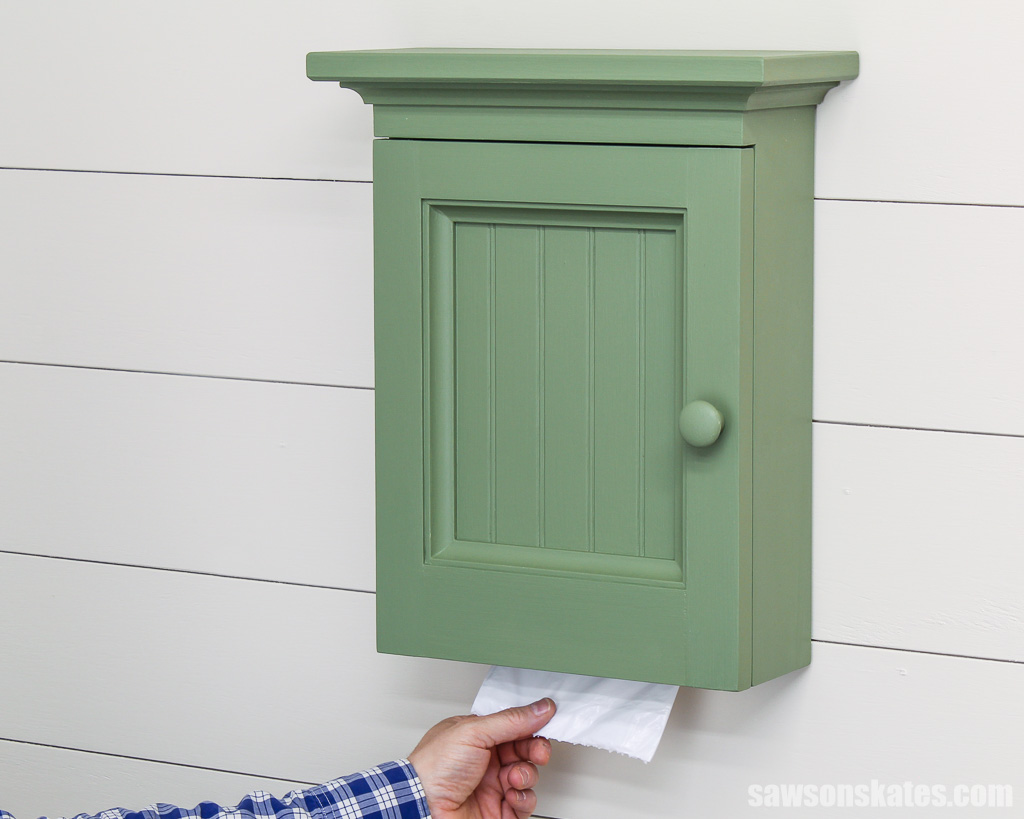
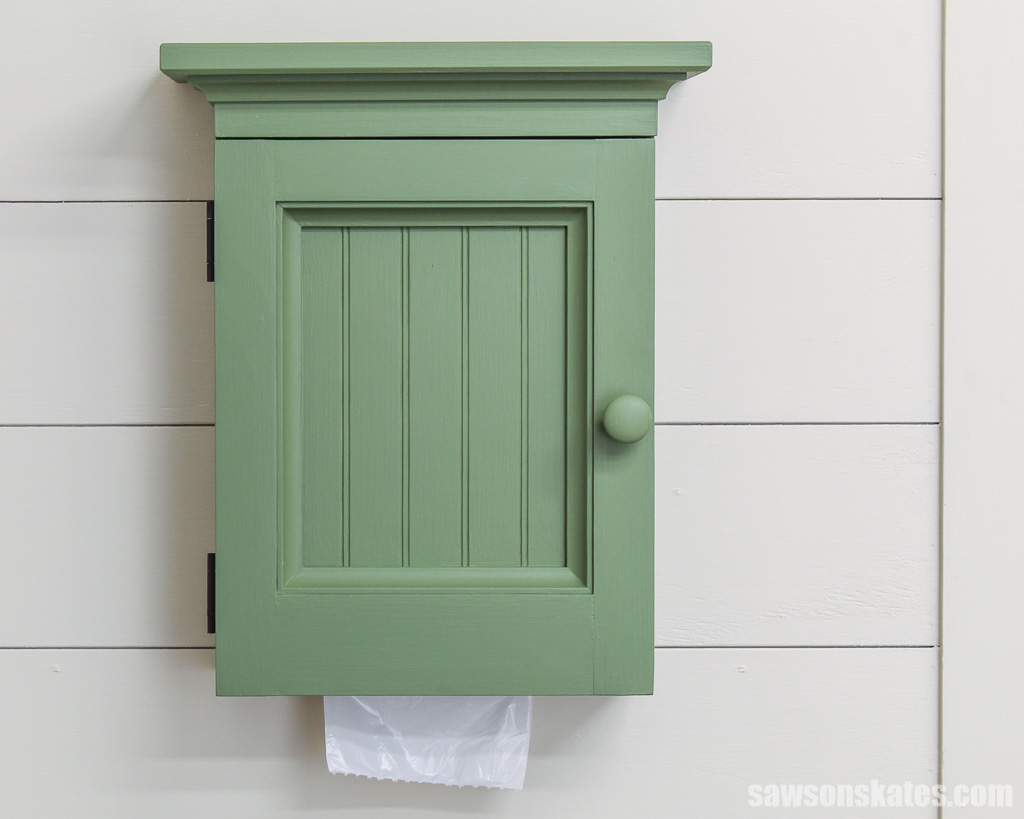
Want a stylish and convenient way to store your garbage bags? Then you need to check out this DIY wall-mounted trash bag dispenser! It’s the perfect solution for keeping your bags neatly rolled and out of the way but easily accessible when needed.
You can easily create this attractive kitchen organizer with simple tools and materials, and I’ll show you how to do it step-by-step!
Table of Contents
- Inspiration for This DIY Wall-Mounted Trash Bag Dispenser
- What Tools Do You Need?
- What Wood Should You Use?
- How to Make a DIY Wall-Mounted Trash Bag Dispenser
- Get the PDF Plan
This article contains affiliate links. If you purchase from these links, I may earn a small commission at no additional cost to you. Visit my site policies for more information.
Inspiration for This DIY Wall-Mounted Trash Bag Dispenser
Artificial intelligence (AI) is everywhere these days, so I decided to have some fun with it. I asked it to suggest a project based on ones I’ve already made, and it told me I should build a DIY trash bag dispenser.
I’d never thought of making a garbage bag dispenser, but I like a challenge, so I decided to give it a try!
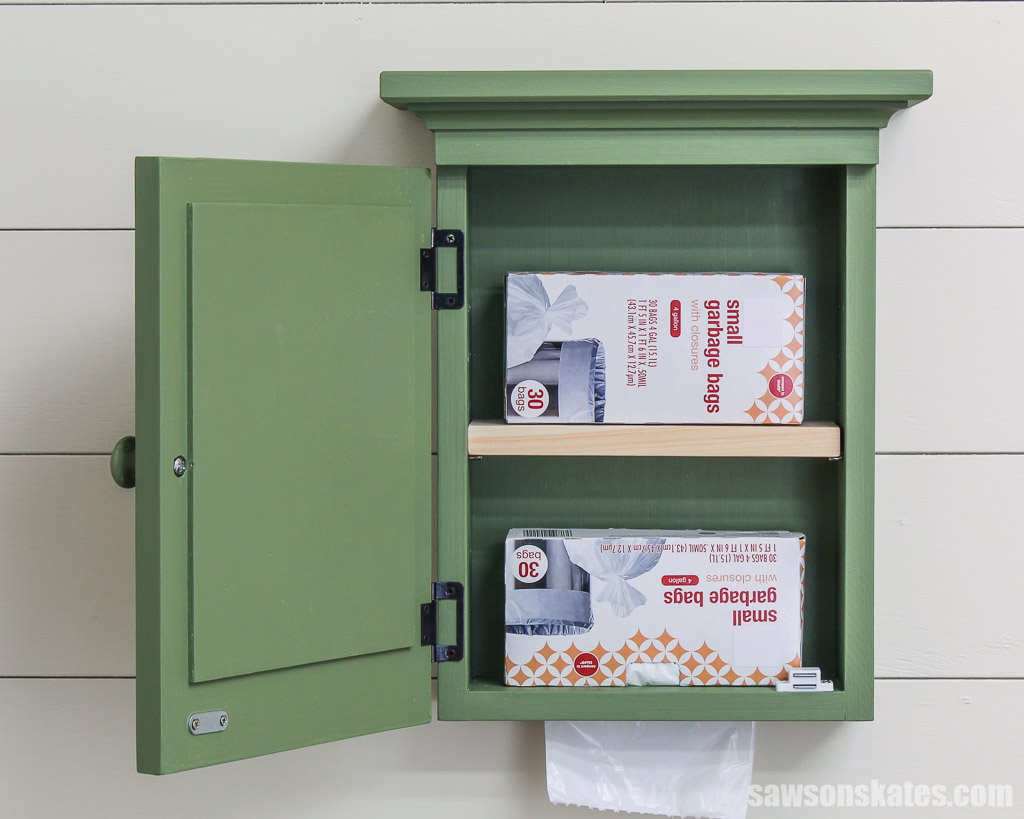
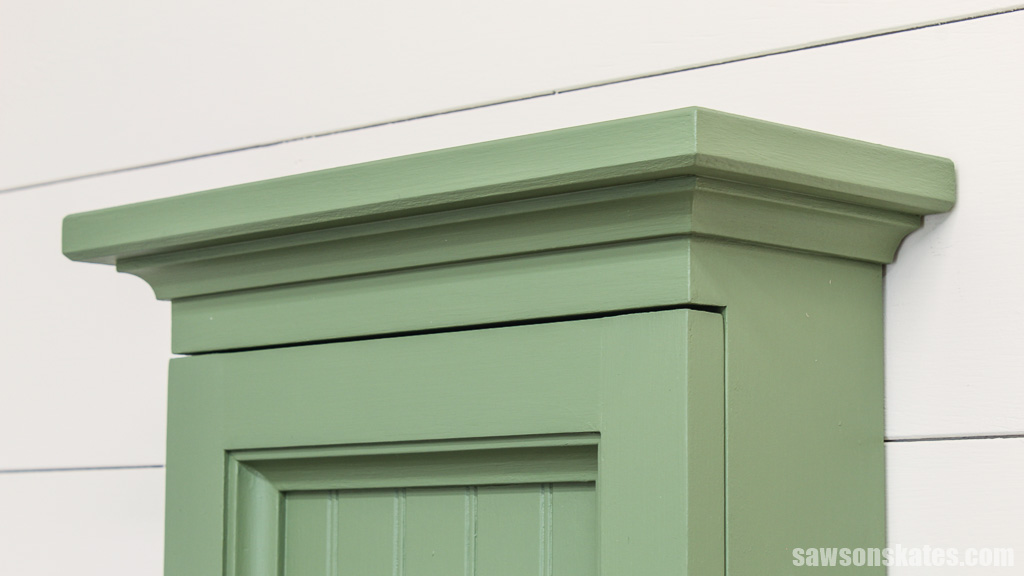
Here’s what I came up with, an attractive way to keep your kitchen tidy while conveniently organizing your trash bags in one spot. This small, wall-mounted cabinet, accented with beadboard and cove molding, features an adjustable shelf and ample storage for bags.
What Tools Do You Need?
You can make this DIY trash bag dispenser with just a few tools, such as a drill, a miter saw, and a pocket hole jig. Here are a few other tools you’ll need:
Scroll Saw
I used a scroll saw to cut a hole in the bottom that you’ll use to pull the garbage bags from the dispenser. You might be able to use a jigsaw for this, but the bottom is small, and it could be tricky to keep your fingers out of the path of your jigsaw’s blade.
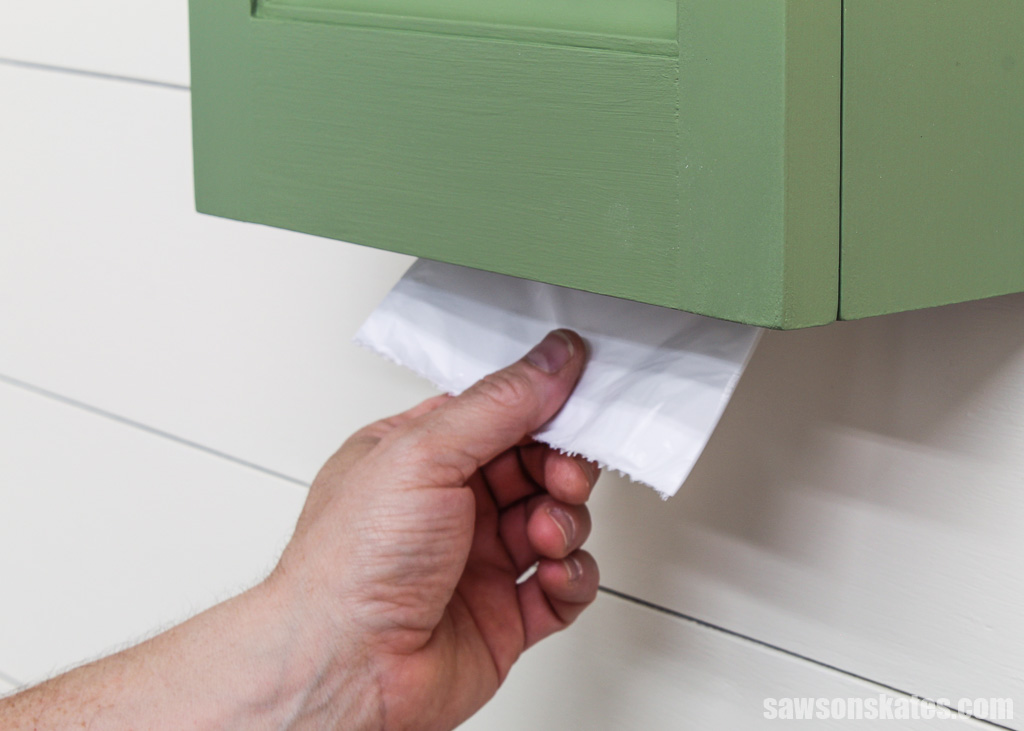
Table Saw or Circular Saw
I used my table saw to rip the door and back panels to width, but you could also use a circular saw and Kreg Rip-Cut instead. Rip cuts are made along the length of a board to make it narrower. Then I used my miter saw to cut them to size.
Related: Table Saw vs Circular Saw (Which Should You Buy?)
Handheld Router (optional)
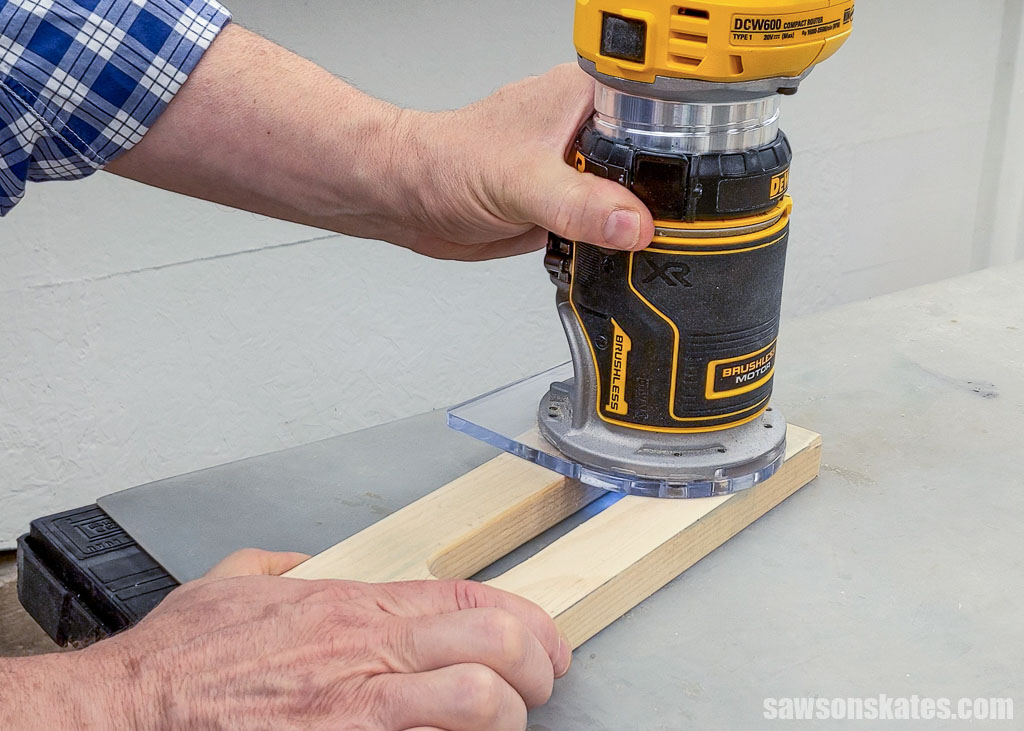
To give the opening in the dispenser’s bottom a professional look, I rounded it with a handheld router and a roundover bit, but you could use sandpaper instead.
I also used my router and chamfer bit on the top’s edges. A chamfer is a beveled edge, making the top appear thinner than it is and giving this project a finished look.
This step is optional, but I recommend it if you have a router and a chamfer bit.
Shelf Pin Jig (optional)
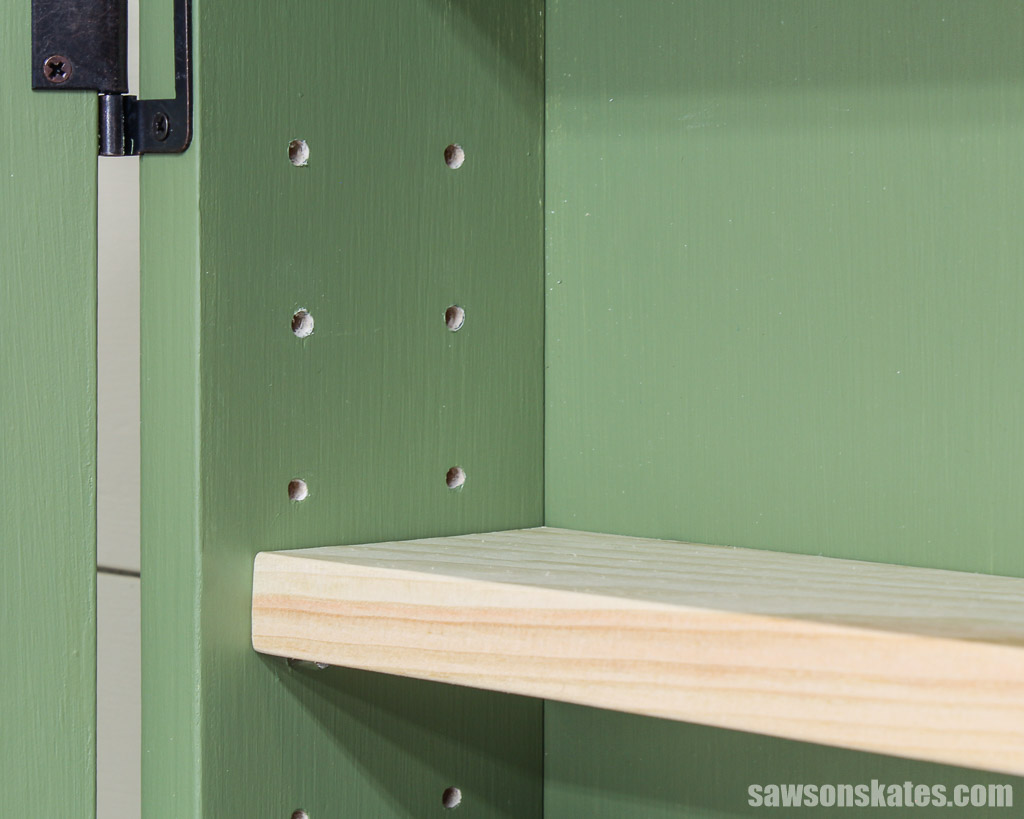
I wanted adjustable shelves for my dispenser, so I used a shelf pin jig to drill holes for the shelf pins. You can skip this step if you prefer a fixed shelf for your project.
What Wood Should You Use?
I used repurposed pine for my project, and you may see some green paint in the build photos from its previous use. However, you can use any wood type for your dispenser.
I added a decorative touch to the dispenser’s top and the door with cove molding. I had some pre-primed molding left over from another project, which worked perfectly because I planned to paint my dispenser. You can use natural wood molding if you plan to stain your project.
How Do You Finish the Trash Bag Dispenser?
You can finish your trash bag dispenser with a coat of paint or stain. I chose to paint mine, so I started by filling the nail holes and imperfections with Ready Patch.
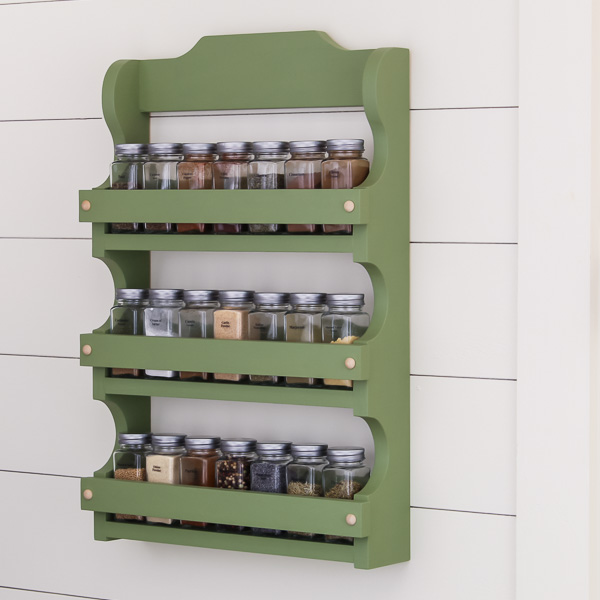
Next, I applied several coats of shellac-based primer. Once the primer was dry, I applied a few coats of a Behr color called “Pesto Paste,” which Is the same color I used for this spice shelf.
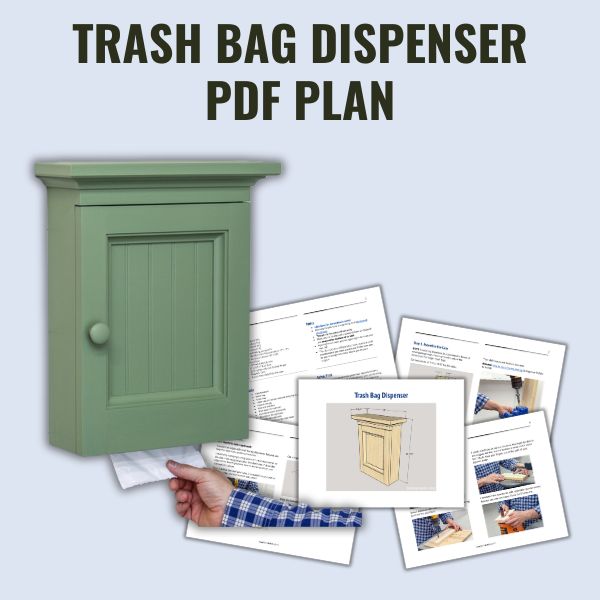
DIY Wall-Mounted Trash Bag Dispenser
Printed Plan
Get the PDF plan here (includes detailed instructions, measurements, and bonus tips)
Supplies
- Wood (per the printed plan)
- Wood Glue
- 1-¼” Pocket Hole Screws
- ½” and 1-¼” Brad Nails
- (2) Small Non-Mortise Cabinet Hinges
- Magnetic Catch
- French Cleat-Style Picture Hanger
Tools
- Tape Measure
- Miter Saw
- Scroll Saw
- Table Saw or Circular Saw and Kreg Rip-Cut
- Pocket Hole Jig
- Drill and Drill Bits
- Brad Nailer or Hammer
- Handheld Router (optional)
- Roundover Bit (optional)
- Chamfer Bit (optional)
- Portable Spindle Sander (optional)
- Shelf Pin Jig (optional)
Step 1. Assemble the Case
NOTE: I made my dispenser to accommodate boxes of small garbage bags. You may need to adjust the dimensions for larger trash bags.

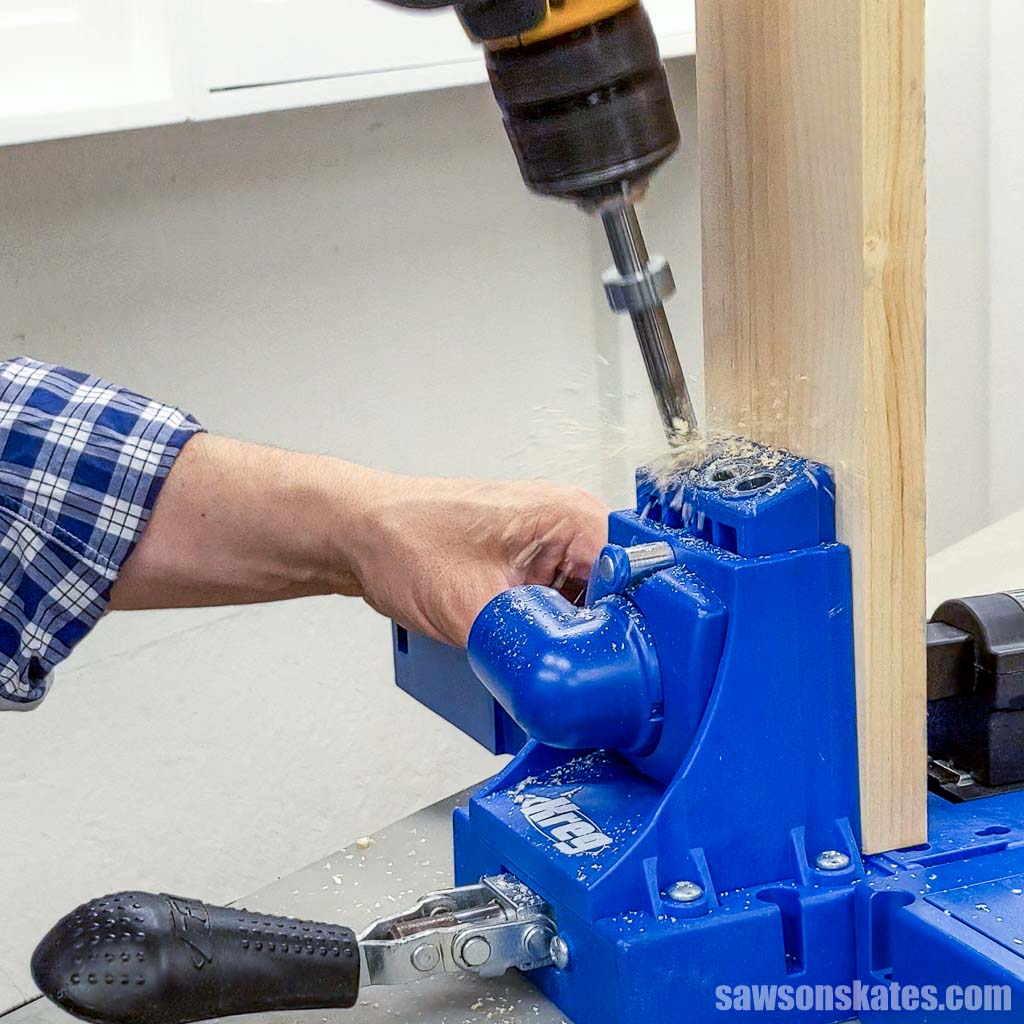
Cut two pieces of wood to length for the side and drill two pocket holes in one end.
Related: How to Use a Pocket Hole Jig (& Beginner Pitfalls to Avoid)
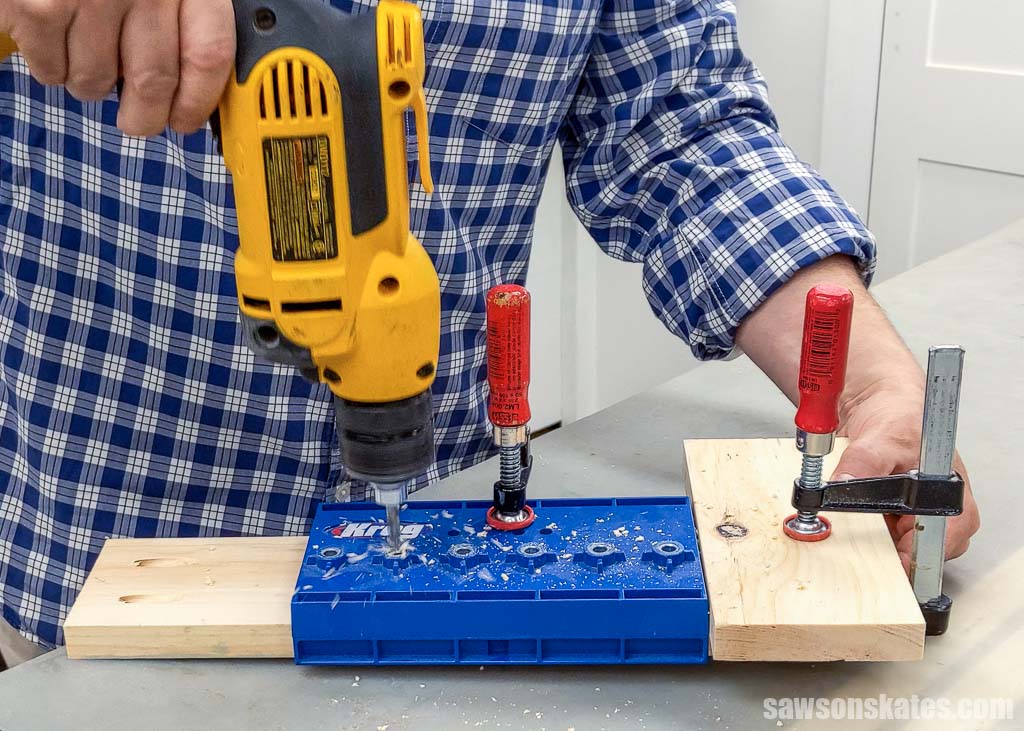
Drill Shelf Pin Holes (optional)
I wanted an adjustable shelf for my dispenser, but you can skip this step if you prefer a fixed one.
I started by clamping a piece of scrap wood to the bottom of the side. I positioned shelf pin jig next to the scrap wood, and clamped it in place.
Next, I drilled the shelf pin holes. I repeated this process on the other edge and the second side panel.
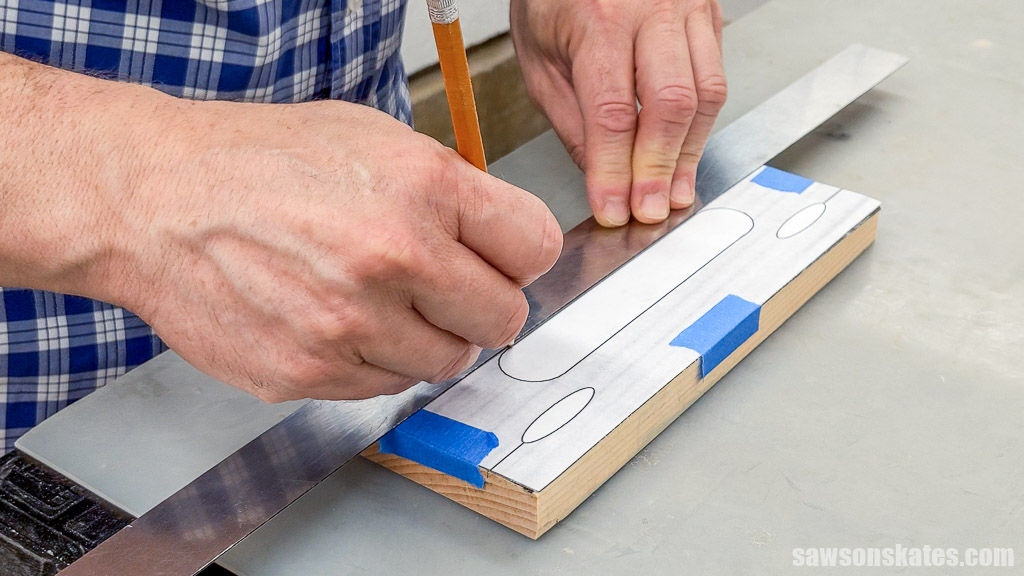
Cut one piece of wood to length for the bottom and print the bottom template at the end of the plan.
I had some carbon paper left over from another project, so I used it to trace the pattern onto the bottom. I used a few pieces of painter’s tape to keep it in position while I traced.
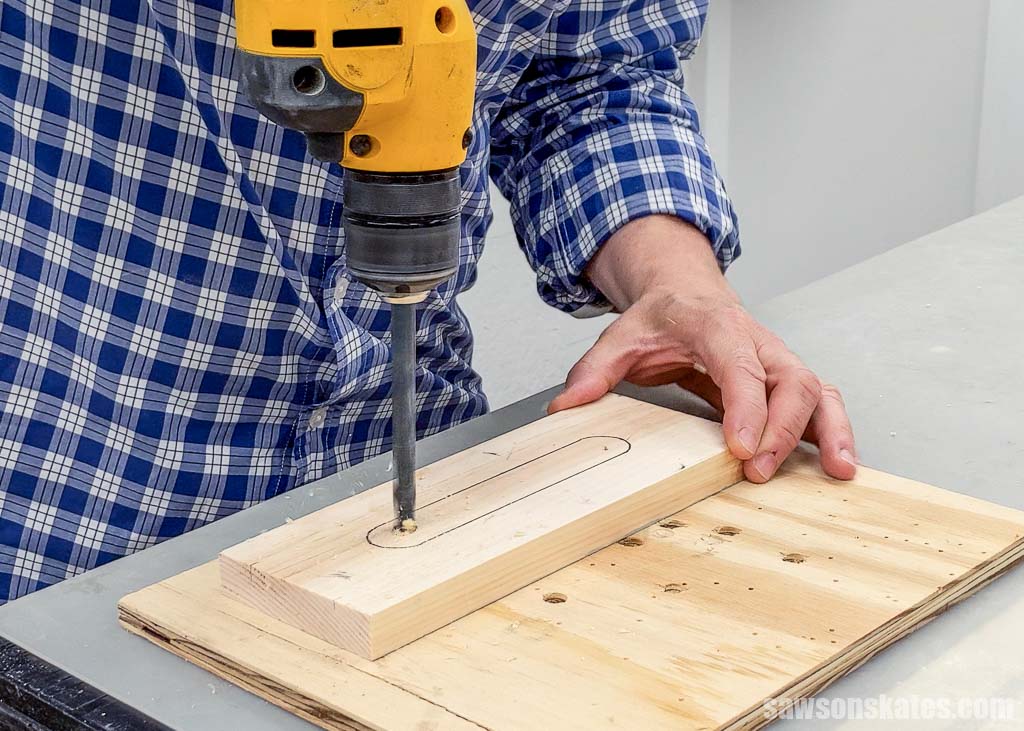
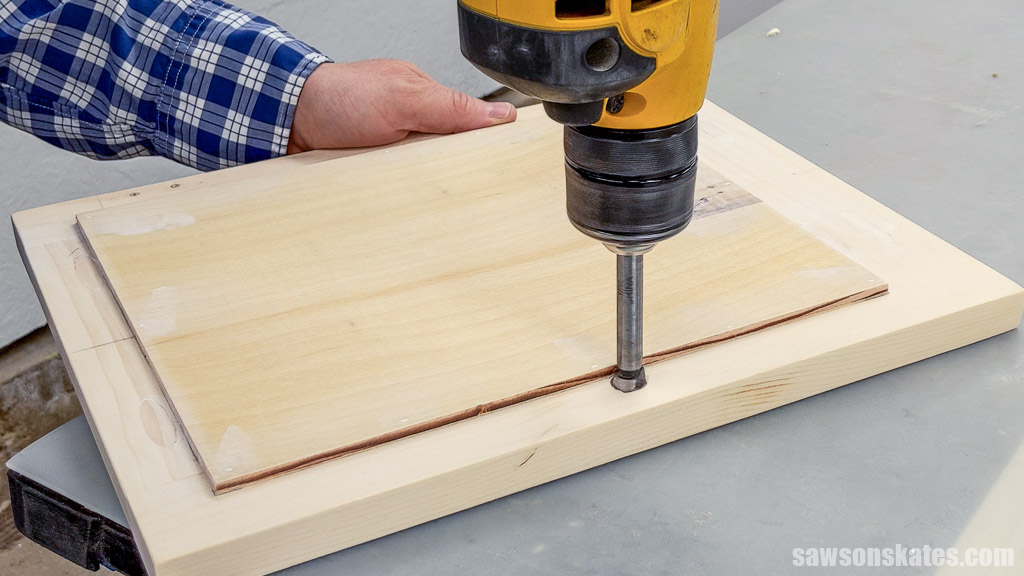
Next, I drilled a hole near each corner to make a starting point for the saw blade.
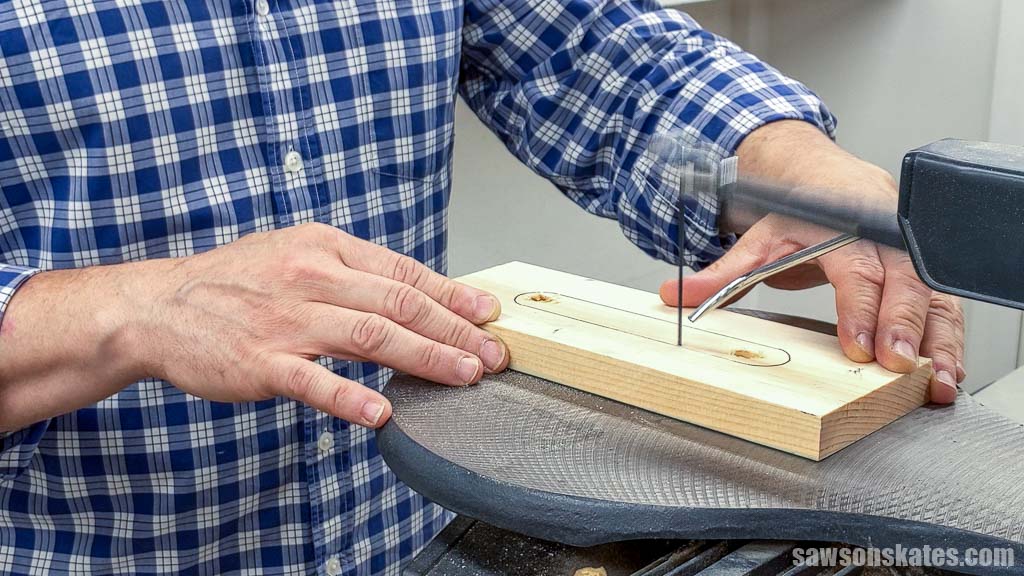
I used a scroll saw to cut out this area. You might be able to use a jigsaw for this, but the bottom is small, and it could be tricky to keep your fingers out of the path of your jigsaw’s blade.
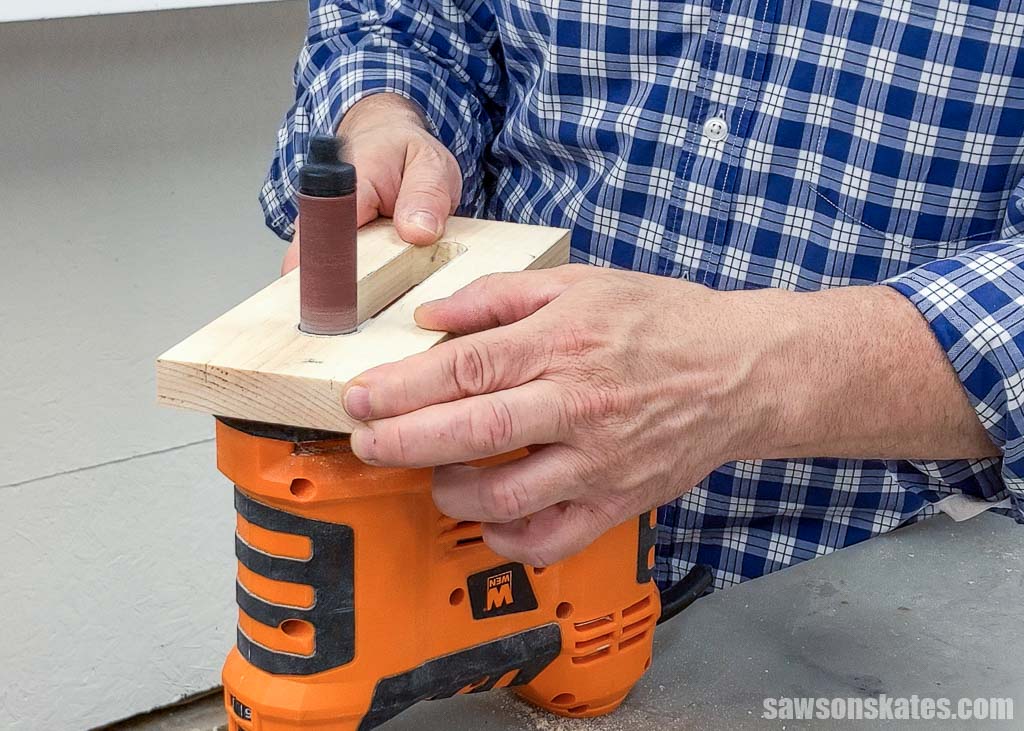
I smoothed the saw marks with a portable spindle sander, but you can use sandpaper if you don’t have one.
I rounded the opening with a handheld router and a roundover bit, but you could also use sandpaper.
Then I drilled two pocket holes in each end.
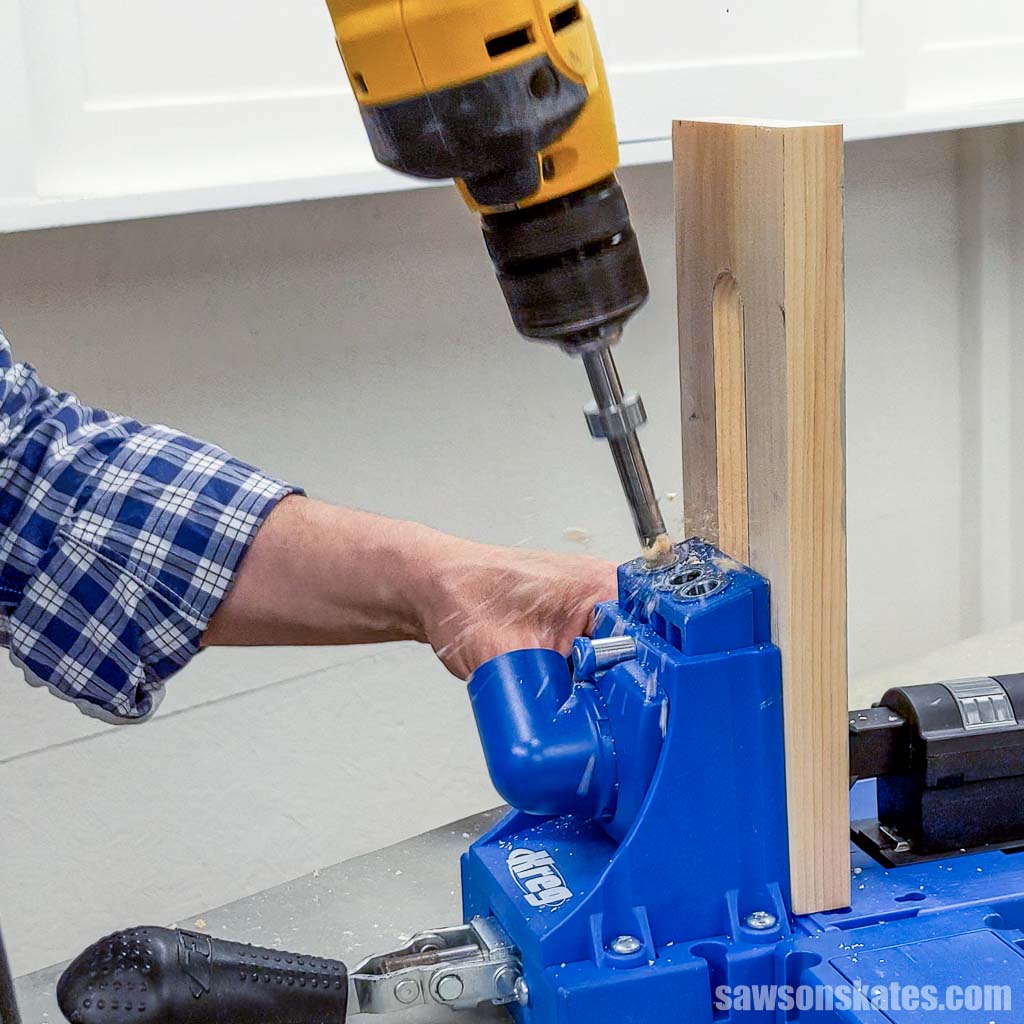
Cut one piece of wood to length for the back rail and drill one pocket hole in each end.
I typically drill two pocket holes in narrow boards to prevent them from twisting. A single pocket hole can create a pivot point, causing the board to rotate. However, the drawback is, drilling two pocket holes close together can sometimes crack the mating workpiece. In this case, I wasn’t concerned about using one pocket hole because the back panel will prevent the rail from twisting out of position.
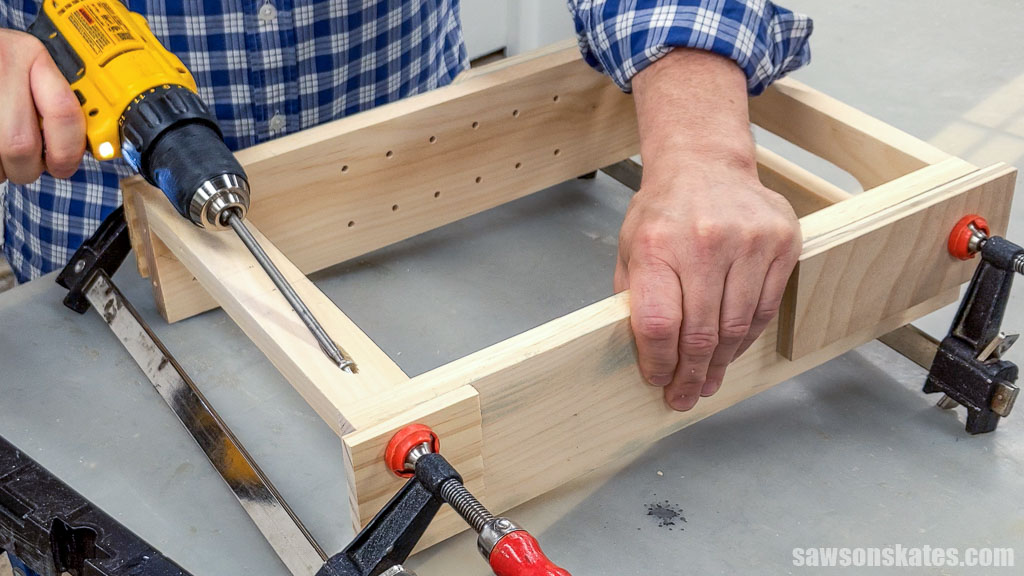
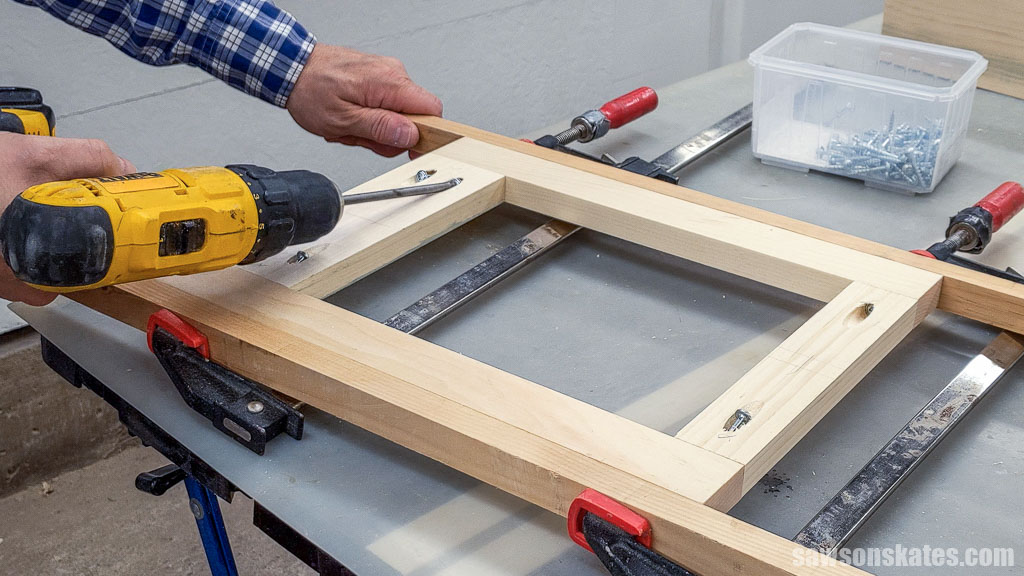
Apply glue to the ends of the bottom and rail, position them on the sides, and clamp. Attach using pocket hole screws.
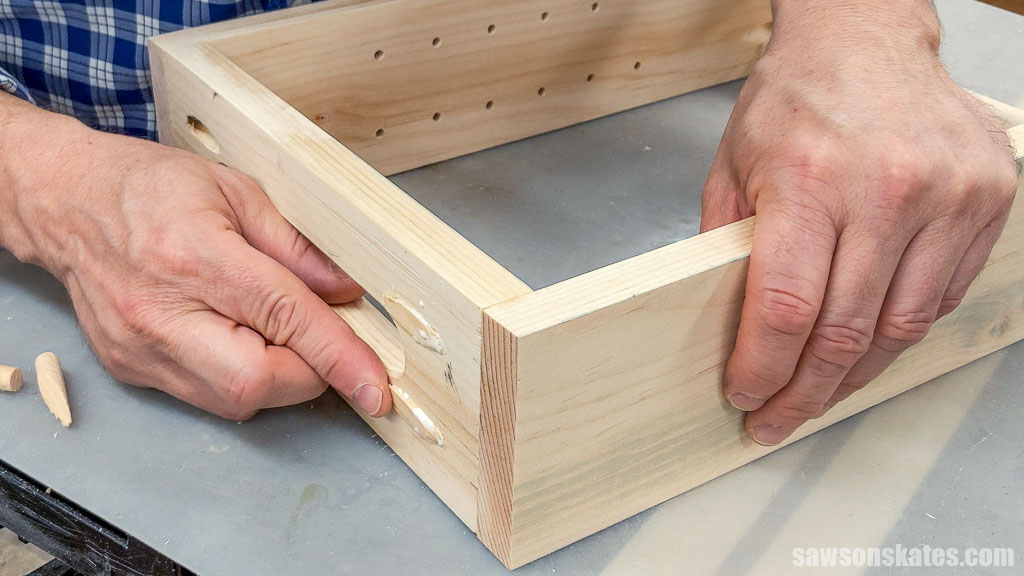
I filled the bottom pocket holes with pocket hole plugs to give this project a polished look.
Related: How to Make Pocket Hole Plugs (Step-by-Step Guide)
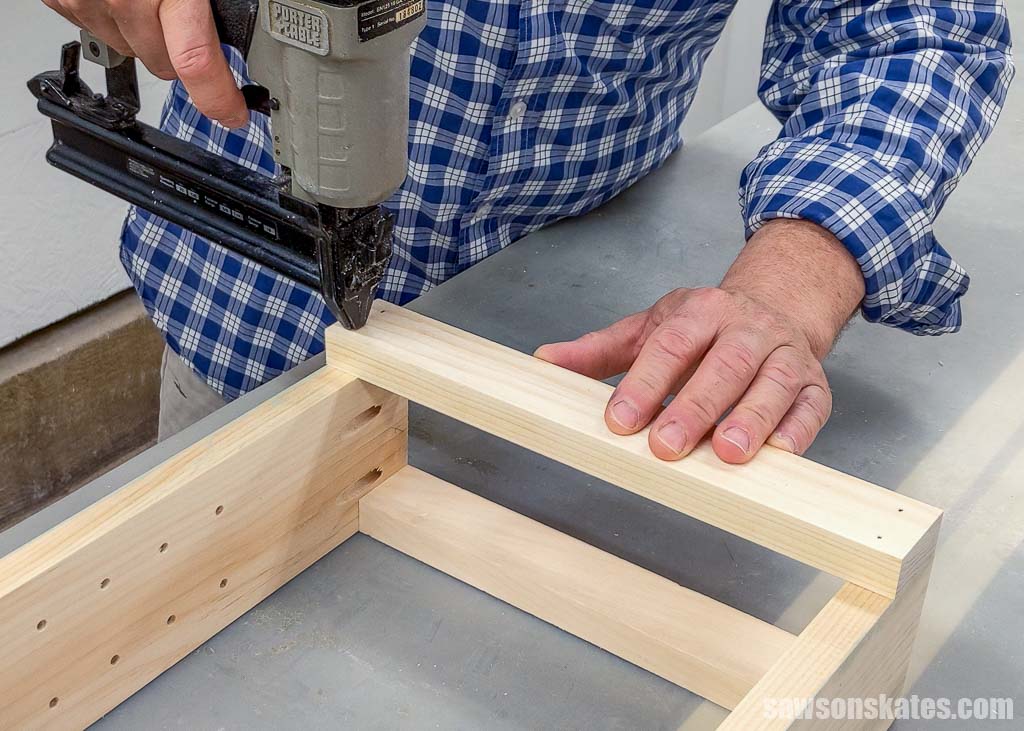
Cut one piece of wood to length for the front rail. Apply a dab of glue to each end of the rail, position on the sides, and attach using brad nails.
Cut one piece of wood to length for the top.
I got so excited about assembling the dispenser that I forgot I wanted to chamfer the top’s edges. A chamfer is a beveled edge, making the top appear thinner than it is and giving this project a finished look.
I attached the top but removed it afterward so I could use my router to shape the edges. This step is optional, but I recommend it if you have a router and a chamfer bit.
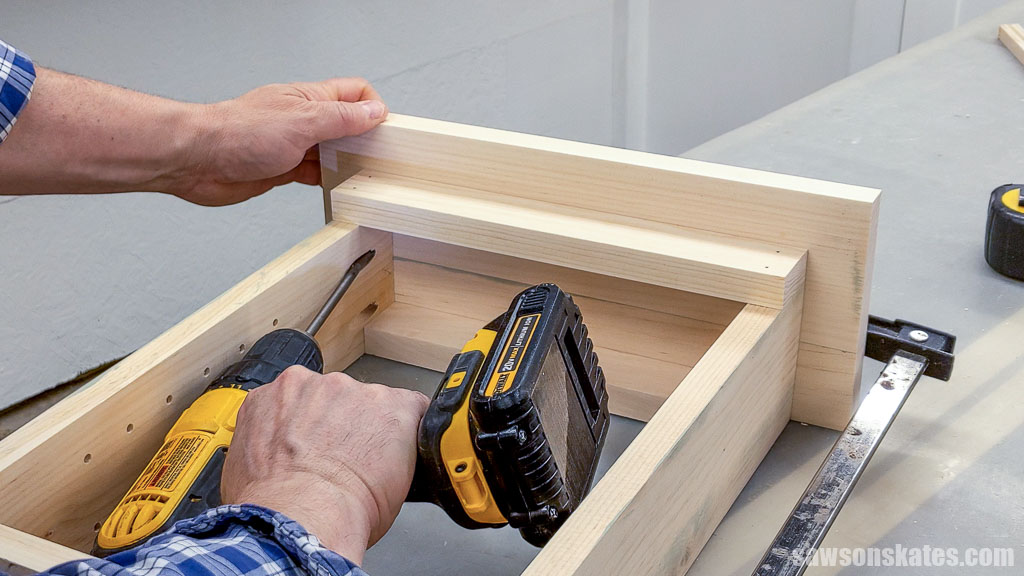
I used my Kreg Multi-Mark to position the case on the top and clamped it in position.

Then I attached it using pocket hole screws.
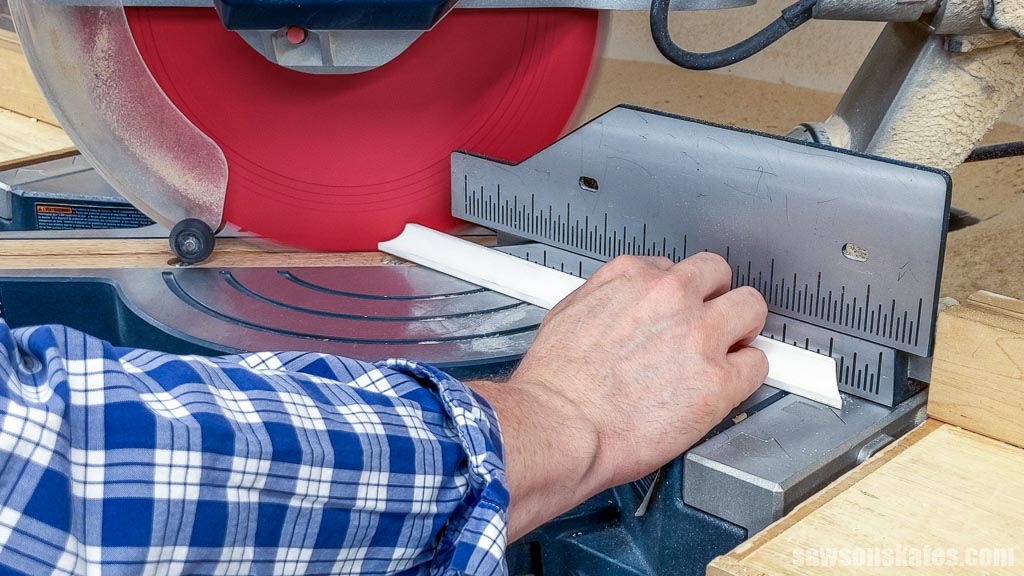
Step 2. Attach the Cove Molding
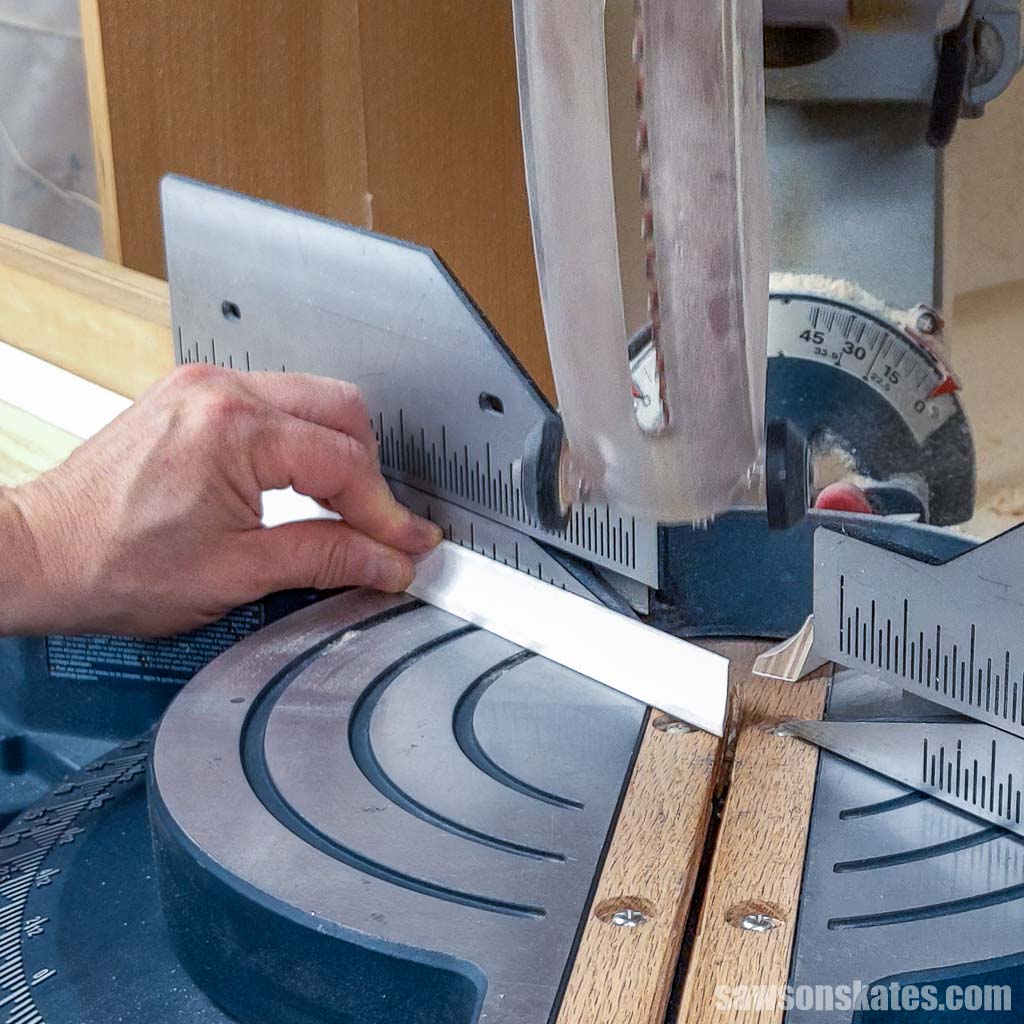
First, I cut a 45-degree angle on one end of the cove molding.
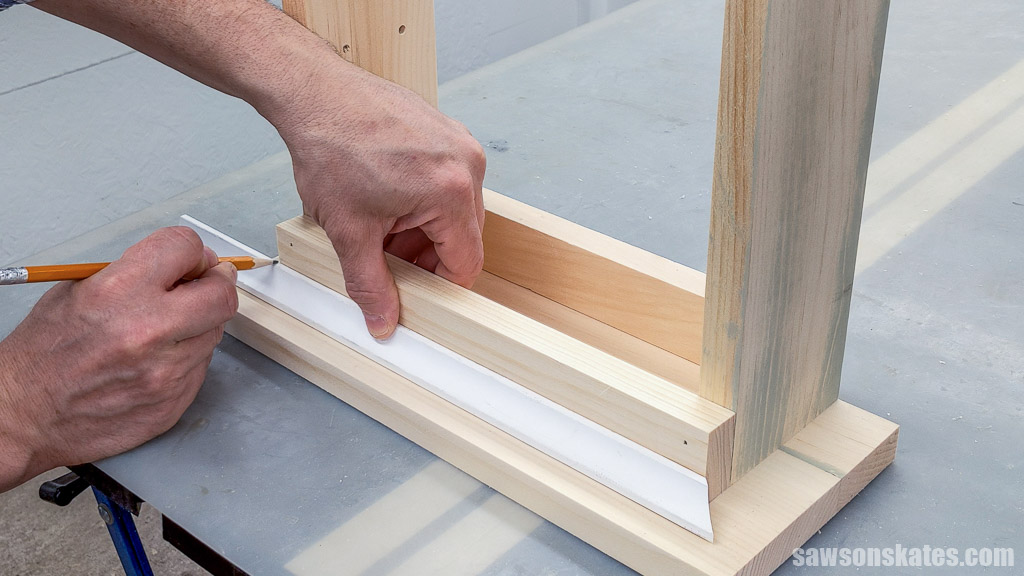
I aligned the molding’s cut edge flush against the corner of the dispenser’s side and then marked the opposite end.
Next, I rotated my miter saw to 45 degrees in the opposite direction and cut the molding slightly longer than necessary, allowing me to test it on the dispenser and trim any excess with my saw.
Related: 7 Miter Saw Tricks Every DIYer Should Know
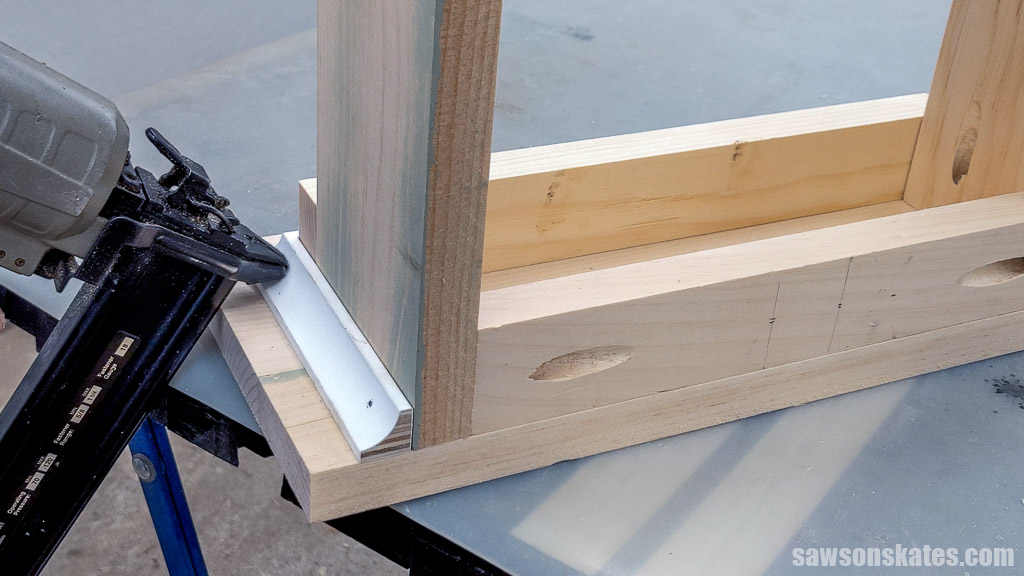
Once I was pleased with the molding’s fit, I attached it with brad nails.
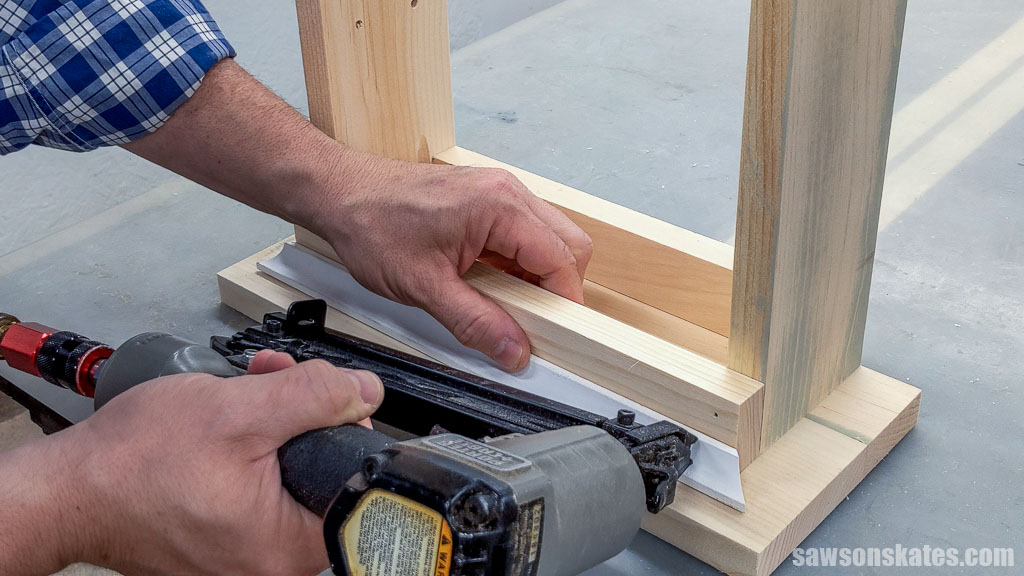
Next, I cut a complementary angle on the molding, positioned it, and marked it for a straight cut.

I applied glue to the cove molding’s mitered end and attached it using brad nails. Then I repeated these steps to install the other side.
Step 3. Make the Shelf
If you’re like me and using an adjustable shelf, cut one piece of wood to length. Next, I used my table saw to rip the shelf to width.
Related: 21 Table Saw Safety Rules (& Mistakes to Avoid)
If you don’t have a table saw or are uncomfortable using one, you can make a shelf by cutting two pieces of wood to length, applying glue, and clamping to form the shelf.
Related: How to Get into Woodworking Without a Table Saw
If you’re using a fixed shelf for your dispenser, cut one piece of wood to length and use a table saw to rip the shelf to width. Then drill two pocket holes in each end. Position the shelf at your desired height in the dispenser, clamp, and attach using pocket screws.
Again, if you don’t have a table saw or are uncomfortable using one, you can make the fixed shelf using two narrow boards.
Step 4. Make the Door
You’ll want to ensure the door has clearance at the top so that it will open and close properly. I recommend measuring your dispenser’s opening and deducting a ⅛” from that measurement.
Cut two pieces of wood to length for the stiles.
Boards can vary in width, so for the best results, I recommend placing the stiles side-by-side on the dispenser, then placing one of the rails next to them and marking the length. Then cut the top and bottom rails to this length.

Drill two pocket holes in each end of the bottom rail and one in the top rail. Again, I wasn’t concerned about the top rail twisting because the door panel will hold it in place.
Apply glue to the ends of the rails, position on the stiles, and clamp. Attach using pocket screws.
Cut one piece of beadboard to size for the door panel.
For helpful tips on making this style of door, please refer to my How to Make DIY Cabinet Doors tutorial, starting at Step 2. Attach the Center Panel.
I used my table saw to rip the panel to width, but you could also use a circular saw and Kreg Rip-Cut instead. Rip cuts are made along the length of a board to make it narrower. Then I used my miter saw to cut it to length.
Related: 4 Ways to Make Straight Cuts with a Circular Saw
I applied glue to the door frame’s opening, centered the panel on the opening, and attached it using brad nails.
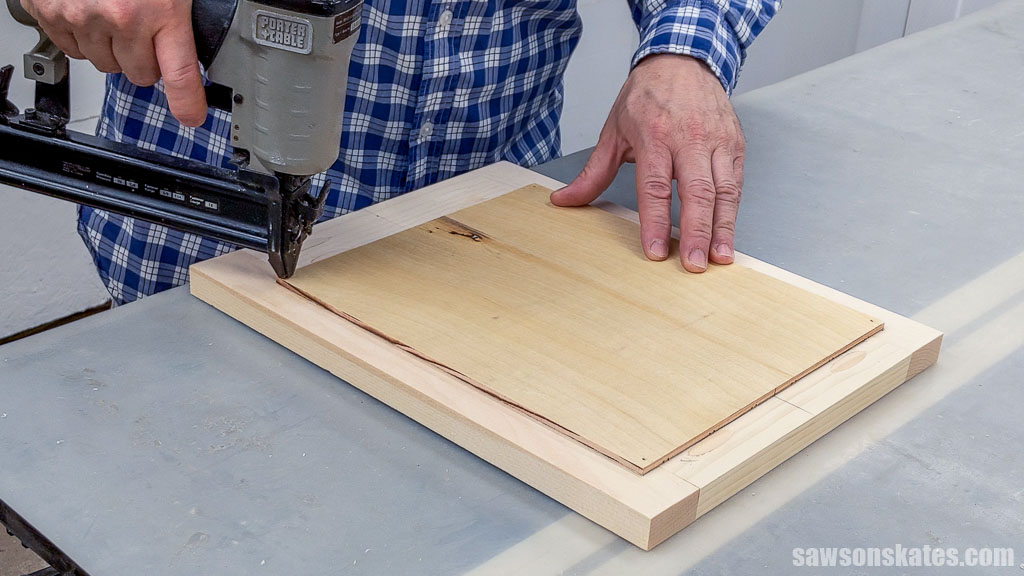
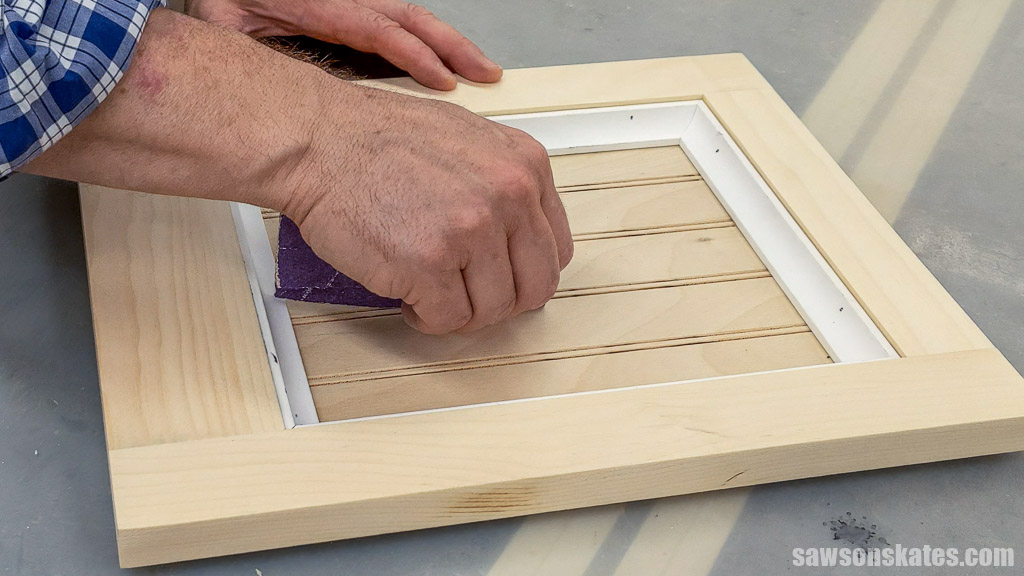
TIP: I forgot to sand the beadboard’s grooves before attaching it to the door frame. It would have been easier to sand them before attaching the panel to the frame.
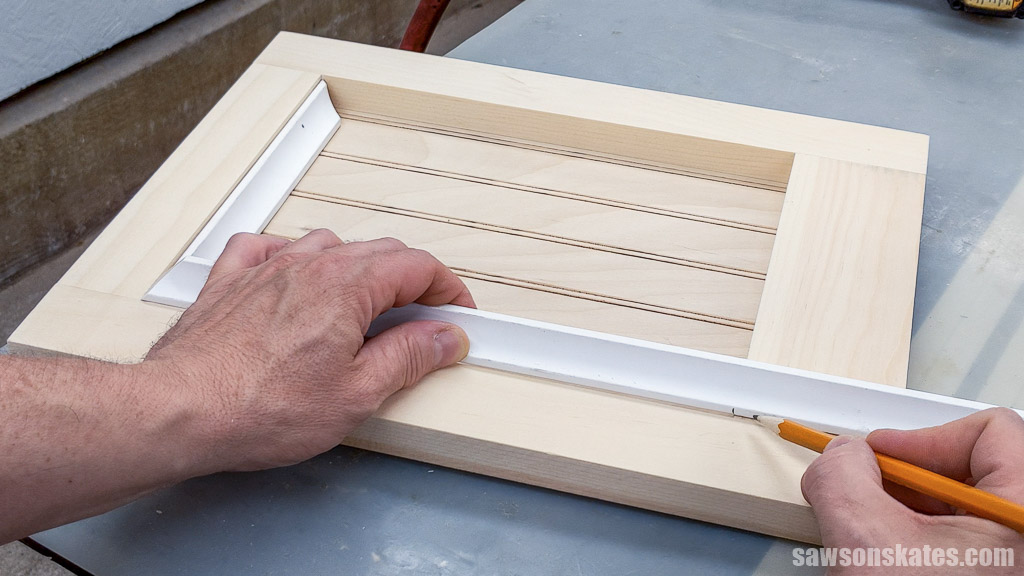
Next, I cut a 45-degree angle on one end of the cove molding.
I positioned the molding on the door opening and marked the other end.
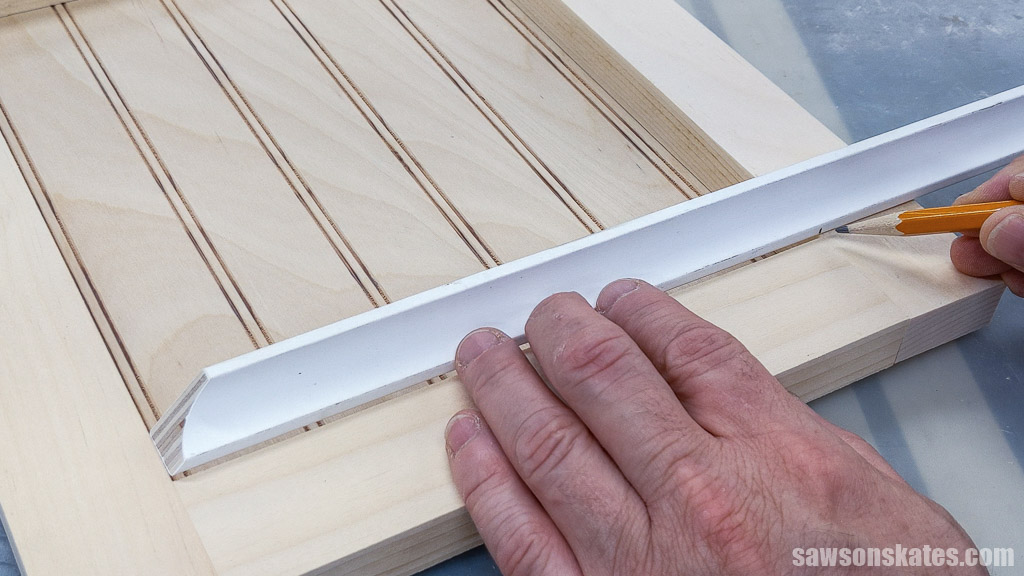
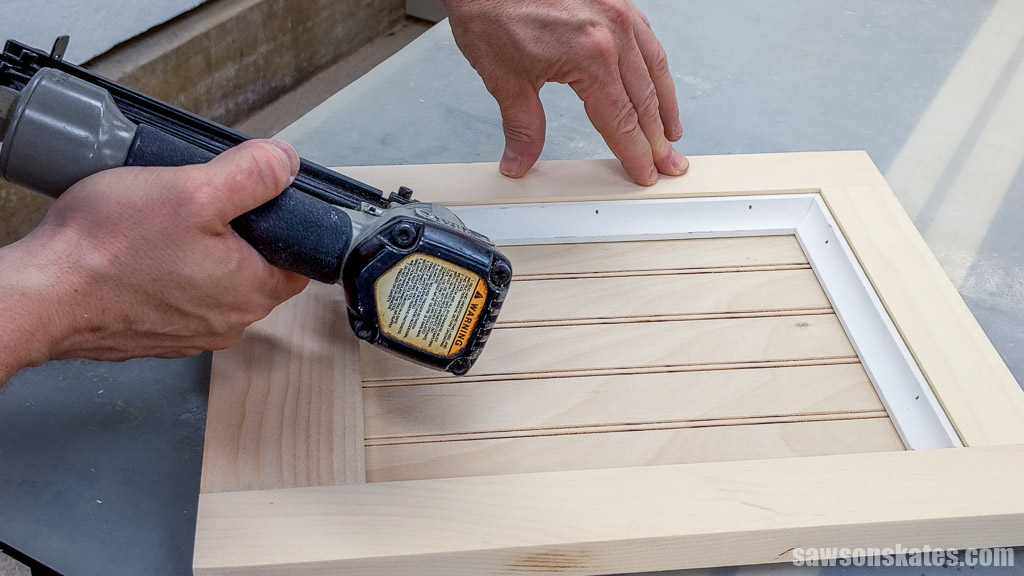
I cut the molding to length and attached it using brad nails.
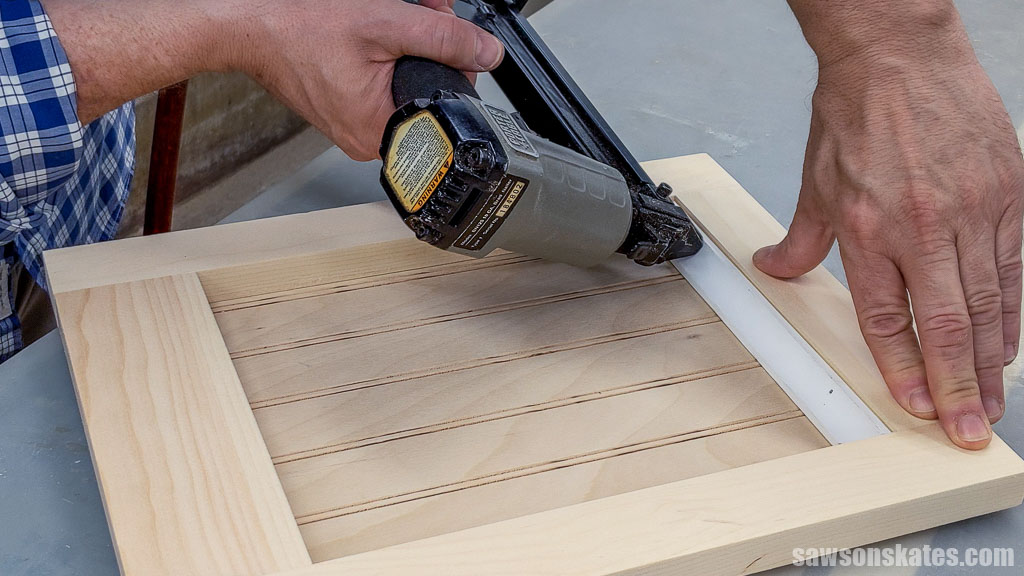
I followed these steps to install the rest of the molding, first cutting a 45-degree angle, positioning it on the opening, marking, and cutting it to length.
Then, attach it with brad nails.
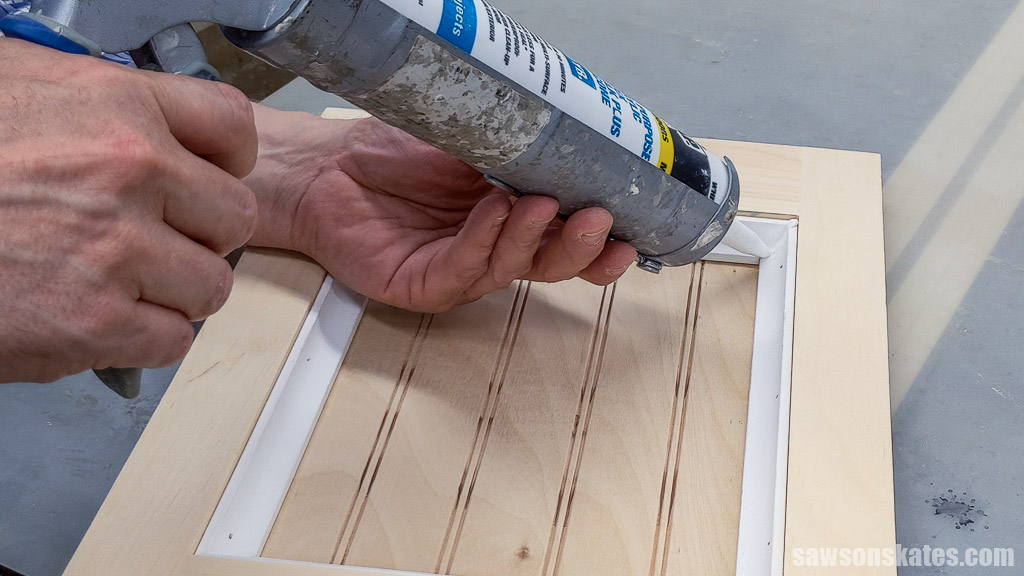
A couple of my joints had tiny gaps. I was planning to paint my dispenser, so I applied a small bead of caulk to the joints.
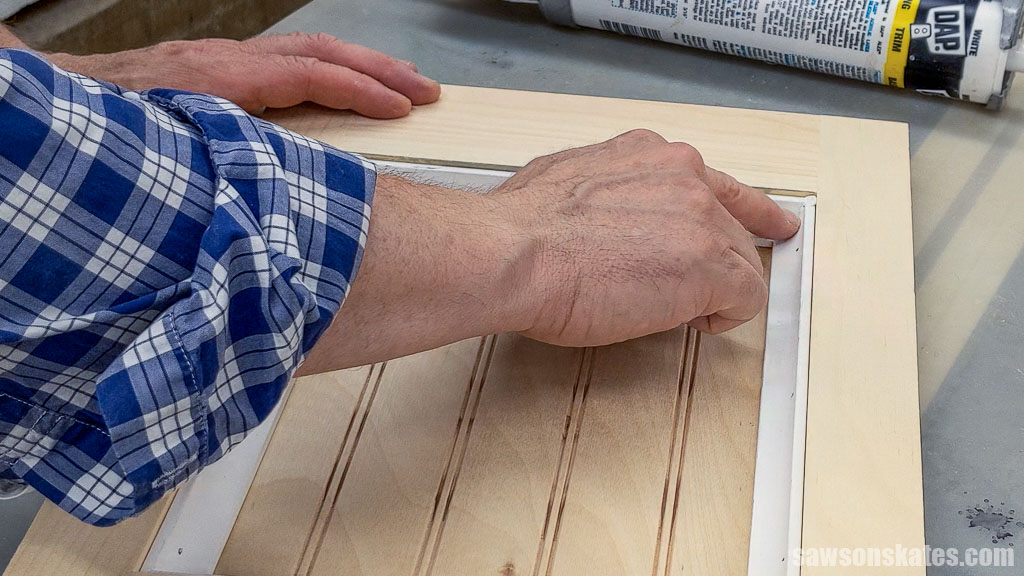
And I used my finger to smooth the caulk into the joint.
Step 5. Install the Door
I attached the door using non-mortise hinges that I had leftover from another project. Unfortunately, I don’t remember where I bought them, but any small non-mortise hinge should work.
I started by attaching the hinges to the back of the door. First, I made a starting point for the drill bit using an awl, then predrilled holes for the hinge screws. Next, I drove the screws with a screwdriver.
Related: How to Drill Pilot Holes (Why, When & Correct Size)
Then, I applied double-sided tape to the hinge side that connects to the cabinet and positioned the door, remembering to leave a ⅛” gap at the top.
I carefully opened the door and used an awl to make a starting point for the drill bit. I drilled pilot holes and drove the screws with a screwdriver. I removed the double-sided tape when I removed the hinges to paint the cabinet.
Next, I installed the door knob. I positioned mine in the middle of the stile, but you could install yours wherever you chose.
Depending on the knob style you choose, you may run into the same problem as me. The knob’s screw protruded from the back of the door, preventing it from closing. I used a Forstner bit to drill a counterbore hole slightly larger than the screw’s head, allowing it to sit just below the surface.
Related: What is a Forstner Bit? (& How to Use It)
I also installed an inexpensive magnetic catch at the bottom of the cabinet to keep the door closed.
Step 6. Finish the Trash Bag Dispenser
Cut one piece of hardboard to size for the back. I thought it was easier to paint the dispenser before installing the back, so when the paint was dry, I attached it using brad nails.
You can use sawtooth picture hangers to mount the dispenser on the wall, but I think the easiest way is to use a French cleat-style picture hanger.
Related: How to Make a French Cleat (2 Easy Ways)
It’s more expensive than other hardware, but its ease of use pays for itself.
You can see how I installed a French cleat-style picture hanger on this DIY medicine cabinet.
Includes:
- List of tools and materials
- Complete measurements (in inches)
- Easy-to-follow instructions
- Step-by-step photos
- Detailed diagrams
Final Thoughts
I’m so happy with how my DIY trash bag dispenser turned out. I think it’s a great solution if you’re looking for an easy and attractive way to store your trash bags in plain sight.
Don’t wait. Get your PDF plan (including the detailed instructions and measurements) now!
Thank you for stopping by. If you enjoyed this tutorial, would you please take a moment and pin it to Pinterest? I’d really appreciate it!
Recommended For You
Pin This For Later

Hi there – I’m Scott, a woodworking enthusiast and creator of Saws on Skates, a site I started in 2015 to share easy-to-follow tutorials, space-saving shop tips, and project inspiration for DIYers at any skill level. Learn more about my woodworking journey here.
Oh. My. Gosh! I am absolutely going to make this!! You are so clever, and your instructions are so clear. I love making your projects, it’s like being in a wood working class but I’m at home! Thank you, thank you thank you!