Getting Started with Furniture Making (Tips for Success)
Wish you could build your own furniture? Get started today with this beginner’s guide to furniture making: essential tips for your first project.
What Should I Build Next?
That's the question I help answer.
Every week, I send woodworking ideas to 17,000 DIYers who love building things.
You'd fit right in.
Are you struggling to find furniture in the style, color, or size you need? Tired of buying flimsy pieces that fall apart quickly? Do you wish you could build your own but don’t know where to start? Look no further! I’m here to help!
Furniture making may seem intimidating, but with the right knowledge, you can create beautiful, functional, one-of-a-kind pieces for your home.
In this guide, I’ll cover everything you need to know to get started, from choosing the right tools and materials to mastering essential techniques.
Originally published April 11, 2017, updated January 5, 2024.
Table of Contents
- What is Furniture Making?
- What Skills Do You Need to Get Started?
- What Tools Do You Need?
- What Should You Choose as Your First Project?
- What Materials Should You Use?
- How Much Does it Cost to Build Your First Furniture Project?
- Building Your Furniture
- Apply a Protective Finish
This article contains affiliate links. If you purchase from these links, I may earn a small commission at no additional cost to you. Visit my site policies for more information.
What is Woodworking?
Woodworking is making objects from wood, such as furniture, cabinets, toys, and decorative items. It’s a skilled craft requiring knowledge of wood types, tools, and joinery techniques.
Many enjoy woodworking to relax, creating beautiful and functional objects, while others pursue it as a career, working for a company or starting their own business.
You can do woodworking with hand or power tools or a combination of both. Using tools such as hand saws, chisels, and planes is a more traditional approach. You can also use power tools like table saws, miter saws, routers, and jointers.
Related: Jointer vs Planer (Differences & Which to Buy First)
What is Furniture Making?
Furniture making is a type of woodworking focusing on building projects such as tables, bookcases, and beds.
Making furniture can be challenging but rewarding, requiring a good understanding of woodworking techniques and the ability to follow plans or develop your own, which calls for an eye for design.
Whether following a plan or designing your own piece, the goal is to create sturdy, functional, and aesthetically pleasing furniture.
Why Should You Get Started in Furniture Making?
There are many reasons why people get started in furniture making. Here are a few:
- It’s a rewarding hobby. There’s nothing like the satisfaction of creating an attractive, useful furniture piece from scratch.
- It’s a great way to learn new skills. Furniture making requires various skills, from learning to use different tools to developing a deep understanding of wood and its properties.
- It’s a creative outlet. Furniture making is a great way to express your creativity and design pieces that are unique to you.
- Allows you to get the look you want. You can get the precise style, size, and color you want by making your own furniture. You can choose the wood type, the style, and the finish, creating pieces that perfectly complement your home. No more settling for mass-produced pieces that don’t fit your needs.
- Allows you to choose better quality materials. When making your own furniture, you have control over the quality of materials. You can select high-quality, durable wood that will last years.
What Skills Do You Need to Get Started?
To get started in furniture making, you will need to have some basic skills.
Safety: Learning how to safely use tools and machinery to avoid accidents is essential. Always wear protective gear, such as safety glasses, ear protection, and a dust mask, when working with power tools.
Woodworking techniques: You’ll need to learn how to use basic woodworking tools, such as a miter saw, drill, and pocket hole jig.
Woodworking terms: You’ll need to understand common woodworking terms such as miter cut, rip cut, and crosscut.
Design: You’ll need to follow a plan or design your own furniture. If you are designing your own furniture, you must have a basic understanding of woodworking principles and construction.
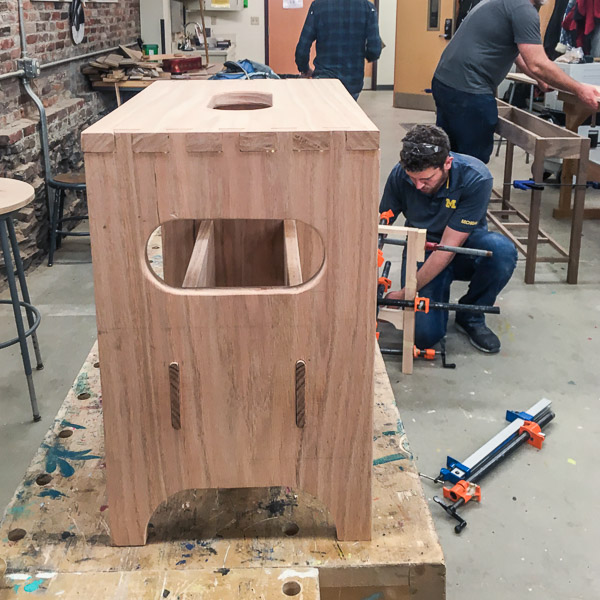
Problem-solving: When I attended furniture making classes at my local arts center, the instructor said, “woodworking is all about problem-solving.” Furniture making can be challenging, and sometimes things don’t go according to plan. You’ll need to be able to think critically and solve problems to complete your projects.
What Tools Do You Need?
I frequently see posts in Beginner Facebook woodworking groups asking, “What tools do I need to get started?” However, I believe the more important question is, “What do you want to build?”
Once you have a project in mind, research the tools you need to complete it. For example, if you want to build a nightstand, Google “nightstand plans,” find a style you like, and see what tools are required to make it.
I recommend only getting the tools you need when you need them, saving you money and preventing you from buying unnecessary equipment. For example, if you were planning to buy a table saw, and the nightstand you want to build doesn’t require one, I suggest you wait. Then, invest in one when you decide to make a furniture piece that requires a table saw.
There are a few tools that I use for almost every project. Some basic tools to get you started include:
- Tape Measure: For taking measurements and making sure everything is square.
- Cordless Drill: Used for making holes and driving screws.
- Clamps: Clamps are essential for holding wood in place while you are working on it.
I want to emphasize that you don’t need all the tools right away. You can start with a basic set of woodworking tools and add more as needed. There are many ways to save money, such as buying used tools, borrowing them from friends or family, or renting tools from a home improvement store.
Safety First
Before you pick up any tool, it is important to put on your personal protective equipment (PPE), including safety glasses, a dust mask, and hearing protection.
Safety glasses prevent eye injuries from flying debris. A dust mask protects your lungs from inhaling wood dust. Hearing protection protects your hearing from loud noises, such as the noise of a power saw.
What Should You Choose as Your First Project?
When getting started with building furniture, I recommend choosing a project that’s small, easy, and appropriate for your experience level. This strategy will help you develop your skills and confidence without feeling overwhelmed. Once you have mastered the basics, you can tackle more complex projects.
Here are some additional tips for choosing your first furniture project:
- Keep it simple. It’s best to start with a small, simple project you can complete in a reasonable amount of time.
- Functionality. Opting for a project with a practical application provides a sense of accomplishment, motivating you to complete it.
- Cost: When estimating your project expenses, consider the cost of lumber, tools, fasteners, hardware, and any finishing supplies you may need to complete your project.
Here are a few suggestions for good first woodworking projects:
Picture Frame
A picture frame is a simple project you can customize to fit almost any photo or painting. It is also a relatively inexpensive project.
Bookshelf
A bookshelf is another good option for a first woodworking project. It’s a relatively simple project to build and a handy furniture piece you can use in almost any room.
Small Table
A small table, such as a side table or bedside table, is a useful item you can use in your home or give as a gift.
Entryway Bench
An entryway bench is a great way to add functionality and style to your home.
Shelf
A shelf is a versatile project that you can use to store books, photos, or other items.
Tool Box
While not technically a furniture project, building a toolbox is a great way to practice your woodworking skills and create something useful for your workshop.
What Materials Should You Use?
Once you have chosen your project, you’ll need to gather the necessary materials, and the most important is wood. Many different wood types are available, each with its own unique properties.
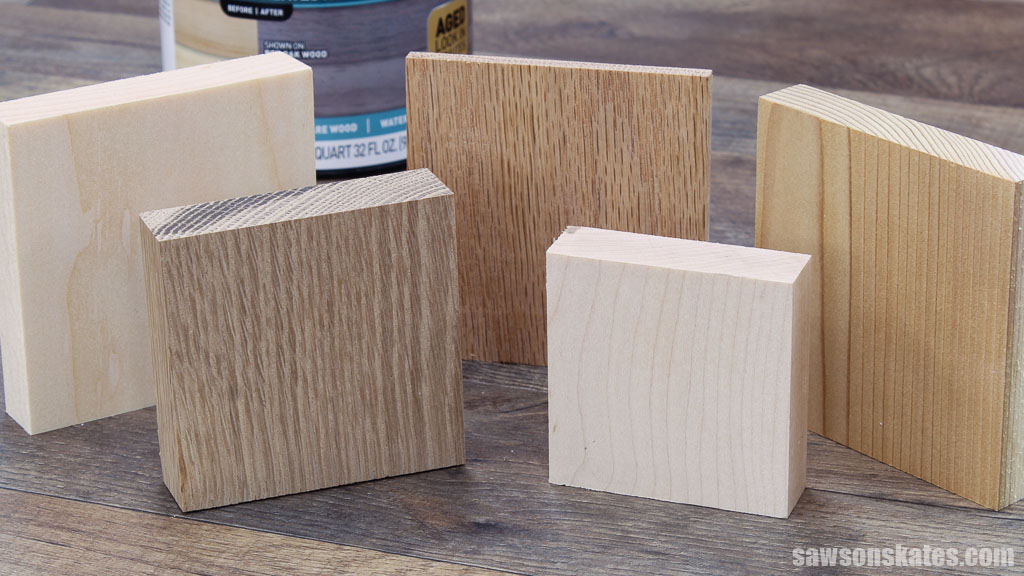
Hardwoods are more durable and dense than softwoods. They are also more expensive. Some common hardwoods include oak, maple, walnut, and mahogany. Hardwoods are an excellent choice for projects you will use frequently or need to be strong and durable, such as dining tables and cabinets.
Softwoods are less expensive and easier to work with than hardwoods. They are not as durable as hardwoods, but they are a good choice for beginner projects and projects that will not be used frequently, such as side tables and shelves. Some common softwoods include pine, fir, and cedar.
Related: How to Buy Wood (Top Tips for Choosing Woodworking Lumber)
When choosing wood for your project, it is important to consider the following factors:
- The type of project: Some projects require specific kinds of lumber. For example, if you are building a table, you will need strong and durable wood, such as oak or maple. If you are making a shelf, you can use a less expensive softwood, such as pine.
- The appearance: Wood comes in a variety of colors and grain patterns. Choose a wood that has the appearance you want for your project.
- The cost: Wood can be expensive. Set a budget before you start shopping, and choose a wood that fits your budget.
How Much Does it Cost to Build Your First Furniture Project?
Furniture projects costs vary depending on the size, complexity, and materials used. The costs to consider include the wood, tools, fasteners, hardware, and finishing supplies.
Materials
Materials like boards, plywood, and hardboard are frequently your largest expense when building furniture.
As I mentioned above, the wood type can significantly impact your project’s overall cost. Hardwood lumber is generally more expensive than softwood but offers greater durability and aesthetic appeal.
Tools
Depending on your project, you may need to purchase some tools you don’t currently own, which can add to the project’s overall cost.
Fasteners
Screws, nails, and other fasteners are essential for assembling furniture pieces. They may seem like minor expenses, but they can add up.
Hardware
Hinges, knobs and pulls, drawer slides, mounting brackets, and other hardware components contribute to the functionality and aesthetics of your project. Their cost will vary depending on their quality.
Finishing Supplies
Wood finishing materials, such as sandpaper, stains, paints, and sealers, protect and enhance the appearance of the furniture. The finish type and the amount of material needed will influence the finishing costs; however, you’ll usually have extra that you can use on your next project.
Building Your Furniture
You can start building your project once you have your tools and materials.
- Take your time. Read the project plan from start to finish and understand the steps before beginning.
- Measure and cut the wood
- Assemble the components
- Apply a protective finish
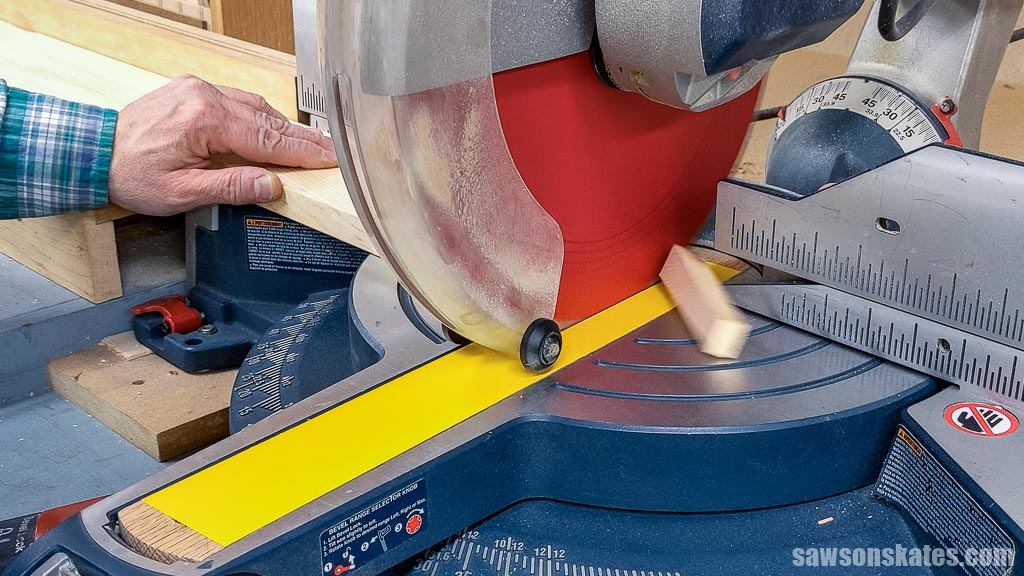
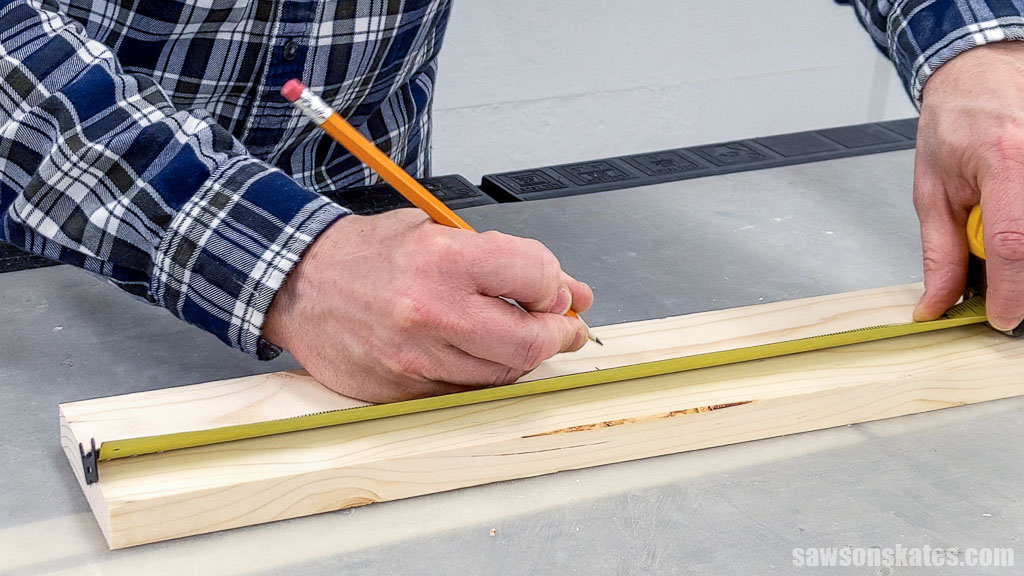
Measure and Cut the Wood
In my journey through woodworking, I’ve learned the importance of measuring, marking, and cutting the wood accurately – a critical step for any project, especially for creating furniture with sturdy, well-fitting joints.
The process begins by squaring the board and marking an ‘X’ on the waste side to avoid cutting on the side you want to keep. One key tip that’s served me well is “leaving the line,” which involves cutting just outside your mark to compensate for the blade’s width or kerf.
For more tips and a detailed explanation of the process, please check out my article, Why Can’t I Make Accurate Cuts? (& How to Fix It!).
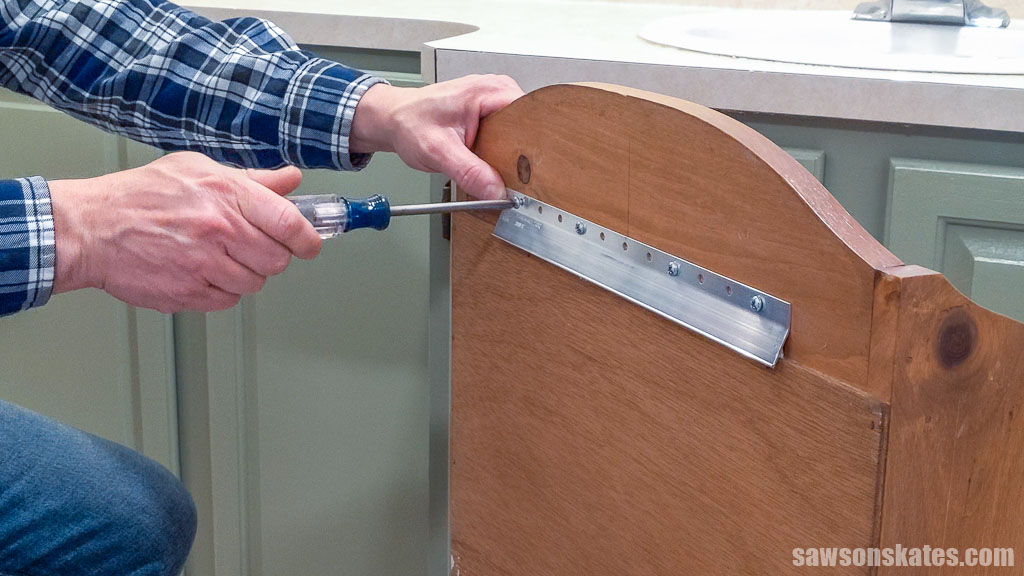
Assemble the Components
With your wood pieces cut, follow your plan to join them together. Joinery choices depend on your personal preference, the project type, and the tools you have on hand.
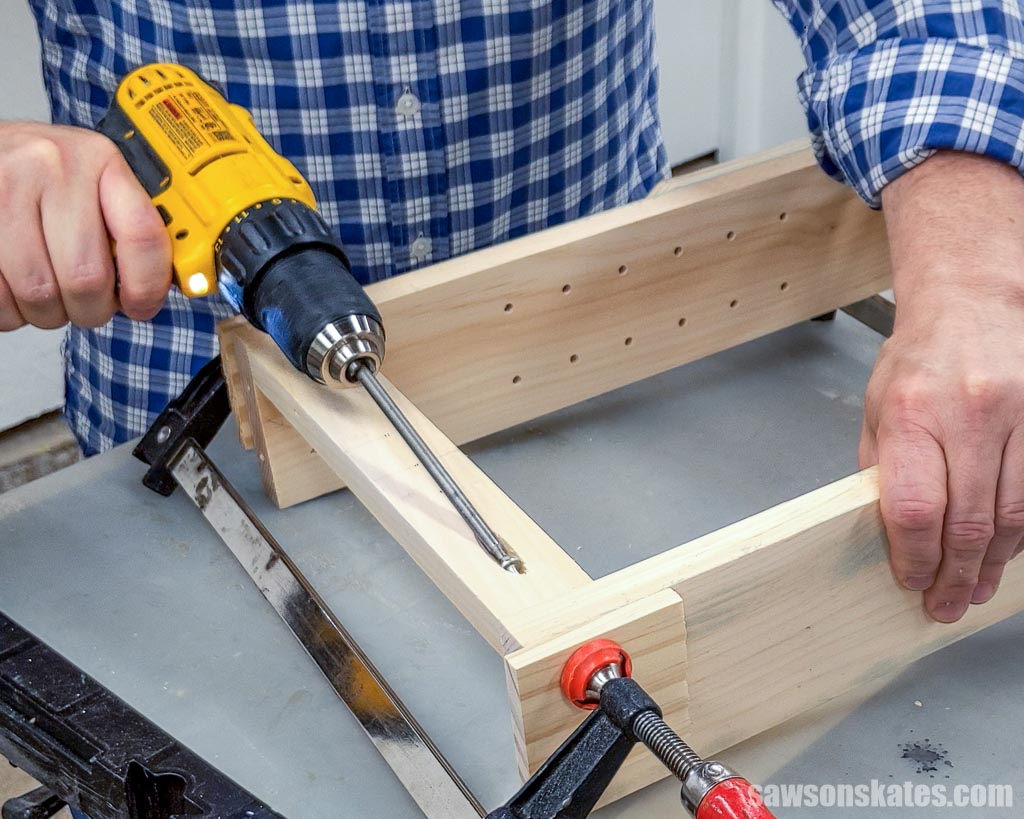
I generally use pocket hole joinery to assemble my DIY furniture, a quick, easy, and strong method to connect two pieces of wood that’s also beginner-friendly.
Pocket hole joinery involves drilling an angled hole into one workpiece using a pocket hole jig and joining it to a second with pocket hole screws.
Related: How to Use a Pocket Hole Jig (& Beginner Pitfalls to Avoid)
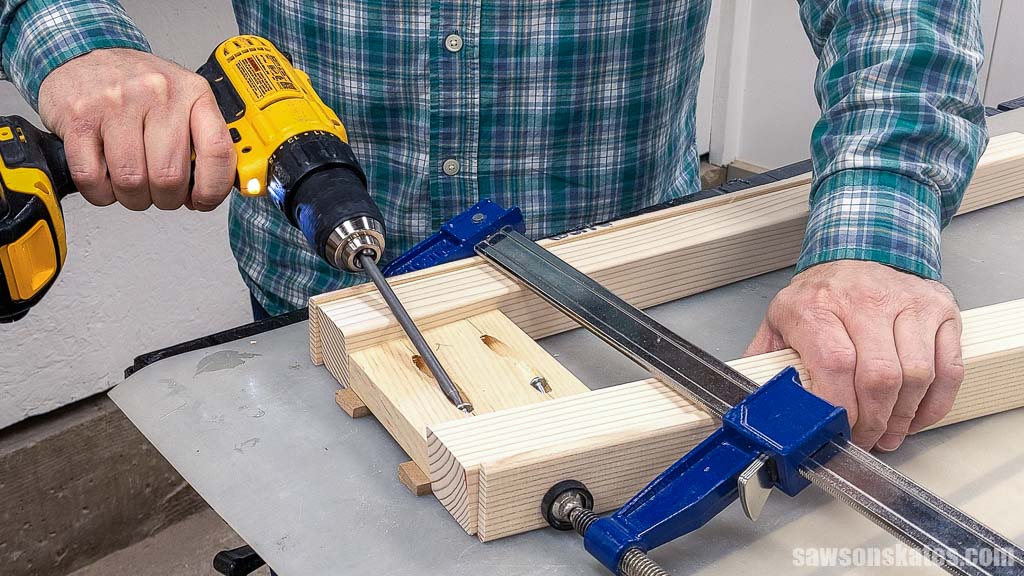
Other techniques you’ll frequently see referenced in woodworking plans are predrilling and countersinking.
Predrilling is the process of making a small hole, called a pilot hole, in the wood before driving a screw, helping to prevent the wood from splitting.
Related: How to Drill Pilot Holes (Why, When & Correct Size)
Countersinking is the process of making a concave hole at the top of a pilot hole, allowing the screw’s head to sit flush with the wood’s surface.
Related: How to Use a Countersink Bit
Before you move on, I recommend sanding your parts as you build your project because reaching all surfaces and tight corners can be difficult once the piece is assembled. Sanding is the process of removing the wood’s rough spots and imperfections. It’s an important step in any woodworking project, as it helps to create a smooth surface.
Next, you’ll apply glue evenly on each piece at the mating surfaces, helping to create a strong and durable joint.
Your glue selection depends on your materials and whether your project will be used outside or inside. Options include PVA wood glue, polyurethane glue, and CA glue for quick-bonding applications.
Once you’ve applied the glue, join the two pieces of wood and clamp them in place. The clamps will help to keep the joint aligned while the glue dries.
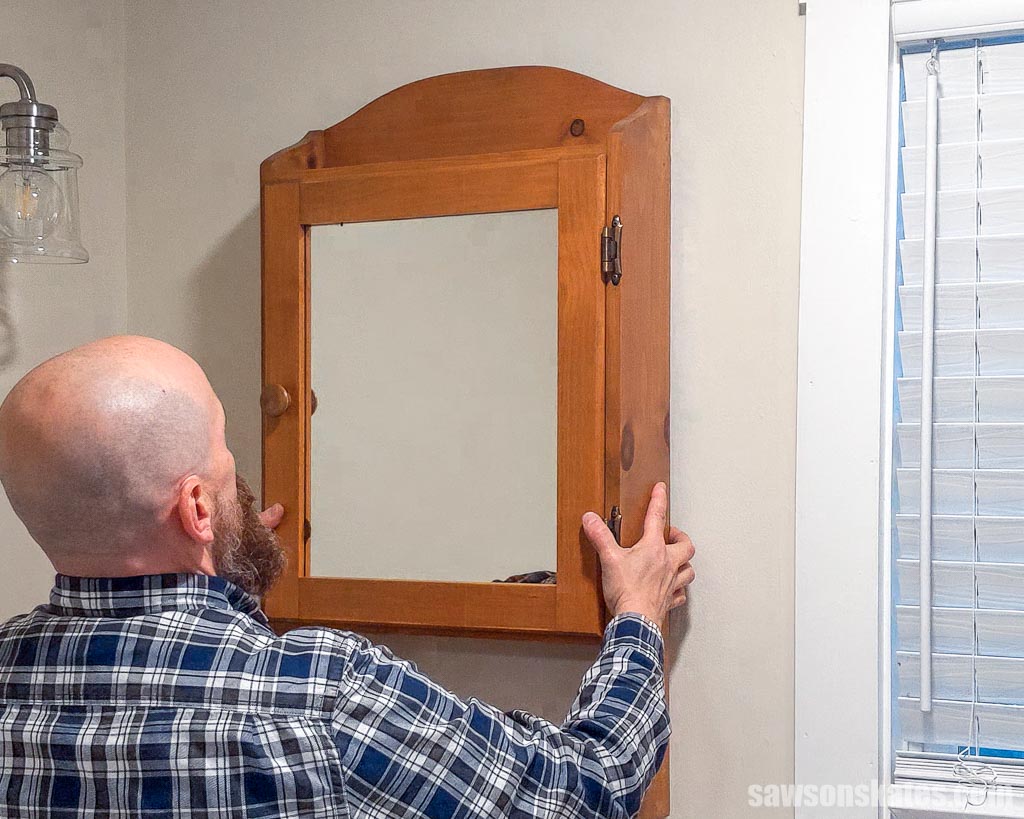
Apply a Protective Finish
Once you’ve assembled your project, you’ll need to apply a finish to protect the wood from moisture, dirt, and wear and tear. This step may involve applying a colored stain, but a protective finish is essential even if you leave the wood its natural color.
Before applying a stain or finish, you’ll need to ensure your project’s surface is clean and smooth. As I mentioned earlier, I recommend sanding as you build, but now is a good time to touch up any imperfections or rough spots you may have missed. Then, wipe away the sanding dust with a tack cloth.
Related: What is a Tack Cloth? (How to Use + 4 Alternatives)
Wood Stain
Wood stain is a liquid or gel applied to wood to change its color. Stains penetrate the wood, enhancing the grain. Stains are available in various colors, from light and airy to dark and dramatic.
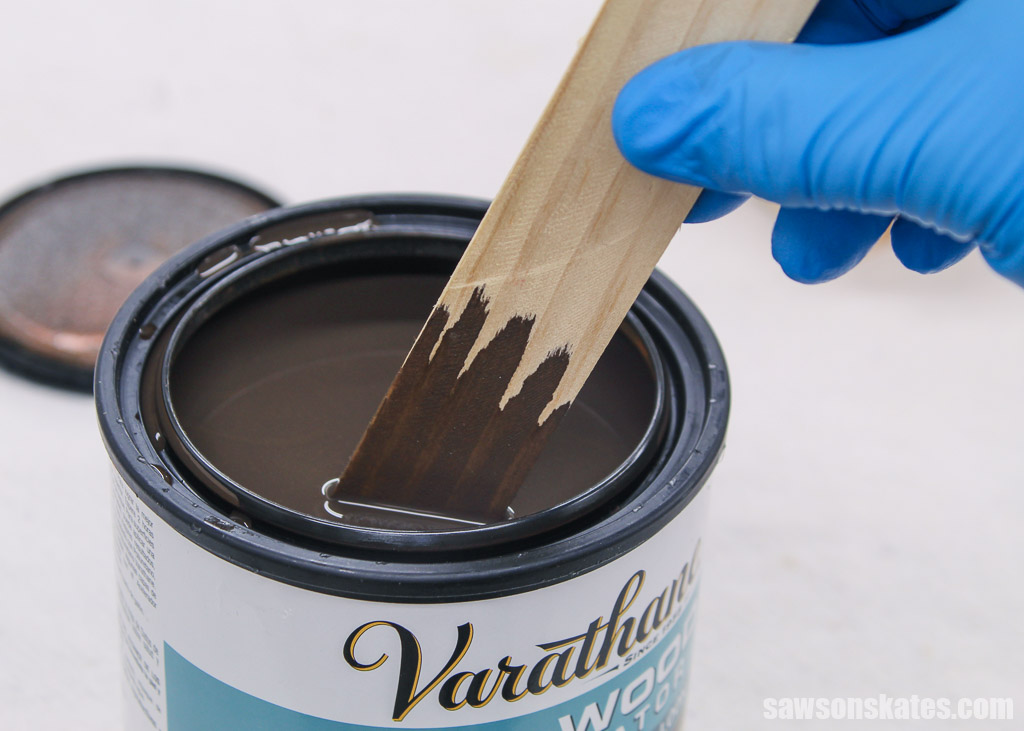
Stains are available in oil-based and water-based. You can also make your own natural stains using household ingredients, like coffee.
Related: How to Stain Wood With Coffee
You can even apply a mix of steel wool and vinegar, creating a chemical reaction that oxidizes the wood, making it darker. It’s fascinating to watch!
Related: How to Make Steel Wool and Vinegar Stain
When choosing a stain, it’s important to consider the wood type you are using. Some woods, such as oak, absorb stains more evenly than others. For example, pine often becomes blotchy, requiring a pre-stain conditioner to ensure the stain applies evenly.
Related: What I Use Instead of Wood Conditioner
You can apply wood stain with a rag or brush, wiping away any excess stain with a clean rag before it dries. As I mentioned, each wood type absorbs stains differently, so it is always best to test it on a scrap piece before applying it to your finished project, ensuring it produces the color you’re looking for.
Wood Finishes
Finishes, also called top coats, are applied over natural and stained wood to seal and protect it from damage.
Choose the right finish
Many different wood finishes are available, each with its advantages and disadvantages. Some common options include:
Polyurethane: Polyurethane is a durable and water-resistant finish available in oil-based and water-based varieties. Oil-based polyurethane provides a more durable finish but is more challenging to apply, has a longer drying time, and has a strong odor. Water-based poly is easier to apply and dries quicker but is less durable than oil-based polyurethane.
Polycylic: Polycrylic is a water-based clear coat that is similar to polyurethane, but it’s not as resistant to moisture.
Related: Polycrylic vs Polyurethane (Are They The Same?)
Spar Urethane: Spar urethane is a finish designed for exterior use. It’s water-resistant and provides UV protection, making it ideal for protecting outdoor furniture.
Related: Spar Urethane vs Polyurethane (Differences + Which to Use)
Shellac: Shellac is an easy-to-apply finish that dries quickly. It’s not as durable as polyurethane, but it is a good choice for furniture that will not be heavily used.
Wax: Wax is a natural finish that applies easily and dries quickly. It’s not as durable as polyurethane, Polycrylic, or shellac, but it is a good choice for furniture that will not be heavily used and that you want to have a natural look.
Related: DIY Beeswax Wood Finish
Final Thoughts
Furniture making is a fulfilling, rewarding hobby and a great way to create functional pieces for your home. With the right tools, materials, and techniques, you can create beautiful and durable furniture that will last for generations.
Interested in woodworking but need help figuring out where to start? Join the FREE Saws on Skates® Beginner Woodworking VIP list and gain instant access to top-notch tool comparisons, tool tutorials, and free woodworking plans. Join for FREE now!
Recommended For You
Pin This For Later

Hi there – I’m Scott, a woodworking enthusiast and creator of Saws on Skates, a site I started in 2015 to share easy-to-follow tutorials, space-saving shop tips, and project inspiration for DIYers at any skill level. Learn more about my woodworking journey here.
Thanks for the guide. I came here after looking around for ideas.
I’ve been building a linen trunk out of old pallets and salvage bits of wood I get for free from work.
I’ve never really built anything apart from raised beds before so the idea appealed to me.
The idea of recycling old pallets it seems was more a romantic image in my mind than a practical way of making something though.
Most of the wood is stained or has splits, nasty knots and most of it was non-use and only suitable for chopping into kindling for the fire.
I have basically built the thing but I’m missing enough of the same wood for the lid now.
I think in future I’ll just leave the pallets for firewood and use nice, new wood.
I know a lot of people enjoy building with pallet wood and I’ve seen some beautiful pallet wood projects. But I’m with you, I prefer to skip the pallet wood and build with store-bought wood.