How to Use a Kreg Jig Mini
Learn how to use a Kreg Jig Mini! It’s perfect for making hard-to-reach repairs, adding pocket holes to assembled projects and even building DIY furniture.
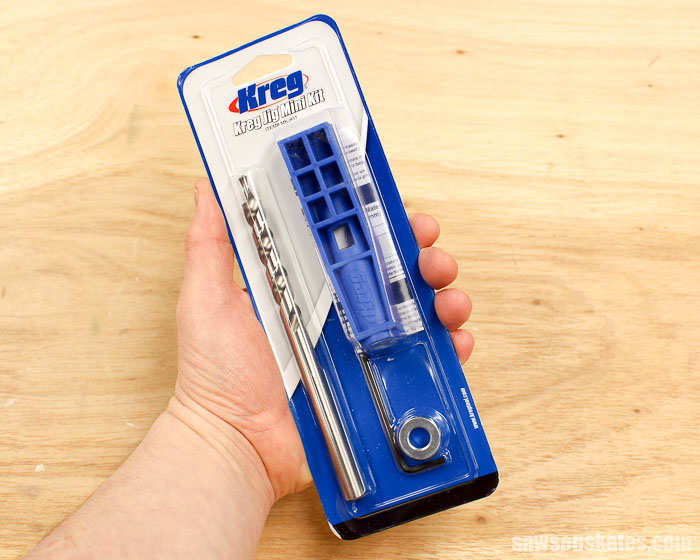
The small size of the Kreg Jig Mini makes it the perfect solution for making hard-to-reach furniture repairs and more. It’s also great for adding pocket holes to assembled projects.
Before we get into how to use our Kreg Mini Jig Pocket Hole Kit, be sure to click the subscribe button at the bottom of this page to sign up for my FREE weekly newsletter loaded with helpful pocket hole tricks, space-saving workshop ideas, clever DIY tips and more!
You may also enjoy these 9 Solutions to Common Pocket Hole Problems.
For your convenience, this post contains affiliate links to supplies or tools I used to complete this project. Purchases made using these links help support the Saws on Skates website and allow me to share more DIY projects. and DIY tips with you. There is no cost to you for using these links. Click here to visit my site policies.
I received the Kreg Mini Jig Pocket Hole Kit in exchange for my honest review. All thoughts and opinions are my own.
A few weeks ago Mark posted a comment on the 9 Pocket Hole Mistakes You Don’t Want to Make post. His comment wasn’t about a pocket hole mistake he had made, instead he professed his pocket hole love for the Kreg Jig Mini and I can’t wait to share with you all of the ways he uses the jig! Mark says:
I have used this item so many times with hard-to-reach repairs. My parents have had a small motel for 40 years, and I do all the upkeep!”
Where Can I Use the Kreg Jig Mini?
Mark says he’s used his Kreg Jig Mini to repair everything from chair legs and bed frames, to window sills (both inside and out) planter boxes, roof fascia boards, doors and more.
Let’s say you had a chair and one of the legs was a little wobbly. You could clamp the Mini, drill a pocket hole, drive a pocket screw and repair that wobbly chair.
It’s also great for adding pocket holes to assembled projects. Let’s say you built a DIY furniture project and a joint wasn’t quite as strong as you had hoped. You could clamp the Mini, drill a pocket hole, drive a pocket screw and beef up that weak joint.
Can I Use the Kreg Jig Mini to Build Furniture?
One of the often asked questions I hear is “Can I use the Kreg Jig Mini to build projects from scratch like DIY furniture?” Because of its small size the Mini is great for repairs and adding pocket holes to assembled projects, but you could definitely build projects from scratch with the Mini.
Mark says he’s “made some wooden frames with clear plastic stretched… like a painting canvas.” He then covered the frame with “closed cell foam surrounding the edges of the frame to insert in the window wells to seal out drafts. What a difference it makes in a warm room in Vermont during the cold winters!”
And yes, you can use the Mini to build DIY Furniture. The thing to consider is if you plan to build often or have a lot of pocket holes to drill you may want to consider a different Kreg Jig.
Let’s say you were going to build the Outdoor Coffee Table with 4 Hidden Side Tables. This project requires more than 300 pocket holes! That means you would have to reposition and clamp the Kreg Jig Mini more than 300 times in order to drill each pocket hole. It’s definitely doable but if you were going to build projects like this on a regular basis I would recommend a Kreg Jig K4 or a Kreg Jig K5 because they would speed up the drilling process.
What’s the Difference Between the Mini and Other Kreg Jigs?
The big difference between the Kreg Jig Mini and other Kreg Jigs is the size. See what I did there? The big difference is the size lol! You can use any Kreg Jig to make a repair or add a pocket hole to an assembled project, but the Mini is unique because it’s significantly smaller than the other Kreg Jigs. The small size means it can fit into places where other jigs can’t, so it’s perfect for those hard-to-reach repairs.
The second difference between the Mini and the Kreg Jig K4 or the Kreg Jig K5 is speed. The Kreg Jig Mini needs to be positioned and clamped in order to drill each pocket hole. Let’s say you were going to drill pocket holes in a 1×4. To assemble a 1×4 you would typically drill two pocket holes. With the Mini, you would position, clamp and drill the first pocket hole then position, clamp and drill the second pocket hole.
With the Kreg Jig K4 and the Kreg Jig K5, you would initially setup the jigs for the workpieces you need to drill. Then insert the workpiece in the jig, clamp and use the spacing on the drill guide to drill two pocket holes without repositioning the jig.
Essentially the Kreg Jig K4 or the Kreg Jig K5 compared to the Mini could cut your pocket hole drilling time in half. Don’t get me wrong. The Kreg Jig Mini, Kreg Jig K4, and Kreg Jig K5 are all great pocket hole jigs. Where the Mini really shines is for making repairs and adding pocket holes to assembled projects.
How to Use a Kreg Jig Mini
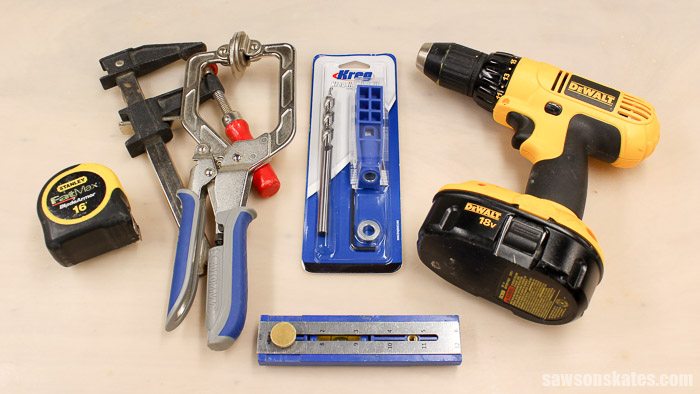
Supplies
Mark has a few recommendations for supplies too. He says “I always keep my Kreg Jig Mini in my go-to tool box along with a selection of screw types and lengths, short 2″ and long 6″ square drive bits (sometimes the drill chuck gets in the way on intricately shaped repairs), and a couple clamps.”
FREE Kreg Jig Mini Setup Guide
Get your FREE nine page Ultimate Kreg Jig Mini Setup Guide! The guide shows how to position the jig, how to set the drill bit depth collar, how to drill pocket holes, how to choose the right screw for your project and how to fill pocket holes. Just click the link below and the guide will be sent to your inbox!
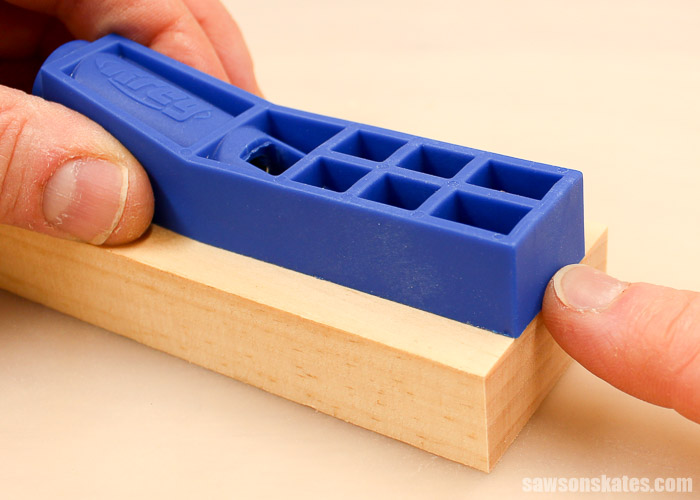
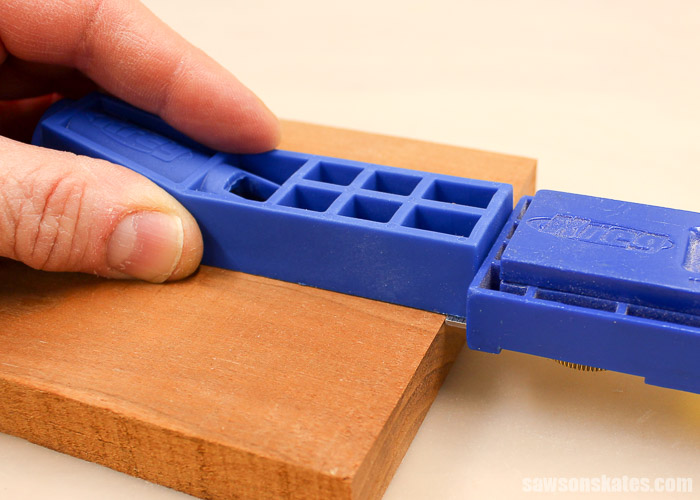
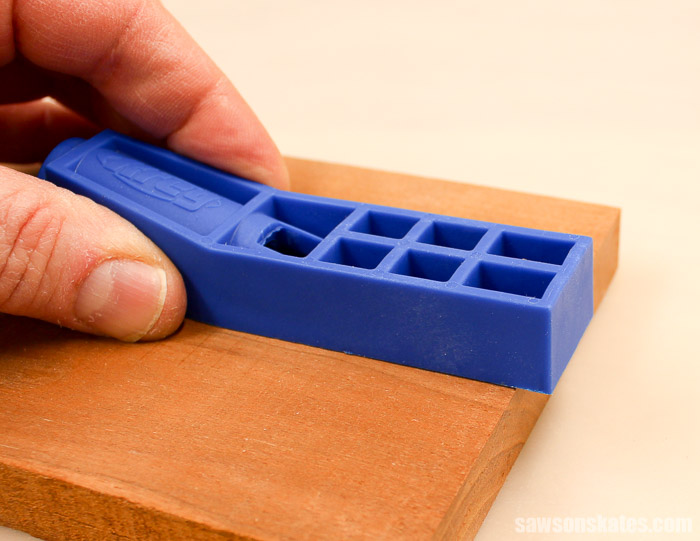
Step 1. Position the Jig
The position of the Kreg Jig Mini is determined by the thickness of the workpiece you’re using. There are three common workpiece thickness you’ll likely be working with. The most common thicknesses are 3/4”, 1/2” and 1-1/2”.
3/4” Workpieces
The Mini is preset for 3/4” workpieces. Simply place the jig flush with the end of your workpiece.
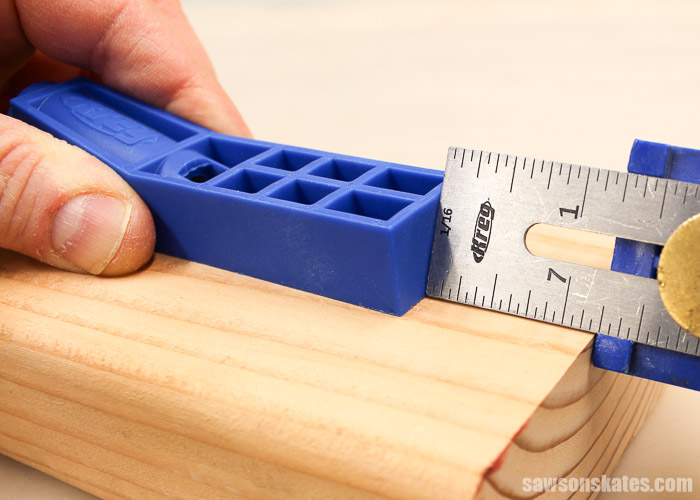
1/2” Workpieces
For 1/2” workpieces set a Kreg Multi-Mark for a 1/4” and place against the end of your workpiece. Place the jig on your workpiece and against the Multi-Mark.
The jig will overhang the end of the workpiece.
1-1/2” Workpieces
For 1-1/2” workpieces set a Kreg Multi-Mark for a 1-1/4” and place against the end of your workpiece. Place the jig on your workpiece and against the Multi-Mark.
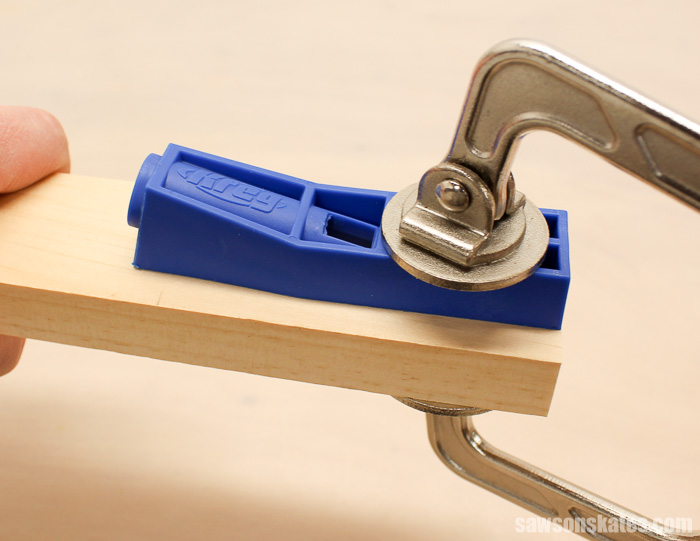
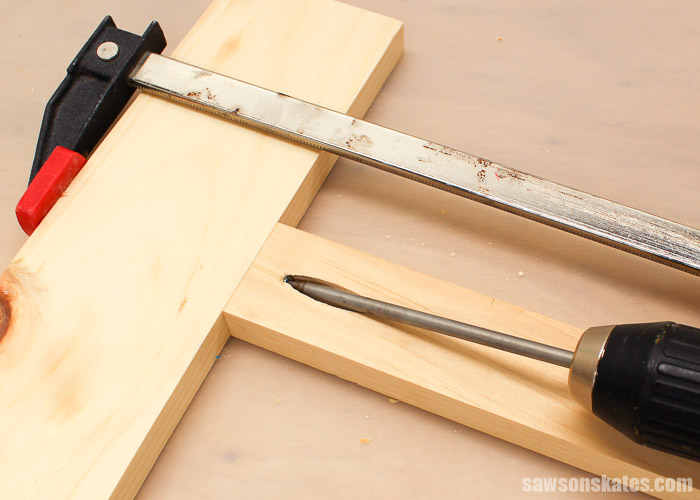
Clamp the Jig
Once you have the Kreg Jig Mini in the proper position you must clamp the jig to the workpiece. Do not attempt to hold the jig in place while drilling the pocket hole. Holding the jig would be dangerous and there is a great chance of injuring yourself. You must use a clamp!
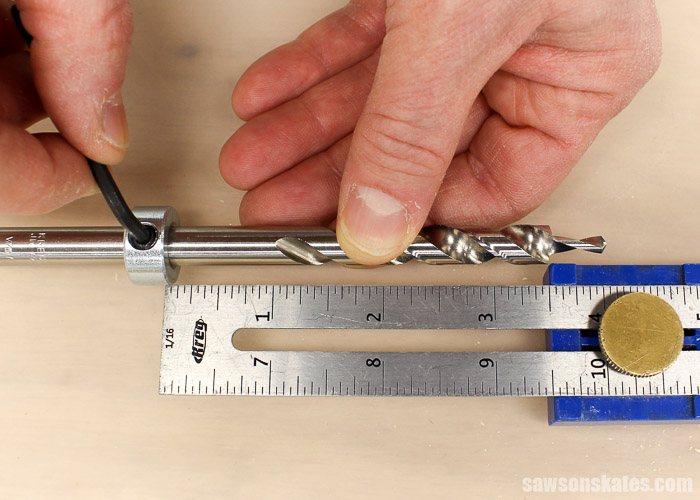
Step 2. Set the Drill Depth
The depth of the drill is also determined by the thickness of the workpiece you’re using. In other words, if you drilled a pocket hole for 3/4” material also set the depth of your drill for 3/4” material.
3/4” Workpieces
Set a Kreg Multi-Mark to 3-1/2” and place the shoulder of the stepped drill bit against the Multi-Mark.
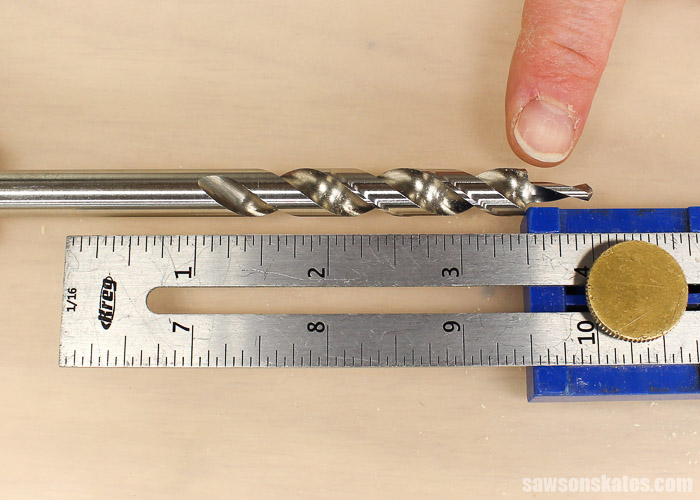
Next, slide on the depth collar so that it touches the ruler of the Multi-Mark.
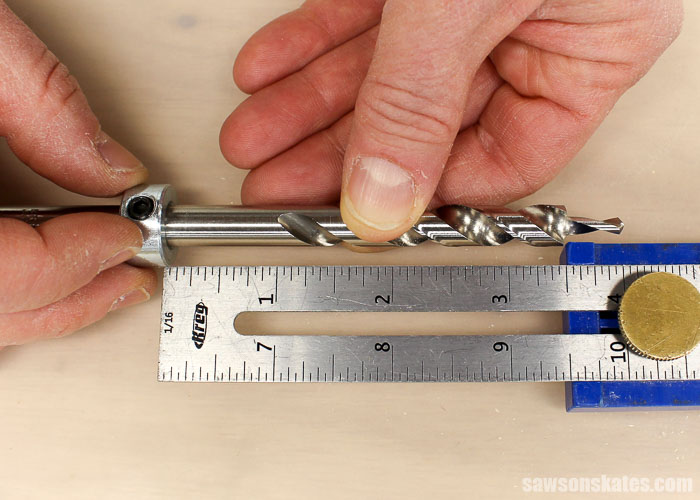
Tighten the set screw with the Allen wrench and chuck the drill bit in your drill.
1/2” Workpieces
Set a Kreg Multi-Mark to 3-5/16” and repeat the process above.
1-1/2” Workpieces
Set a Kreg Multi-Mark to 4-1/4” and repeat the process above.
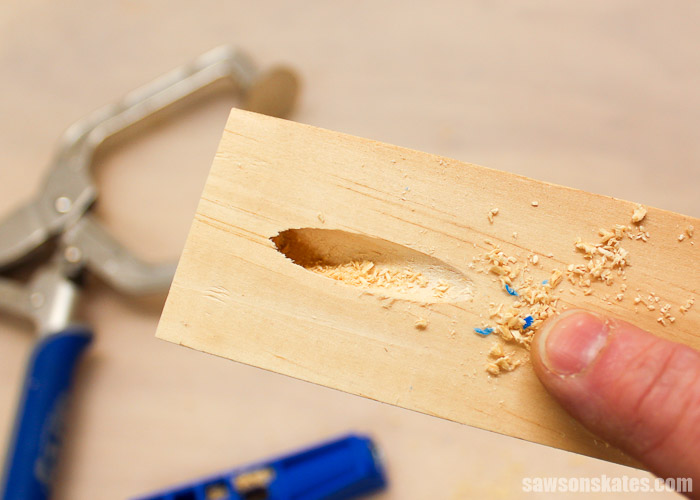
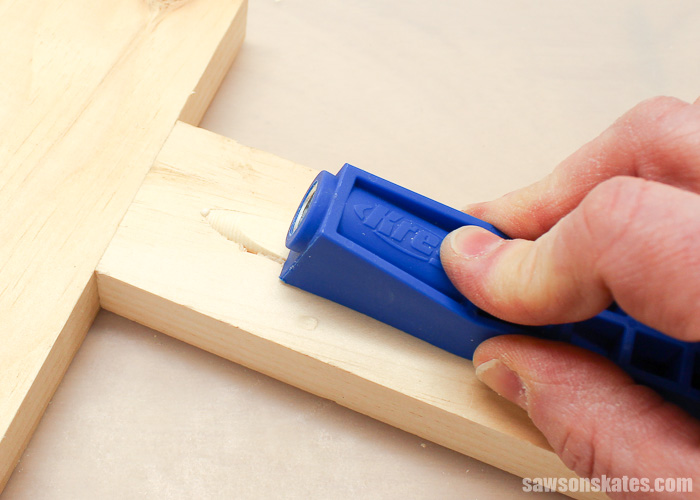
Step 3. Drill the Pocket Hole
To drill the pocket hole first, clamp the workpiece to your Mobile Project Center or workbench. Insert the bit into the drill guide, bring the drill up to full speed, slowly lower the bit and drill the pocket hole.
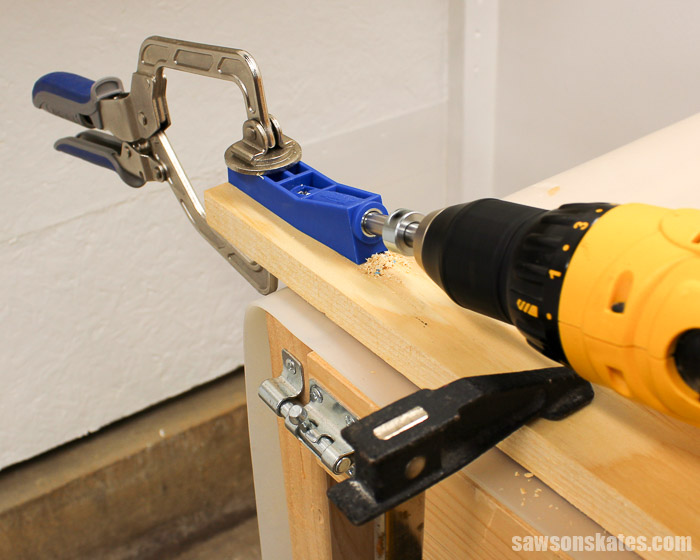
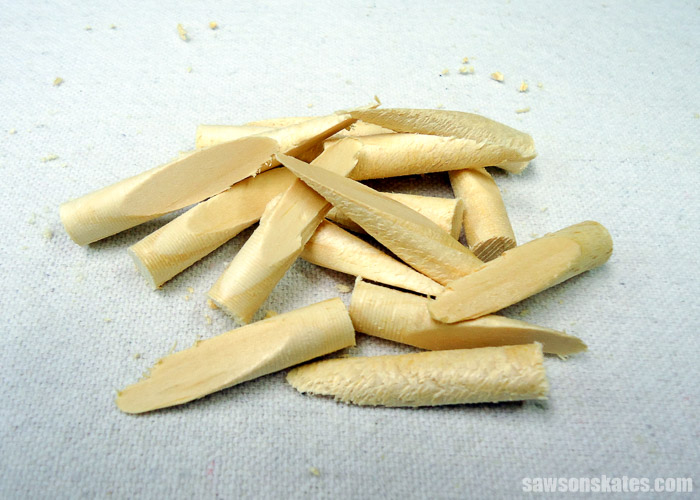
It’s not uncommon to see some blue plastic shavings when drilling your first few pocket holes.
Step 4. Use Wood Glue
When joining any project with pocket holes I always recommend using a quality wood glue in addition to the pocket screws. Even though pocket hole joints don’t require it, in my opinion, adding glue to a pocket hole joint improves the quality of the joint.
When making a repair with the Kreg Jig Mini you may not be able to use glue, but definitely, use glue if you’re creating a new joint. For more information about why you should use glue with pocket hole joints skate over to 9 Pocket Hole Mistakes You Don’t Want to Make and Need to Know Pocket Hole Tips for Edge Joints.
Step 5. Use Clamps
How the heck do these DIYers assemble pocket hole projects without using clamps?! Anytime I’ve tried to drive a pocket screw without using a clamp one of the boards inevitably shifts and I end up with a sloppy, amateur looking joint. Clamps keep your joints properly aligned and produce a professional looking joint.
For more information about why you should use clamps with pocket hole joints skate over to 9 Pocket Hole Mistakes You Don’t Want to Make and Need to Know Pocket Hole Tips for Edge Joints.
Related: How to Prevent Pieces from Moving When Assembling Pocket Hole Joints
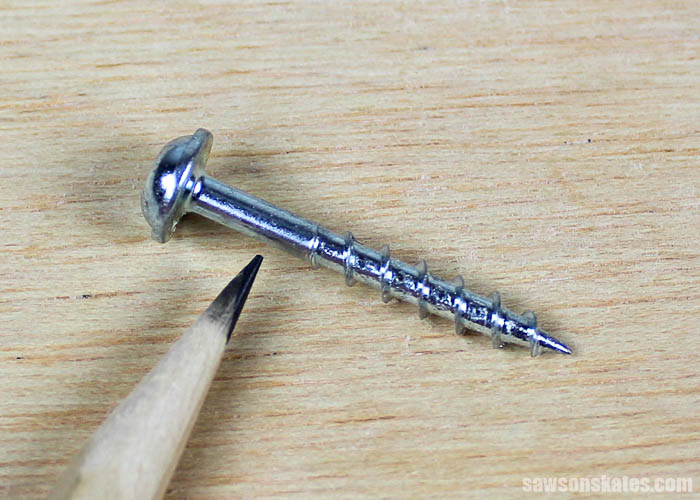
Step 6. Use Pocket Screws
Pocket screws are specifically designed to work with pocket holes. Pocket screws have threads only on the lower portion, while the upper portion or shank is not threaded. This design allows the shank of the pocket screw to slide through the pocket hole and pull the joint tight.
Unlike pocket screws, regular wood screws have threads along the entire length. A wood screw won’t slide through a pocket hole. The threads may not only crack the board with the pocket hole, but it might not pull the other board tight, resulting in a loose-fitting joint. Be sure to use only Kreg brand pocket screws for your pocket hole joints.
Pocket Screw Thread
Pocket screws are available in a coarse thread and a fine thread. Use the coarse thread pocket screw for softer materials like pine, plywood, particle board and MDF. Use a fine thread pocket screw for hardwoods like oak, maple, hickory, cherry, walnut, and birch.
Pocket Screw Length
The pocket screw length is determined by the thickness of your workpiece. Using a pocket screw that is too short won’t connect the boards together and using a pocket screw that is too long could drive the screw through the edge of the other piece. Check out the pocket hole screw guide in the 9 Pocket Hole Mistakes You Don’t Want to Make post to be sure you’re using the right pocket screws for your project.
Step 7. Set Your Drill
As we mentioned earlier pocket screws are different than wood screws and that means we have to take a different approach when driving them in the workpieces. Unlike a wood screw, pocket screws only need to be driven until they’re “just snug” to create a strong joint. Basically, we want to stop driving the pocket screw when we start feeling some resistance.
Over-tightening a pocket screw can strip the pocket hole which creates a loose joint. Or could even drive the screw through the other workpiece. To avoid over-tightening I set the clutch on my drill. Setting the clutch prevents the drill from driving the screw any further when the drill meets a certain amount of resistance. This prevents over-tightening and stripping the pocket hole. For driving pocket screws my DEWALT drill works well when I set the clutch to 3.
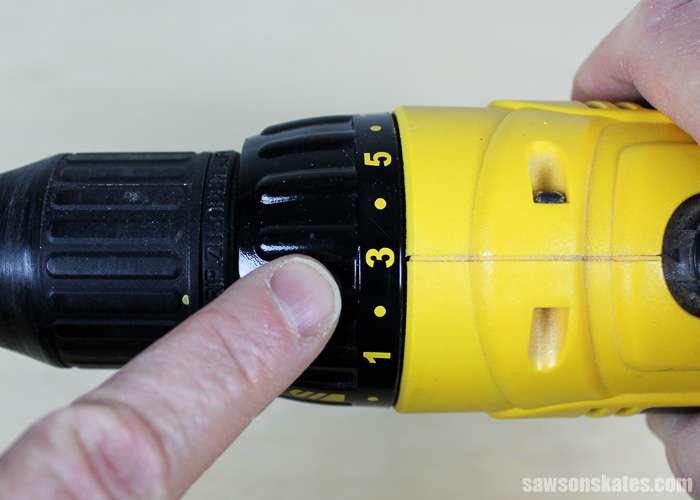
One more thing while we’re chatting about drills. I recommend using a drill for both drilling pocket holes and driving the screws rather than an impact driver. The impact action of an impact driver can loosen the depth collar and strip the pocket hole when driving the screw. Stick with a drill and you’ll be good to go.
Related: Impact Driver vs Drill: What’s the Difference?
Hard-to-Reach Pocket Holes
A Kreg Jig Mini is the perfect tool for making hard-to-reach repairs. Because the repair is hard-to-reach your freshly drilled pocket hole may likely be hard-to-reach. My secret weapon for a hard-to-reach is a right angle attachment. Skate over and learn more about this handy tool in this post.
Step 8. Hide Pocket Holes with Plugs
Did you know you can make pocket holes virtually disappear with pocket hole plugs? You can buy pocket hole plugs or you can DIY your own plugs with a pocket hole plug cutter. If you DIY your own you can use scrap wood from your project which will match the color and wood grain of the area where you drilled your pocket hole. Skate over to 9 Secrets to Make the Best Pocket Hole Plugs to learn more.
The Kreg Jig Mini has a great feature built into it. It can help seat pocket hole plugs into pocket holes.
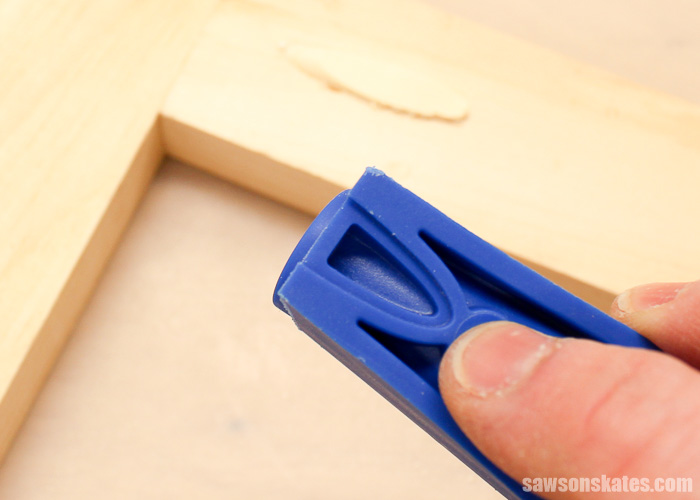
Apply glue to the pocket hole or the pocket hole plug, slide the plug in the hole and use the Mini to seat the plug all the way in the hole.
Skate over to 9 Secrets to Make the Best Pocket Hole Plugs for some options for trimming the plugs flush to the surrounding wood.
FREE Pocket Hole Mistakes Guide
Master your pocket hole projects with this FREE ten-page Pocket Hole Mistakes You Don’t Want to Make Guide! The guide is overflowing with useful hints and easy tips to help you avoid time-consuming mistakes. Click below, get your FREE guide, and tackle your next pocket hole project with confidence!

Pocket Hole Questions
Having some pocket hole problems? Can’t get your Kreg Jig Mini setup properly? Are your pocket hole joints loose? Do your pocket holes crack? If you have a question about pocket holes and you didn’t find the answer in Kreg Jig Tips and Tricks directory then skate over to this form and ask your pocket hole question!
Final Thoughts
Now you know how to use a Kreg Jig Mini! The Kreg Mini Jig Pocket Hole Kit is perfect for making hard-to-reach repairs, adding pocket holes to assembled projects and even building DIY furniture.
Thank you for stopping by. If you found this information helpful, would you please pin it to Pinterest? Other DIYers would appreciate it and I would too! Thank you – Scott
More Like This:

Hi there – I’m Scott, a woodworking enthusiast and creator of Saws on Skates, a site I started in 2015 to share easy-to-follow tutorials, space-saving shop tips, and project inspiration for DIYers at any skill level. Learn more about my woodworking journey here.
Good information, thanks for sharing. I debated for a long time between getting a mini.
I followed all directions and when it was time to plug it didn’t cover the entire head of the pocket screw? The plug slid into place but head of screw was still showing. I tried to drill the screw deeper but it would not go any further. Quite frustrating.
Hi Greg – I’m sorry to hear about your issue with the pocket hole plugs. I would like to see if we can figure this out. What thickness material were you working with? Do you have any pics you can share with me?