7 Reasons a Kreg R3 is the Best Pocket Hole Jig for Beginners
The Kreg R3 is the best pocket hole jig for beginners. It’s simple to use, affordable and includes most everything needed to make repairs and build DIY furniture.
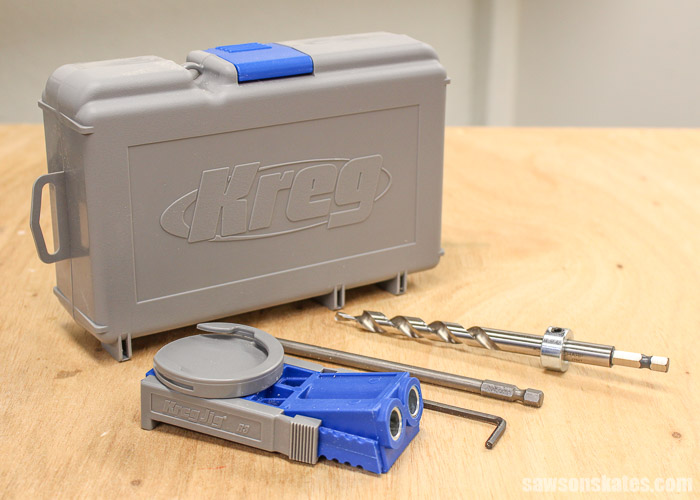
The Kreg Jig R3 is a great choice for newbies to get started with pocket hole joinery. The kit includes the pocket hole jig, the drill bit and the bit to drive the pocket hole screws all in a compact storage case. It’s an affordable way to make repairs and to build DIY furniture.
You may also enjoy 9 Solutions to Common Pocket Hole Problems, Need to Know Pocket Hole Tips for Edge Joints and 11 Places to Take Beginner Woodworking Classes.
Thank you to my friends at Kreg Tool for sponsoring this post!
This post contains affiliate links to supplies or tools I used to complete this project. Purchases made using these links help support the Saws on Skates website and allow me to share more DIY projects. and DIY tips with you. There is no cost to you for using these links. Click here to visit my site policies.
What is a Pocket Hole Jig?
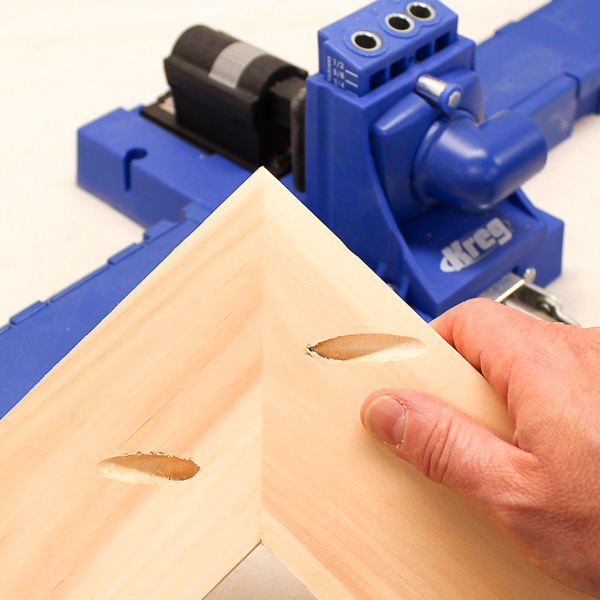
The Kreg R3 is a pocket hole jig, but what is a pocket hole jig and what is pocket hole joinery? A Kreg Jig or pocket hole jig uses a guide block with preset holes to drill angled pocket holes in a workpiece. A pocket screw, specifically designed to be used with pocket holes draws the two workpieces together to form a strong joint.
7 Reasons a Kreg R3 is the Best Pocket Hole Jig for Beginners
1. Get Started With Pocket Hole Joinery
The Kreg Jig R3 kit includes most everything we need to drill our first pocket holes. Included in the kit is the Kreg Jig R3, a drill bit, stop collar, hex wrench, square-drive bit, owner’s manual and the storage case. There’s even a package of pocket hole screws to get us started.
There are a few other things we’ll need to drill our first pocket holes. We’ll need a drill to make the pocket holes and drive the pocket hole screws. A clamp will be needed to attach the jig to the workpiece. We’ll chat about these and look at some options for each a little later.
2. The Kreg Jig R3 is Easy to Use
When we first start DIYing we have enough things to figure out like what’s the difference between a pocket hole jig vs a biscuit joiner? The last thing we want as a beginner are complicated tools or a difficult to understand manual.
What we get with the Kreg Jig R3 is a simple to use tool with straightforward instructions.
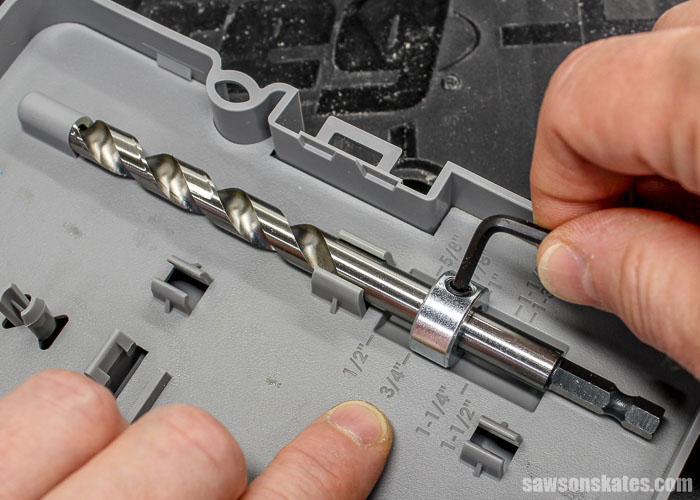
Set the Drill Bit
The Kreg Jig R3 is easy to set up. First, we’ll set the drill bit and stop collar for the thickness of the workpiece we’re joining. For instance, if our workpiece is a 1×4 (which measures 3/4” thick x 3-1/2” wide) we’ll set the bit to drill into 3/4” material.
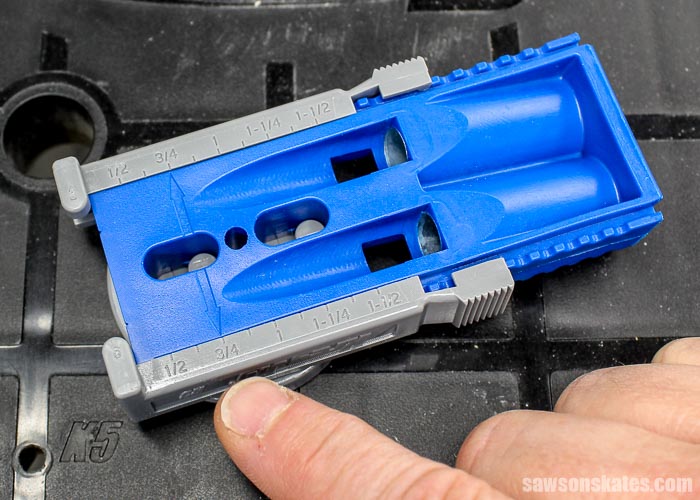
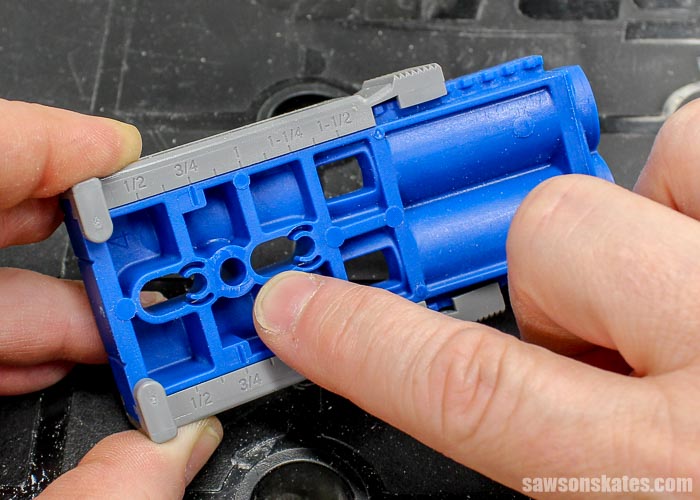
Set the Jig
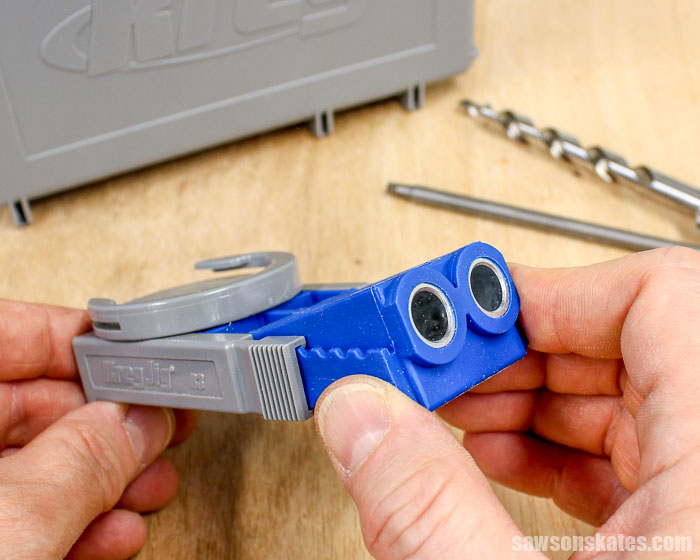
Next, we’ll adjust the jig for the thickness of the workpiece we’re joining. The workpiece in our example is a 1×4 (which measures 3/4” thick x 3-1/2” wide) so we’ll set the jig to drill into 3/4” material.
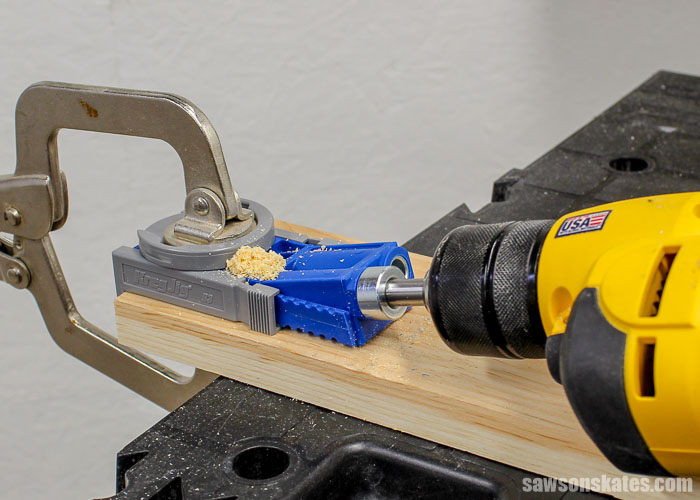
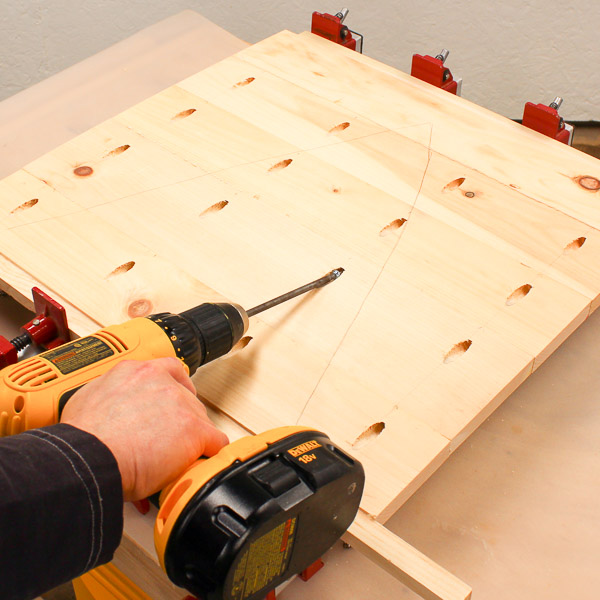
Clamp and Drill
Then, we’ll clamp the jig to our workpiece and drill our pocket hole. Pretty easy, right?!
3. The Kreg Jig R3 is Compact
As a beginner DIYer, we’re often limited on space. We may not have a dedicated space to build or we may have a really small, cramped workshop.
This might be the reason why you came to Saws on Skates in the first place. If that’s the case you may want to skate over to 9 Clever Ways to Make Your Small Workshop Feel Bigger.
The good news is the space-saving Kreg Jig R3 easily fits into a toolbox, drawer, or workshop cabinet which makes it a perfect choice for those of us with limited space.
4. The Kreg Jig R3 Makes Repairs Simple
The compact size of the Kreg Jig R3 makes it a great choice for tackling repairs. The small size means it can get into tight spaces.
Let’s say we have a table and one of the legs is a little loose. The Kreg Jig R3 has us covered. Typically we would use a clamp to attach the jig to the workpiece. But what if the area around the table leg is so tight that we can’t use a clamp?
See that hole in the body of the jig? We can place the jig on the apron of the table and use the hole to temporarily attach the jig with a screw. Pretty cool, huh?!
Then all we have to do is drill the pocket hole, remove the jig and drive a couple of pocket screws. Now we’ve fixed our wobbly table.
The Kreg Jig R3 is also great for adding pocket holes to our assembled projects. Maybe we built a DIY furniture project and we realized we forgot to drill a pocket hole. OK, there’s no maybe about it. This happens and I can’t even count the number of times I’ve assembled a project and realized that I forgot to drill a pocket hole!
The fix is simple. We can clamp the jig (or attach it to our project with a screw), drill a pocket hole, and then drive a pocket screw. Done!
5. The Kreg Jig R3 Makes Building Furniture Easy
The Kreg Jig R3 can be used for more than making repairs. We can also use it to build DIY furniture like beds, tables, storage projects, bathroom vanities and more.
The first thing we’ll need is a plan. We can design our own plan or search for a plan on google, Pinterest or Build Something Kreg’s project plan site.
Then we’ll follow the plan to cut the parts. Next, we’ll place the Kreg Jig R3 on one of the workpieces and drill our pocket holes. A little glue is applied to the joint and the workpieces are clamped together. The last thing to do is drive a few pocket screws. That’s it. We’re on our way to building a piece of furniture!
Related: Essential Tools Every DIY Furniture Builder Needs
6. The Kreg Jig R3 is Affordable
We all know it can be costly to get into DIY. The Kreg Jig R3 is a budget-friendly way for us to drill pocket holes. Which means it’s an affordable way for us to make repairs and build our own DIY furniture.
We can also use the Kreg Jig R3 to build DIY gifts. Making our own gifts is another way to save. Plus, who doesn’t appreciate a handmade gift over an expensive, impersonal store-bought gift?
Related: Beginner’s Guide to Buying Used Woodworking Tools
7. The Kreg Jig R3 Grows With You
One of the things I talked about in 5 Questions Beginners Need to Ask Before Buying Power Tools post is to look at buying tools as an investment.
In that post, I said when I was newbie DIYer “I used to think about tools in the short term. What tool do I need right now to complete this project?” But over the years I changed my thinking about tools.
Instead of looking at tools in the short term I started looking at them in the long term. “What tool do I need to complete this project AND what tool might I need for future projects?” I began to see my tools as an investment.
As our skills increase we may want to consider upgrading to a Kreg Jig K4 or Kreg Jig K5. These pocket hole jigs include even more handy features that allow us to build more quickly and more easily.
Kreg Jig K4
The Kreg Jig K4 is great for building furniture projects of all sizes. It includes a clamp to secure the workpiece to the jig, preset holes in the guide block to precisely drill pocket holes in 1×2, 1×3, and 1×4 workpieces.


Kreg Jig K5
The Kreg Jig K5 has all of the great features of the Kreg Jig K4, plus more. The K5 includes a quicker ratcheting clamp, a quick release guide pin, storage wings, plus more. Skate over to 5 Reasons Why the Kreg Jig K5 Will Change the Way You Make Pocket Holes to learn more.


The great thing about the Kreg Jig R3 is that it will grow with us. Even if we upgrade our Kreg Jig R3 won’t get tossed aside. We’ll still use it for repairs or when we forget to drill a pocket hole and our project is already assembled.
Or maybe we’ll mount our Kreg Jig K4 or Kreg Jig K5 to our workbench and use our Kreg Jig R3 for outdoor projects.
We can also keep our Kreg Jig R3 in our toolbox so we can take it with us when we’re helping a buddy with a DIY project.
The bottom line is the Kreg Jig R3 is a good investment. We’ll still use our Kreg Jig R3 even if we upgrade to a new pocket hole jig in the future.
Helpful Kreg Jig R3 Accessories
Drill
One of the most important tools we’ll need for drilling pocket holes other than the jig itself is a drill. We’ll need a drill to make the pocket holes and to drive the pocket screws. In the 5 Easy Fixes Guaranteed to Prevent Rough Pocket Holes post, I talked about the difference between corded vs cordless drills.
In that post, I shared that I’ve found a corded drill works best for drilling pocket holes. Don’t get me wrong. I love my cordless drill, but for drilling pocket holes I like the consistent power of a corded drill.
If we use a cordless drill for drilling pocket holes we need to be sure the batteries are fully charged and the drill is set for the highest speed.
Related: How to Use a Drill and Change a Drill Bit
Clamp
The next most important thing we’ll need when using the Kreg Jig R3 is a clamp to attach the jig to our workpiece. The Kreg Face Clamp is a great way to clamp the jig to a workpiece.
![]()
Pocket Hole Screws
We need to use pocket screws when attaching a pocket hole joint. Using a wood screw might make the joint loose and even crack the pocket hole.
Pocket screws are specifically designed to work with pocket holes. Pocket screws have threads only on the lower portion, while the upper portion or shank is not threaded. This design allows the shank of the pocket screw to slide through the pocket hole and pull the joint tight.


FREE Pocket Hole Mistakes Guide
Master your pocket hole projects with this FREE ten-page Pocket Hole Mistakes You Don’t Want to Make Guide! The guide is overflowing with useful hints and easy tips to help you avoid time-consuming mistakes. Click below, get your FREE guide, and tackle your next pocket hole project with confidence!
Final Thoughts
The Kreg Jig R3 is a great choice for newbies to get started with pocket hole joinery. The kit includes the pocket hole jig, the drill bit and the bit to drive the pocket hole screws all in a compact storage case. It’s an affordable way to make repairs and to build DIY furniture.
Thank you for stopping by. If you found this information helpful, would you please pin it to Pinterest? Other DIYers would appreciate it and I would too! Thank you – Scott
Recommended For You

Hi there – I’m Scott, a woodworking enthusiast and creator of Saws on Skates, a site I started in 2015 to share easy-to-follow tutorials, space-saving shop tips, and project inspiration for DIYers at any skill level. Learn more about my woodworking journey here.
Greetings Scott! Started following you a few weeks back, and I’m glad I did; you’re quite an inspiration. Setting up my home shop/garage/cave as we speak – everything I can possibly put on “skates” is getting them, and I’ve quickly become a pocket-hole-joinery fan. For years, I’ve had a Kreg K-4 system that I never used. My wife and kids bought me a K-4 Master System for my birthday recently and after visiting your site, I determined it was time to give it a try, and now I cannot imagine why I neglected this system for so long.
Hi Alan – Thank you so much for following and for the compliments! Goof luck with putting you saws on skates and your K4. Can’t wait to see what you build!
Hi. Great blog post! It is EXACTLY what I was looking for when I Googled “what is best kreg jig for beginners.” ??
I’m off to order the Kreg 4, a clamp and some screws.
Hi Diane – Thank you for stopping by. I’m glad this was helpful for you. Good luck with your new Kreg Jig K4. You’re going to love it!
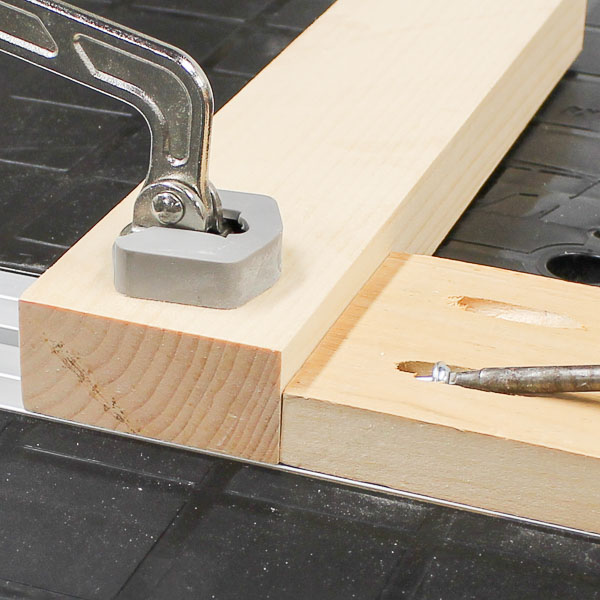
Great guide, thanks. Question about pocket holes for edge joining. I see the photo example you have here, the pocket hole is going into the end of the wood piece, and the clamp is obviously off the end of the board. For edge joining, how would you clamp the R3 into place so you can drill your holes into the side of the board for joining?
Hey there – Thank you for stopping by. You could position the clamp the same way on the on an edge joint as you would for a butt joint. For more info I have a post about edge joining with pocket holes.