DIY Farmhouse Medicine Cabinet
Looking to add storage and farmhouse style to your bathroom? Look no further than this DIY medicine cabinet. Step-by-step plan included.
What Should I Build Next?
That's the question I help answer.
Every week, I send woodworking ideas to 17,000 DIYers who love building things.
You'd fit right in.
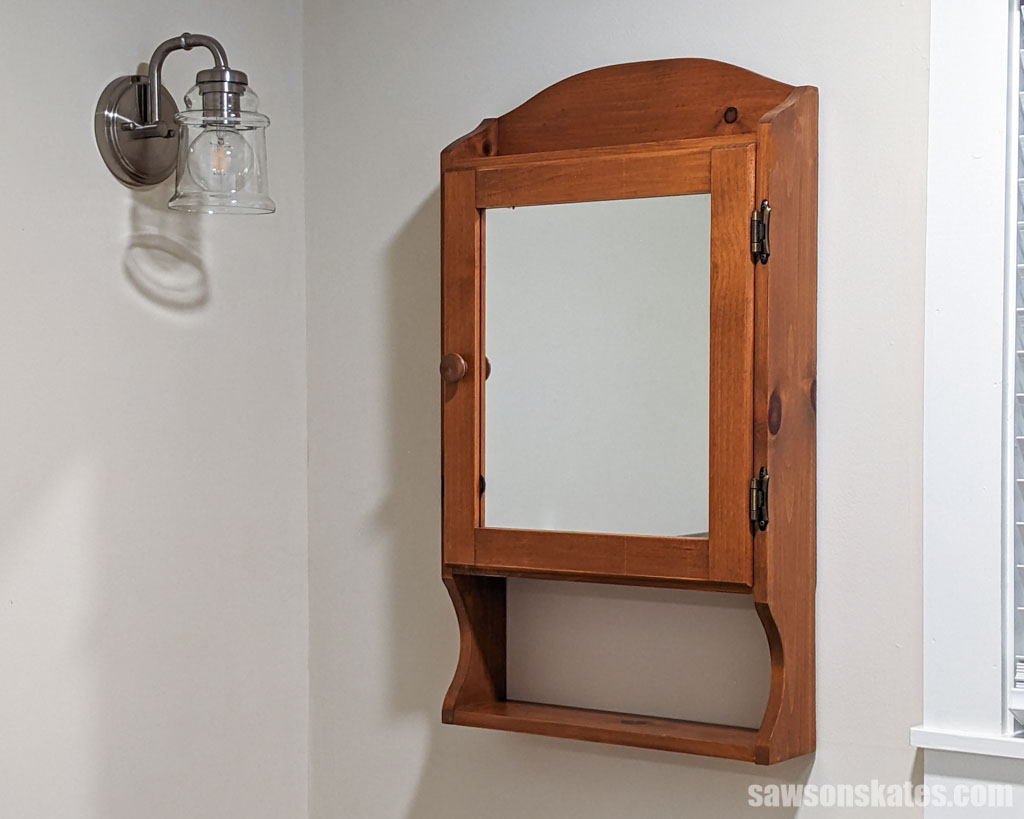
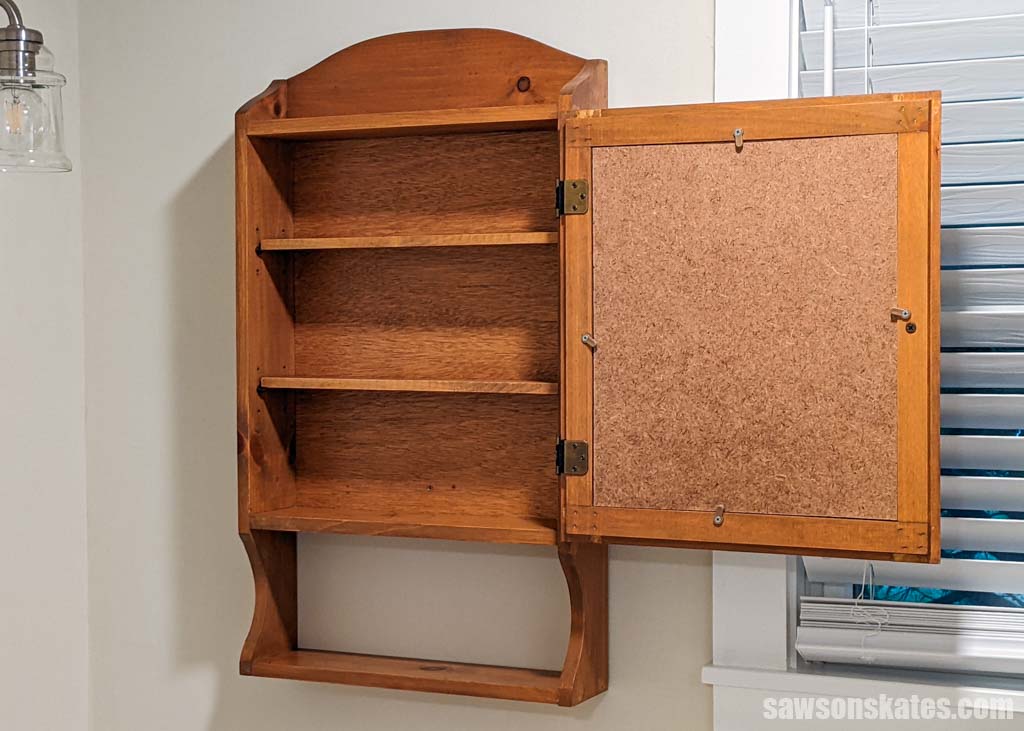
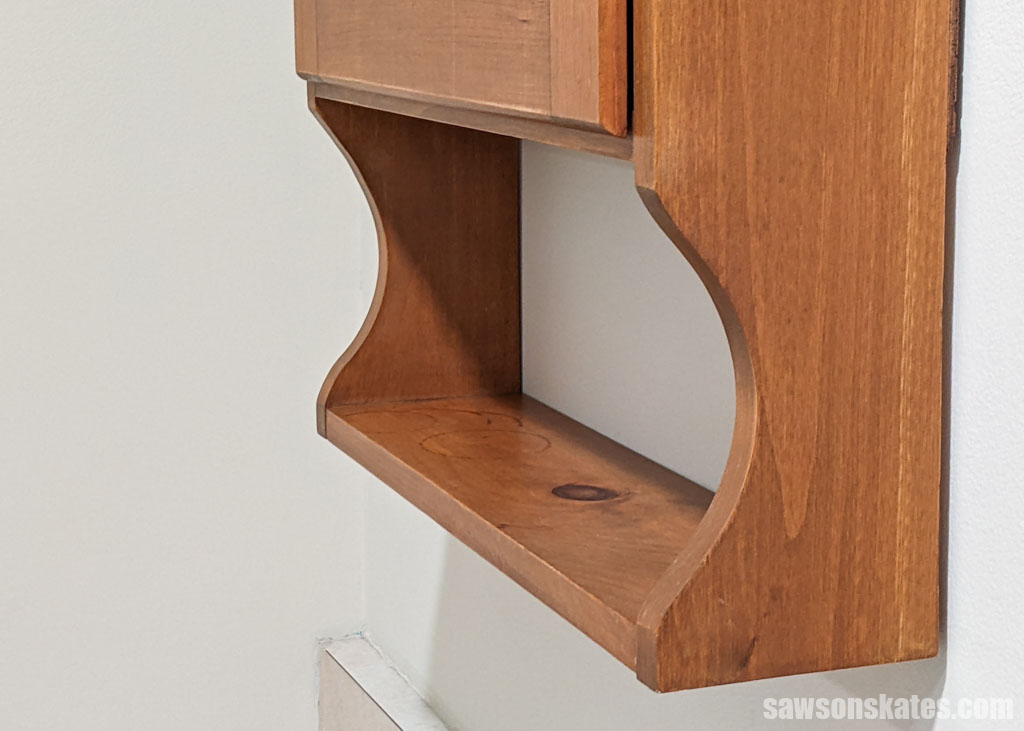
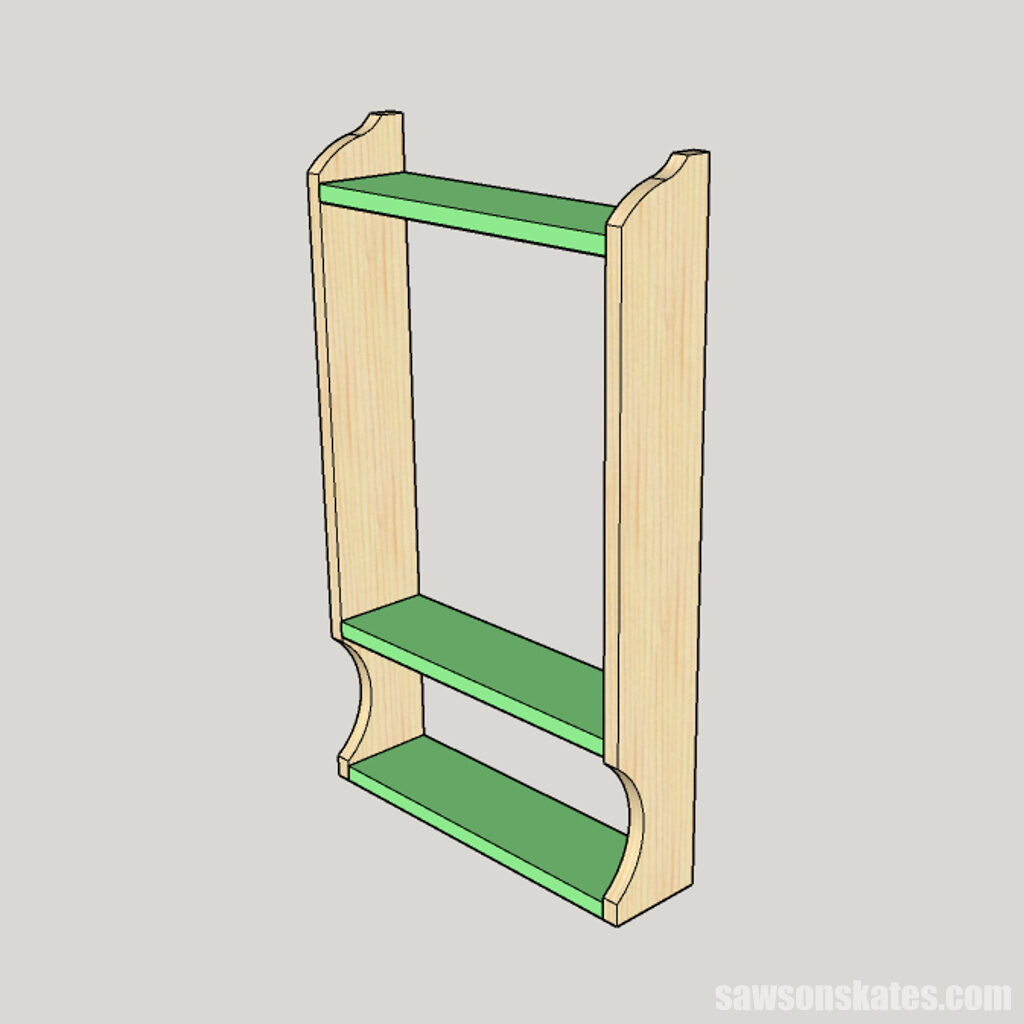
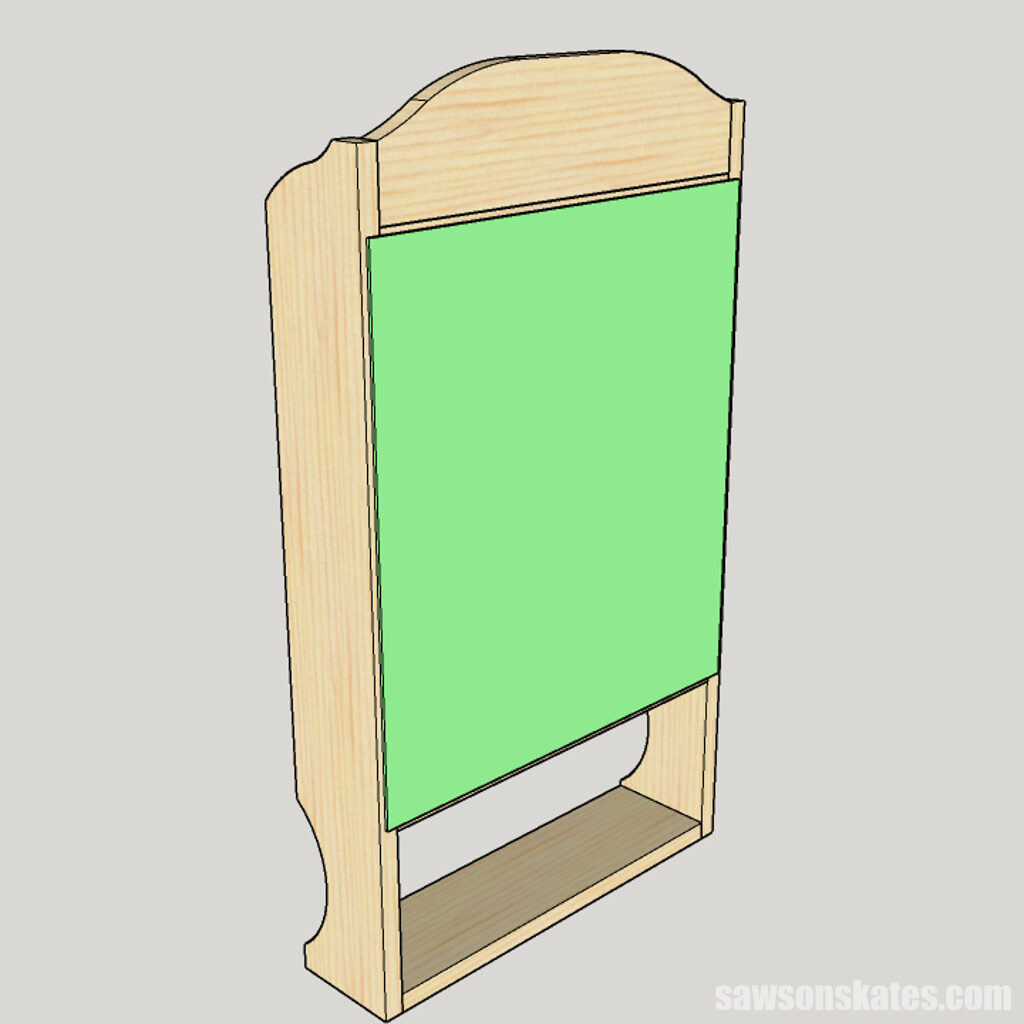
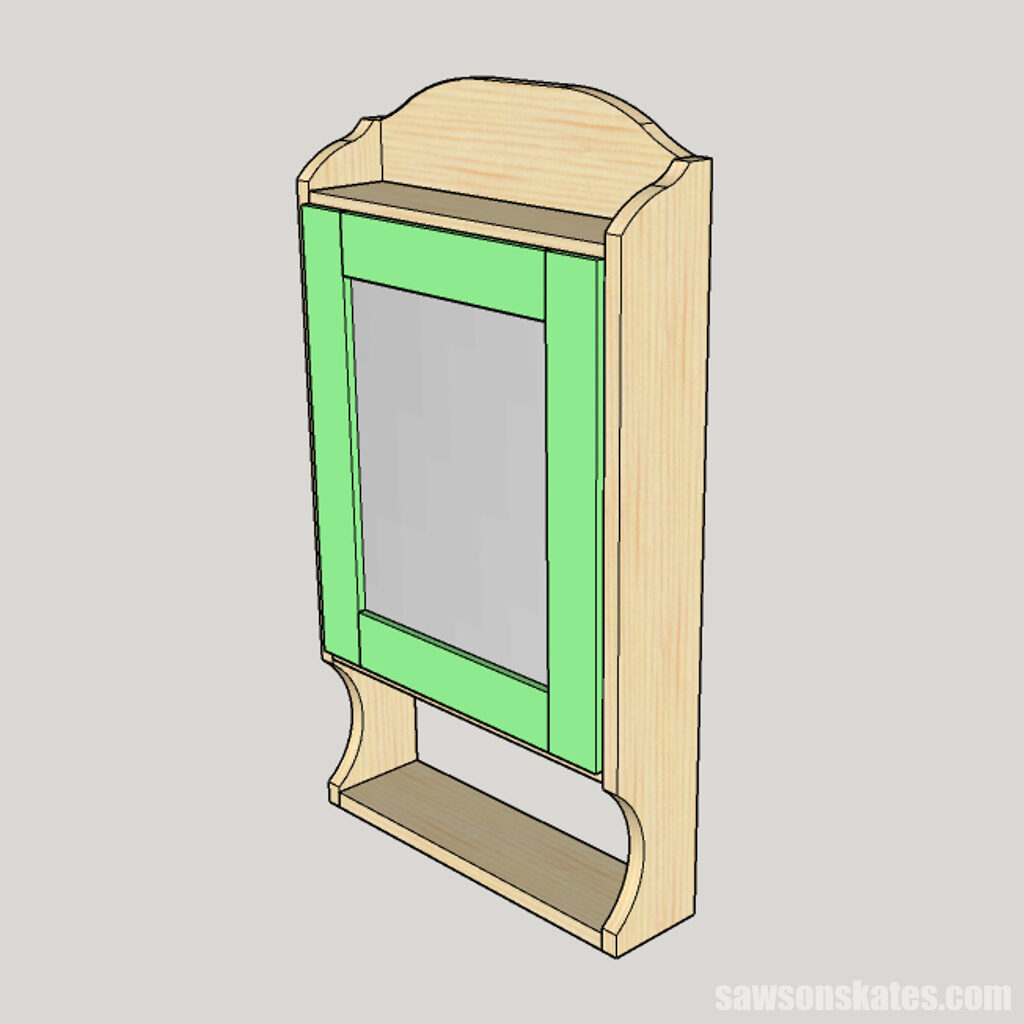
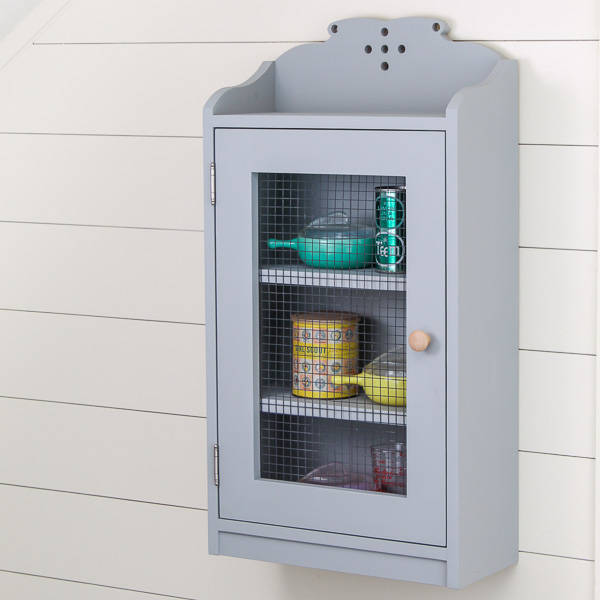
Transform your bathroom into a beautiful and functional space with this attractive farmhouse-style DIY medicine cabinet bursting with storage. It has two adjustable shelves inside and two more to show off your favorite keepsakes or organize toiletries on the outside.
The plan includes all of the measurements and step-by-step instructions. Plus, for picture-perfect results, I included two templates for cutting out the curved details.
Table of Contents
- Inspiration for This DIY Medicine Cabinet
- What Tools Do You Need?
- What Wood Should You Use?
- How Do You Draw the Curved Details?
- How Do You Finish the Medicine Cabinet?
- How Do You Hang the Medicine Cabinet on the Wall?
- How to Make a DIY Farmhouse Medicine Cabinet
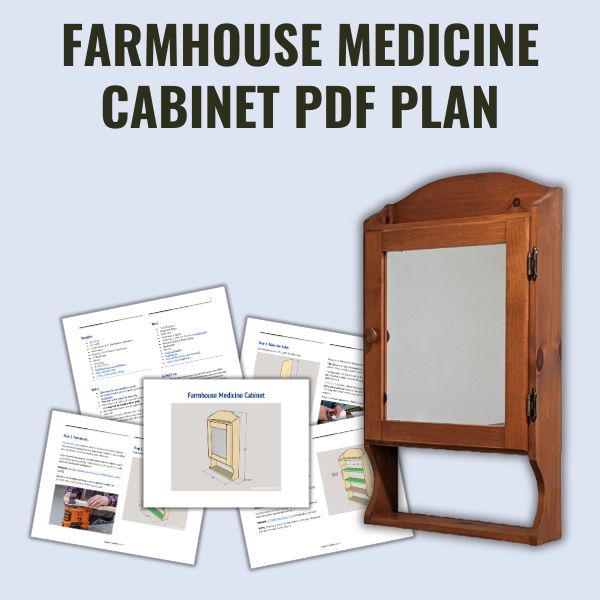
- Get the PDF Plan
This article contains affiliate links. If you purchase from these links, I may earn a small commission at no additional cost to you. Visit my site policies for more information.
Inspiration for This DIY Medicine Cabinet
On a recent thrift store trip with a friend looking for some items for his vacation rental, we stumbled across an incredible find – a handmade medicine cabinet. It would make a great addition to one of his units that didn’t have one, and when we saw that it was only $19.99, we knew we couldn’t pass it up!
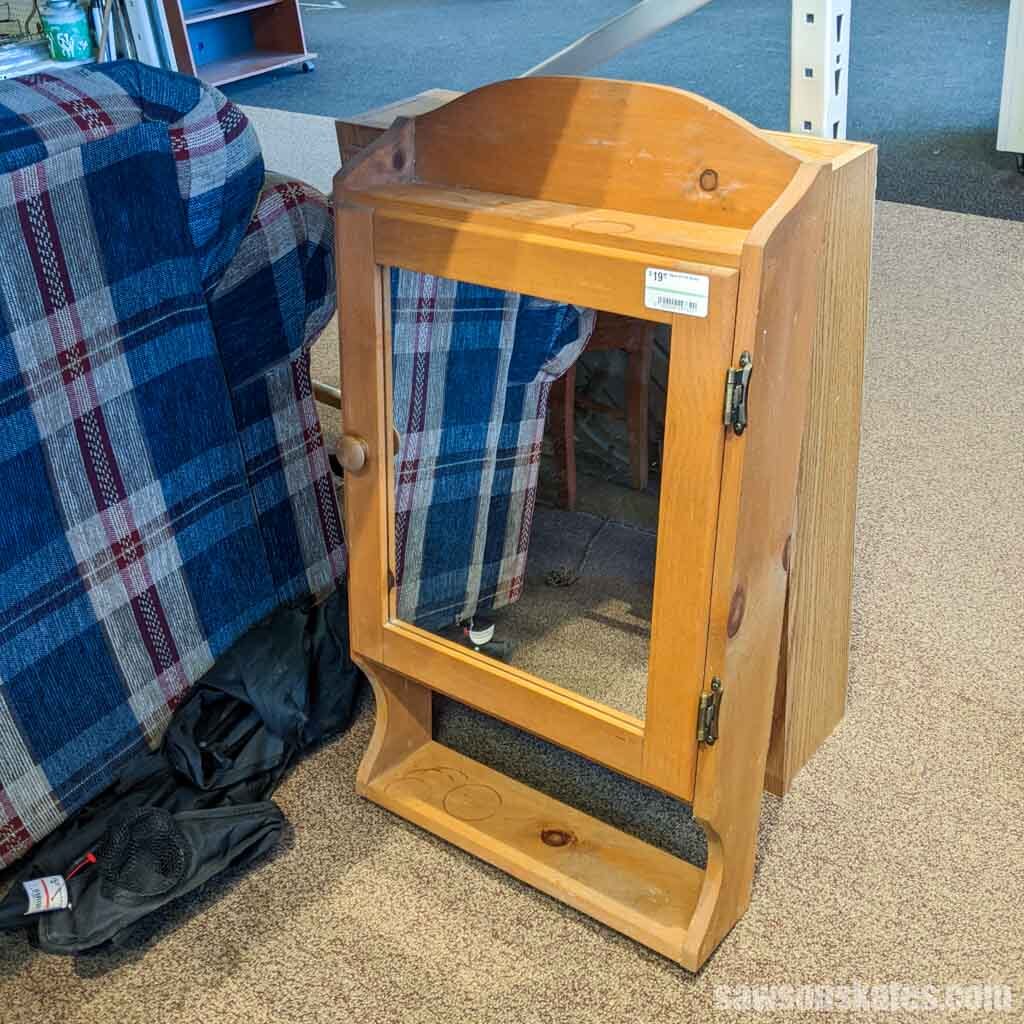
The cabinet needed a little freshening up, so I sanded it and gave it a couple of coats of polyurethane. The more I worked on it, the more impressed I was with the design and simple construction. I was so inspired by this piece that I decided to draw up plans for it so that you can make one too.
What Tools Do You Need?
This project is relatively straightforward, but the door has some details that require a few extra steps. For that reason, I would say this is more of an intermediate project, but I think even beginners can tackle it with a little patience.
Miter Saw
You’ll use a miter saw to cut the parts to length.
Scroll Saw or Jigsaw
You’ll need either a scroll saw or jigsaw to cut the curved details for the sides and top of the cabinet.
Table Saw or Circular Saw
Depending on the wood you use for the cabinet (see note below), you may need to rip some boards to width, and a table saw would be the best tool to do that.
You’ll also need to cut the back for the cabinet and door, which you can do with either a table saw or a circular saw and a Kreg Rip-Cut.
Related: Table Saw vs Circular Saw (Which Should You Buy?)
Pocket Hole Jig or Doweling Jig
You can use either a pocket hole jig or a doweling jig to join the pieces together. I join nearly all of my projects with pocket holes, so that’s what I would use for a project like this.
Related: Which Kreg Jig Should You Buy? (Here’s the Answer)
Brad Nailer
I recommend a brad nailer to attach the back to the cabinet, but you can also use a hammer and nails.
Related: Brad Nailer vs Pin Nailer (Differences & Which to Use)
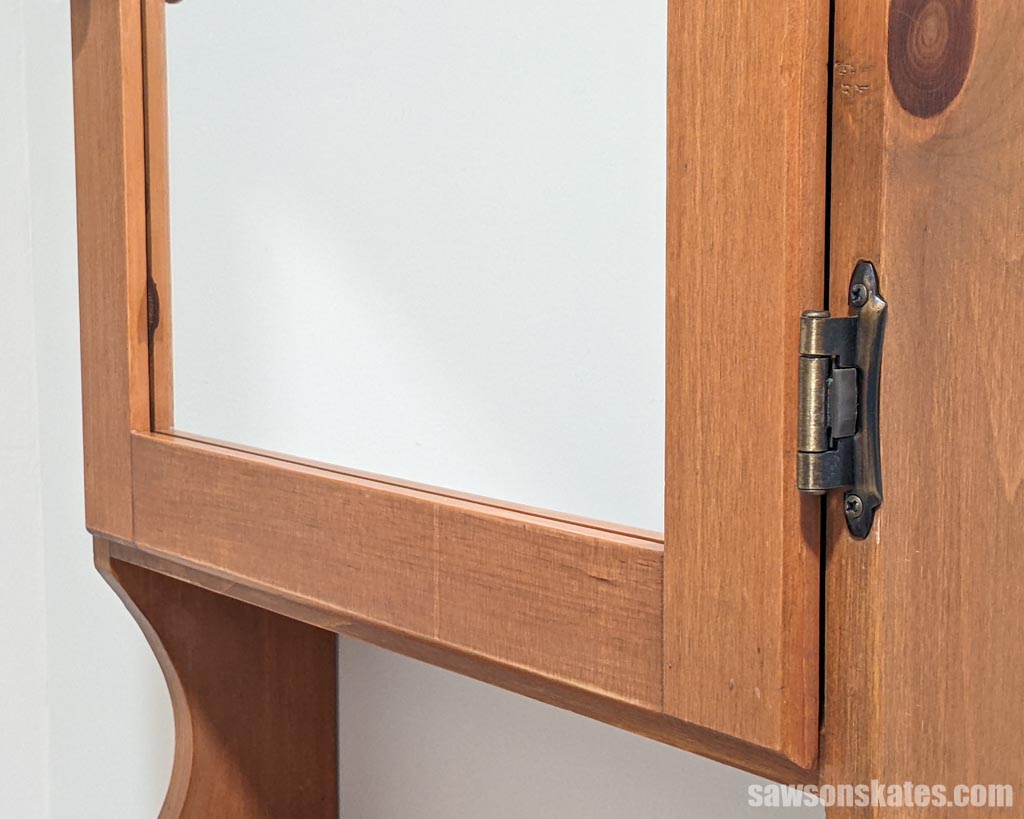
Router
You’ll need a handheld router and a ⅜” rabbeting bit to create a rabbet on the inside of the door for the mirror and around the outside so the door sets into the cabinet. A rabbet is a recessed area cut into the edge of a board.
Related: How to Use a Router Table for Beginners
Shelf Pin Jig
You will also need a shelf pin jig to drill the holes for the adjustable shelves.
Related: How to Make Adjustable Shelves with a Shelf Pin Jig
What Wood Should You Use?
This inspiration piece for this project was made with 1×5 pine boards. I always hesitate to share plans with 1×5s because readers frequently tell me they can’t find them in their area.
Related: Beginner’s Guide to Wood Sizes
My local home improvement store carries 1×5s, but if you can’t find them, you can rip 1×6s to width using a table saw. Alternatively, you could make the cabinet with 1×6s; however, it will stick out from the wall a bit farther, and you will have to adjust the measurements of the removable shelves.
Related: 21 Table Saw Safety Rules (& Mistakes to Avoid)
I should also mention that pine is a softwood and can easily dent, so this medicine cabinet may show signs of wear and tear over time.
Looking for a more durable option? Consider hardwoods such as poplar, oak, or maple. Although they may cost you more upfront than pine, they will be more resistant to wear and tear.
You’ll also need a small piece of 1/8″ plywood or hardboard for the back of the cabinet and door.
How Do You Draw the Curved Details?
Drawing the curved details for this medicine cabinet could be tricky if you have to do it by hand. But don’t worry. I’ve got your back. I included two templates with the PDF plan that’ll take care of all the heavy lifting for you.
To get started, get your plan, print the templates, and trace them. It’s that easy.
How Do You Finish the Medicine Cabinet?
This medicine cabinet was already stained when I found it at a thrift store. All that was necessary to freshen it up was some light sanding and applying a few coats of this polyurethane alternative.
You can leave your cabinet natural or finish it with your favorite stain or paint.
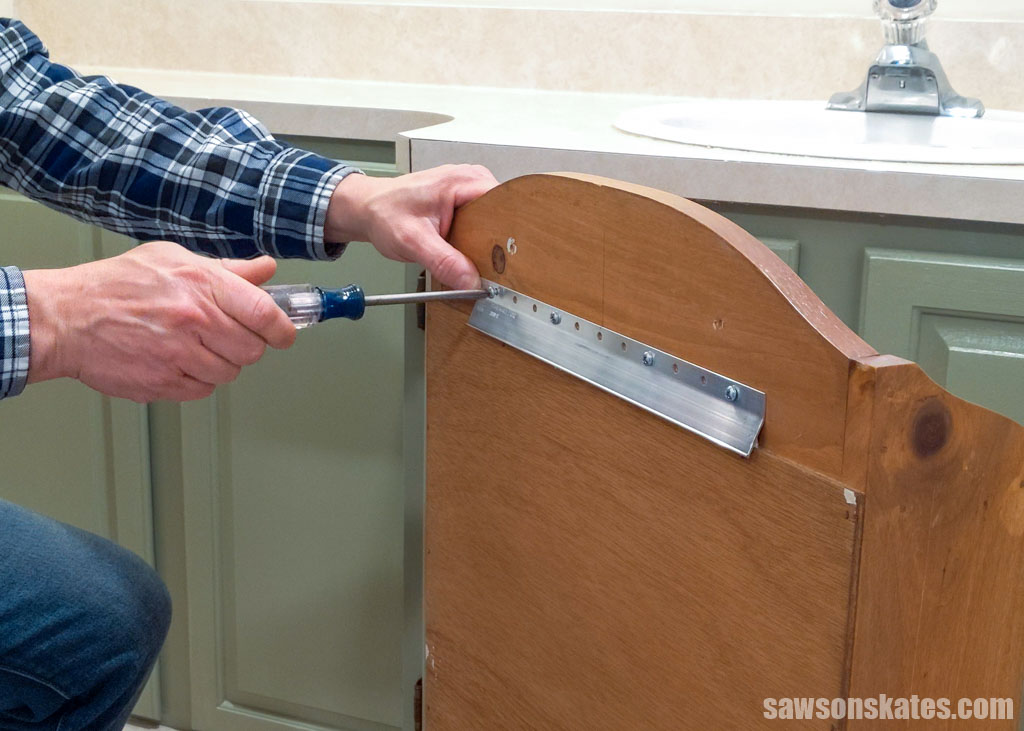
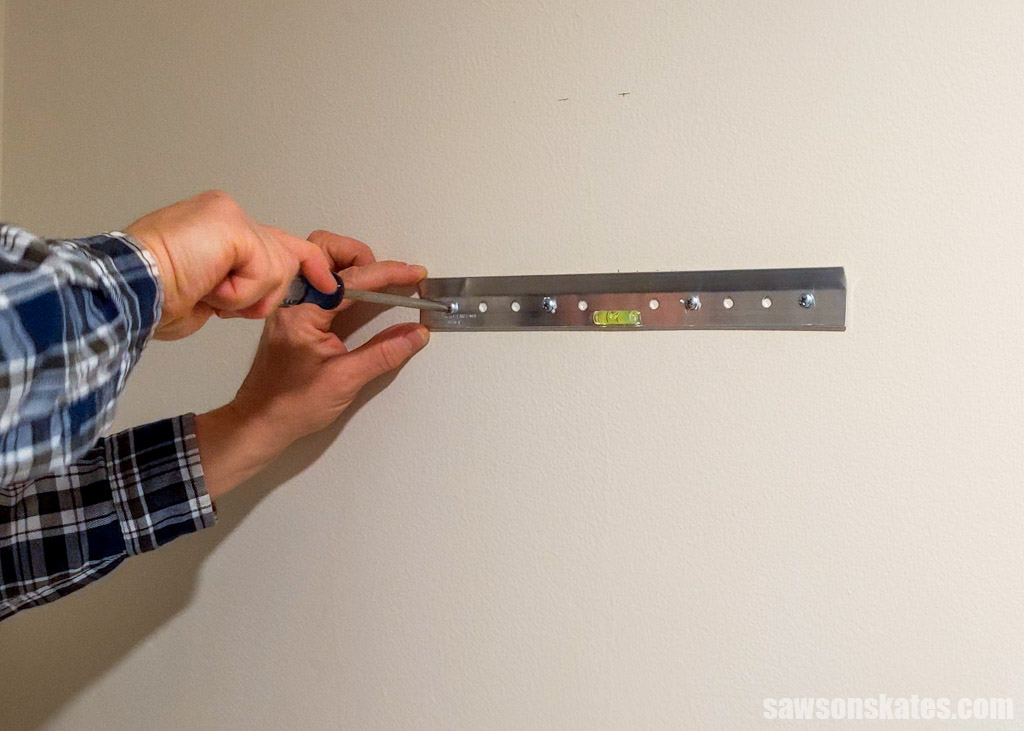
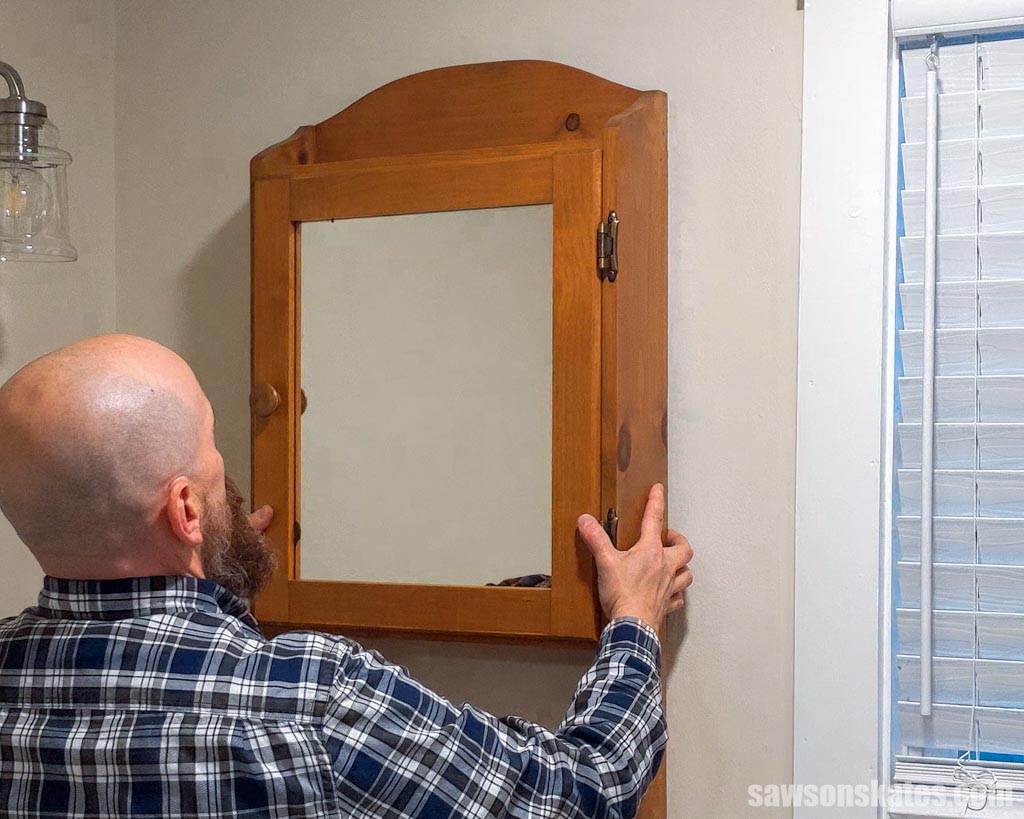
How Do You Hang the Medicine Cabinet on the Wall?
An easy way to hang the medicine cabinet is with one of these french cleat-style picture hangers.
Related: How to Make a French Cleat
Following the directions on the package, I began by attaching one section of the hanger to the back of the cabinet.
Next, I attached the other section of the hanger on the wall.
Finally, I hung the cabinet on the wall.
How to Make a DIY Farmhouse Medicine Cabinet
Printed Plan
Get the PDF plan here (includes detailed instructions, measurements, and bonus tips)
Supplies
- Wood (per the printed plan)
- Wood Glue
- Dowels or 1-¼” Pocket Hole Screws
- ½” Brad Nails
- Mirror
- (2) Hinges
- (1) Door Knob
- Shelf Pins
- Glass Retainer Clips
- French Cleat Picture Hanger
Tools
- Tape Measure
- Kreg Multi-Mark
- Miter Saw
- Scroll Saw or Jigsaw
- Table Saw or Circular Saw (and Kreg-Rip Cut)
- Pocket Hole Jig or Doweling Jig
- Brad Nailer
- Router
- ⅜” Rabbeting Bit
- Shelf Pin Jig
- Portable Spindle Sander (optional)
- Corner Chisel (optional)
Step 1. Make the Sides
Cut two pieces of wood to length for the sides.
I began by preparing the side templates included with the printed plan.
TIP: When printing the template, make sure the scale is set to 100%.
Tracing paper templates can be frustrating because the pencil point pushes into the flimsy paper, resulting in a distorted line. To fix this problem, I attach my patterns to a manila folder using spray adhesive and cut out the design with scissors. This way, the folder acts as a guide for my pencil to trace around.
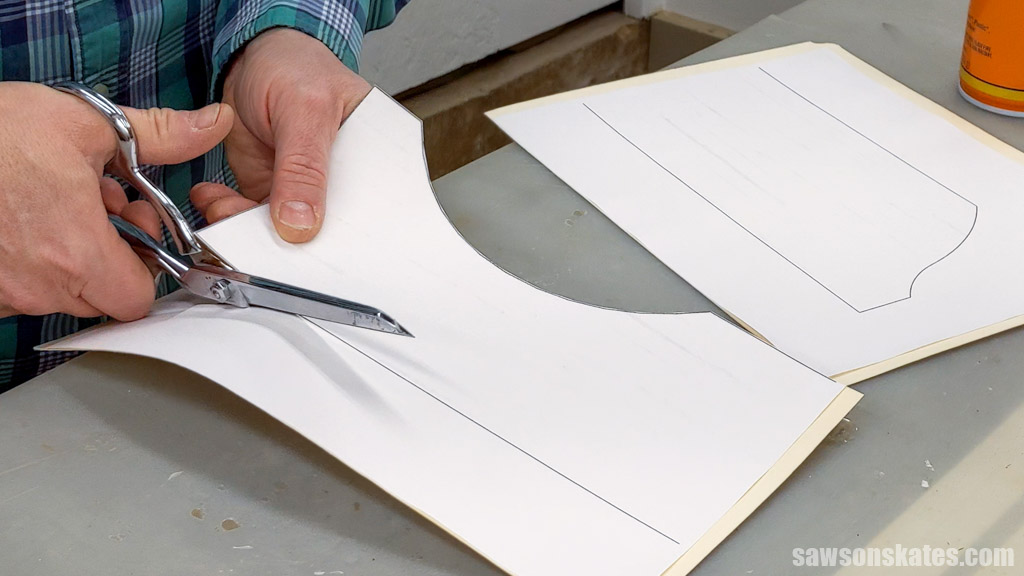
Next, trace each pattern on both of your boards.
You can cut the sides of the cabinet using a scroll saw or jigsaw. I recommend leaving the line when you make the cut, so that you can fine-tune it by sanding up to the line.
A quick and easy way to smooth these curved edges is with a portable spindle sander; otherwise, you’ll have to smooth them by hand with sandpaper.
Related: The Best Sanders for Furniture (Which One to Buy & Why)
Step 2. Attach the Shelves
Cut three pieces of wood to length for the shelves.
You can attach the shelves to the sides of the cabinet using pocket hole joinery or dowels. I’m a fan of pocket holes, so I would use those for my project.
Related: How to Use a Pocket Hole Jig
Apply glue, position on the sides, clamp and attach using dowels or pocket screws.
Next, use a shelf pin jig to drill shelf pin holes into each side of the cabinet.
Related: How to Use a Shelf Pin Jig
Cut two pieces of wood to length for the removable shelves and use a table saw to rip them to width.
Related: 21 Table Saw Safety Rules (& Mistakes to Avoid)
Step 3. Attach the Top
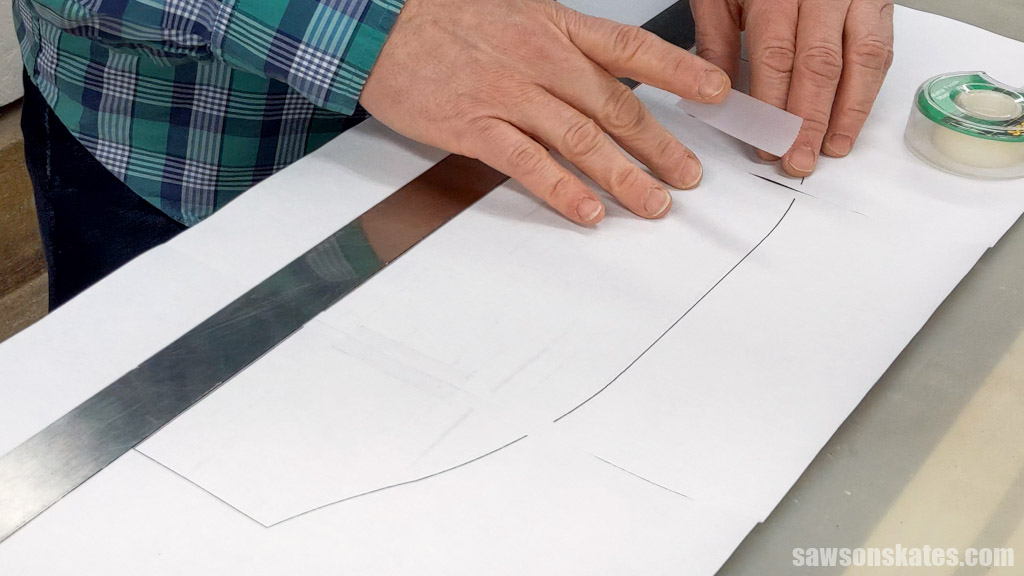
Cut one piece of wood to length for the top and print the template included with the PDF plan.
The sheets have a white border around them, but they need to be joined together at the edges.
Using a metal ruler, I ensured the straight lines were positioned correctly.
I joined them using tape once the sheets were in the correct position.
As in Step 1, I recommend using spray adhesive to attach the pattern to a manila folder. Then cut it out and trace it on the wood.
You can cut the top using a scroll saw or jigsaw. I recommend leaving the line when you make the cut so that you can fine-tune it by sanding up to the line.
Then use a spindle sander or sandpaper to smooth the saw marks.
Drill two pocket holes in each end, position and attach using pocket screws.
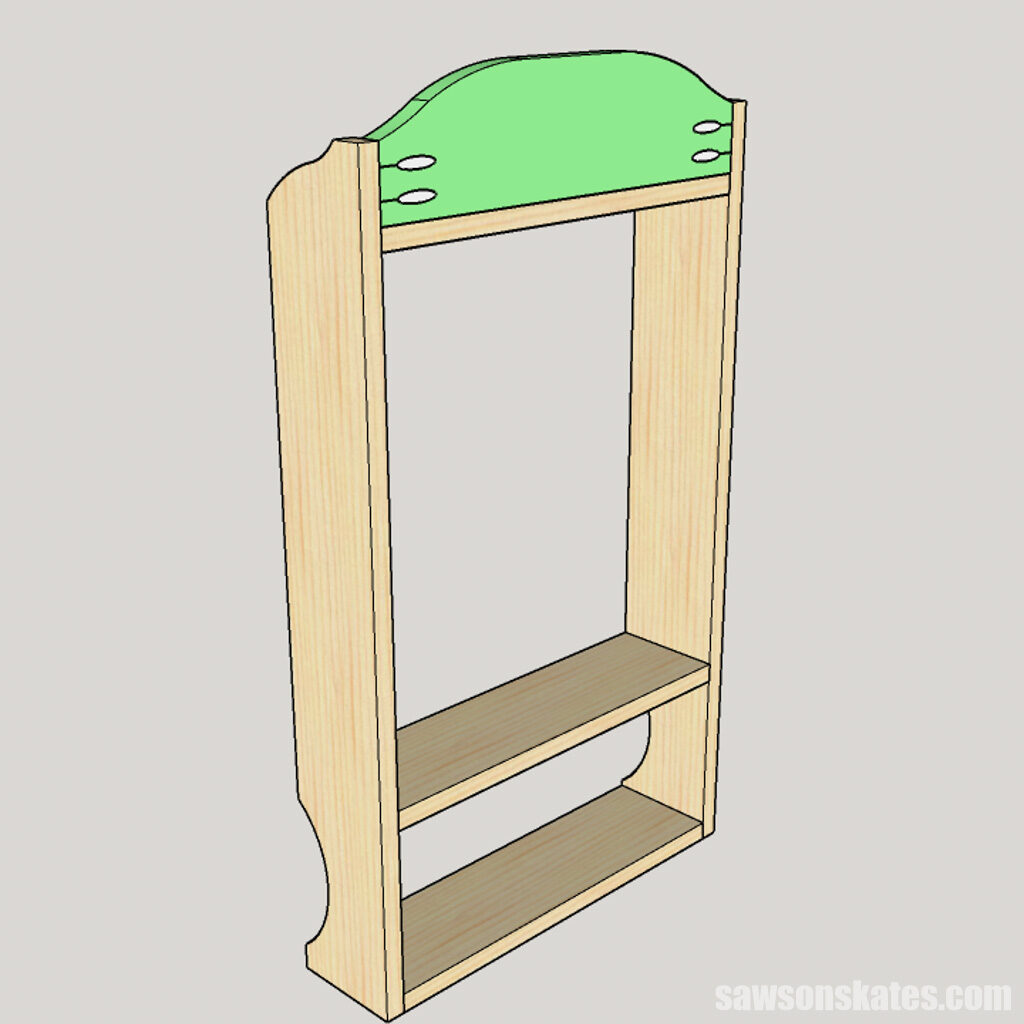
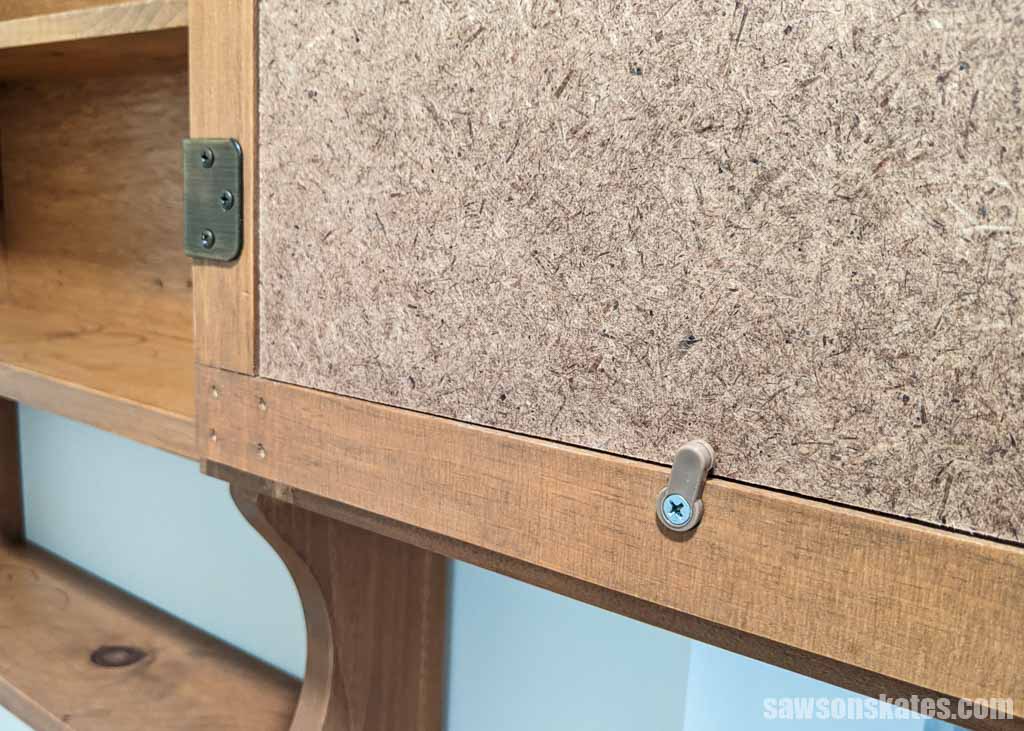
Step 4. Attach the Back
Cut one piece of plywood or hardboard to size for the back.
Center on the back opening and attach using brad nails.
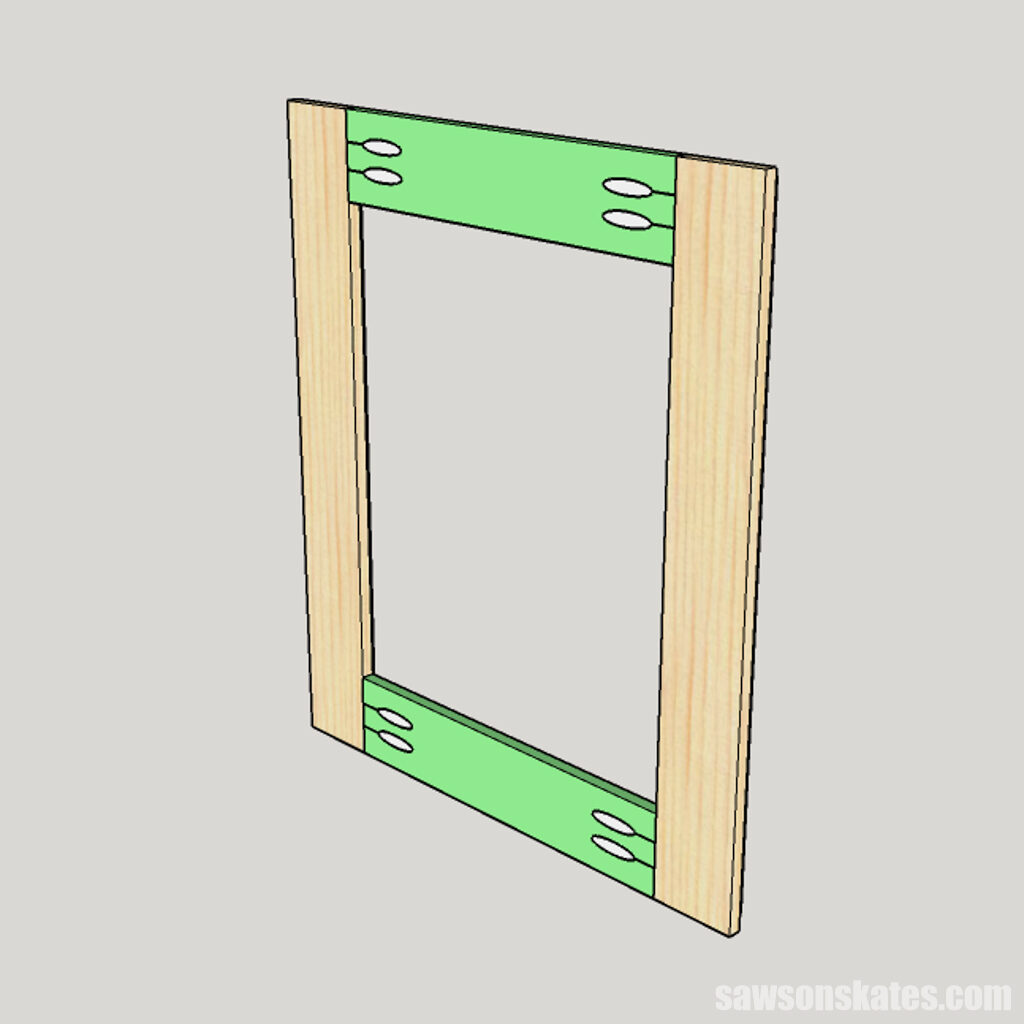
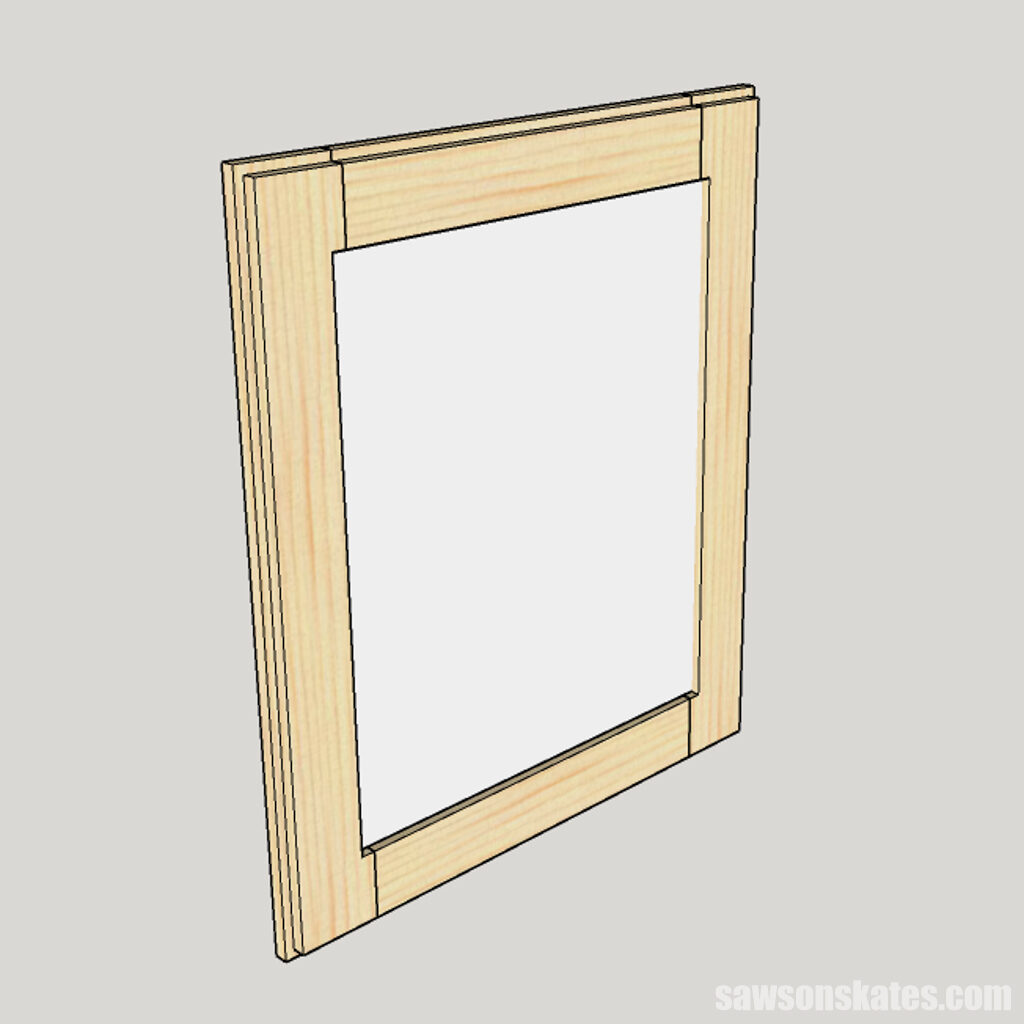
Step 5. Make the Door
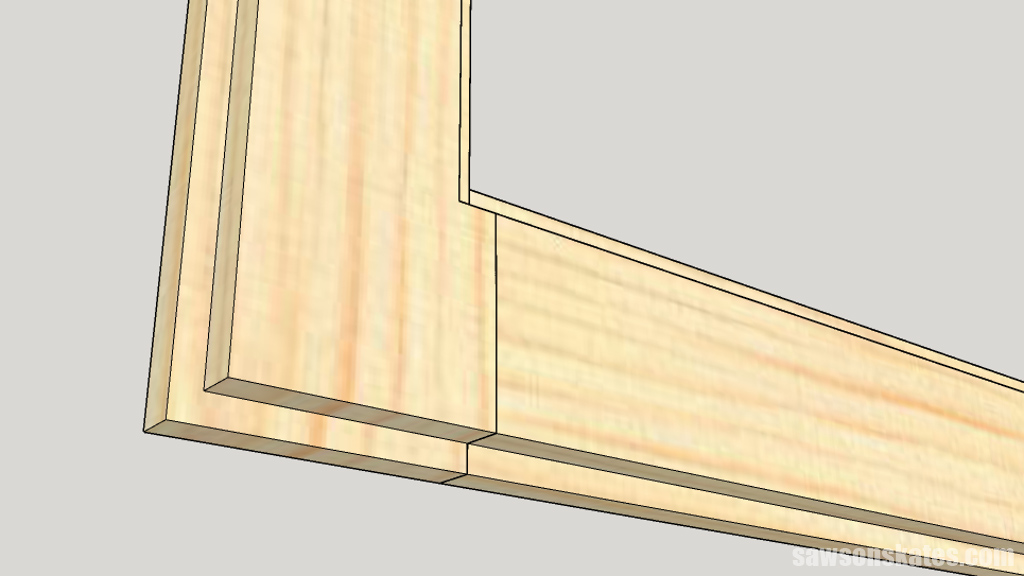
Cut two pieces of wood to length for the stiles and two pieces of wood to length for the rails.
Again, you can either use dowels or pocket holes to join the door. I typically use pocket holes; however, they must be strategically located because you’ll need to use a router to make rabbets for the mirror and inset the door. If the pocket hole screws are too close to the edge, you may damage your router bit.
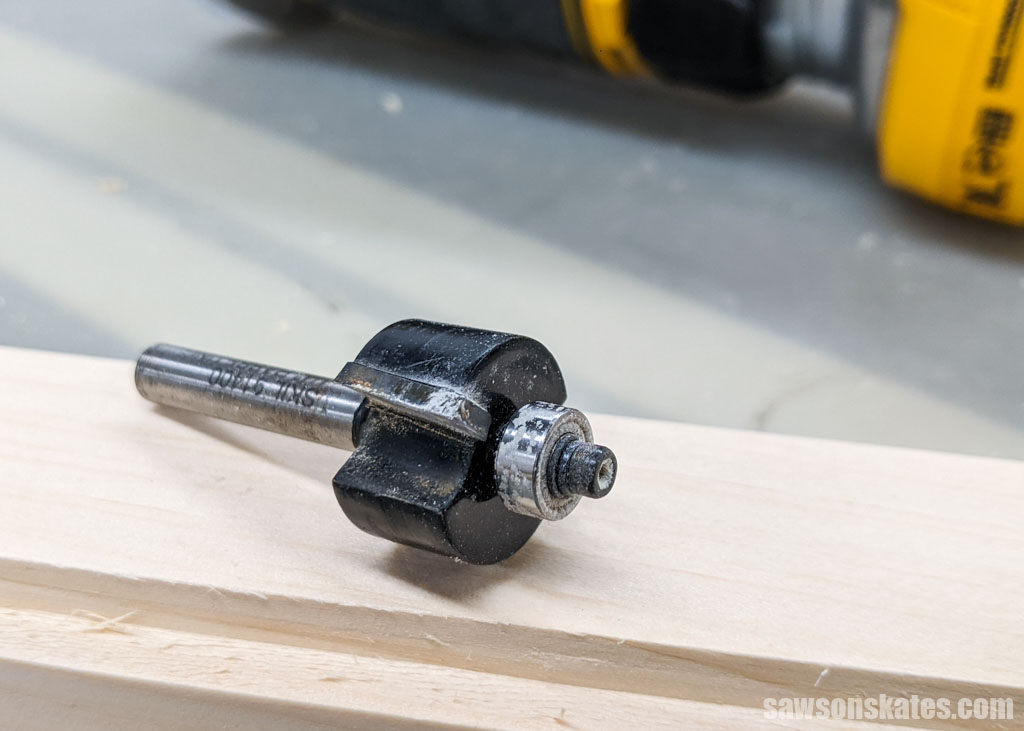
On the inside of the door opening use a router and a rabbeting bit to cut a rabbet for the mirror.

Below is an example of a rabbeting bit.
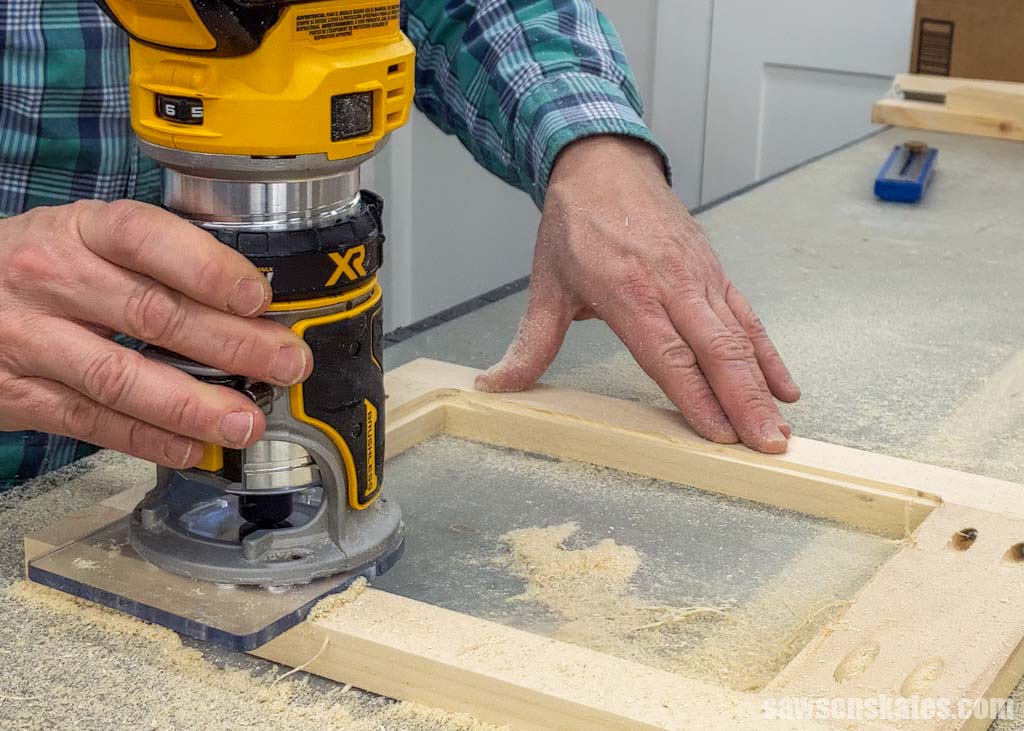
For the best results, I suggest making the cut in two passes. Start by setting the bit to remove a small amount of material, and then move your router around the interior edge of your door in a counterclockwise direction. Then, set the bit to the final depth and make the second pass.
Below is an example of how I used a rabbeting bit to make a rabbet on this picture frame.
The router bit leaves the corners rounded, but they need to be square so you can install the mirror.
Below is an example of a round corner after making the rabbet for this picture frame.
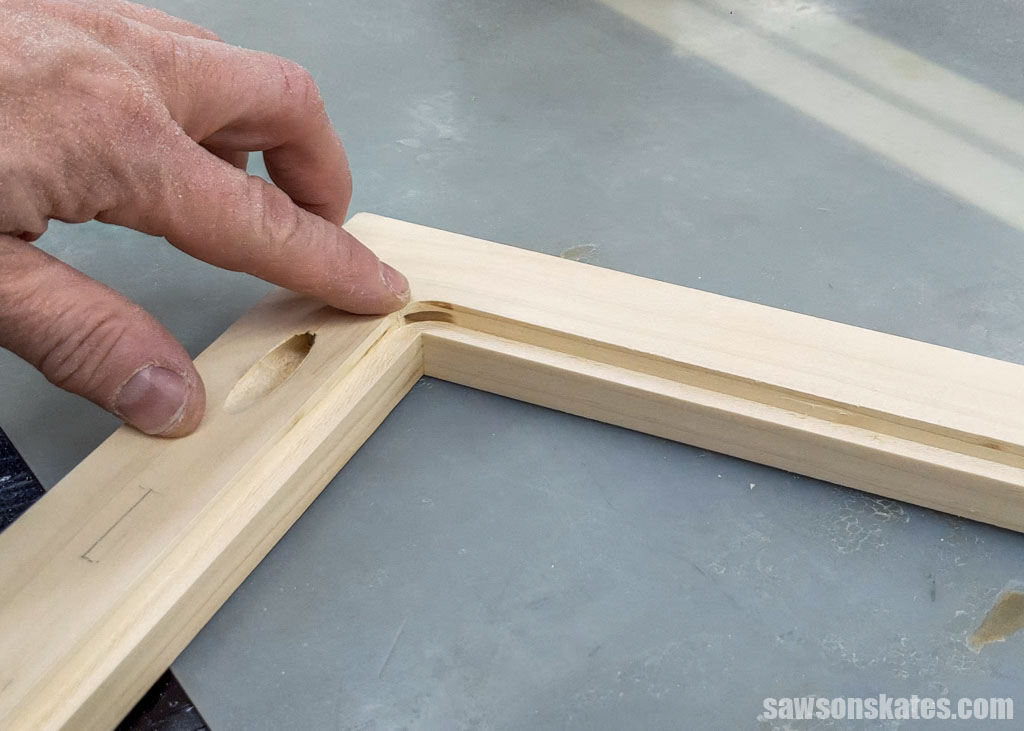
For perfectly squared corners, try using a corner chisel. Just place it into the corner and tap it with your hammer two or three times. If you don’t have a corner chisel, using a flat chisel and a hammer works just as well.
Again, this is an example from the DIY picture frame where I used a corner chisel to square the corners of the rabbet.

The outside of the door also needs a rabbet so that it sets into the cabinet. Again, I recommend making the cut in two passes. First, remove a small amount of material, adjust the bit to its final depth and make the second pass.
Measure the mirror opening and have a piece of mirror cut so that it’s about 1/16th smaller in each direction.
Most hardware stores, home improvement centers, and glass shops will cut mirrors to size for you. Make sure to measure the opening several times before having it cut.
Cut a piece of plywood or hardboard to size for the back of the door.
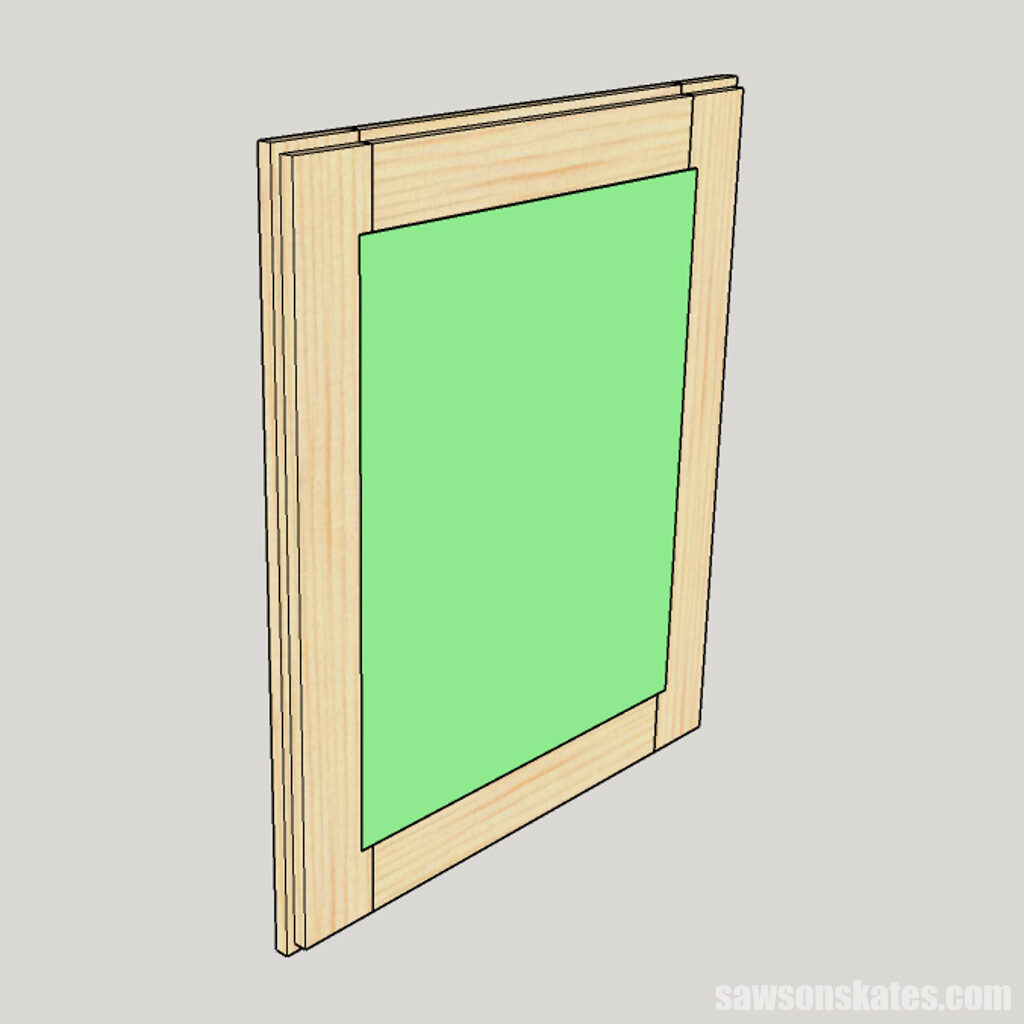
Place the mirror and door back in the opening and secure them with glass retainer clips.
Step 6. Install the Door
Attach the hinges to the back of the door, center in the opening, and attach the hinges to the cabinet.
Step 7. Finish the Medicine Cabinet
Whether you keep your cabinet natural or give it a personalized touch with paint or stain, the choice is yours!
Includes:
- List of tools and materials
- Complete measurements (in inches)
- Easy-to-follow instructions
- Detailed diagrams
Final Thoughts
Making a DIY medicine cabinet may seem like an intimidating project, but it’s relatively straightforward. With the right tools and supplies, you can have your own farmhouse-style medicine cabinet in no time!
Get your PDF plan (including the detailed instructions and measurements) now!
Thank you for stopping by. If you enjoyed this tutorial, would you please take a moment and pin it to Pinterest? I’d really appreciate it!
Recommended For You
Pin This For Later

Hi there – I’m Scott, a woodworking enthusiast and creator of Saws on Skates, a site I started in 2015 to share easy-to-follow tutorials, space-saving shop tips, and project inspiration for DIYers at any skill level. Learn more about my woodworking journey here.
Wow, how did you finish your 1*5 pine boards? It looks so authentic like a true antique.
Hi there – As I mentioned early on in the tutorial and again under the How Do You Finish section, I bought this at a thrift store, and it was already stained. But if I had to guess, the person who handcrafted it probably used a colonial maple stain.