DIY Key Holder With Shelves (Pattern Included)
Looking for an easy, attractive, and affordable way to organize your keys? This DIY key holder with three shelves is the perfect solution!
What Should I Build Next?
That's the question I help answer.
Every week, I send woodworking ideas to 17,000 DIYers who love building things.
You'd fit right in.
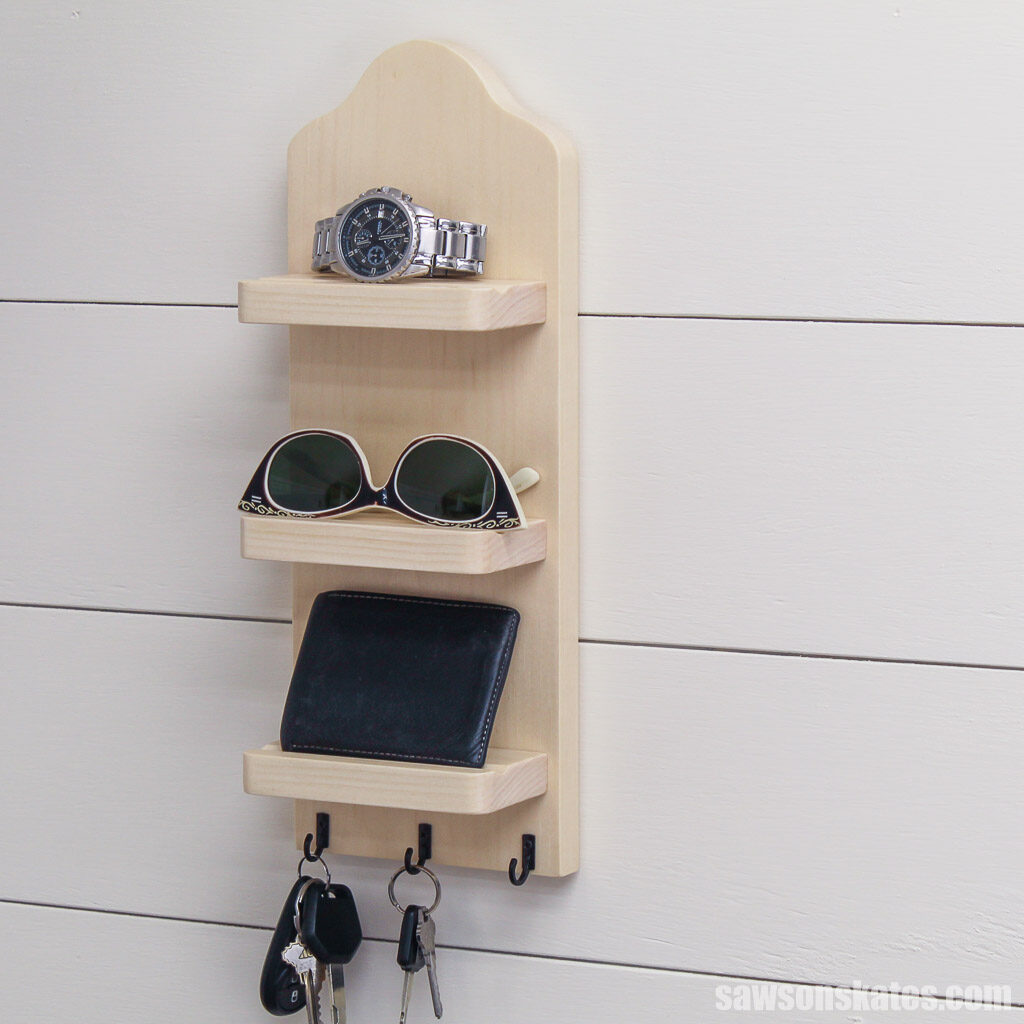
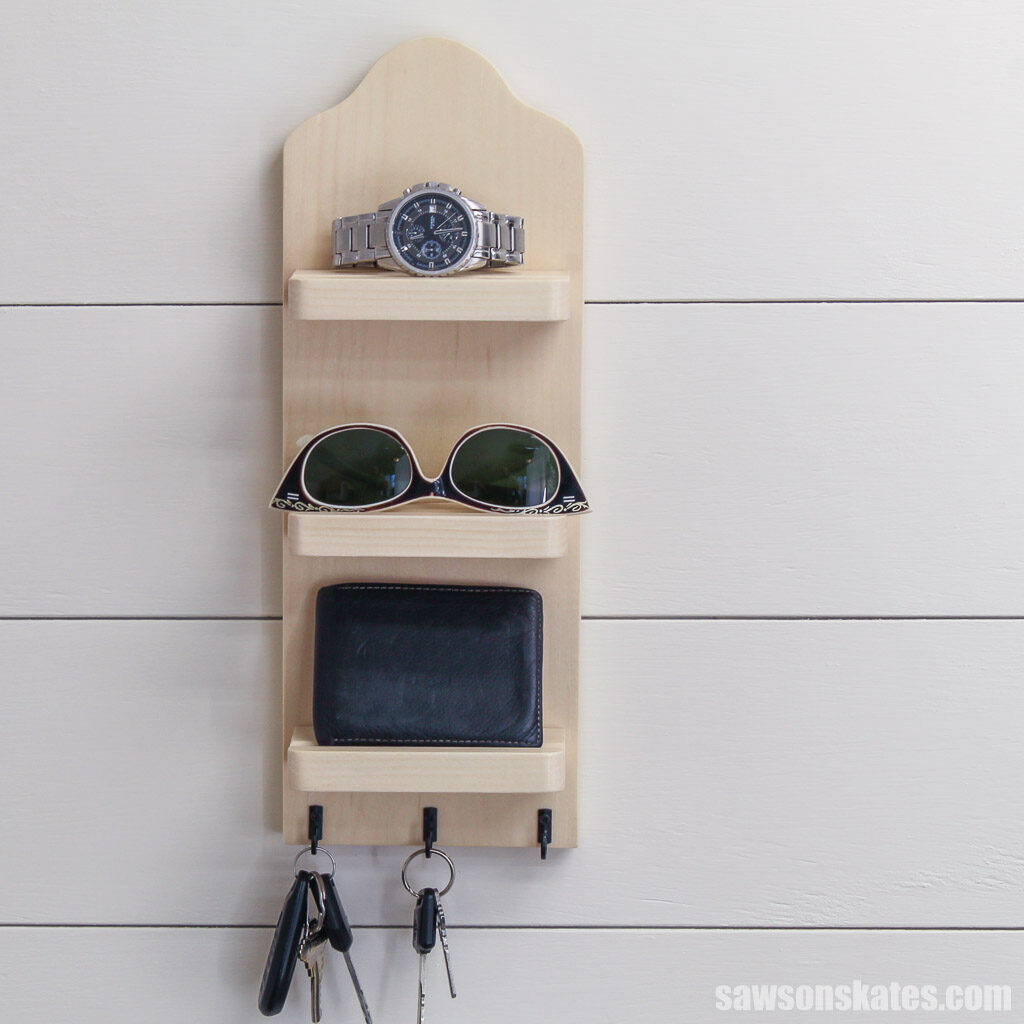
Don’t waste another minute searching for your keys. Organize them in one convenient spot with this wall-mounted DIY key holder! And keep sunglasses, wallets, and watches within easy reach on the handy storage shelves.
It only takes a few hours to complete and doesn’t require any special tools or skills. But the best part is you can make it with scrap wood!
If you’re looking for an easy afternoon project, keep reading for the simple step-by-step tutorial and the pattern below.
Table of Contents
- Inspiration for This Wall-Mounted DIY Key Holder
- What Tools Do You Need?
- What Wood Should You Use?
- How Do You Draw the Curved Details?
- How Do You Finish the the DIY Key Holder?
- How to Make a DIY Key Holder
- Get the PDF Plan
This article contains affiliate links. If you purchase from these links, I may earn a small commission at no additional cost to you. Visit my site policies for more information.
Inspiration for This Wall-Mounted DIY Key Holder
Recently, Jean-Paul messaged asking, “Can you make plans for a key chain holder? For hanging car keys or your house keys?”
When I read the suggestion, my mind instantly flashed to the hooks at the bottom of my 1950s tin mail organizer where I store my keys.
Many of my projects are inspired by vintage and antique pieces, and this key holder was no exception.
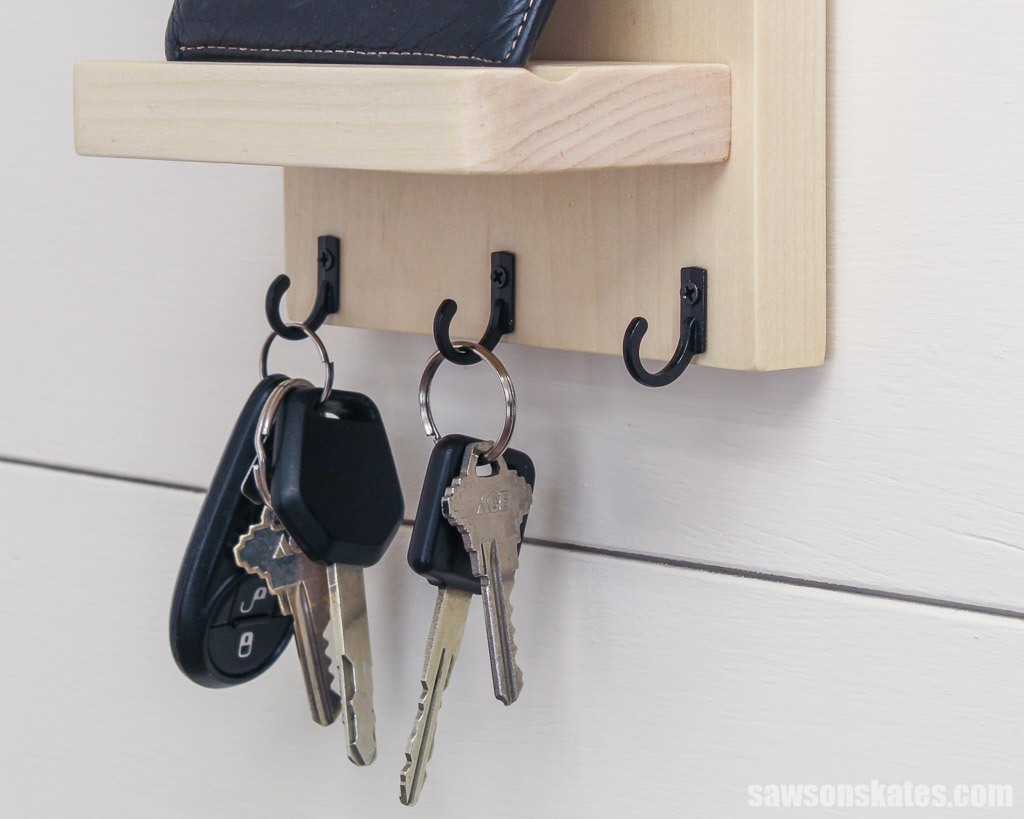
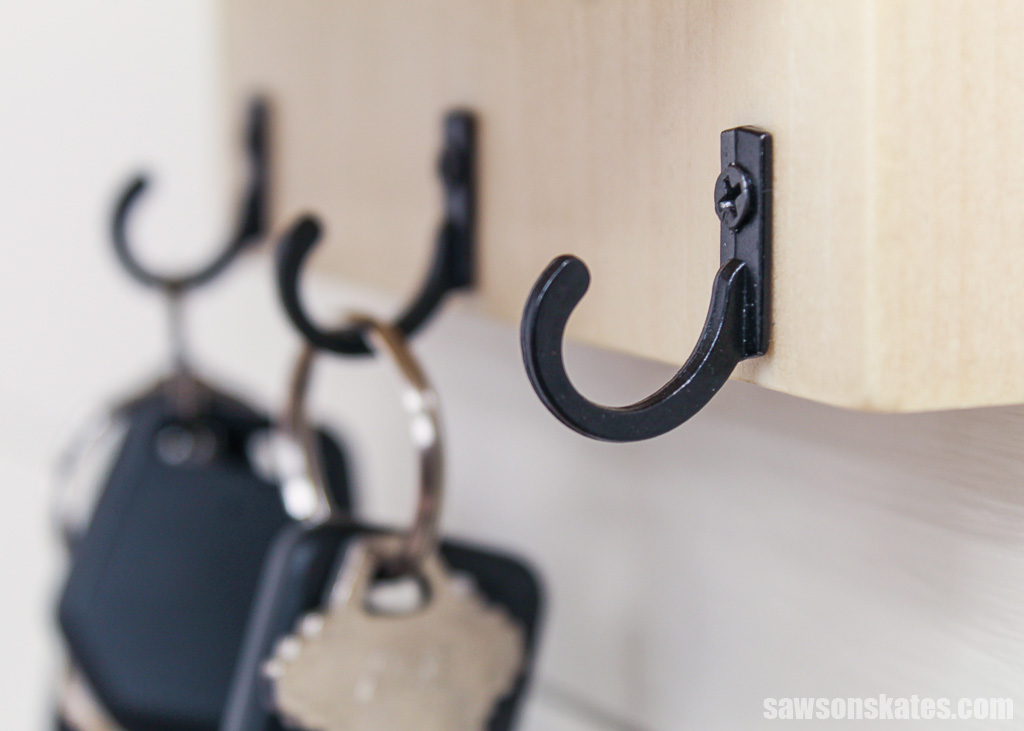
So, here it is. At the bottom are three hooks for organizing all of your keys.
Instead of mail slots, there are three shelves for additional storage. The shelves are excellent for storing small items such as wallets, sunglasses, and watches. And the curved detail at the top is almost identical to my 50s-style organizer!
What Tools Do You Need to Make a Key Holder with Shelves?
You’ll only need three basic tools to make this simple key holder: a miter saw, a scroll or jigsaw, and a drill! I also used a router, and spindle and disc sander, but these tools are optional.
Miter Saw
I used my miter saw to cut the key holder’s parts to their required lengths.
Scroll Saw
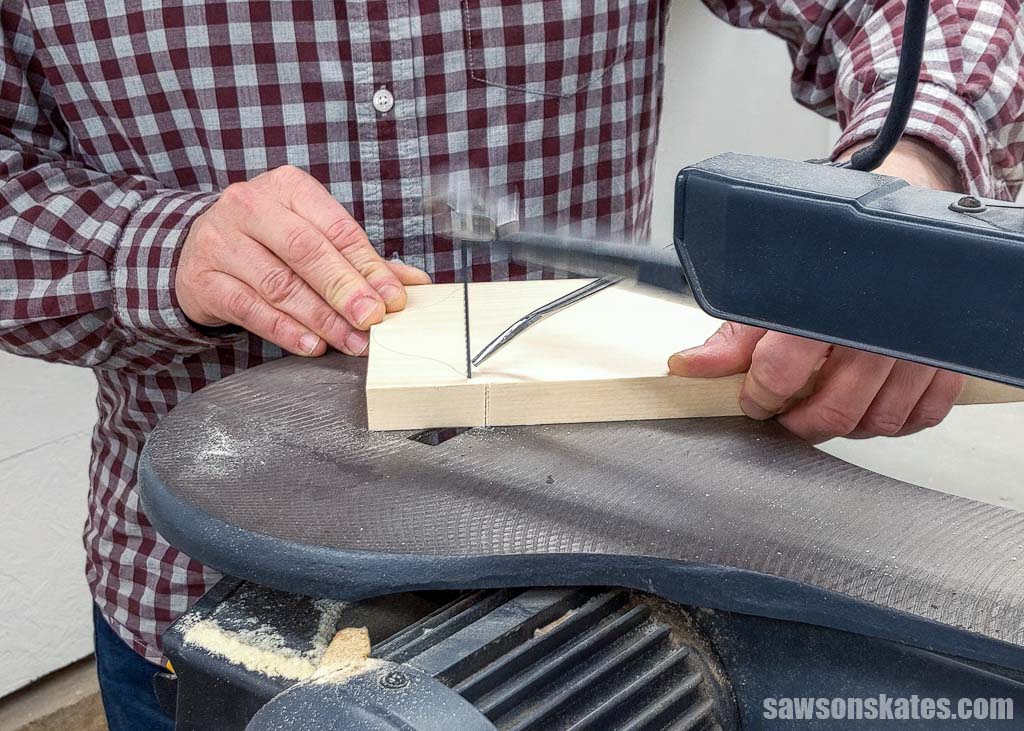
I used a scroll saw to cut the curved detail at the top of the holder, but you might be able to use a jigsaw instead.
Drill
I used my drill to make countersink holes and to drive the screws that attach the shelves to the holder.
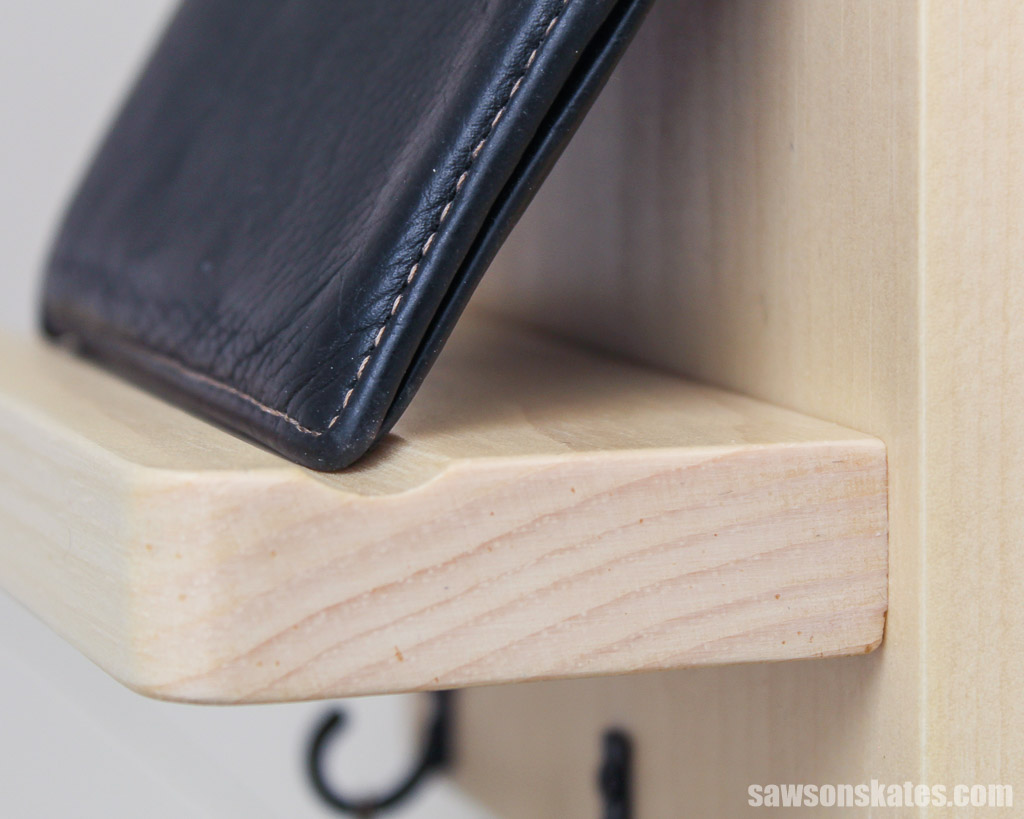
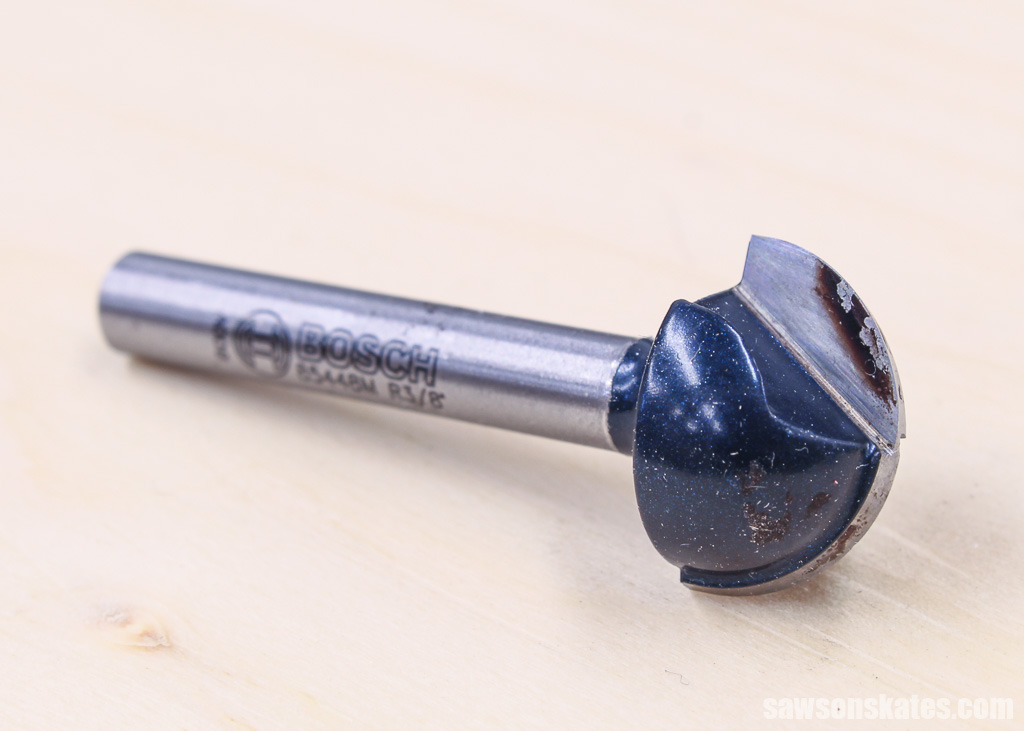
Router
I used a router table and a cove bit to make a shallow groove in the shelves, allowing you to stand up items like wallets or envelopes without sliding off. You can skip this step if you don’t have a router.
Related: How to Use a Router Table for Beginners
Spindle and Disc Sander
I used a spindle sander to smooth the saw marks on the inside edges of the top’s curved detail and a disc sander to smooth the outside edges. You can smooth these edges with sandpaper if you don’t have either of these tools; it will just take a bit longer.
What Wood Should You Use?
I used scrap pieces of pine boards for my key holder, but you can use any type of wood to make yours.

How Do You Draw the Curved Details?
I included a pattern in the PDF plan for the curved details, so you don’t have to draw them yourself. All you need to do is print it, cut it out with scissors, trace it onto your board, and then cut it out with a scroll saw or jigsaw.
How Do You Finish the DIY Key Holder?
You can paint, stain or leave your key holder natural. I choose to leave mine natural, protecting it with a few coats of this polyurethane alternative.
TIP: I thought it was easier to apply the finish when the holder was disassembled, so I removed the hooks, shelves, and sawtooth hanger, applied the finish and reassembled the holder.
How to Make a DIY Key Holder With Shelves
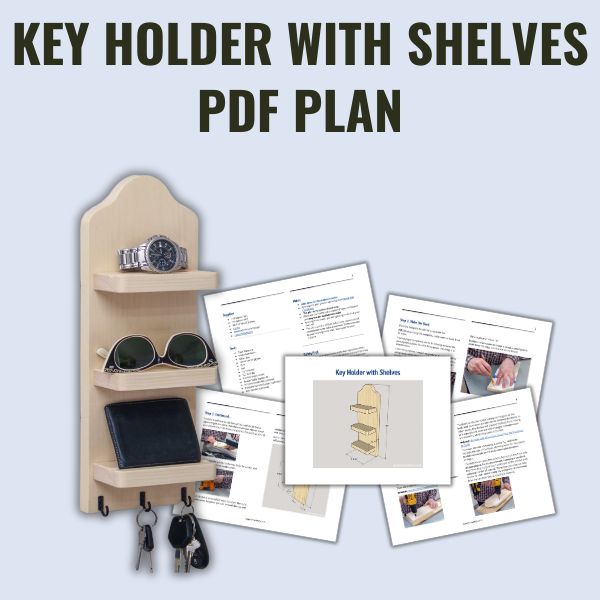
Printed Plan
Get the PDF plan here (includes detailed instructions, measurements, and bonus tips)
Supplies
- Wood (per the printed plan)
- #8 1-¼” Wood Screws
- Hooks
- Sawtooth Picture Hanger
- Cabinet Bumpers
Tools
- Tape Measure
- Kreg Multi-Mark
- Miter Saw
- Scroll Saw or Jigsaw
- Drill
- Awl
- ⁷/₃₂” Drill Bit
- ⁵/₆₄” Drill Bit
- Countersink Drill Bit
- Router Table (optional)
- ⅜” Cove Router Bit (optional)
- Portable Spindle Sander (optional)
- Disc Sander (optional)
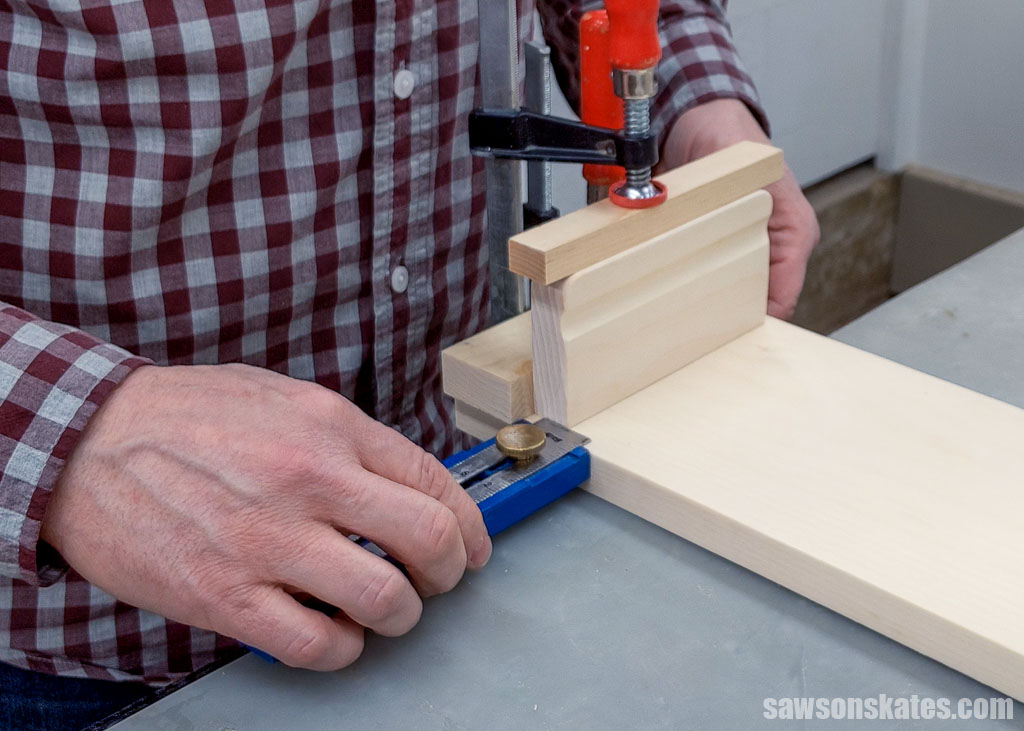
Step 1. Make the Key Holder’s Back
Cut one piece of wood to length for the back.
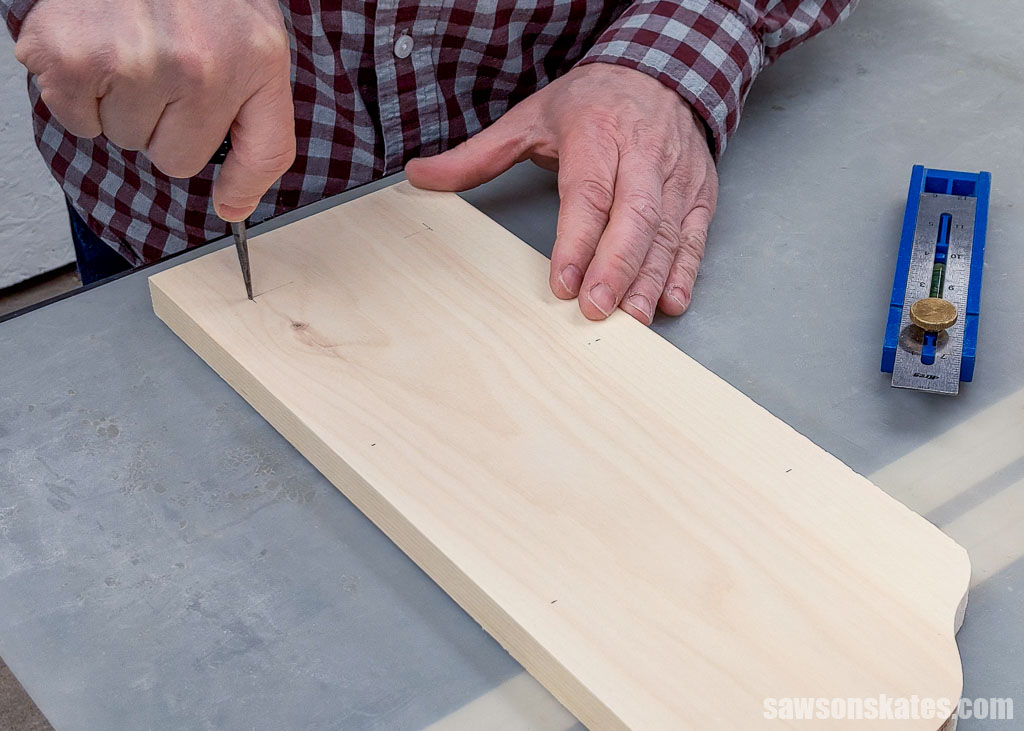
Print the back template at the end of the plan, position it so the pattern’s top is about a pencil point’s width from the edge, and trace it on the board.

I used a scroll saw to cut the top’s curved detail, but a jigsaw might also work. Whichever saw you choose, leave your pencil line, then fine-tune your cut by sanding up to it.
A portable spindle sander is the way to go to quickly and effortlessly smooth the inside curves.
Related: The Best Sanders for Furniture (Which One to Buy & Why)
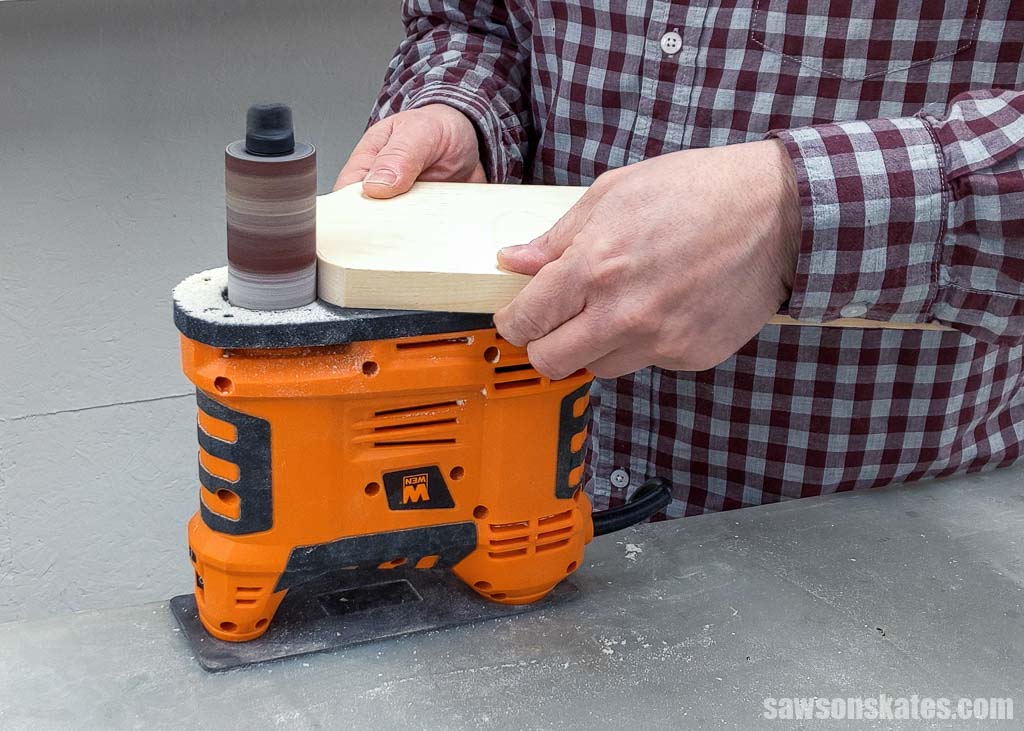
A disc sander is an excellent way to smooth the top’s outside curve; however, you can smooth the top with sandpaper if you don’t have a spindle or disc sander, but it will take a little more time.
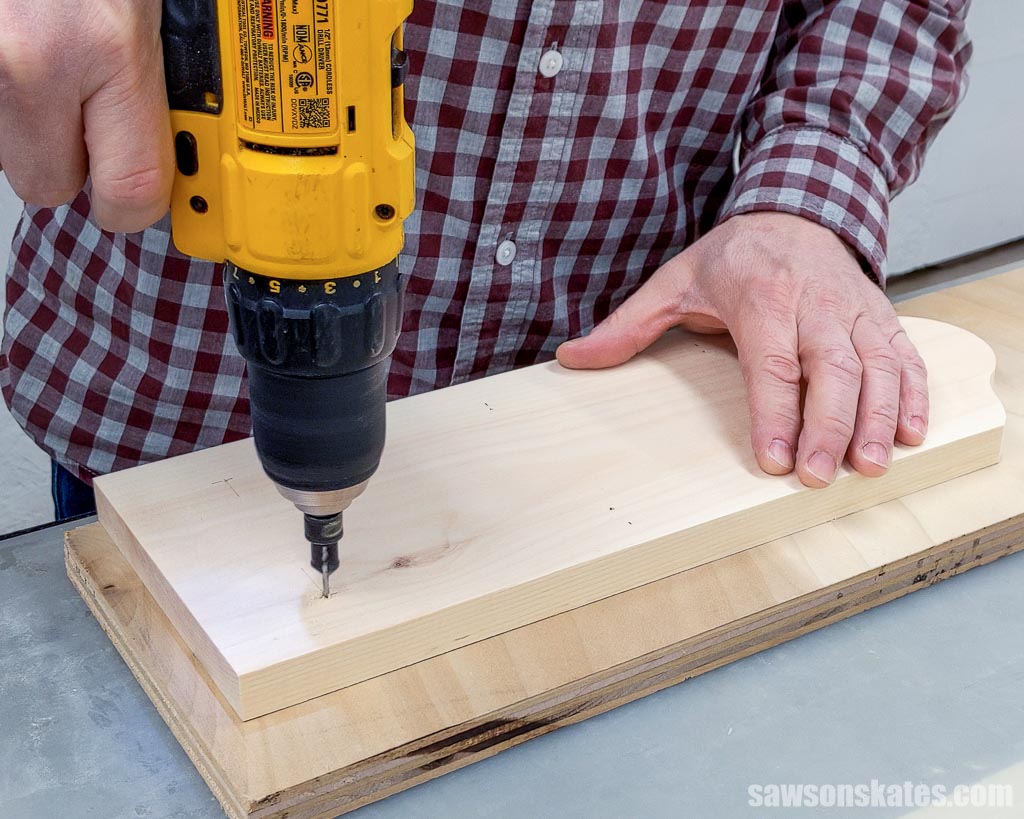
Next, use the diagram in the printed plan to mark the location for holes that will connect the back to the shelves.
Use an awl to make a starting point for the drill bit at each mark.
Related: What is an Awl? (& How to Use It)
Then use a countersink bit to make a hole at each location.
Related: How to Use a Countersink Bit
The drawback to this holder’s design is the grain of the back, and the shelves are oriented in different directions. In other words, the shelves will prevent the back from moving as it expands and contracts with changes in temperature and humidity, which may cause it to crack.
Related: Mistakes with Wood Can Cause Your DIY Furniture to Crack
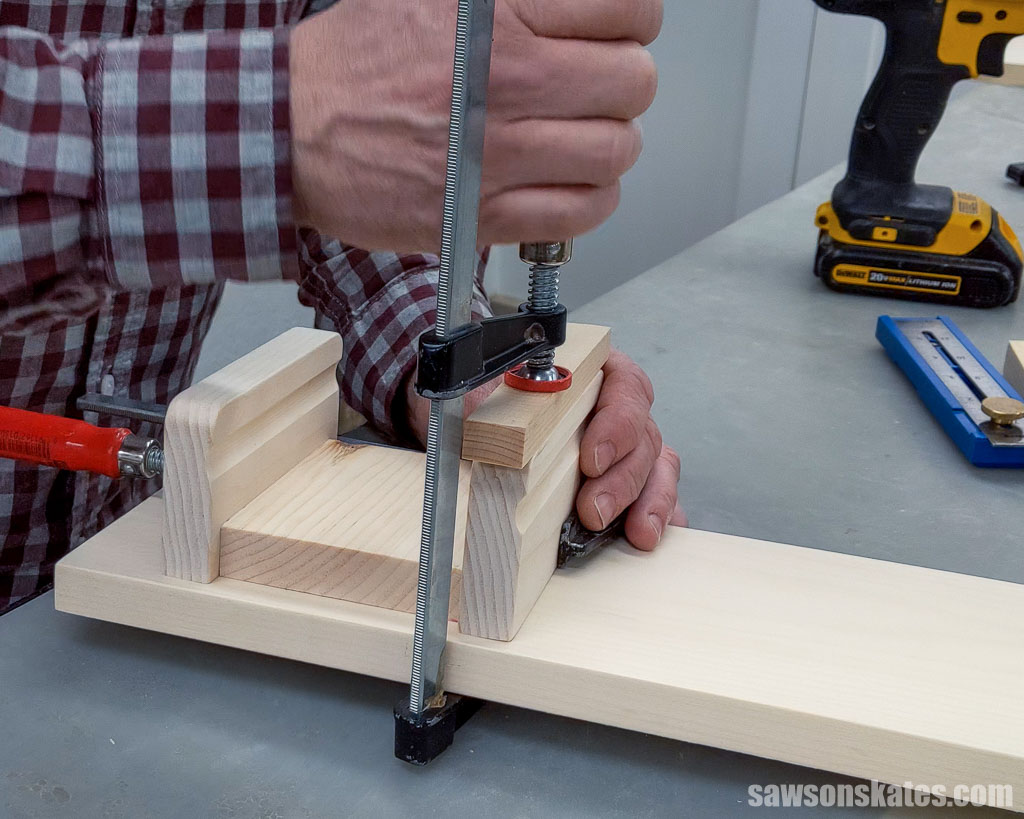
To reduce the risk of cracking, I used a drill bit to increase the size of the holes, allowing room for the screws to slide side to side as the back moves with seasonal changes.
The drill bit can cause the wood to tearout on the front side of your project. For the best results, clamping a sacrificial board will help support your workpiece as the drill bit exits, reducing the risk of tearout. Otherwise, you may run into issues as I did. I didn’t clamp my workpiece; it lifted away from my sacrificial board, causing a blowout.
Step 2. Make the Shelves
I used a router to make a shallow groove in the shelves, allowing you to stand up items like wallets or envelopes without sliding off. You can skip this if you don’t want to add a groove or don’t have a router. In that case, cut three pieces of wood to length for the shelves.
If you want to add a groove, I think it’s easier to rout it first, then cut the shelves to length. In this case, cut one piece of wood to length.
Make a Groove (optional)
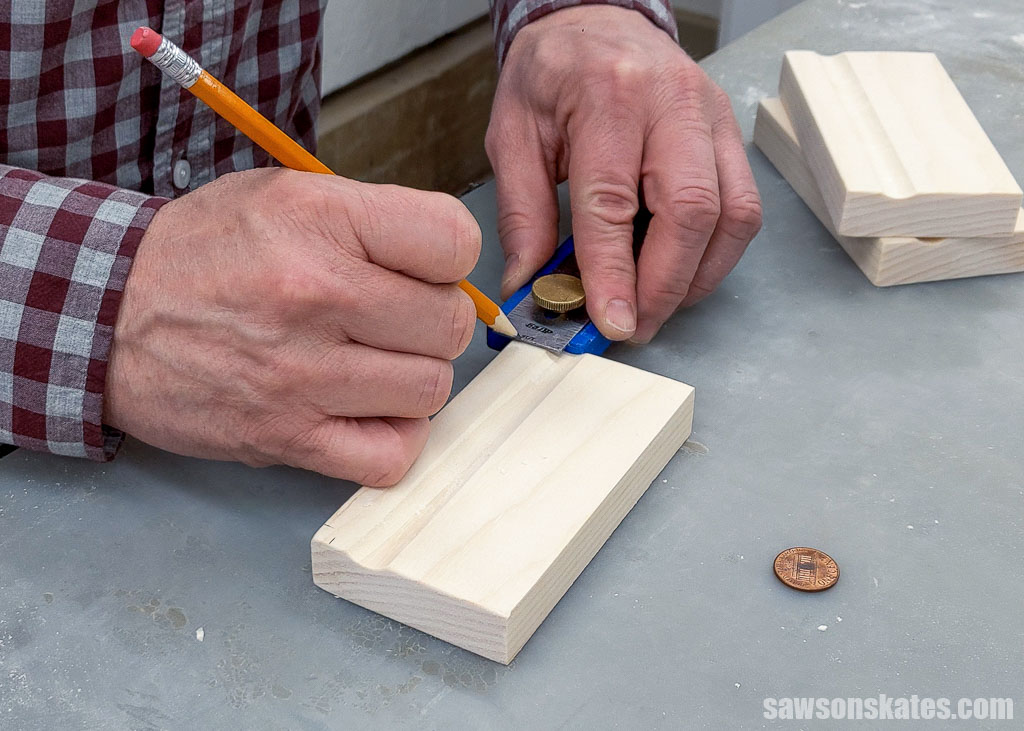
I used my Kreg Multi-Mark to make a pencil line.
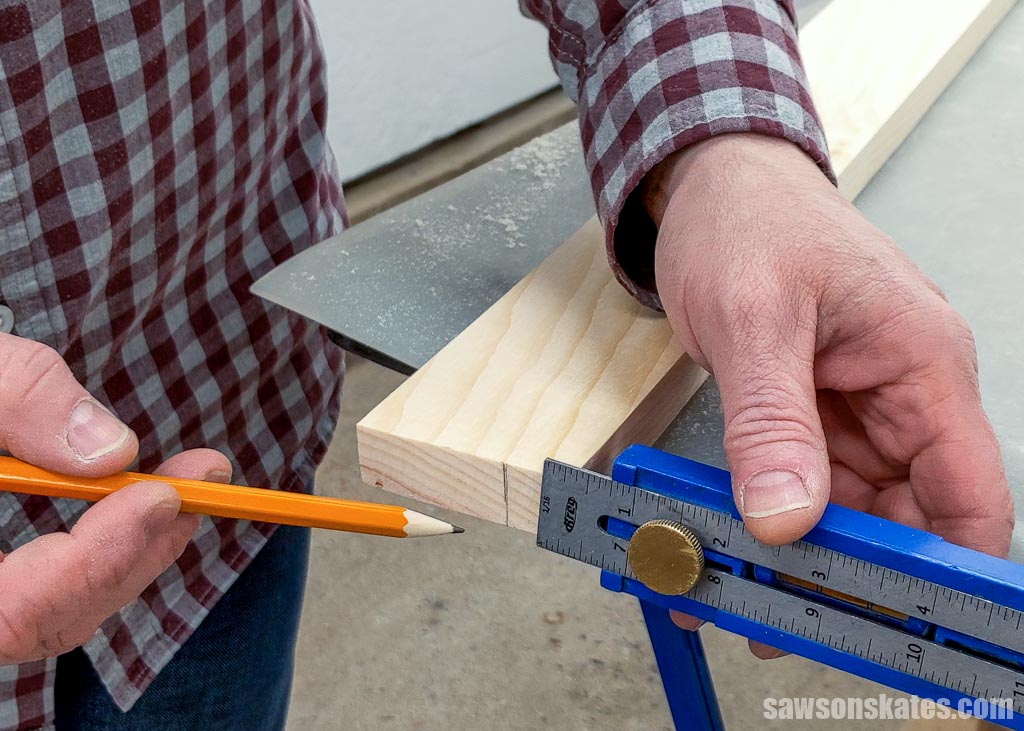
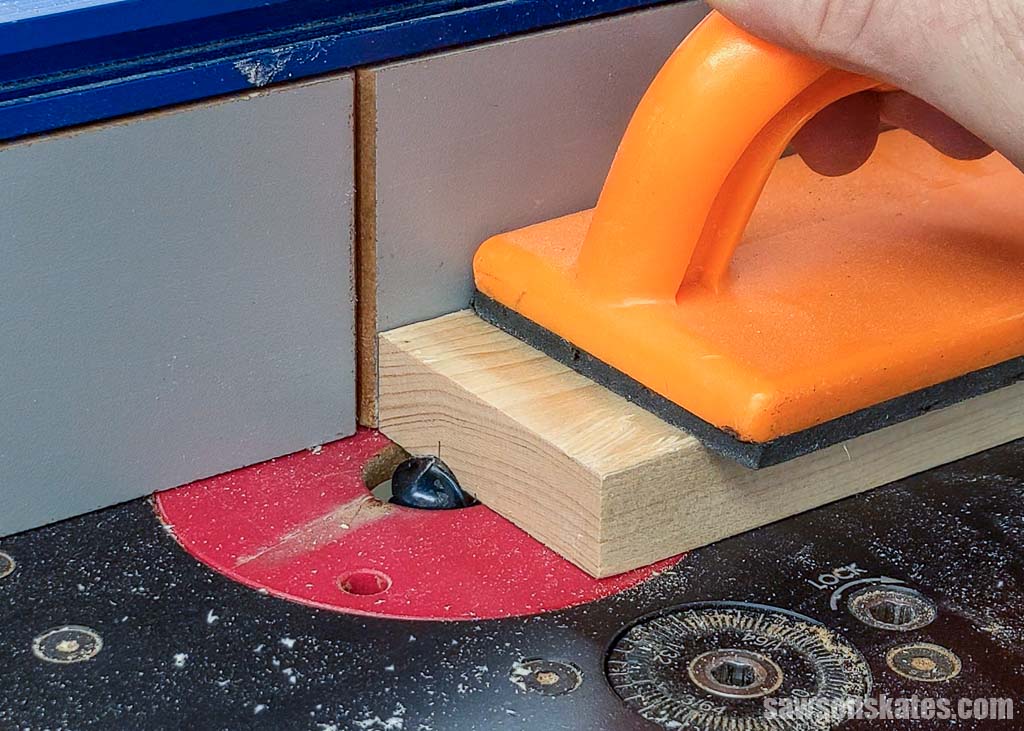
To make the groove, I installed a cove bit in my router.
Then I set the router table’s fence so the pencil mark was centered over the middle of the bit and used a push block to feed the material.
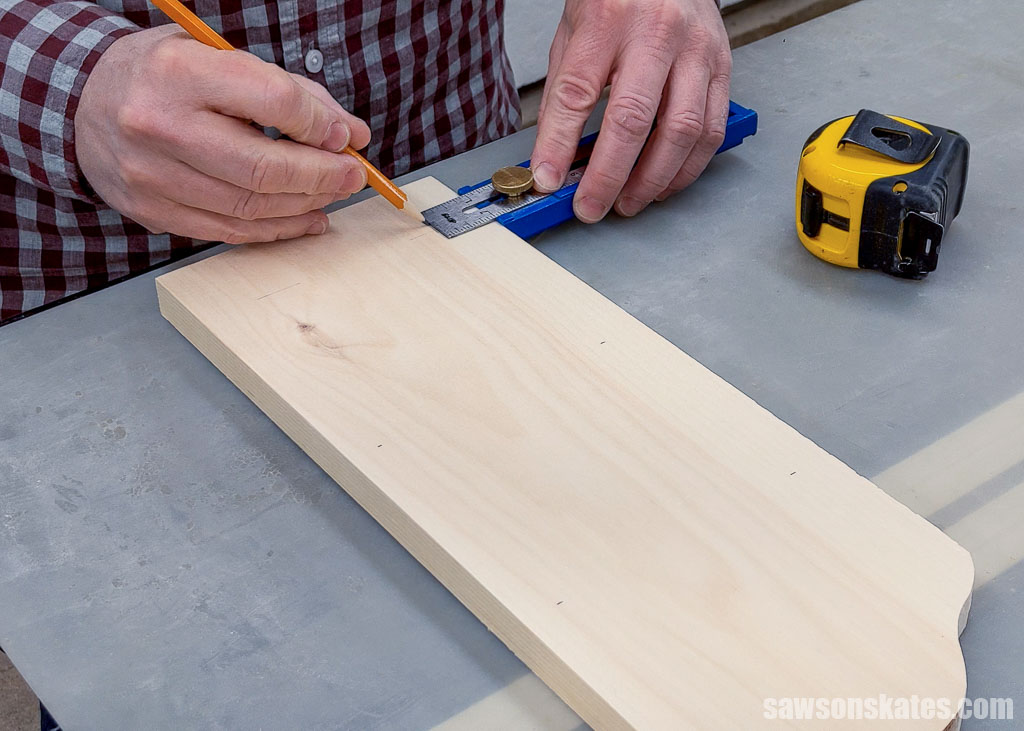
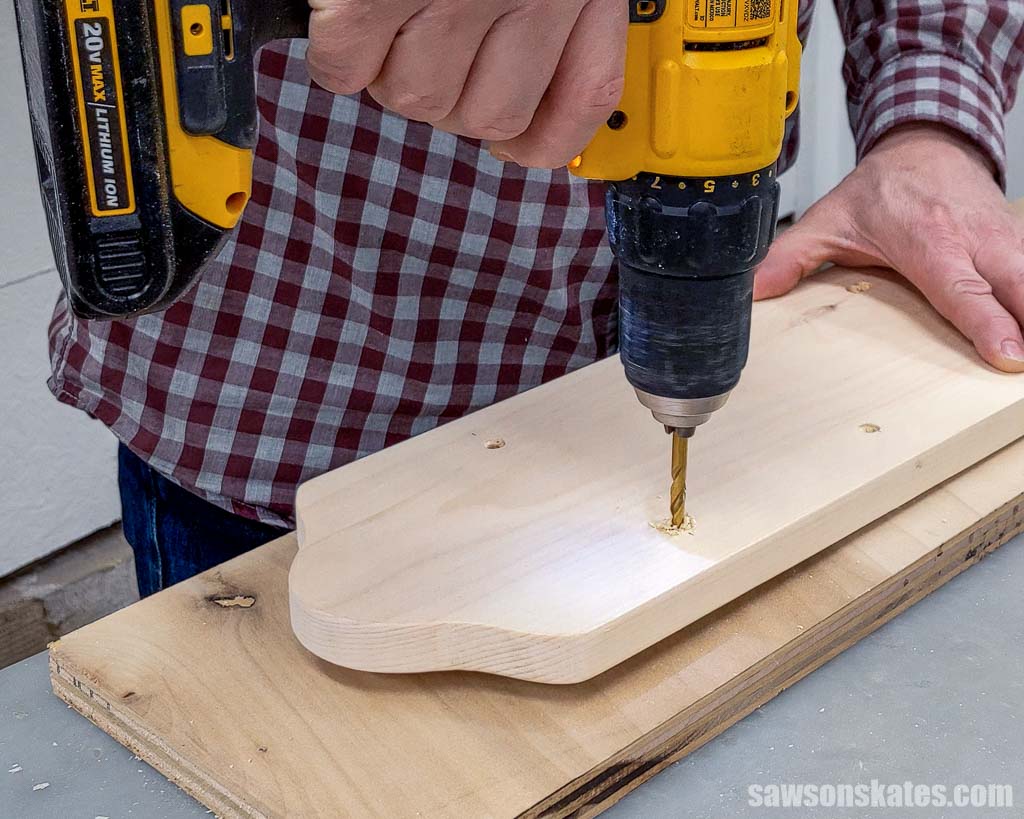
Round the Corners (optional)
The corners looked too square for my taste, so I rounded them off.
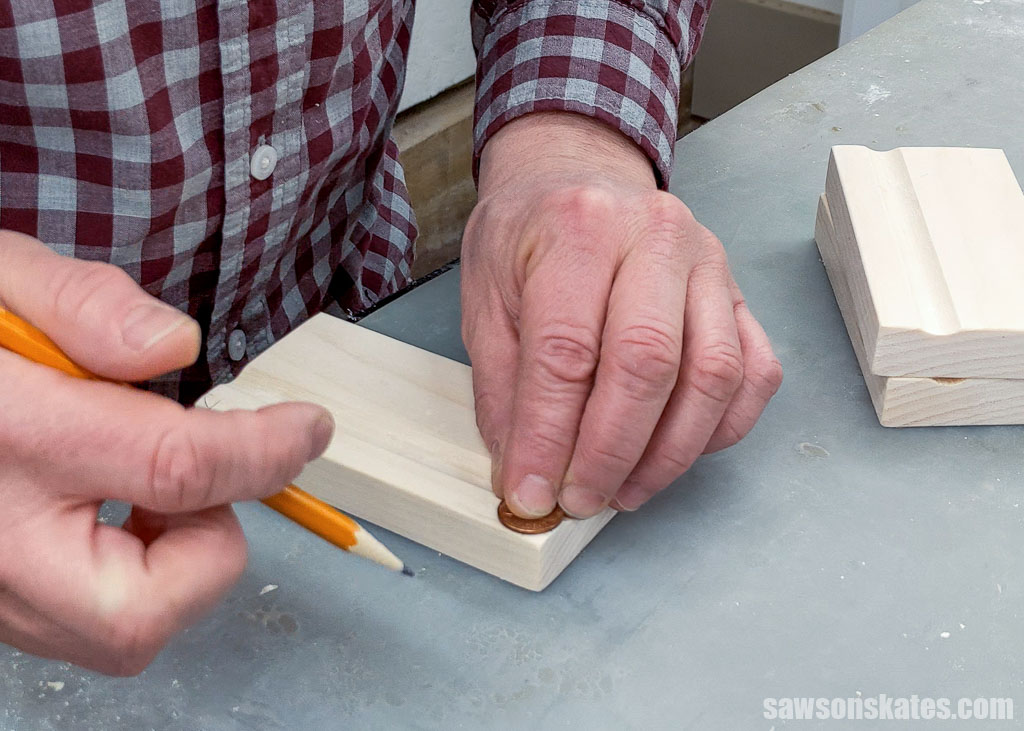
First, I made a mark on each front corner.
Next, I placed a penny on each mark and traced it with a pencil.
Then I use my disc sander to remove the corners, but you could use a sanding block instead.
Step 3. Attach the Shelves
If you haven’t already, now is a good time to sand all of your parts.
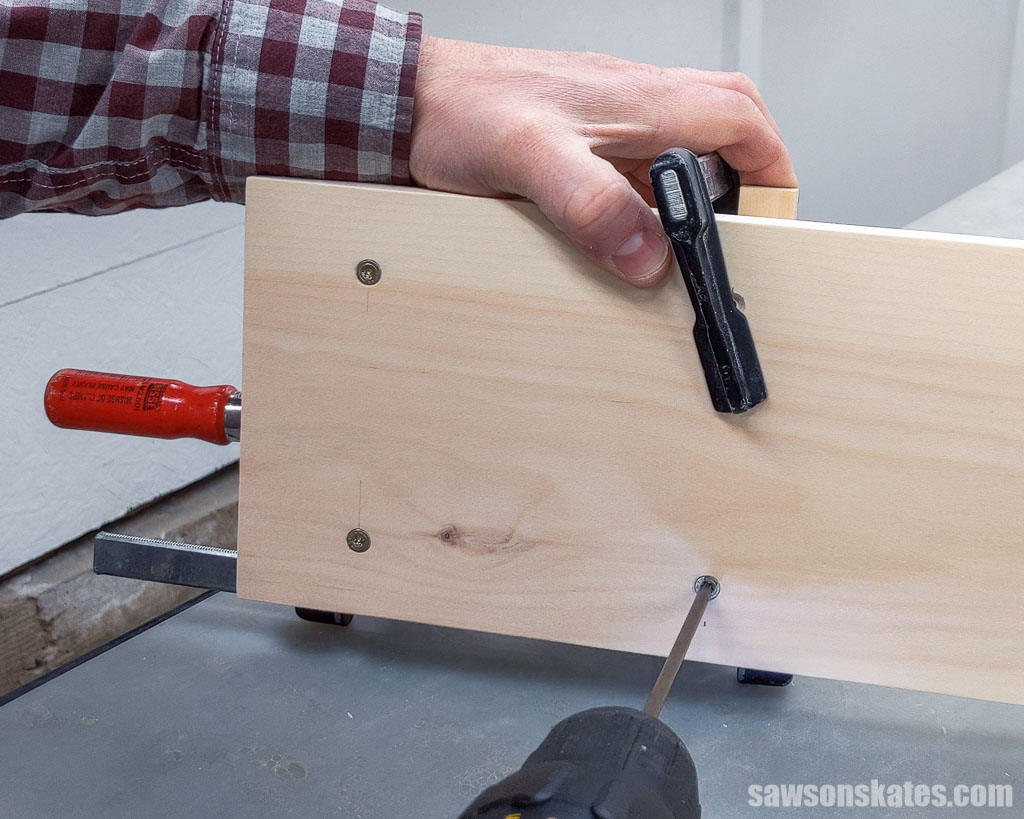
The lower shelf sets up from the back’s bottom. I clamped a scrap wood piece to the bottom to help position the first shelf.
I placed the shelf on top of the scrap wood, used my Kreg Multi-Mark to center it on the back, and clamped it in position.
Then I attached the shelf using wood screws.
TIP: Make sure the screws are centered in the holes and tightened until they are “just snug.” Over-tightening could prevent the back from moving with seasonal changes.

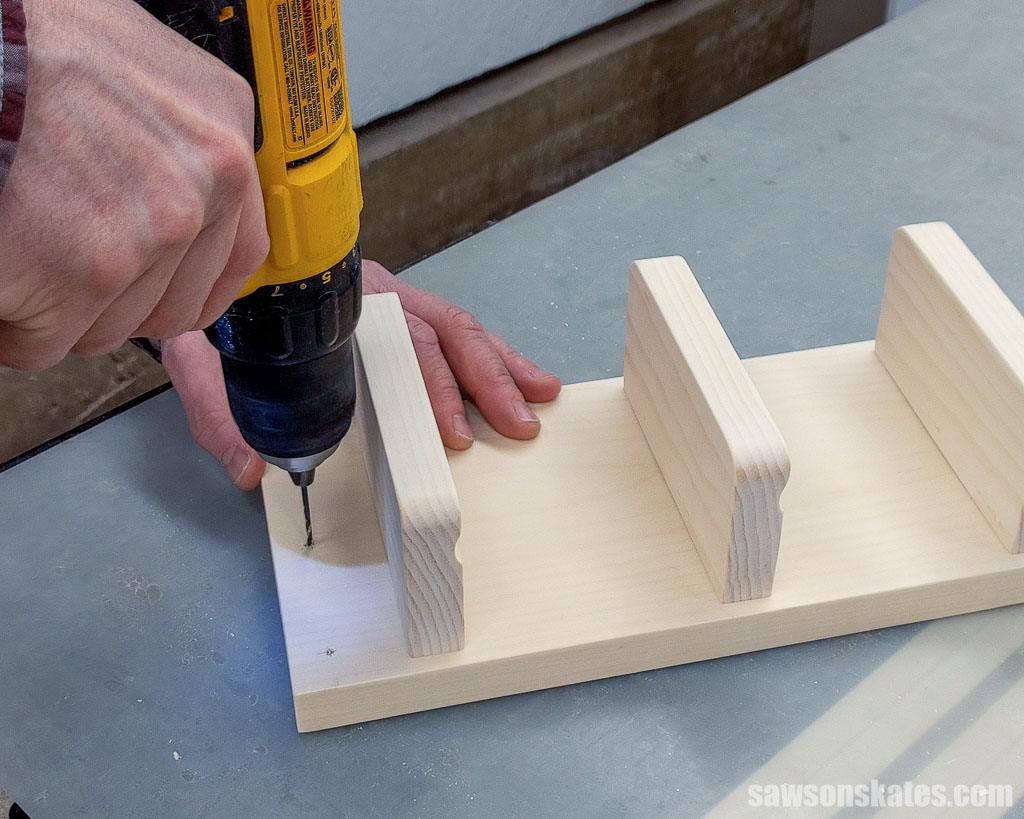
I placed a scrap wood piece on top of the bottom shelf, to help position the middle shelf. I used my Kreg Multi-Mark to center it on the back and clamped it in position.
Then I attached the shelf using wood screws. Repeat for the top shelf.
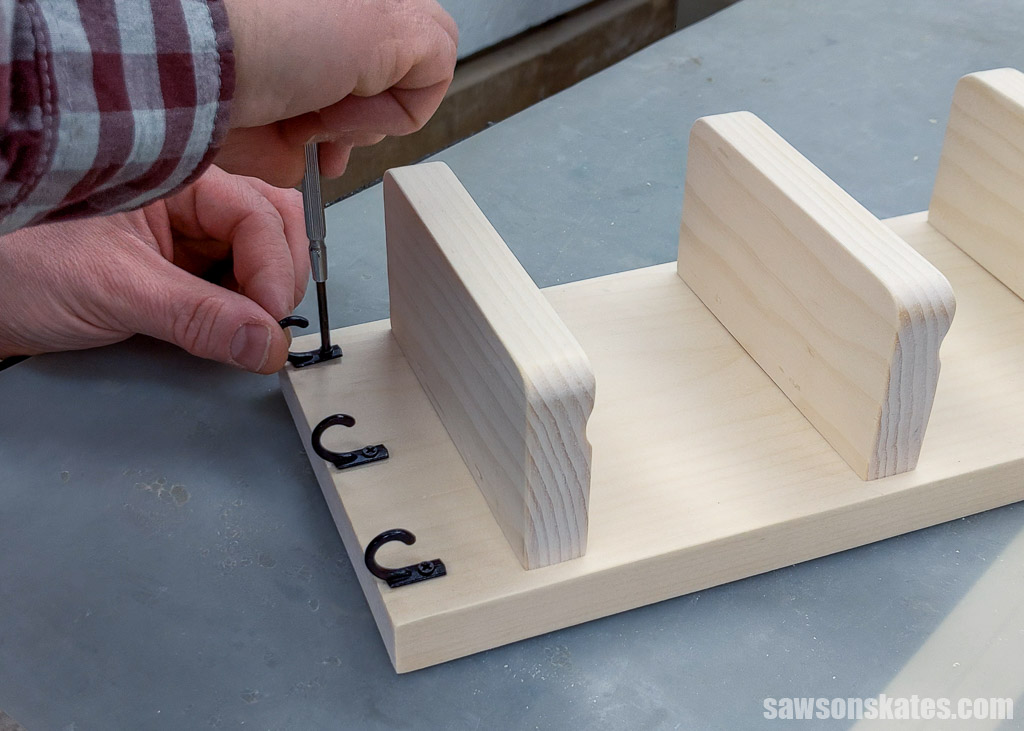
Step 4. Attach the Hooks
I used these hooks for my holder, but your locations may vary if you use different ones.
Use the diagram in the printed plan to mark the location for pilot holes that will attach the hooks to the back.

I used an awl to make a starting point for the drill bit.

Then I used a drill bit to make a pilot hole.
Related: How to Drill Pilot Holes (Why, When & Correct Size)
I positioned a hook over the hole and attached it using a screw that came with it. Repeat for the remaining hooks.
Step 5. Attach the Hanger
I used a sawtooth picture hanger to attach the holder to the wall. Position the hanger on the back and attach it with the screws that came with it.

Step 6. Finish Your Key Holder
See How Do You Finish the DIY Key Holder for more information.
After you’ve applied your chosen finish, I recommend attaching a cabinet bumper to each bottom corner on the backside of the holder to reduce the risk of it tipping from side to side.
Includes:
- List of tools and materials
- Complete measurements (in inches)
- Easy-to-follow instructions
- Step-by-step photos
- Detailed diagrams
Final Thoughts
This DIY wall-mounted key holder with shelves is an easy, attractive, and affordable weekend project. It’s an excellent way to keep track of your keys and organize smaller items like wallets, sunglasses, and watches.
Don’t wait. Get your PDF plan (including the detailed instructions and measurements) now!
Thank you for stopping by. If you enjoyed this tutorial, would you please take a moment and pin it to Pinterest? I’d really appreciate it!
Recommended For You
Pin This For Later

Hi there – I’m Scott, a woodworking enthusiast and creator of Saws on Skates, a site I started in 2015 to share easy-to-follow tutorials, space-saving shop tips, and project inspiration for DIYers at any skill level. Learn more about my woodworking journey here.