Farmhouse DIY Dog Stairs
Give your pup a boost on the couch or bed with these DIY dog stairs! The wood stairs are easy to make, and the subtle farmhouse look complements any decor.
What Should I Build Next?
That's the question I help answer.
Every week, I send woodworking ideas to 17,000 DIYers who love building things.
You'd fit right in.
DIY Dog Stairs
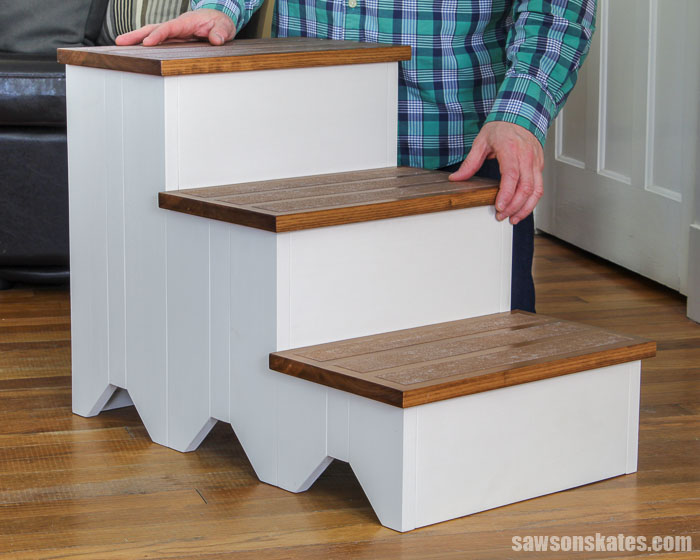
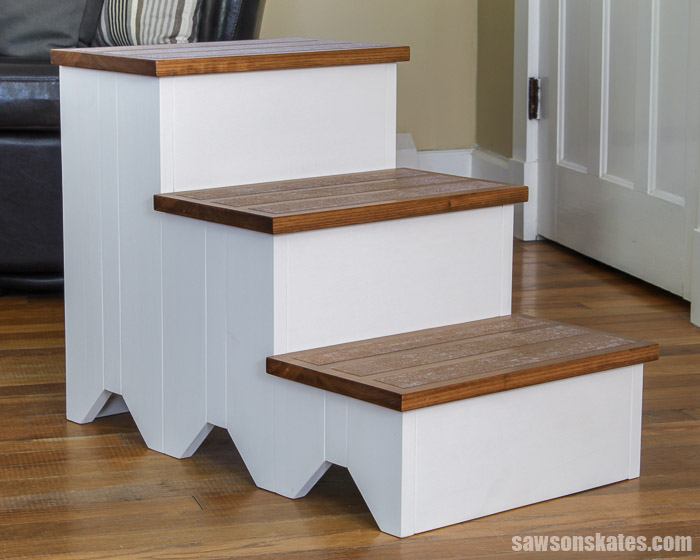
These DIY dog stairs are perfect for an aging pooch with joint problems or a small pup who needs an extra boost onto a sofa or bed.
The stairs are constructed with solid wood and they’re easy to make with just a few basic woodworking tools.
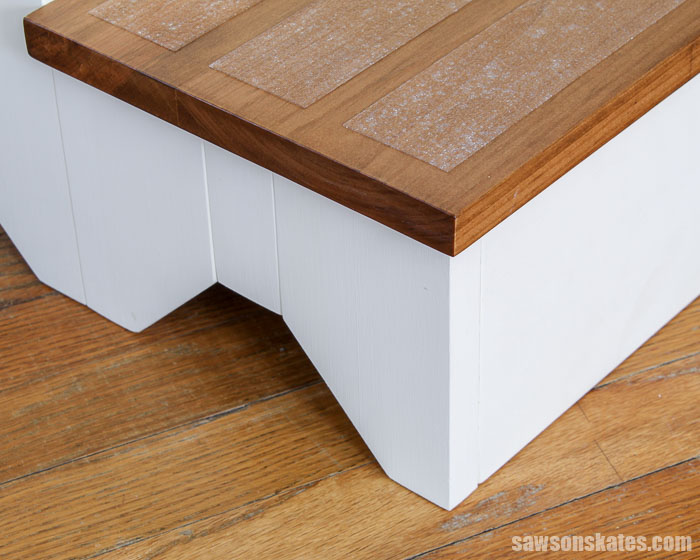
The steps can be covered with carpeting, but I chose to apply strips of clear anti-slip tape instead. The clear tape complements any decor and gives these homemade stairs a professional, store-bought look.
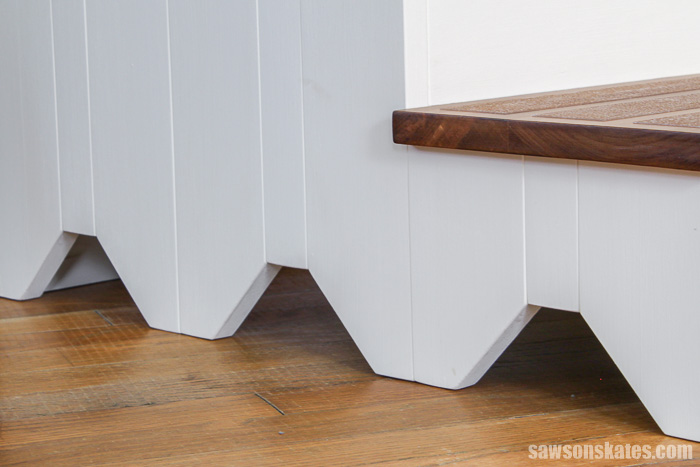
The sides of the doggie stairs have a simple detail at the bottom that gives this piece a subtle farmhouse feel.
You may also enjoy this DIY Dog Gate.
Table of Contents
- What Skills Do You Need to Build These DIY Dog Stairs?
- What Tools Do You Need to Build These DIY Dog Stairs?
- What’s the Best Type of Wood For Dog Steps?
- How Do You Finish the DIY Dog Stairs?
- Where to Buy Dog Stairs
- How to Make a DIY Dog Stairs
- Get the Free Printed Plan
What Skills Do You Need to Build These DIY Dog Stairs?
These DIY dog steps are an easy-to-make project for DIYers of any skill level.
The steps were made using simple construction methods and just a few basic tools which makes this a great project for beginners.
Related: 10 Must-Have Woodworking Tools for Beginners
Back to Table of ContentsWhat Tools Do You Need to Make These DIY Dog Stairs?
Many homemade dog steps are made with plywood. Plywood can be difficult to work with for some do-it-yourselfers.
Plywood can be difficult to transport. It then needs to be cut with either a circular saw or a table saw. I understand many DIYers either don’t have a table saw or are not comfortable using one.
Related:
I designed this set of stairs with solid wood boards rather than plywood. This means we only need a miter saw to cut the wood for this project.
Related: 7 Miter Saw Tricks Every DIYer Should Know
We also need a few other basic tools to build this project. Tools like Kreg Jig, a drill, and an assortment of bar clamps.
It’s also important to have a right angle driver attachment. Some of the pocket hole locations on this project are almost impossible to reach with a traditional driver.
A right angle driver attachment is the perfect tool to drill in a tight spot or to drive screws in hard-to-reach places.
Related: Why You Need a Right Angle Driver
Back to Table of ContentsWhat’s the Best Type of Wood For Dog Steps?
As I mentioned earlier, sometimes plywood can be difficult to work with for some DIYers. This is especially true for those of us with small workshops.
I designed these DIY pet stairs with pine boards rather than plywood. I think smaller boards like 1×4s and 1×6s are much easier to work with than large sheets of plywood.
Related: Beginner’s Guide to Wood Sizes
How Do You Finish the DIY Dog Stairs?
These DIY dog stairs could be finished in a variety of ways. They could be painted, stained, or a combination of paint and stain.
I chose to do a combination of paint and stain for my pet steps.
I wanted to keep this project simple so I painted the sides of the steps with this chalk-type paint. Unlike other types of paint, we don’t need to apply a primer to the wood before applying a chalk-type paint.
I sanded the wood smooth and applied the paint with this paintbrush. Chalk-type paint dries quickly so I was able to apply two coats in just a few hours.
For the treads, I applied five coats of this homemade black walnut stain. When the stain was dry, I lightly sanded with 220 grit sandpaper, and removed the sanding dust with a ShopVac.
Related: How to Make a DIY Black Walnut Stain
Next, I applied one coat of this wax-free shellac. When the shellac was dry, I lightly sanded with 220 grit sandpaper, and removed the sanding dust with a ShopVac.
Related: What You Need to Know About a Shellac Wood Finish
I followed the shellac with a couple of coats of this matte-finish Minwax Polycrylic. Polycrylic is not as durable as polyurethane, so you may want to consider using polyurethane for your project instead.
Related: Polycrylic vs Polyurethane: Are They The Same?
Back to Table of ContentsWhere to Buy Dog Stairs
Store-bought dog stairs are available if you don’t have the tools or time to make them. Here are a few options you can buy online and have sent to your home.
Back to Table of ContentsDIY Dog Stairs
Printed Plan
- Click here to get the FREE plan (includes detailed instructions, measurements, and bonus tips)
Supplies
- Wood (per printed plan)
- 1-¼” Pocket Screws
- 1-¼” Wood Screws
- #6 ½” Wood Screws
- Wood Glue
- Figure-8 Table Top Fasteners
- Chalk-Type Paint (I Used this one)
- Wax-Free Shellac
- Matte-Finish Minwax Polycrylic
- Anti-Slip Tape
Tools
- Tape Measure
- Drill
- Kreg Jig
- Kreg Multi-Mark
- Miter Saw
- Forstner Bit Set
- Right Angle Driver Attachment
- Chisel
Step 1. Make the Sides
Cut the wood to length for the top, bottom, and middle sections of the sides. Drill pocket holes, apply glue, clamp, and attach using pocket screws.
Related: How to Use a Kreg Jig
Layout the sections so that you have a right and left side. Drill pocket holes in the bottom section and the middle section. Apply glue to the edges, clamp and attach using pocket screws.
Step 2. Attach the Riser Cleats
Cut 6 pieces of wood to length for the front cleats and drill 2 countersink holes in each piece.
Related: How to Use a Countersink Bit
Cut 4 pieces of wood to length for the rear cleats. Drill a pocket hole and 2 countersink holes in each piece.
Position the cleats on the side, clamp, and attach using wood screws. Repeat for the other side.
Step 3. Make the Treads
Cut 2 pieces of wood to length. Apply glue to the edge, and clamp. When the glue is dry, cut 3 pieces to length for the treads.
Step 4. Attach the Risers
Cut 4 pieces of wood to length and drill pocket holes in each end. 3 of the pieces will be used as risers, and 1 piece will be used as a stretcher on the back. Attach the risers to the sides using pocket screws.
Apply glue to the ends of the stretcher, clamp to the sides, and attach using pocket screws.
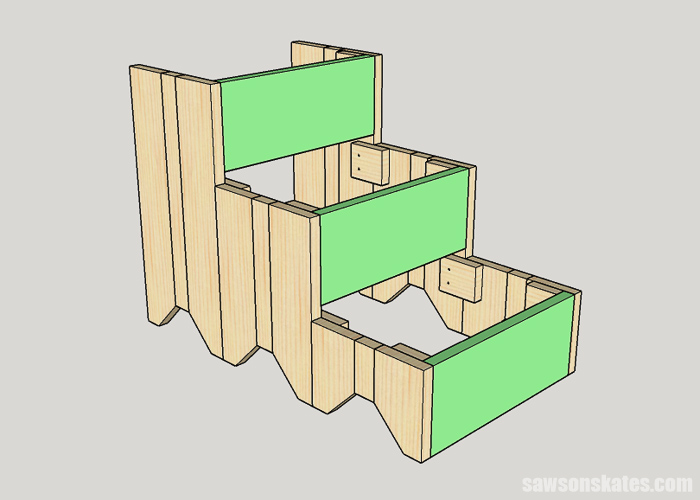
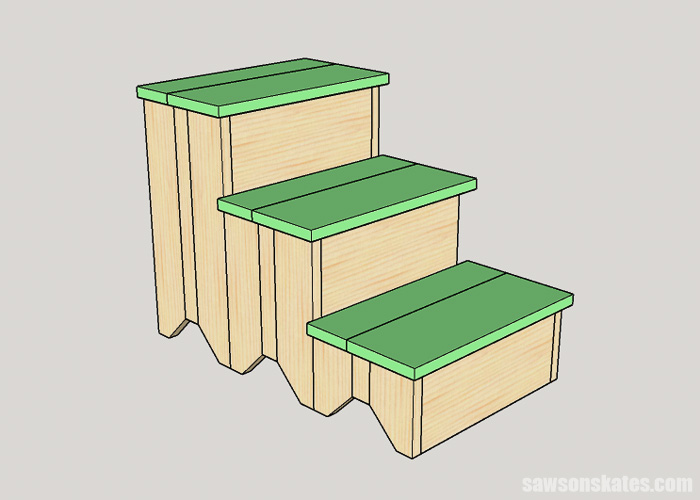
Step 5. Attach the Treads
On the front cleats, use a Forstner bit to drill a hole for a table top fastener. Attach a table top fastener in each hole using a wood screw.
Related: Learn More About Table Top Fasteners
Center the treads on the stairs. Attach the treads using a pocket screw through the back cleat and a wood screw through the table top fastener in the front cleat.
Step 6. Finish the DIY Dog Stairs
See How Do You Finish the DIY Dog Stairs? for more information.
Final Thoughts
These DIY dog stairs are perfect for an aging pooch with joint problems or a small pup who needs an extra boost onto a couch or bed. They’re easy for anyone to make with just a few basic woodworking tools.
Click here to get the free plan (including the detailed instructions, diagrams, and measurements) now!
Thank you for stopping by. If you enjoyed this tutorial, would you please take a moment and pin it to Pinterest? I’d really appreciate it!
Recommended For You
Pin This For Later

Hi there – I’m Scott, a woodworking enthusiast and creator of Saws on Skates, a site I started in 2015 to share easy-to-follow tutorials, space-saving shop tips, and project inspiration for DIYers at any skill level. Learn more about my woodworking journey here.