DIY Mid-Century Modern One-Drawer Nightstand
Are you craving some mid-century modern flair in your bedroom? In this step-by-step tutorial, I’ll show you how to make a stylish and functional nightstand with a single drawer. Using a few basic tools and materials, you’ll learn to build a sturdy, statement piece that perfectly complements your decor.
What Should I Build Next?
That's the question I help answer.
Every week, I send woodworking ideas to 17,000 DIYers who love building things.
You'd fit right in.
Originally published September 9, 2017, republished January 27, 2025.
Table of Contents
This article contains affiliate links. If you purchase from these links, I may earn a small commission at no additional cost to you. Visit my site policies for more information.
Inspiration for This Project
Finding furniture for my loft-style bedroom is challenging because I only have one wall to put my bed against, and it’s a short knee wall, meaning it’s about the height of your knee.
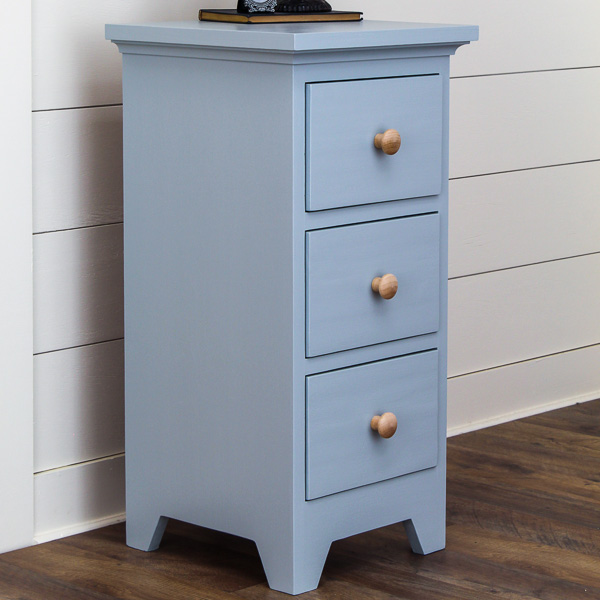
I needed nightstands, so I built this version, and while I liked the compact size, it felt too small for the space.
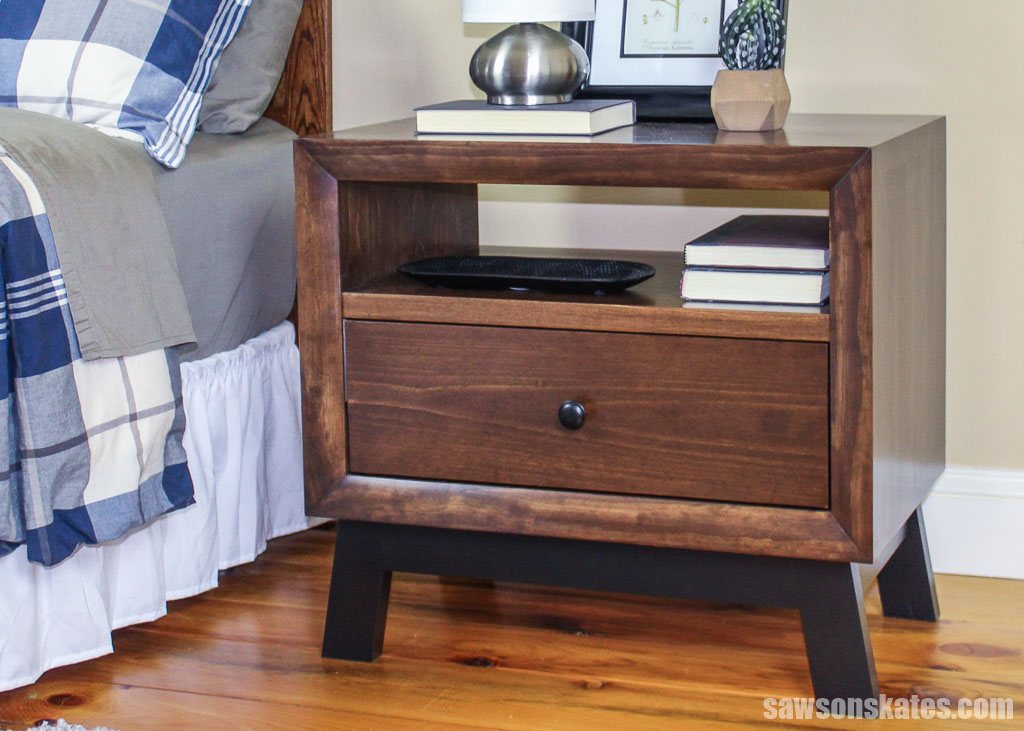
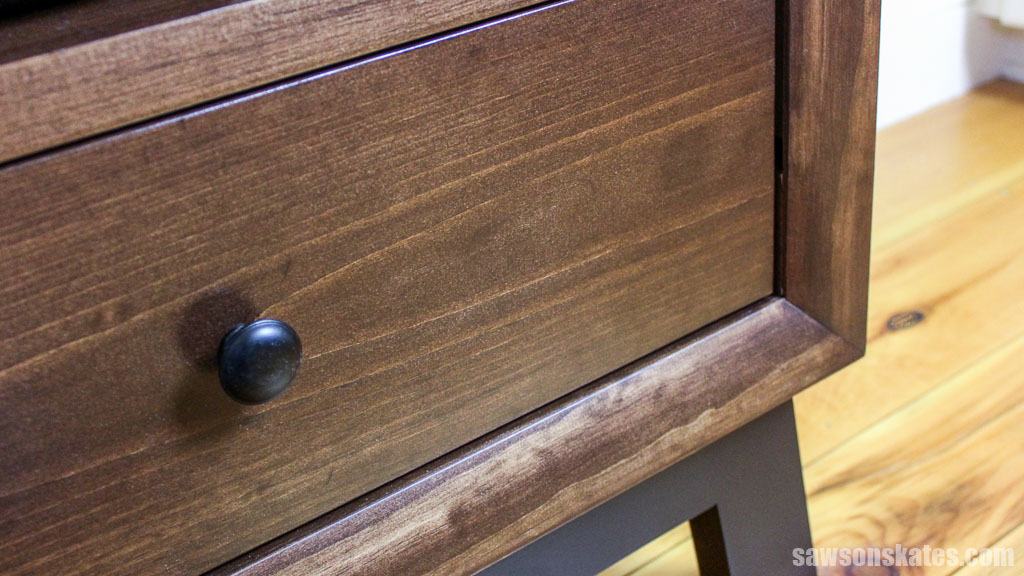
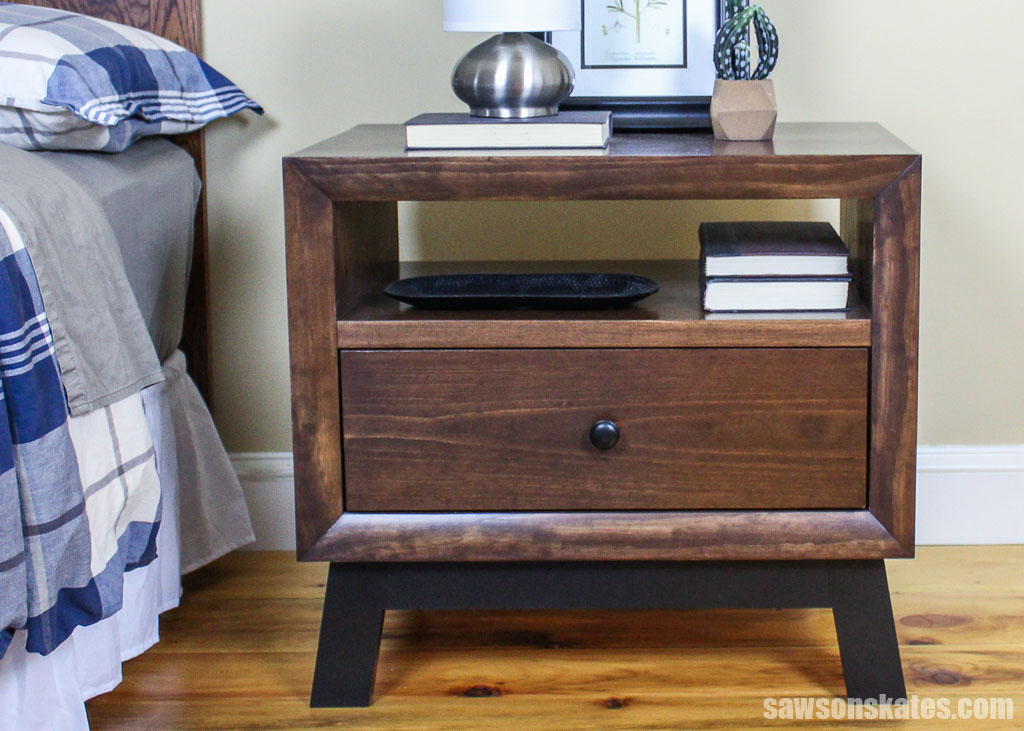
Then, while browsing a furniture store with a friend, I found inspiration for my next version. My new nightstand features angled legs, a storage shelf, and a deep drawer, all with a sleek Mid-Century Modern (MCM) design. I used window/door casing molding to make the face frame, giving this project a thick, chunky look.
The shelf is perfect for storing books, magazines, reading glasses, remotes, phones and more.
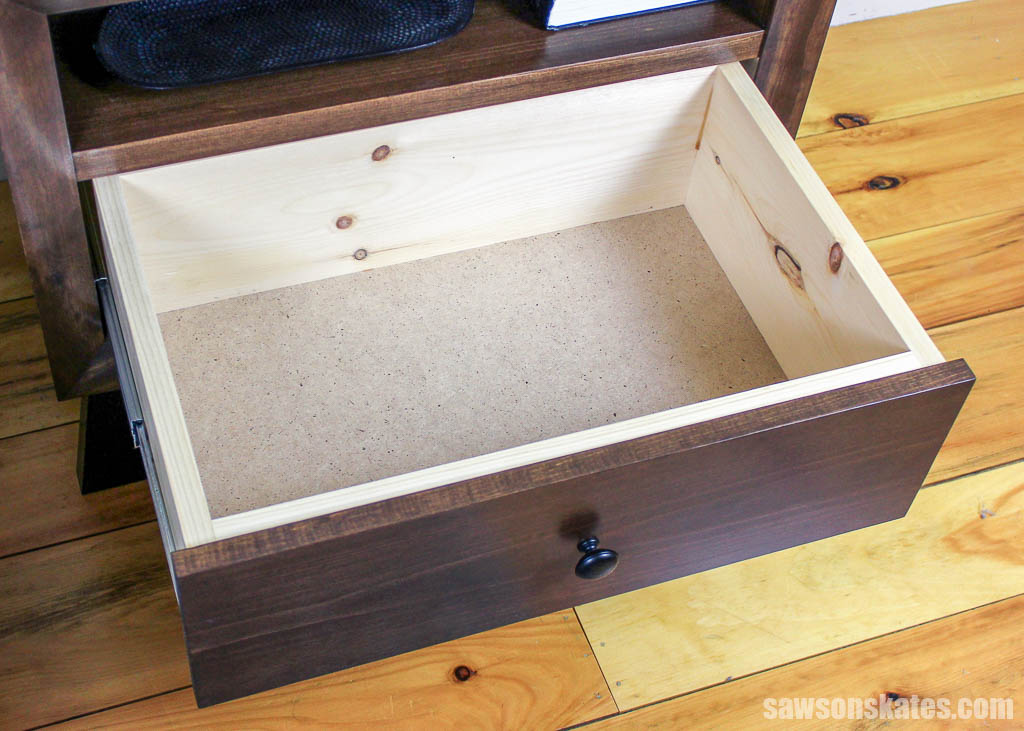
There’s more storage in the deep drawer below the shelf. The drawer’s bottom is made of hardboard, and the only part of the nightstand that is not made of solid wood.
I feel a bit like Goldilocks. I used these nightstands for a while, but they started to feel too big for my small bedroom. When my friend needed nightstands for his vacation rental, I was happy to give them to him. Honestly, they look much better in that room with the large headboard – they’re the perfect size.

What Would Should You Use?
I chose 5/4 pine (spoken as five-quarter) for this project because its 1-⅛” thickness closely matched the inspiration piece. However, I always hesitate to publish plans using it for several reasons.
First, past experiences have shown that this wood dimension can confuse DIYers.
Related: Beginner’s Guide to Wood Sizes
Also, I’ve received comments from readers expressing difficulty finding 5/4 in their local stores. While I can easily find it in the pine board section at my local Lowe’s and lumber yard, its availability may be limited in other areas.
Related: How to Buy Wood (Top Tips for Choosing Woodworking Lumber)
How to Make a DIY Mid-Century Modern Nightstand with One Drawer
Printed Plan
Get the PDF plan here (includes detailed instructions, measurements, and bonus tips)
Materials
- Wood (per the printed plan)
- 1-¼” #8 Wood Screws
- 1-¼” Pocket Hole Screws
- 1-½” Pocket Hole Screws
- ½” Brad Nails
- 1” Brad Nails
- 1-¼” Brad Nails
- 14″ Full Extension Side Mount Drawer Slides
- Tabletop Expansion Brackets
- Knob or Drawer Pull
Tools
- Tape Measure
- Drill
- Pocket Hole Jig
- Miter Saw
- Table Saw
- Brad Nailer or Hammer
- Countersink Drill Bit
Before You Begin
I made a design flaw in my original version of this nightstand. I used a corner piece to hide the end grain on the sides, top, and bottom.
This created a problem because the corner was perpendicular to the other boards, preventing them from moving with changes in temperature and humidity, which could cause the boards to crack.
I fixed this in my updated design, but now the top and bottom end grain is exposed on the sides, which doesn’t look as polished.
To improve the look, you could use a table saw and a sled to miter the ends of the top, bottom, and sides, creating a “waterfall” effect when assembled, giving the nightstands a more finished appearance. You’ll need to adjust the length of the sides if you use this method. Otherwise, the nightstand will be shorter than outlined in the plan.
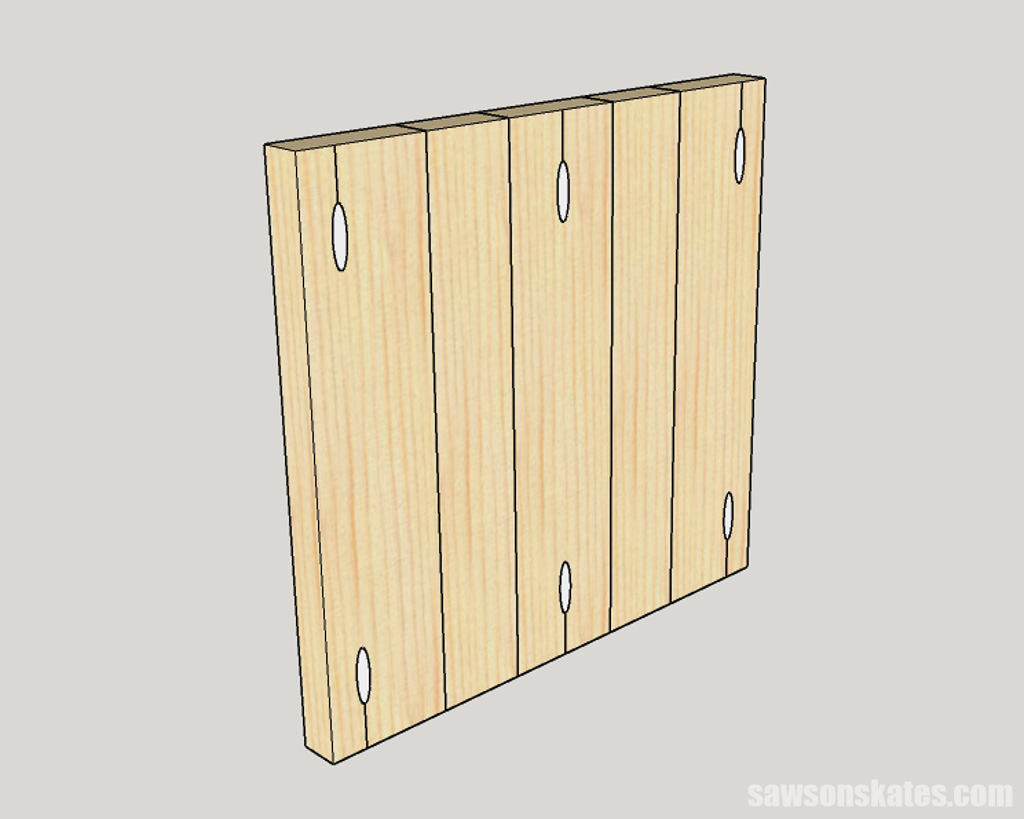
Step 1. Make the Side Panels
I made my side panels from 5/4 boards.
Related: Beginner’s Guide to Wood Sizes
For the best results, I recommend squaring or jointing the edges of your boards before gluing them together, ensuring a tight fit and preventing gaps.
I used a table saw for this, but a jointer is the best option if you have one. And for full disclosure, I sometimes skip the jointing step if my boards’ edges are already reasonably square.
Related: 21 Table Saw Safety Rules (& Mistakes to Avoid)
To make the panels, I cut ten pieces of wood to length for the sides and squared their edges using my table saw.
Related: How I Square Edges Without a Jointer (for Panels and Table Tops)
When the glue is dry, follow the diagram in the printed plan to mark the locations for pocket holes. Set your pocket hole jig and drill one at each mark.
Related: How to Use a Kreg Pocket Hole Jig (& Beginner Pitfalls to Avoid)
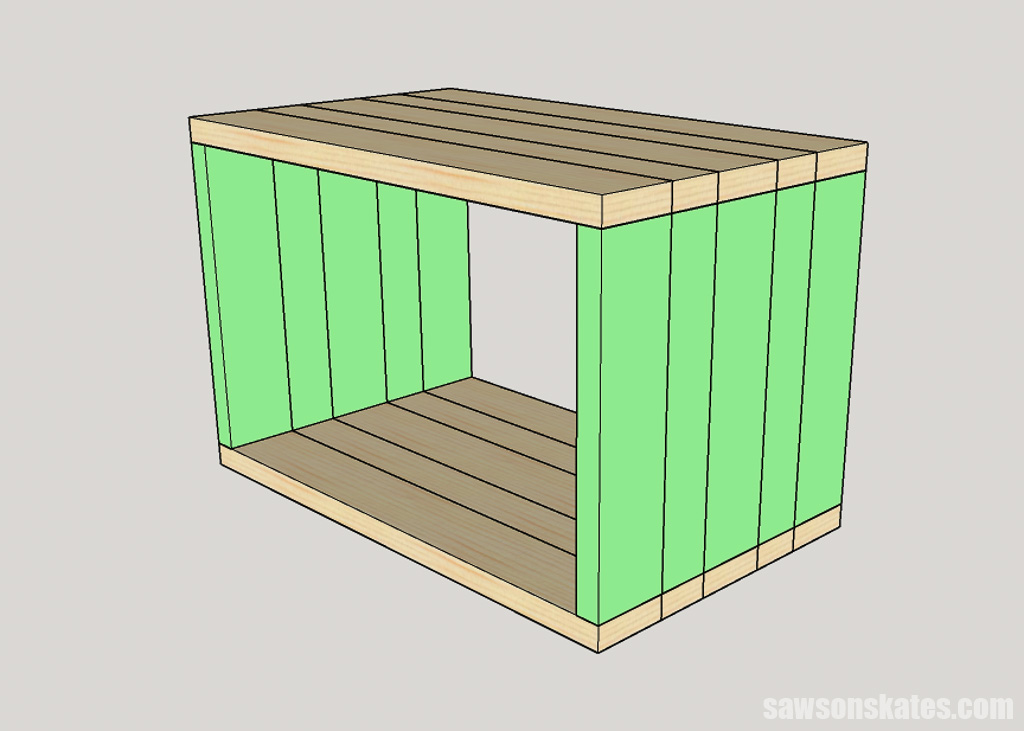
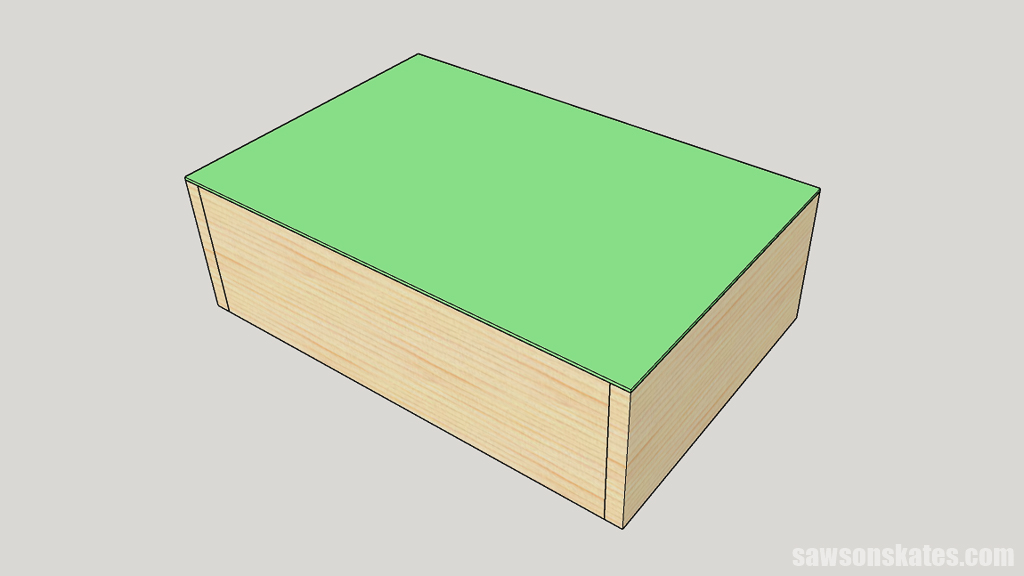
Step 2. Attach the Top and Bottom
I made the top and bottom following the same method as the side panels.
Cut ten pieces of wood to length for the top and bottom. Apply glue and clamp to form two panels.
Apply glue to the ends of the sides, position on the top and bottom, and clamp. Attach using pocket screws.
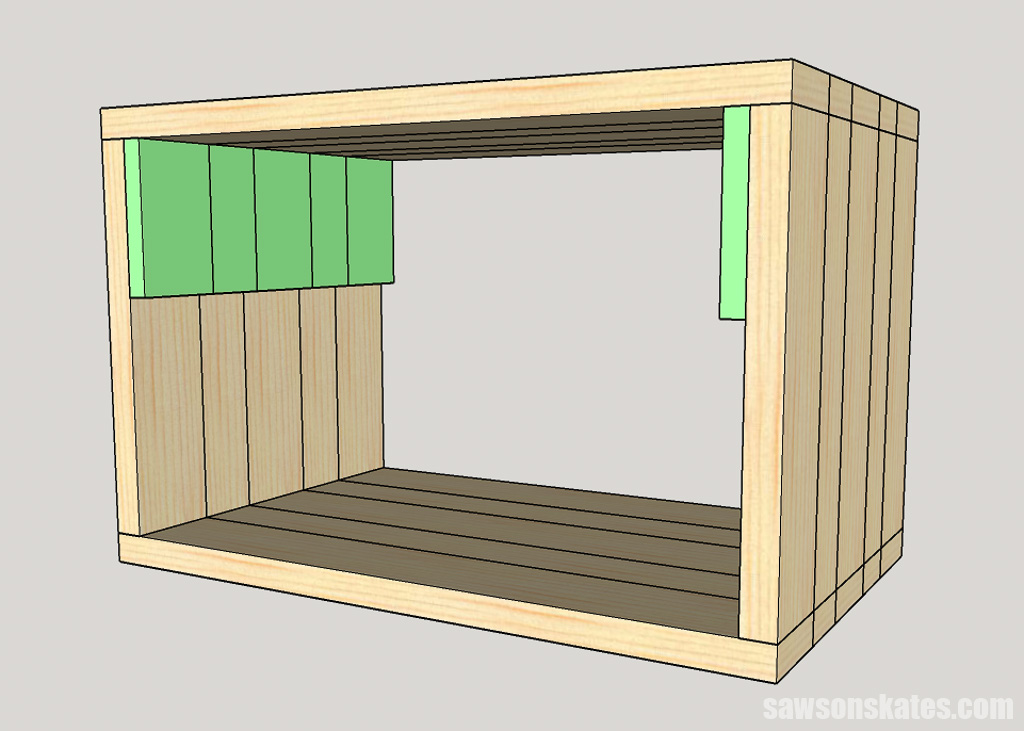
Cut ten pieces of wood to length for the filler panels.
Apply glue and clamp to form two panels. These panels will:
- Help position the shelf
- Hide the pocket holes at the top of the sides
- Provide support for the molding in Step 3
NOTE: I didn’t use a single board for filler panels because it would attach perpendicular to the side panel’s boards, meaning they would move in opposite directions with seasonal changes, which could cause the wood to split.
Wood widths can vary, so it’s a good idea to dry-fit the panels, ensuring they fit correctly. Trim them to fit if they are too long. If the panel is too short, position it so that it’s flush with the front of the case.
Position the panel at the top and attach using brad nails. Repeat for the other panel.
Cut two pieces of wood to length for the cleats, which will provide support for the molding. Apply glue, position at the front of the case, and attach using brad nails.
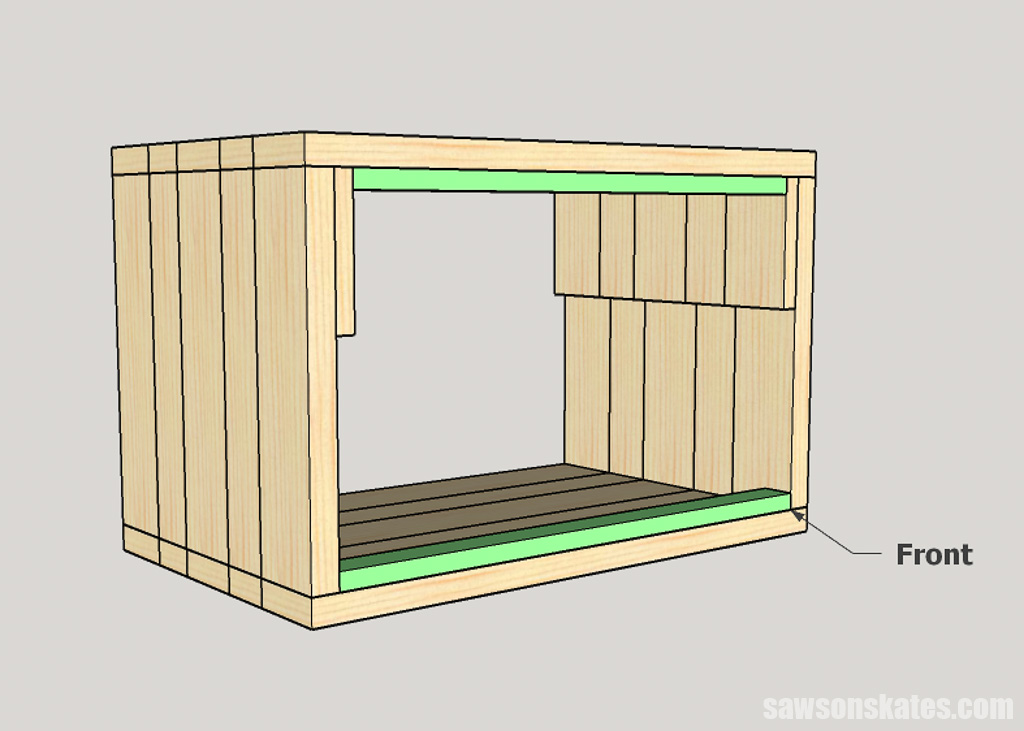
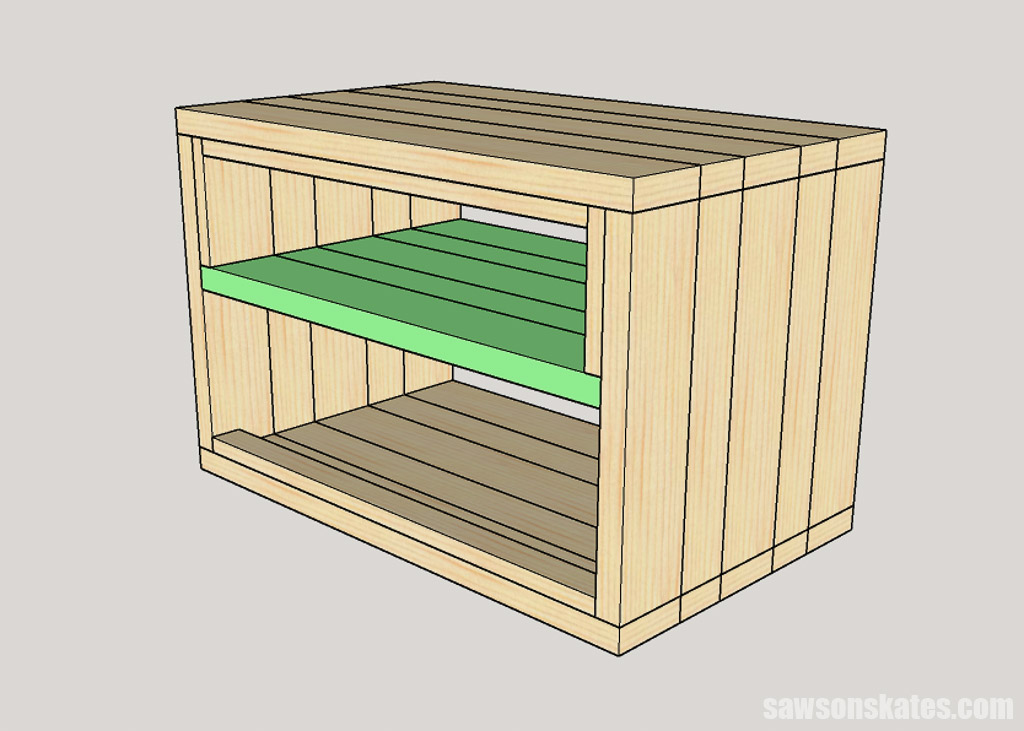
Cut five pieces of wood to length for the shelf. Apply glue and clamp to form a panel.
When the glue is dry, set your pocket hole jig and drill three in each end.
Position the shelf in the cabinet (with the pocket holes facing downward), clamp, and attach using pocket hole screws.
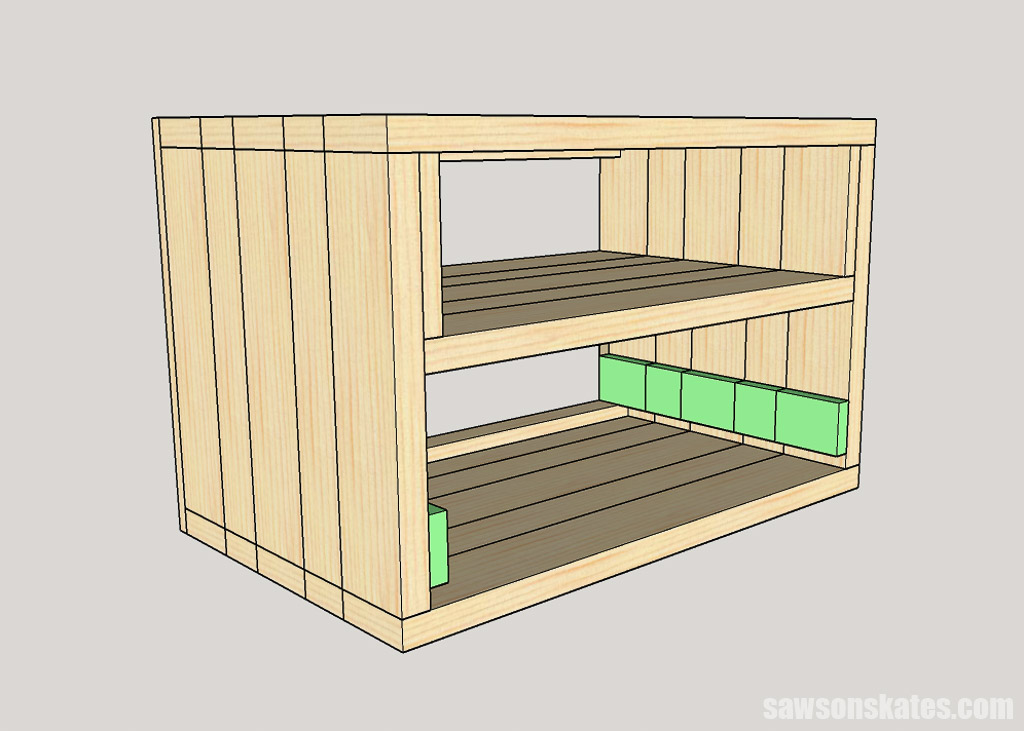
Cut ten pieces of wood to length. Apply glue and clamp to form two panels. These panels will be used to attach the drawer slides and provide support for the molding.
Wood widths can vary, so it’s a good idea to dry-fit the panels, ensuring they fit correctly. Trim them to fit if they are too long. If the panel is too short, position it so that it’s flush with the front of the case.
Position the panels on the lower cleat and attach using brad nails. Repeat for the other panel.
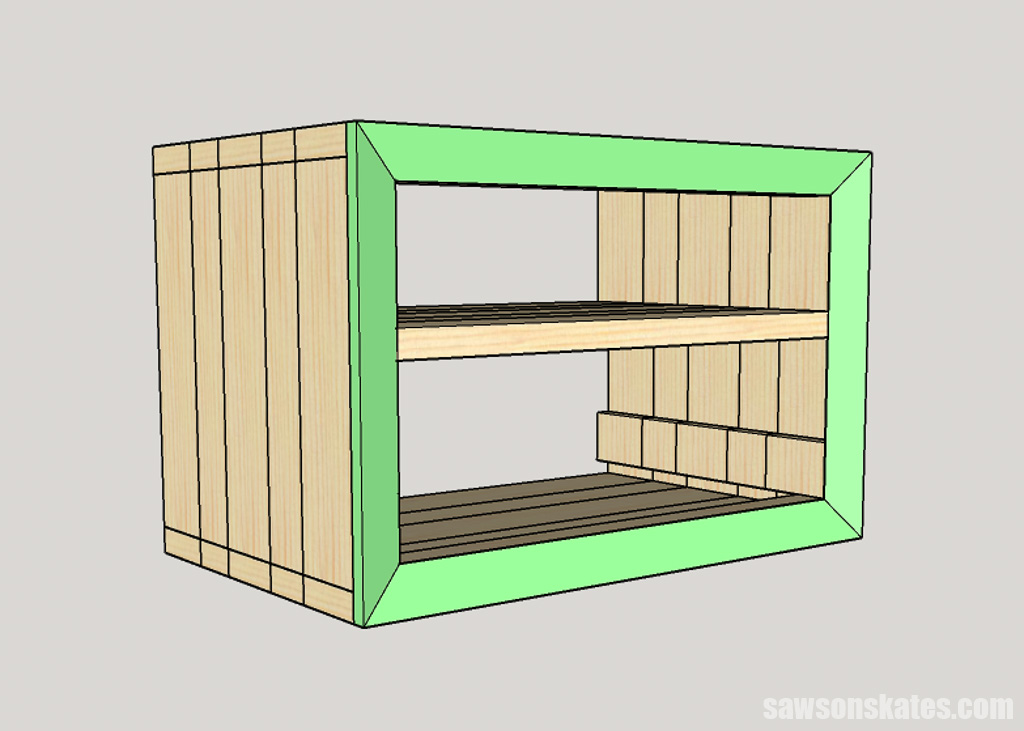
Step 3. Attach the Molding
Using a table saw and Grr-Ripper, rip the casing molding to width.

Cut a 45-degree angle on one end of the molding. Place on the front of the case and mark the other end. Cut a 45-degree at your mark. Test fit and adjust if necessary. Apply glue and attach with 1″ brad nails. Continue working around the sides until all of the molding is installed.
Step 4. Install the Drawer
Install the drawer slides:
- I positioned the drawer slides above from the opening’s bottom edge to allow for clearance.
- I set the drawer slides in from the opening’s edge.
- Attach using screws.
Measure the space between the drawer slides and adjust the dimensions of your drawer box if necessary.
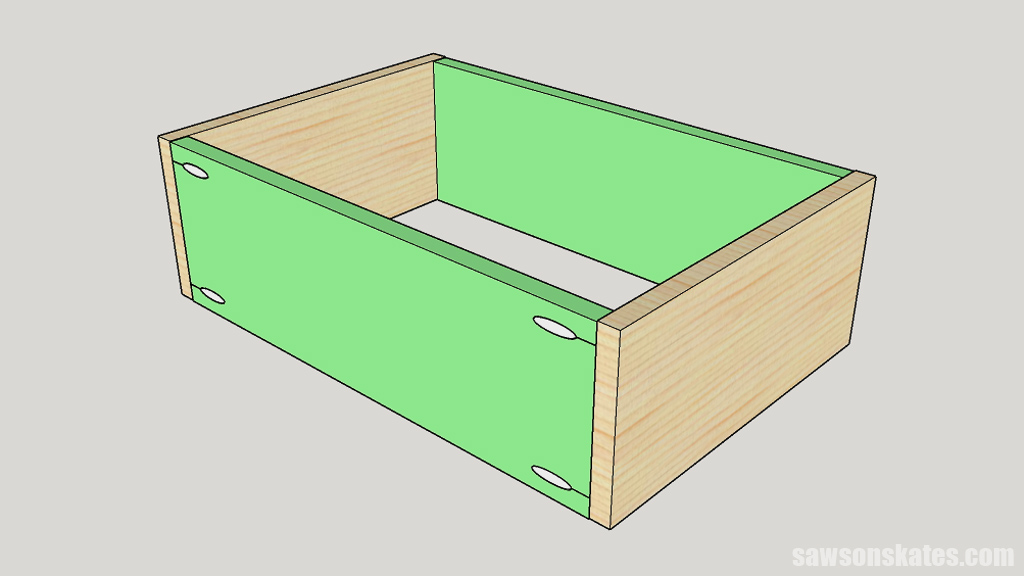
Cut two pieces of wood to length for the front and back and rip to width using a table saw. Adjust your pocket hole jig and drill two in each end.
Cut two pieces of wood to length for the sides and rip to width. Apply glue to the ends of the front and back, position on the sides, and clamp. Attach using pocket screws.
Related: How to Build DIY Drawers
Measure the drawer box and cut a piece of hardboard for the bottom. Apply glue to the drawer, place the bottom, and attach using brad nails.
Extend the drawer slides, position the drawer box flush with the front and bottom of the slides, and attach using screws.
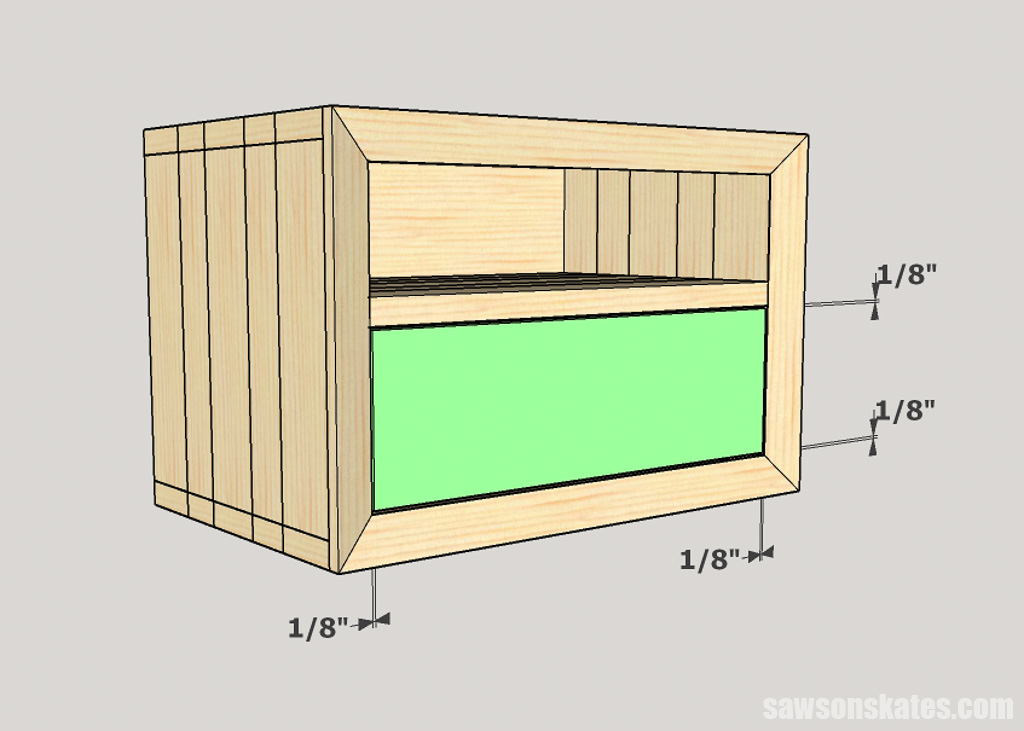
The drawer face needs ⅛″ clearance on all sides. Measure the opening and subtract ¼″ from your top-to-bottom dimension and ¼″ from your side-to-side measurement.
To determine the knob location, use a straightedge to draw a line from corner to corner.
Drill a hole slightly larger than the screw that came with your knob.
Place a few pieces of ⅛″ scrap (I used leftover hardboard, but you can also use playing cards instead) on the bottom of the drawer opening and each side.
Place the drawer face in position and drill a hole through the face into the box. Then, attach the knob.
Again, using the ⅛″ scrap hardboard (or playing cards), fine-tune the drawer face to ensure it’s centered in the drawer opening.
Remove the drawer and drill a countersink hole near each corner. Then, attach the drawer box to the drawer face using 1-¼″ wood screws.
Related: How to Use a Countersink Bit
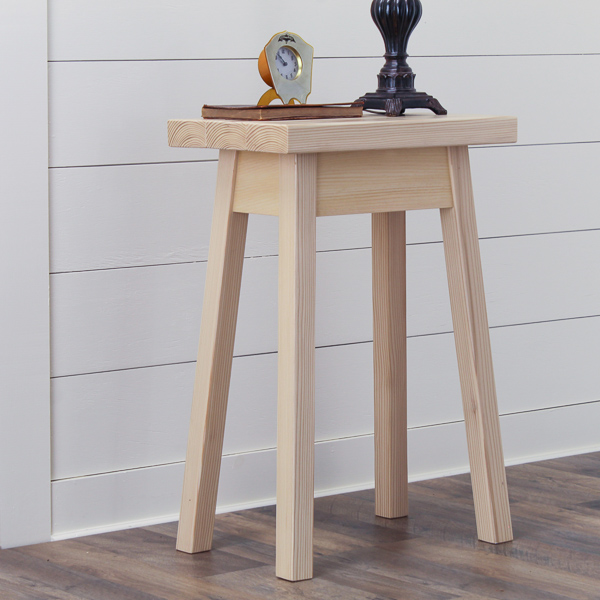
Step 5. Attach the Base
Cut four pieces of wood to length with parallel angles on each end. To cut the angle, I set my miter saw’s angle and made the cut. I kept the piece on the saw and measured from the edge of the cut I made. Next, I slid the piece so the mark corresponded with the saw blade and made the cut. Repeat for the remaining legs.
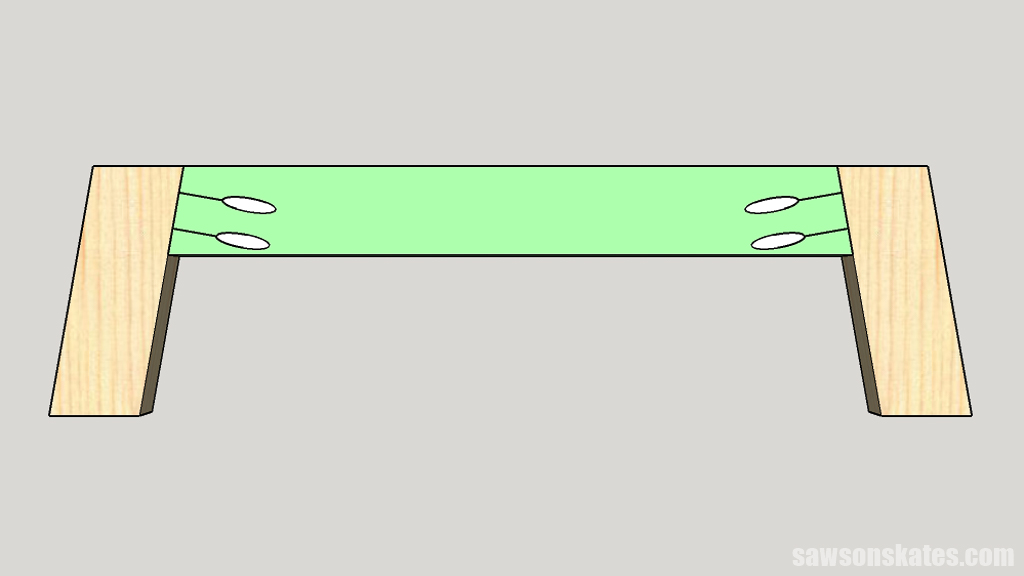
Cut two pieces of wood to length with an angle on each end. Set your pocket hole jig and drill two in each end.
Apply glue, position on the legs, and attach using pocket screws. Repeat for the other leg assembly.
Cut two pieces of wood to length and drill pocket holes in each end.
Apply glue, position flush with the top and on the corner of the leg, and clamp. Attach using pocket screws.
I recommend using tabletop expansion brackets to attach the legs to the nightstand.
The brackets will allow for swelling and shrinking caused by seasonal changes. The wood could crack if this movement is limited or restricted.
Related: Mistakes with Wood Can Cause Your DIY Furniture to Crack
I also used these brackets to attach the top on this nightstand. I placed the holes in the tops of the brackets, so they were oriented in the same direction, as shown below.
Wood expands the most across its width, which means the nightstand’s case will expand from front to back. The case will be free to move from front to back when the holes are oriented as they are in the example below.
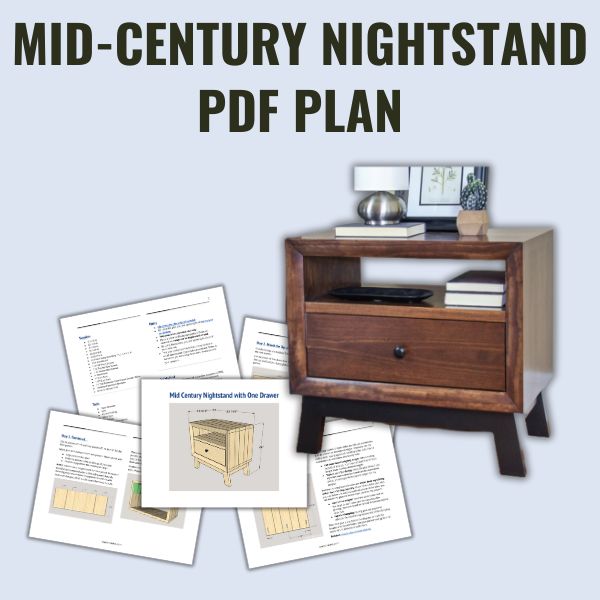
Includes:
- List of tools and materials
- Complete measurements (in inches)
- Easy-to-follow instructions
- Detailed diagrams
Final Thoughts
This DIY nightstand is perfect for adding some mid-century modern to your bedroom. With its angled legs, chunky face frame, and ample storage, it’s both stylish and functional.
Don’t wait. Get your PDF plan (including the detailed instructions and measurements) now!
Thank you for stopping by. If you enjoyed this tutorial, would you please take a moment and pin it to Pinterest? I’d really appreciate it!
Recommended For You

Pin This For Later

Hi there – I’m Scott, a woodworking enthusiast and creator of Saws on Skates, a site I started in 2015 to share easy-to-follow tutorials, space-saving shop tips, and project inspiration for DIYers at any skill level. Learn more about my woodworking journey here.
What are the overall dimensions of the finished nightstand?
Hi Kelly – Thank you for stopping by. The nightstand measures approximately 25-7/8″w x 24″h x 16-1/8″d.
I live in a fairly dry environment, especially during winter. In your opinion with this construction technique, is there a high-low chance the wood will crack?
Hi Shane – Thank you for stopping by. I actually didn’t take my own advice about wood movement into consideration when I built this pieces. The way the corners attach to top, bottom and sides could lead to the wood cracking. That said, mine nightstands have not cracked. I think the better thing to do would be to miter the top/bottom/sides and then glue them together.