DIY Boot Rack (Easy to Make + Only 2 Tools)
Looking for a wooden DIY boot rack that’s simple to make and doesn’t require fancy tools or special skills? Look no further!
What Should I Build Next?
That's the question I help answer.
Every week, I send woodworking ideas to 17,000 DIYers who love building things.
You'd fit right in.
With just two common tools and a few basic supplies, you can create this easy-to-make storage solution in no time. This project is perfect for anyone who wants to add some storage and declutter their home without spending a lot of time or money. Let’s get started!
Table of Contents
- Inspiration for This DIY Boot Rack
- What Tools Do You Need?
- What Wood Should You Use?
- How Can You Customize the Boot Rack?
- How Do You Finish the DIY Boot Rack?
- How to Make a DIY Boot Rack
- Get the PDF Plan
This article contains affiliate links. If you purchase from these links, I may earn a small commission at no additional cost to you. Visit my site policies for more information.
Inspiration for This DIY Boot Rack
In a few tutorials, I mentioned that a buddy of mine owns several vacation rentals in a popular ski town. He swears by DIY solutions to help keep his properties organized and stay on budget.
I’ve designed several projects for his places, including these shelf brackets, this coat rack, and this unique bathroom vanity with a hidden toilet paper holder.
So when he wanted somewhere for guests to store their boots, I put pencil to paper and started sketching. Well, I actually used my laptop and design software, but you get the idea!
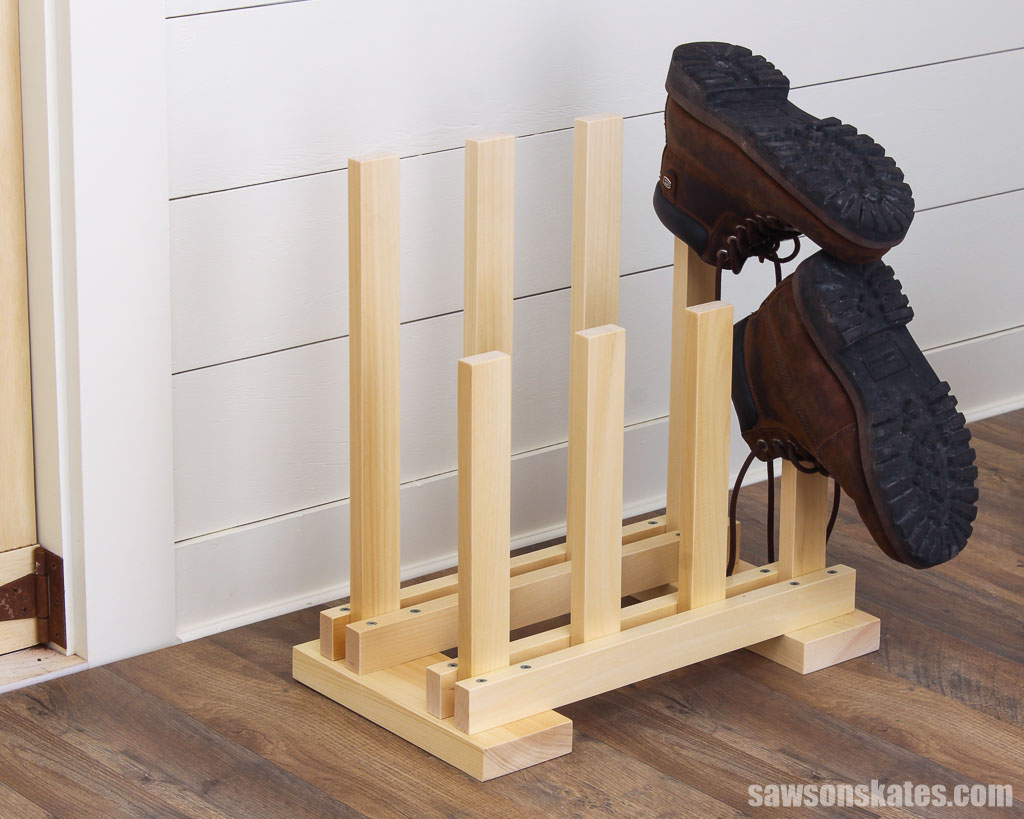
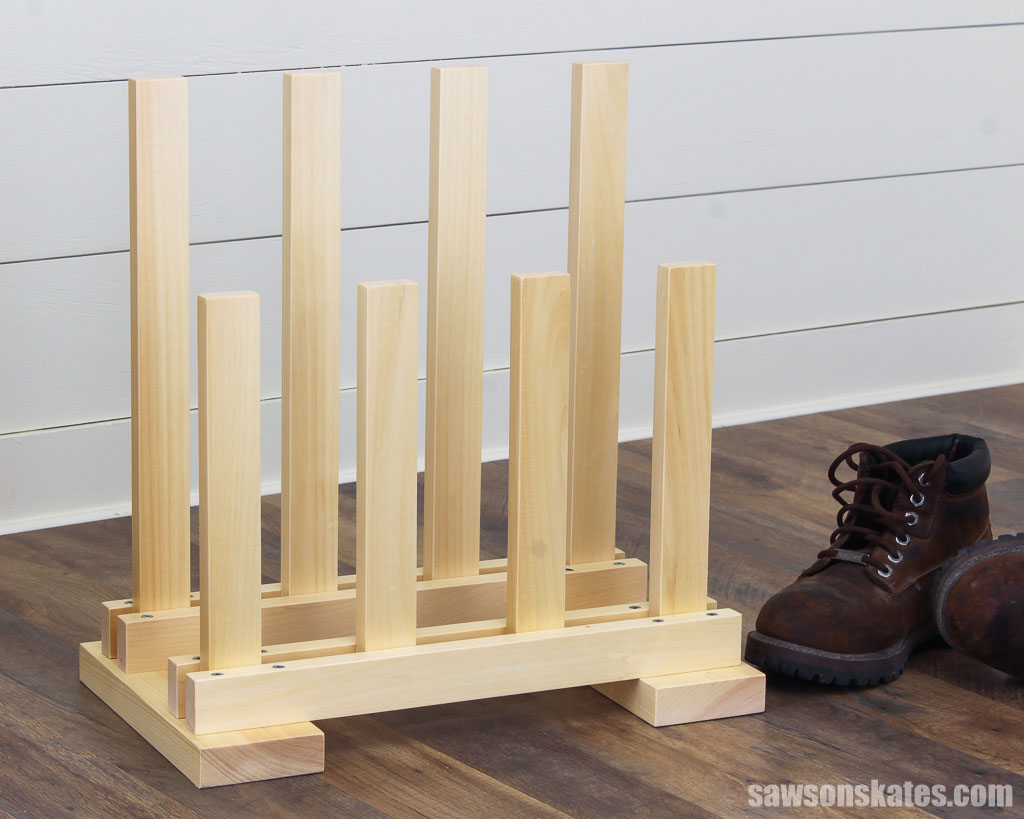
This is what I came up with. A simple, functional storage solution with space for four pairs of boots. And did I mention that it’s super easy to build?!
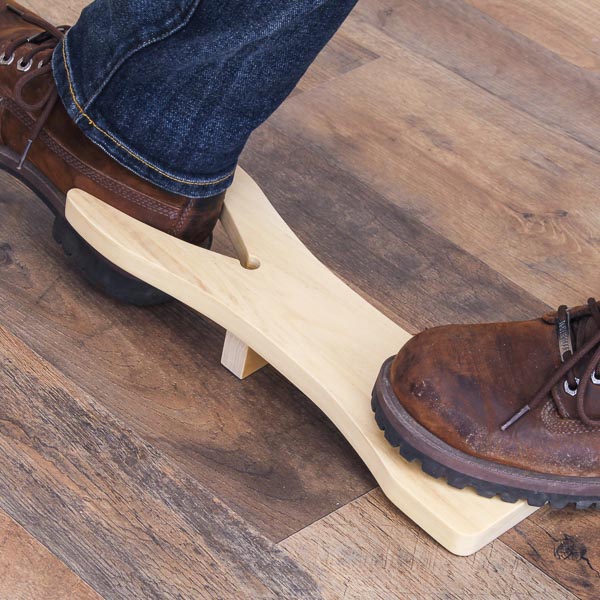
You may also enjoy this DIY boot jack.
What Tools Do You Need?
This DIY boot rack is a simple project that only requires only two basic tools: a miter saw and a drill!
Miter Saw
I used a miter saw to cut the boards to size, but you could also use a handsaw and miter box or even a circular saw if you don’t have a miter saw.
Related: Miter Saw vs Circular Saw (Differences + Which to Choose)
Drill
I used my drill to create countersink holes and to drive the screws that attach the parts together. I recommend using a drill because an impact driver could be too powerful for a project like this.
Related: Drill vs Impact Driver (Which to Use & Why)
What Wood Should You Use?
I designed this project using pine 1×2s and 2×4s. However, I had a 5/4 board (spoken as five-quarter) left over from another project, so I used that instead of a 2×4. The difference between them is a 5/4 board measures about 1-⅛” thick, whereas a 2×4 measures 1-½” thick.
Related: Beginner’s Guide to Wood Sizes

I like that 5/4 lumber has square edges that match the square edges of the 1×2s, as opposed to the rounded edges of 2×4s.
I would have included 5/4 wood in the printed plan, but I didn’t for two reasons. First, when I’ve used 5/4 lumber in the past, people have gotten confused by this wood dimension.
Second, DIYers frequently tell me they can’t find 5/4 wood in their area. It’s readily available in the same aisle as pine boards at my local Lowe’s, and it’s also available at my local lumber yard. So for clarity, I stuck with 2×4 lumber for the printed plan.
I should also note that pine is a softwood and is easily dented. So with repeated use, this boot rack might start to show some wear and tear.
You could use hardwood such as poplar, oak, or maple if you want something more durable. These woods are more expensive, so the project would cost more, but it would also be more durable.
How Can You Customize the Boot Rack?
You can customize this DIY boot rack in several ways to better suit your style and needs. Here are a few ideas:
Adjust the Size
This DIY boot rack is designed to store four pairs of boots, but you could adjust the dimensions to accommodate more or less pairs. Just adjust the length of the cuts and the number of holders if you make changes to the width.
Hide the Screws
The screws on the tops of the stretchers are exposed, but you could use a plug cutter to hide them if you want a more polished look. Just use a Forstner bit to drill holes, insert the plugs, and trim them to length with a flush-cut saw.
Related: What is a Forstner Bit? (& How to Use It)
Add Decorative Details
You could also add some decorative details to the DIY boot rack. For example, you could use a router with a round-over bit to create rounded edges on the boards.
Related: How to Use a Router Table for Beginners
How Do You Finish the DIY Boot Rack?
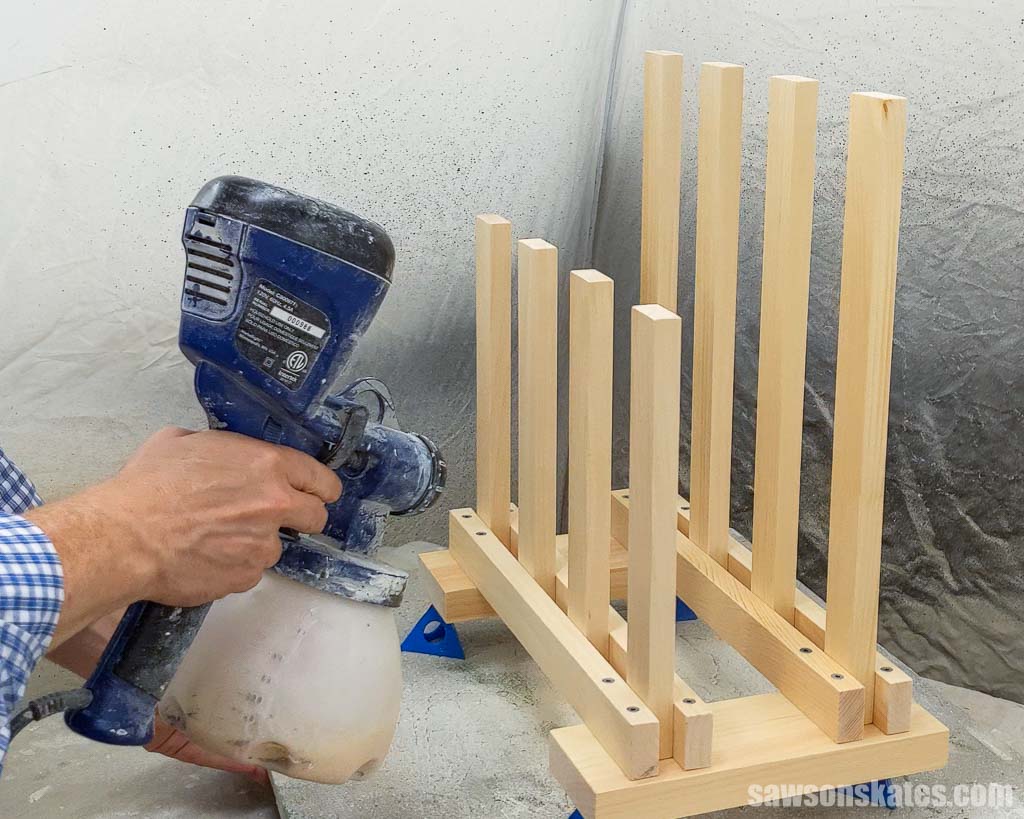
You can paint or stain the boot rack, but I chose to keep mine natural and finish it with a clear coat of this polyurethane alternative.
This project has a few nooks and crannies, so it could be tricky to finish once assembled. I used a sprayer to apply the top coat, which made the process much easier.
Related: How to Spray Polyurethane
You could also use a paintbrush, but you might want to use a small one to get into the tight spaces.

DIY Boot Rack
Printed Plan
Get the PDF plan here (includes detailed instructions, measurements, and bonus tips)
Supplies
- Wood (per the printed plan)
- 1” Pocket Screws
- 2″ Wood Screws
- 2-½” Wood Screws
- Wood Glue
Tools
- Tape Measure
- Drill
- Kreg Multi-Mark
- Miter Saw
- Awl
- Countersink Bit
Step 1. Make the Feet
Cut two pieces of wood to length for the feet.
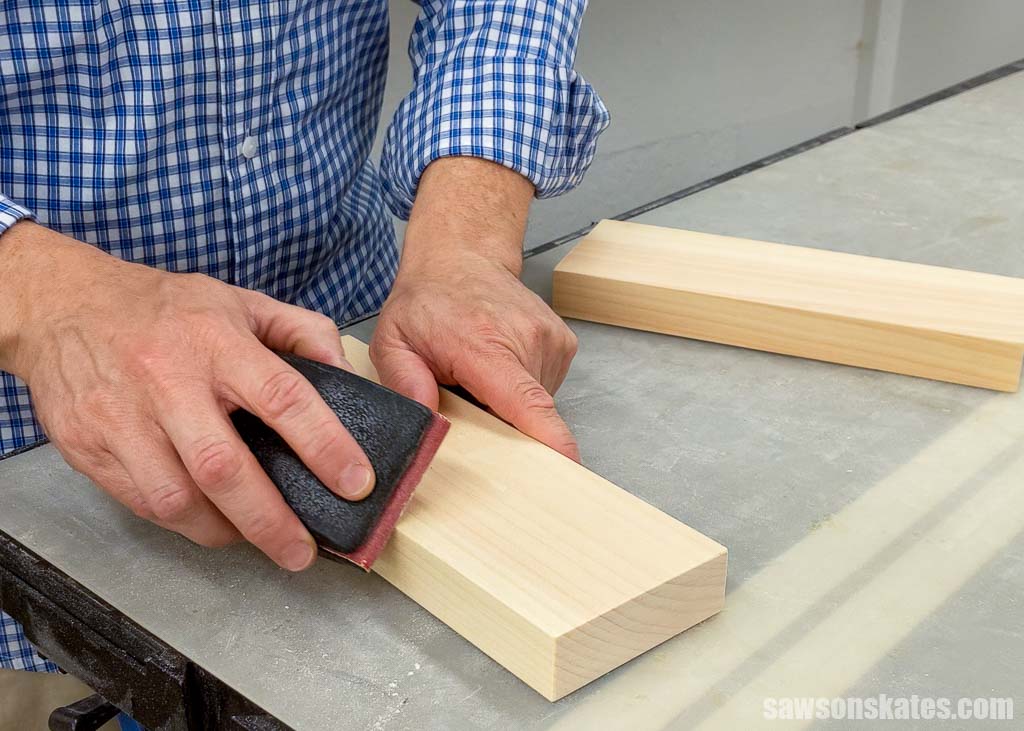
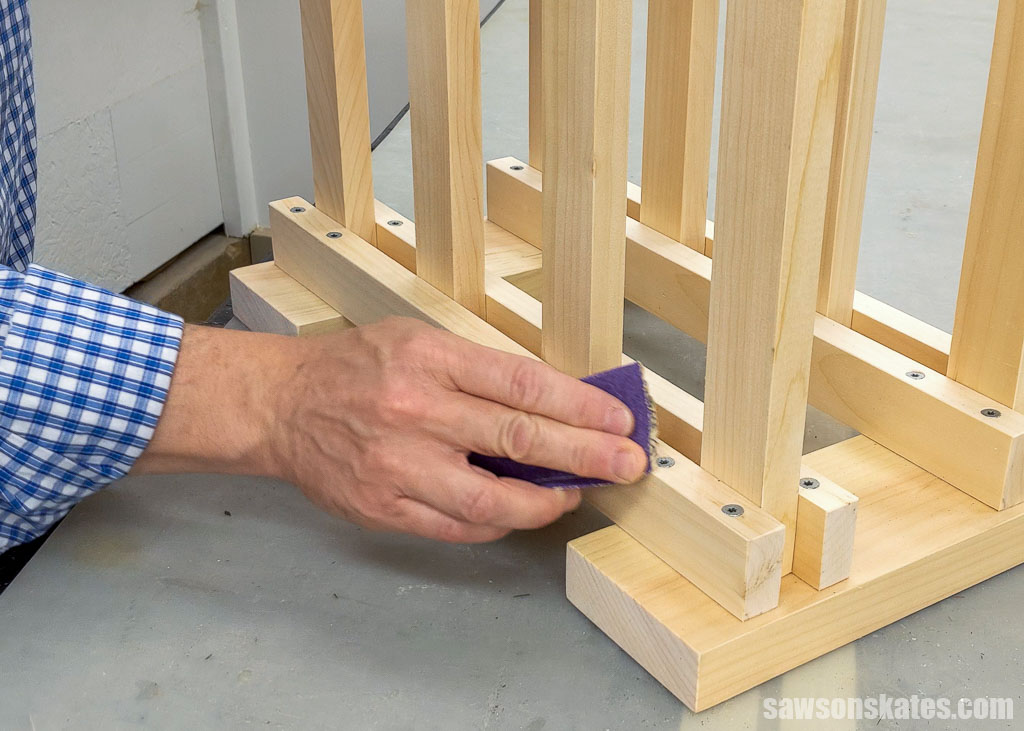
💡 TIP: I used a sanding block to “ease the edges” on all of the parts for this project. Rounding over the sharp edges and corners gives projects a more finished look.
Step 2. Make the Stretchers
Cut four pieces of wood to length for the stretchers, and again, I knocked off the sharp edges with a sanding block.
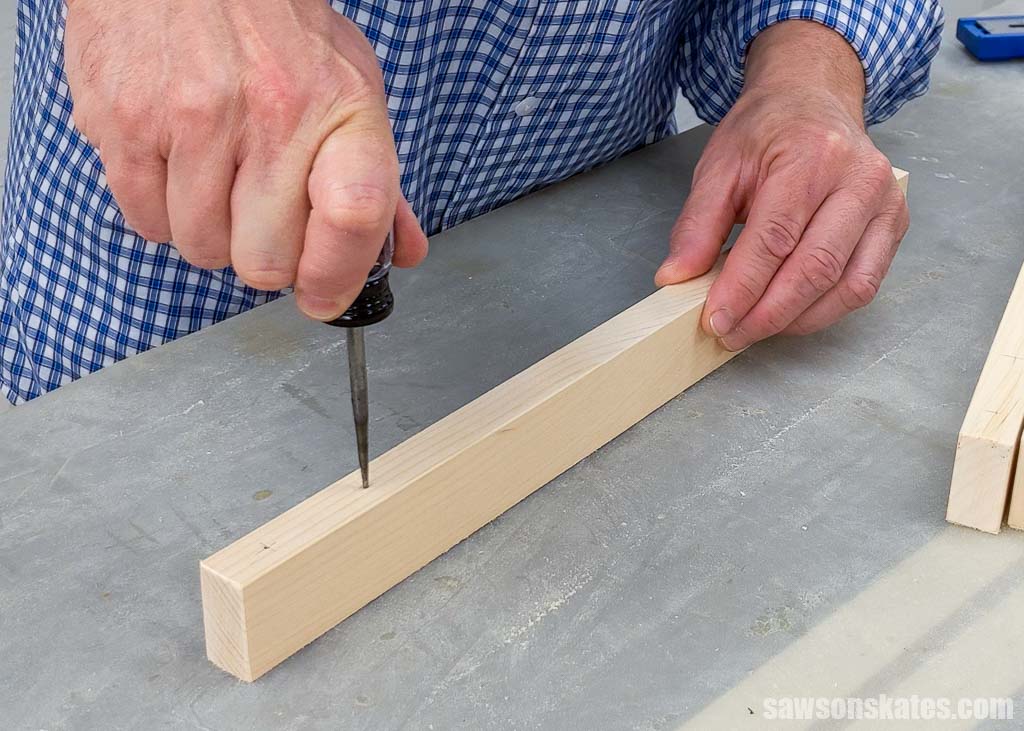
For all of the pieces, use the diagram in the printed plan to mark the locations for countersink holes that will attach the stretcher to the feet.
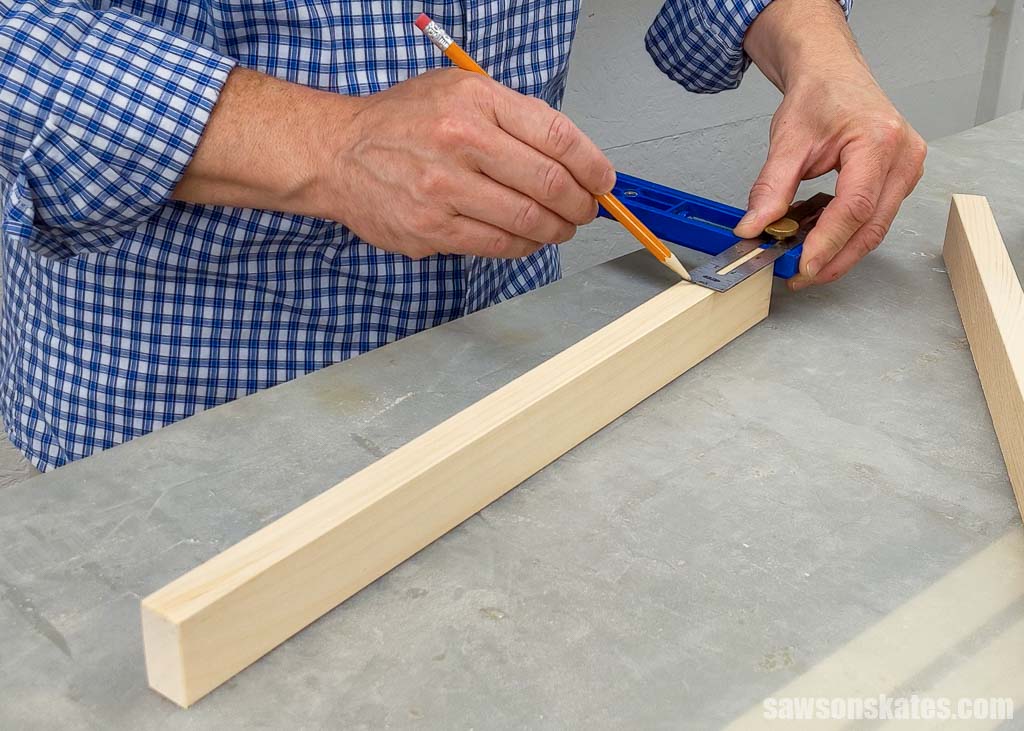
Use an awl to make a starting point for the drill bit.
Related: What is an Awl? (+ How to Use It)
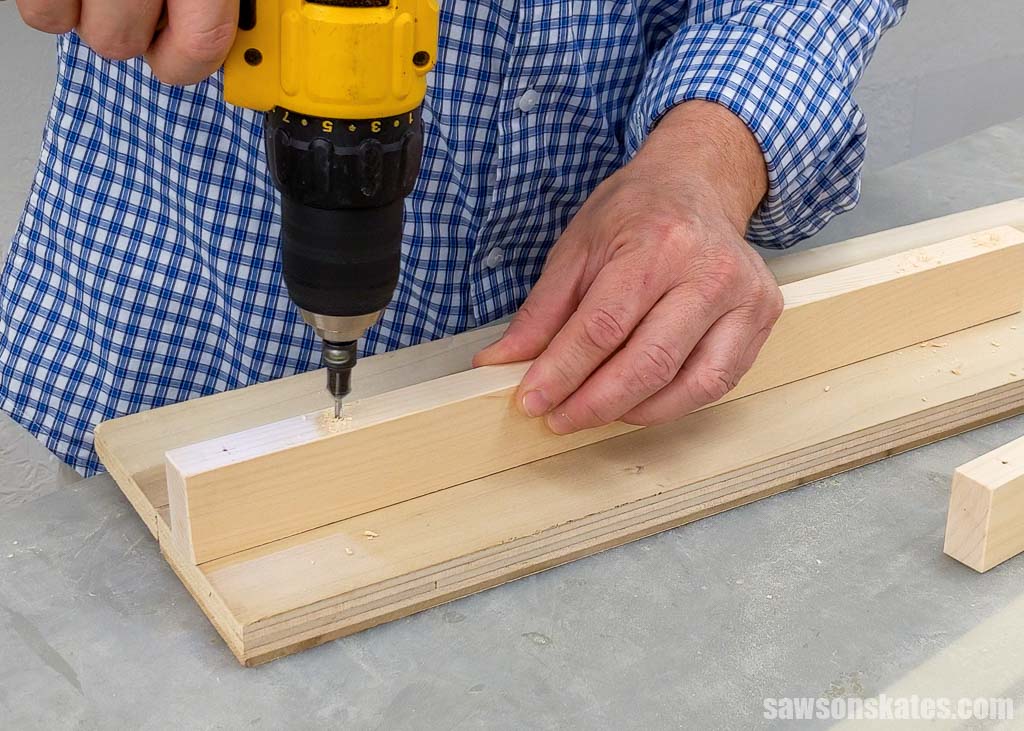
Use a countersink drill bit to drill a hole at each location. Try to keep the drill as straight as possible so the hole will be centered from top to bottom. If you have a drill press, this is a great time to use it.
Related: How to Use a Countersink Bit
In two pieces, use the diagram in the printed plan to mark the locations for countersink holes that will attach the stretchers to the holders.

Use an awl to make a starting point for the drill bit and a countersink drill bit to drill a hole at each location.

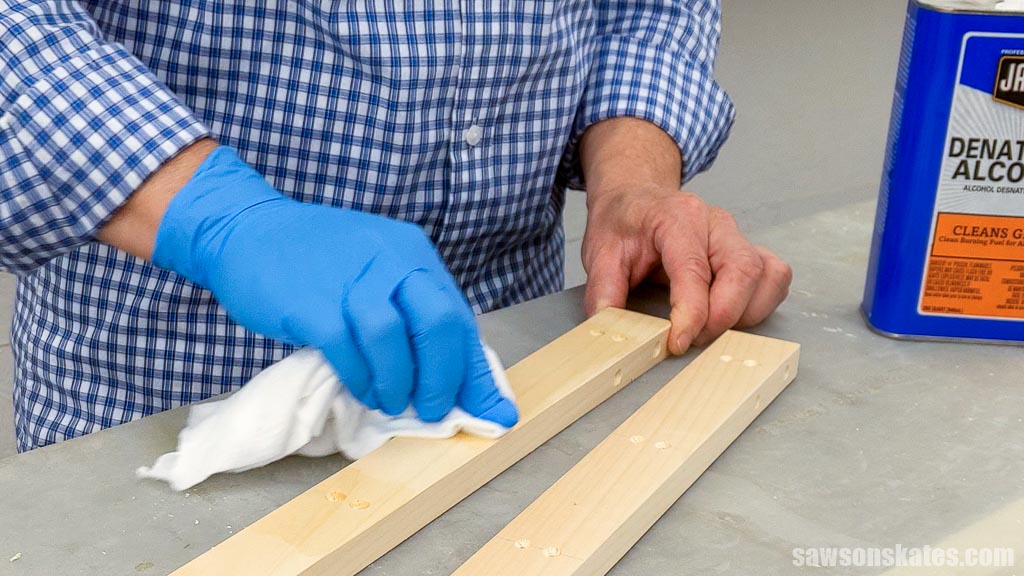
💡 TIP: Using a rag soaked with denatured alcohol is an easy way to remove pencil marks from wood.
Step 3. Assemble the Boot Rack
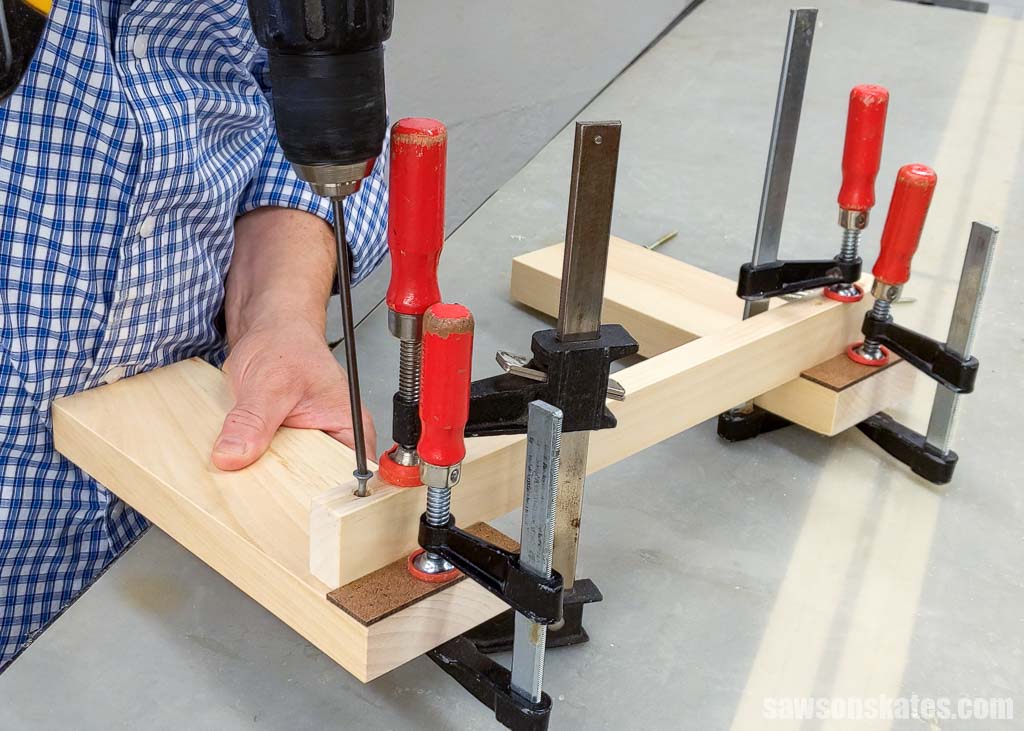
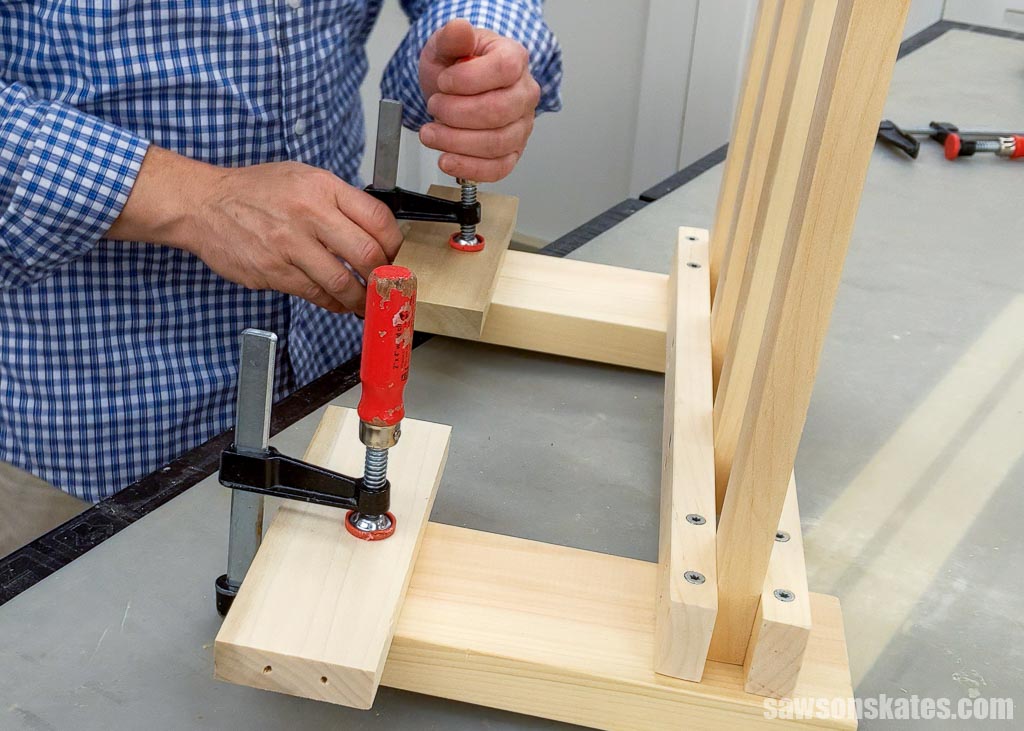
The stretcher sets in from the front and sides of the feet.
To help position the stretcher, I cut a few pieces of scrap wood (I used hardboard) and clamped it to the front of the feet.
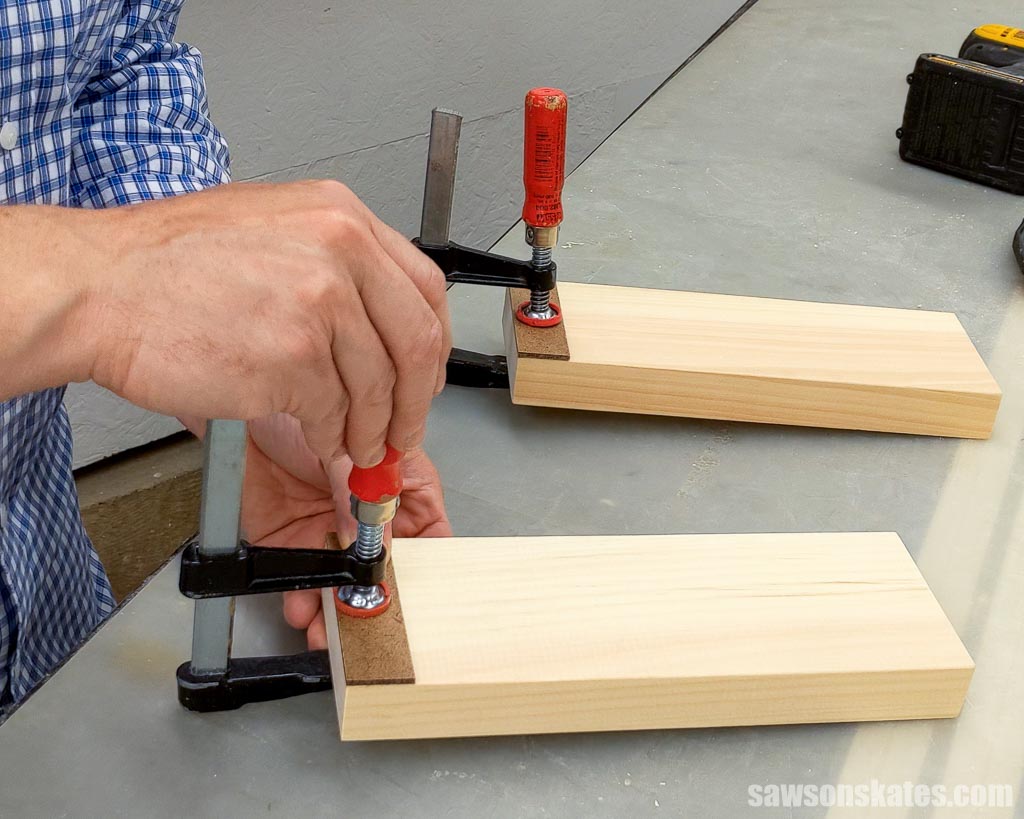
Position the front stretcher on the feet, clamp, and attach using wood screws.
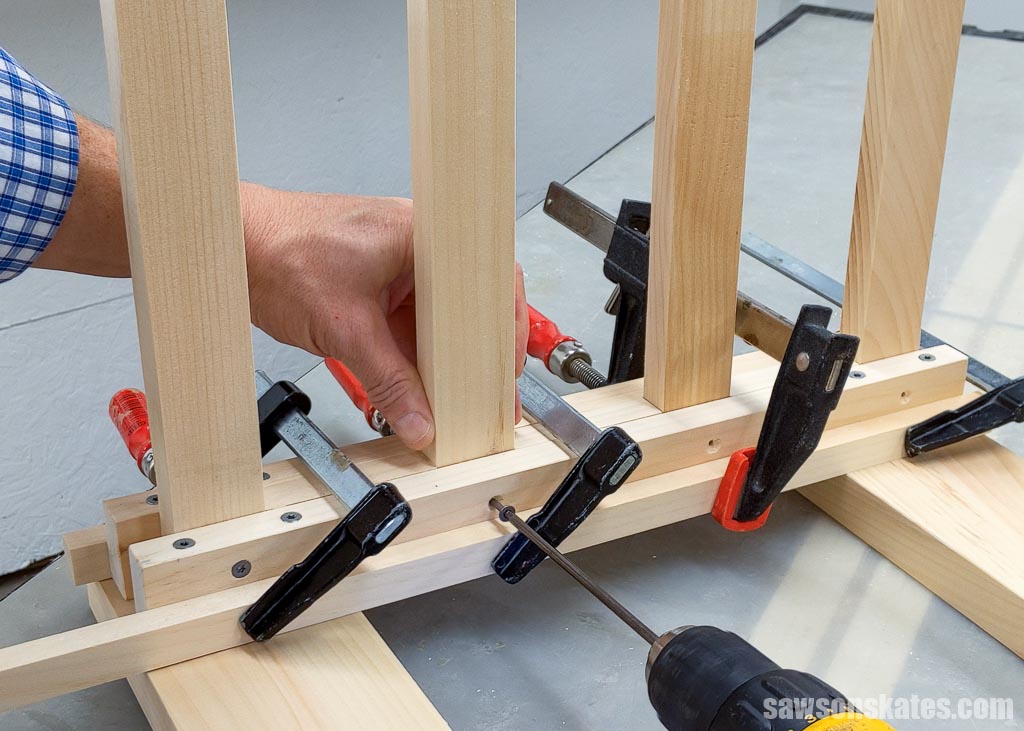
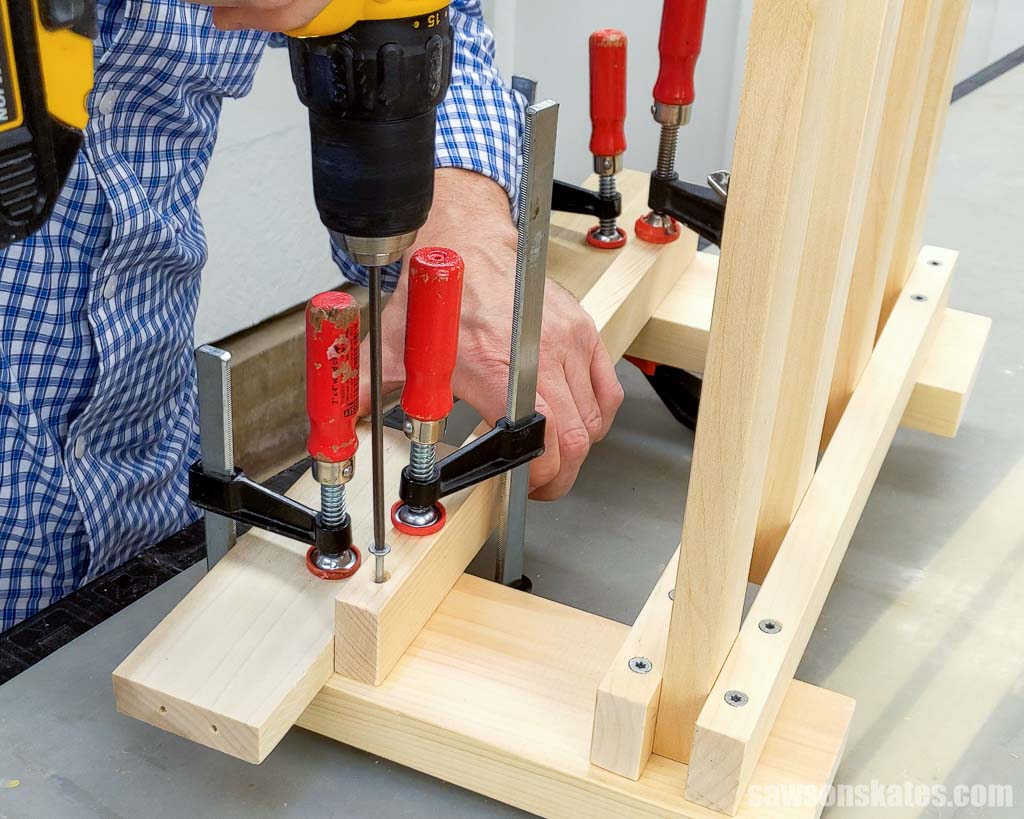
Cut four pieces of wood to length for the front boot holders.
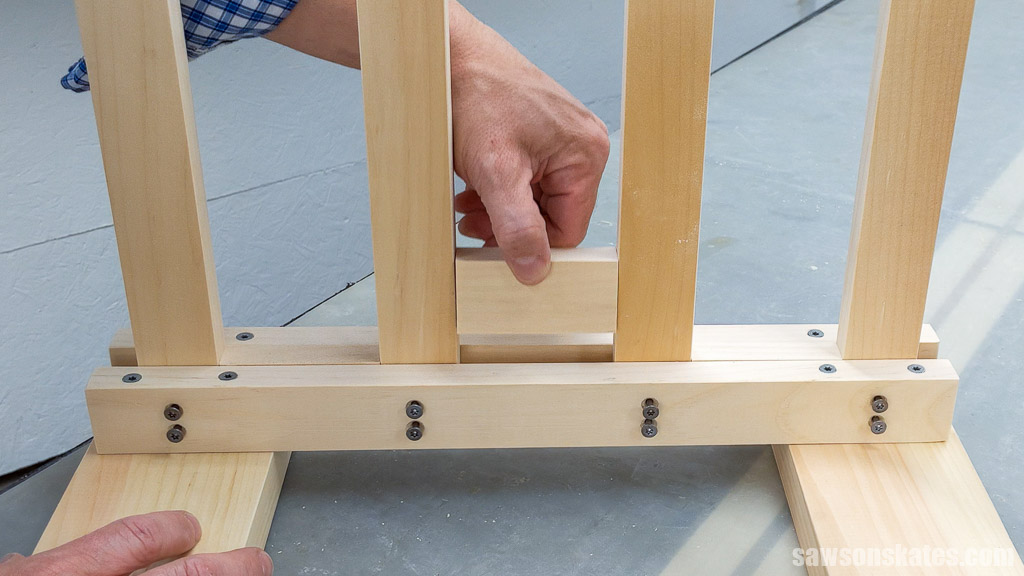
To help position the holders, I cut three pieces of scrap wood and placed them between the boot holders.
I applied a small dab of glue on the back side of the stretcher at each holder location. You want just a small amount to prevent the holders from rocking side to side. I didn’t apply glue to the entire holder area because that could prevent the parts from moving due to seasonal changes, which could cause the pieces to crack.
Related: Mistakes with Wood Can Cause Your DIY Furniture to Crack

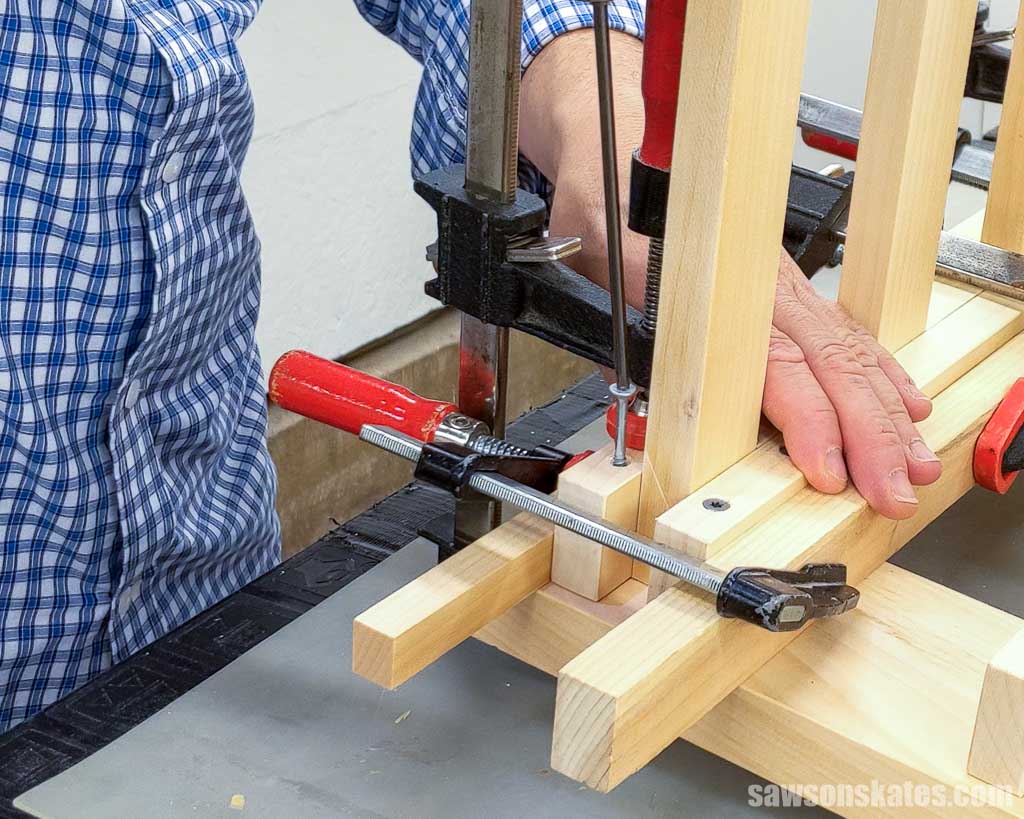
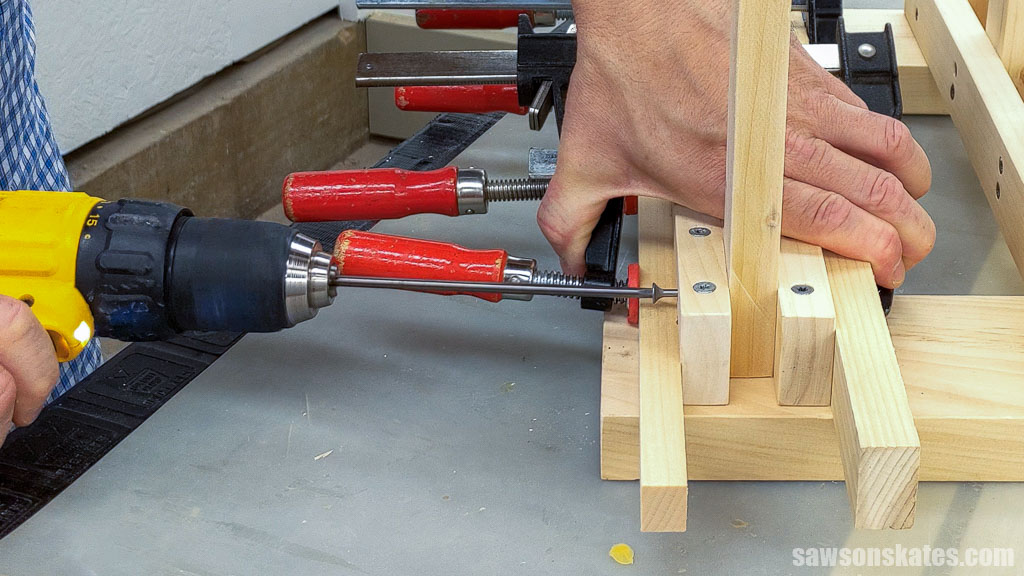
Position the boot holders (with the scrap wood spacers in between) and the stretcher, and clamp them to the front stretcher. Attach the stretcher to the feet using wood screws.
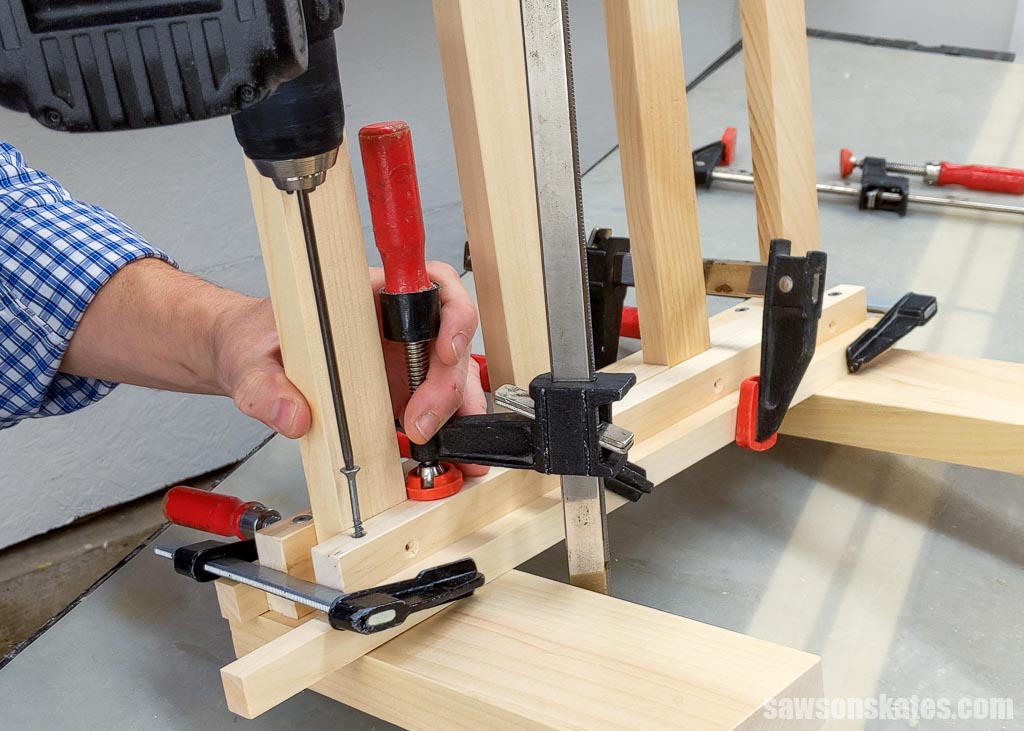
Attach the stretcher to the holders using wood screws.
📝 NOTE: You may need to loosen the screws slightly to remove the scrap wood pieces.
The back stretcher sets in from the back of the feet. To help position the back stretcher, I used a few pieces of scrap wood and clamped it to the back of the feet.
Position the back stretcher on the feet, clamp, and attach using wood screws.
Cut four pieces of wood to length for the back boot holders.
Position the boot holders (with the scrap wood spacers in between) and the stretcher, and clamp them to the back stretcher. Attach the stretcher to the feet using wood screws.
Attach the back stretcher to the holders using wood screws.
Step 4. Finish the Boot Rack
I touched up any rough spots with sandpaper.
I removed the sanding dust with my ShopVac and a tack cloth.
Related: What is a Tack Cloth? (How to Use + 4 Alternatives)

I applied three coats of this polyurethane alternative using my sprayer and lightly sanded between each coat.
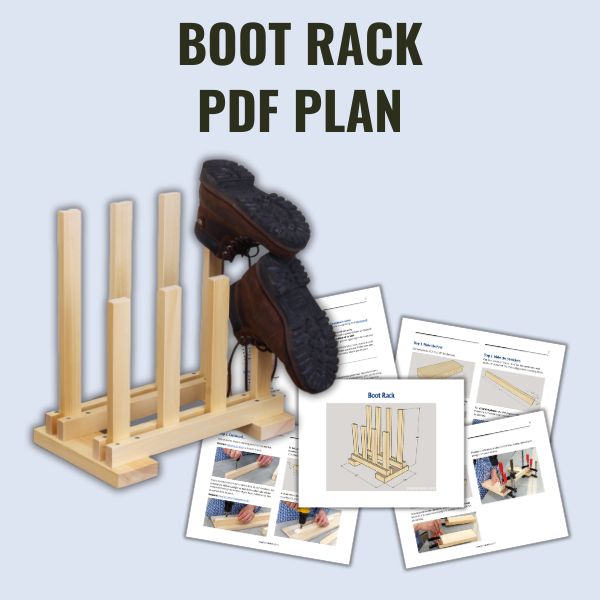
Includes:
- List of tools and materials
- Complete measurements (in inches)
- Easy-to-follow instructions
- Step-by-step photos
- Detailed diagrams
Final Thoughts
This DIY boot rack is a great way to declutter your entryway and keep your boots organized. It’s easy to make and only requires two tools!
Get your PDF plan (including the detailed instructions and measurements) now!
Thank you for stopping by. If you enjoyed this tutorial, would you please take a moment and pin it to Pinterest? I’d really appreciate it!
Recommended For You
Pin This For Later

Hi there – I’m Scott, a woodworking enthusiast and creator of Saws on Skates, a site I started in 2015 to share easy-to-follow tutorials, space-saving shop tips, and project inspiration for DIYers at any skill level. Learn more about my woodworking journey here.
If the unit is placed over a furnace vent, the shoes/boots may dry quicker plus be toasty warm when you go to put them on.