Easy DIY Miter Saw Dust Hood Stops the Mess From Spreading
Miter saws are versatile and easy to use, but they create an overwhelming amount of sawdust. This handy miter saw dust hood will help you control and contain the dust in your workshop, garage, or shed shop. Just connect it to a ShopVac or dust collector, and you’re good to go!
What Should I Build Next?
That's the question I help answer.
Every week, I send woodworking ideas to 17,000 DIYers who love building things.
You'd fit right in.
Why I Almost Didn’t Share This Miter Saw Dust Hood
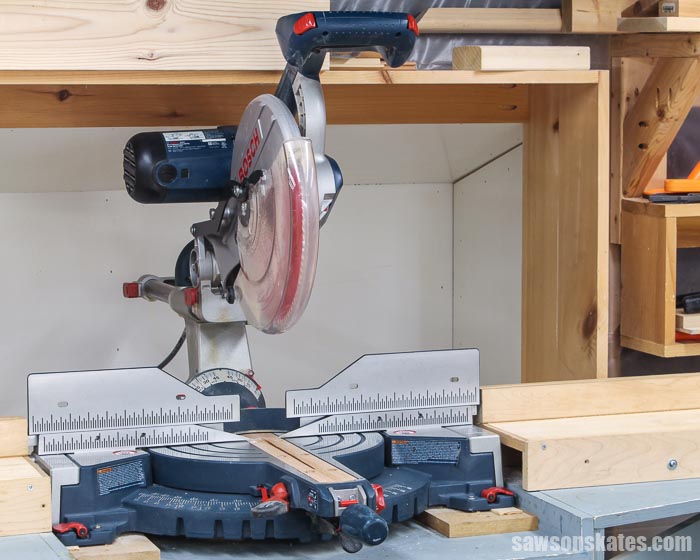
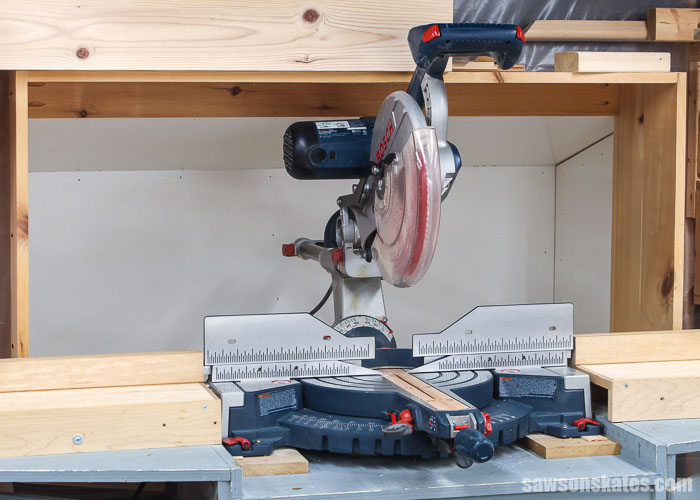
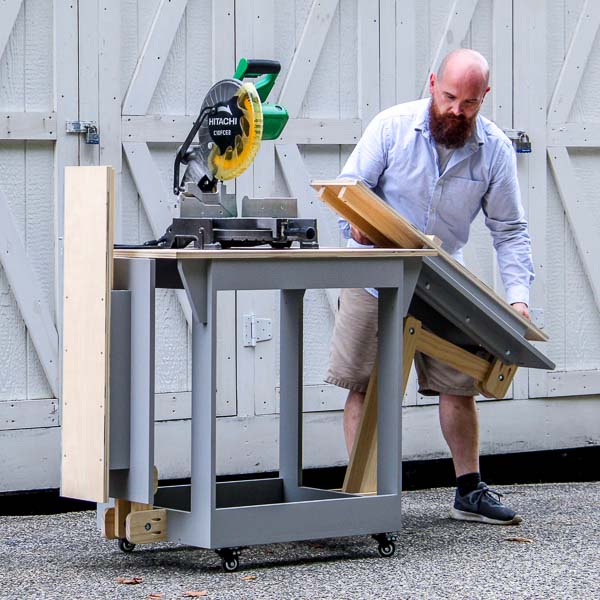
Joe recently sent me a message wondering where he could get the plans for the dust collection hood that he spotted in a photo behind my miter saw.
A miter saw dust hood is a must-have for any shop and makes cleaning your workspace easier and quicker.
The thing is, I had never considered publishing plans for this project because it was so big and didn’t fit with my goal of providing space-saving solutions to DIYers with small workshops.
Related: 9 Clever Ways to Make Your Small Workshop Feel Bigger
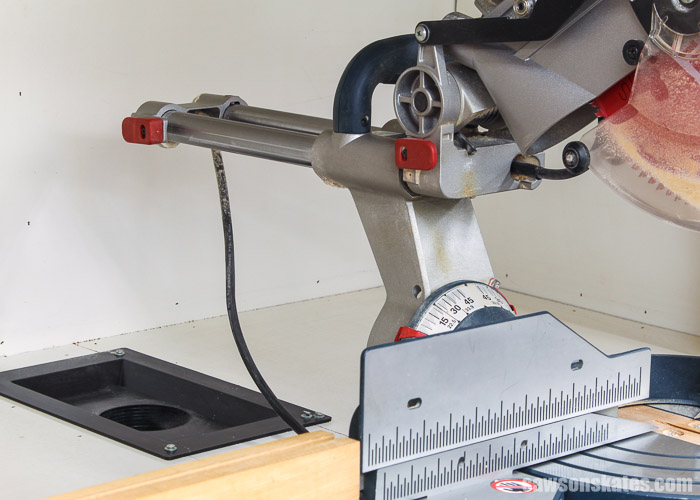
And when I say the hood is big, I mean HUGE! The reason it’s so big is that the hood had to be large enough to fit the slide rails extending from the back of my Bosch sliding miter saw.
After giving it some thought, I realized this project had so much potential:
- It would help you control the mess
- You’ll save time and effort when cleaning up your shop
- You could simply adjust the dimensions for your own needs
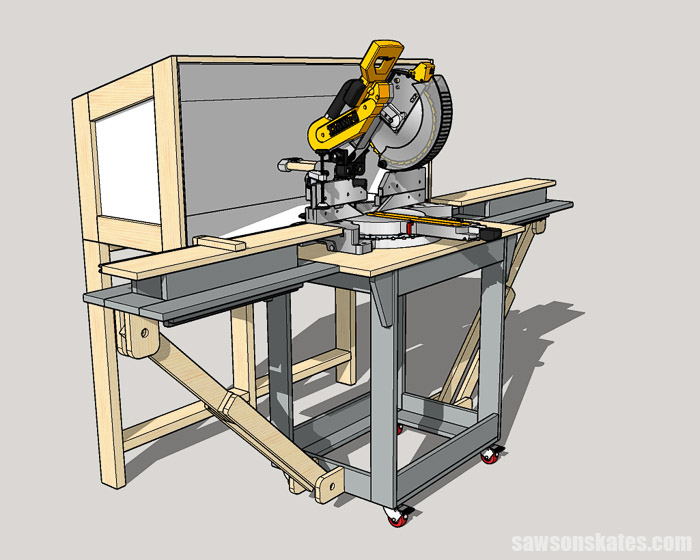
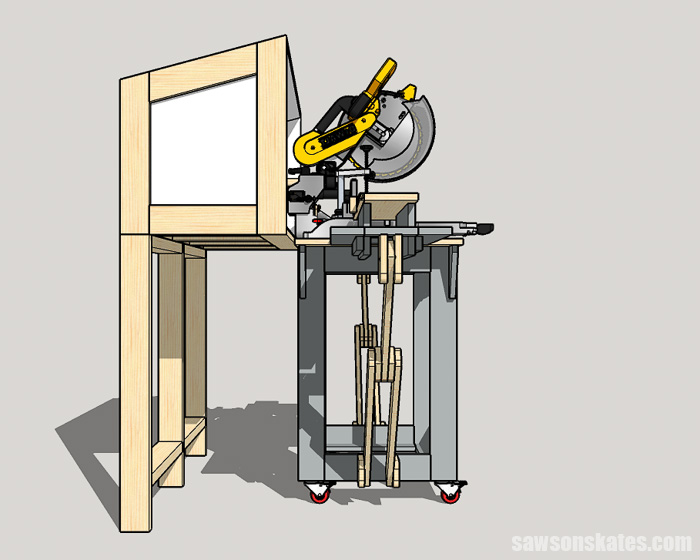
It was tough to photograph my dust hood because it’s built right into the wall of my shop, so you can’t really see the full shape or how everything fits together in a single shot.
That’s why I used SketchUp drawings throughout this post. They show the completed dust hood and break down how the parts fit together so you can actually see what’s going on.
If you like the idea of planning a project like this before you build it, I put together a SketchUp class that walks you through it step by step.
Related: Getting Started with SketchUp (Basics for Modeling Your First Woodworking Project)
Are you ready to get the mess under control? I’ll show you step-by-step how to make your own miter saw dust collection hood.
What Tools Do You Need to Make a Miter Saw Hood?
This miter saw dust hood is a bit more advanced than many of the other easy-to-make workshop plans. This project requires basic woodworking tools like a miter saw, a pocket hole jig, and a drill. But it also requires a table saw, and it’s helpful to have a circular saw or jigsaw.
Miter Saw
I used a miter saw to cut all of the parts to length for this project.
Related: 7 Miter Saw Tricks Every DIYer Should Know
Pocket Hole Jig
This dust hood was constructed using pocket hole joinery. I used my Kreg Jig, but you can use just about any pocket hole jig to drill the pocket holes for this project.
Related: Which Kreg Pocket Hole Jig Should You Buy? (Here’s the Answer)
Drill
I used a drill to make the pocket holes and join the sections together with pocket hole screws.
Related: Impact Driver vs Drill: Which to Use + Why
I also used a drill to make countersink holes and drive the wood screws that join the bottom to the back.
Related: How to Use a Countersink Bit
Table Saw
I ripped a bevel on the edges of the back and top using a table saw. A bevel is made by tilting the blade to one side and removing material from the board’s edge to create a beveled edge.
Related: The Easy Way to Set Table Saw Blade Angle
Brad Nailer
I attached the white hardboard that lines the inside of the dust collection hood with a brad nailer.
Related: Brad Nailer vs Finish Nailer
What Wood Should You Use?
To construct my dust hood, I used common 1×4 pine boards. Pine is relatively low-cost compared to other types of wood and easy to work with. I bought the lumber for my project at a local home improvement store.
Related: How to Buy Wood (Top Tips for Choosing Woodworking Lumber)
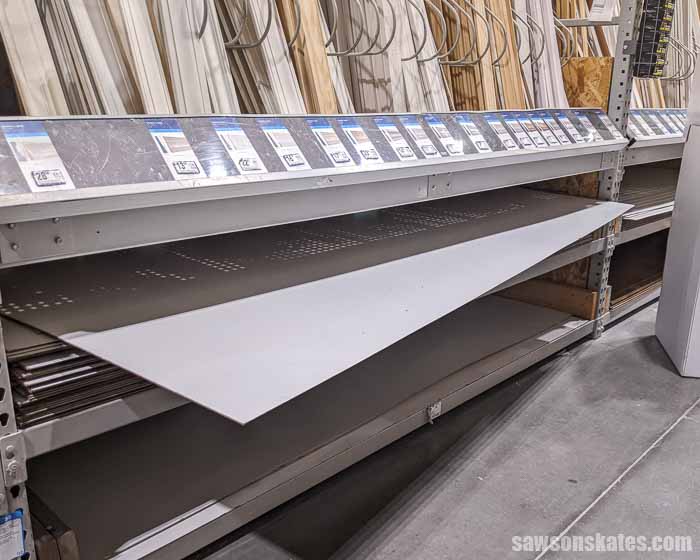
I also used a sheet of ⅛” white hardboard to line the inside of the hood. White hardboard has a slick surface and is easy to clean.
Hardboard is generally located near the plywood section of most home improvement stores; however, at my store, it’s beneath the molding rack.
Customize Your Miter Saw Dust Collection Hood
As I mentioned earlier, I made this dust hood deep and wide to fit the slide rails of my sliding miter saw.
If you have a compound miter saw (a miter saw that does not slide) or a newer style sliding miter saw (without slide rails like my older saw), chances are you won’t need a dust hood as large as this one.
If you don’t need a large dust hood, you can easily adjust the dimensions to fit your miter saw and then follow the same steps I outlined in this tutorial.
How Do You Collect Dust From the Hood?
Your dust collection hood can be attached to either a ShopVac or a dust collector:
- Purchase a fitting that matches the diameter of your ShopVac or a dust collector hose.
- Drill a hole in the hood, and attach the fitting with screws.
- Connect the fitting to your ShopVac or dust collector with a hose.
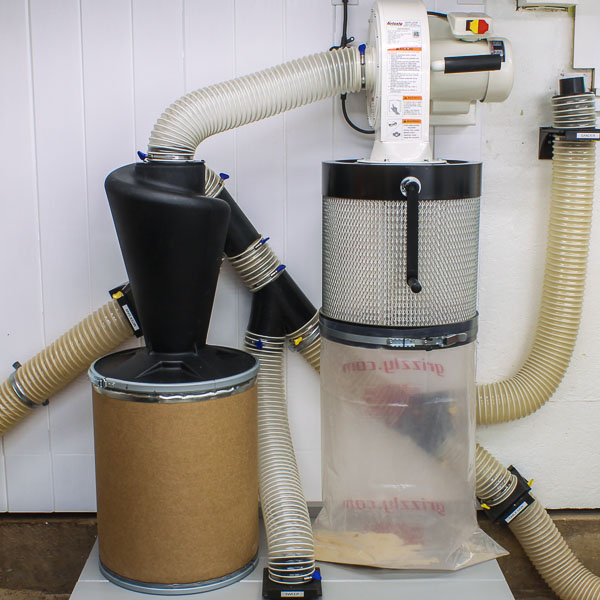
For mine, I mounted a 4″ fitting in the bottom of the hood and connected the fitting to my dust collector with a flexible hose.
Related: My Small Shop Dust Collection System
What Would I Do Different?
This hood collects a decent amount, but a good portion of airborne sawdust still escapes from the front because of its long width. I would like to add sliding doors, adjustable doors, or another mechanism on either side of the saw to enclose the hood and trap even more dust.
How to Make a DIY Miter Saw Dust Hood
Printed Plan
Get the PDF plan here (includes detailed instructions, measurements, and bonus tips)
Materials
- Wood (per the printed plan)
- 1-¼” Pocket Hole Screws
- 1-¼” Wood Screws
- Wood Glue
- ⅝” Brad Nails
Tools
- Tape Measure
- Drill
- Kreg Jig
- Kreg Multi-Mark
- Miter Saw
- Table Saw
- Circular Saw or Jigsaw
- Countersink Drill Bit Set
- Brad Nailer
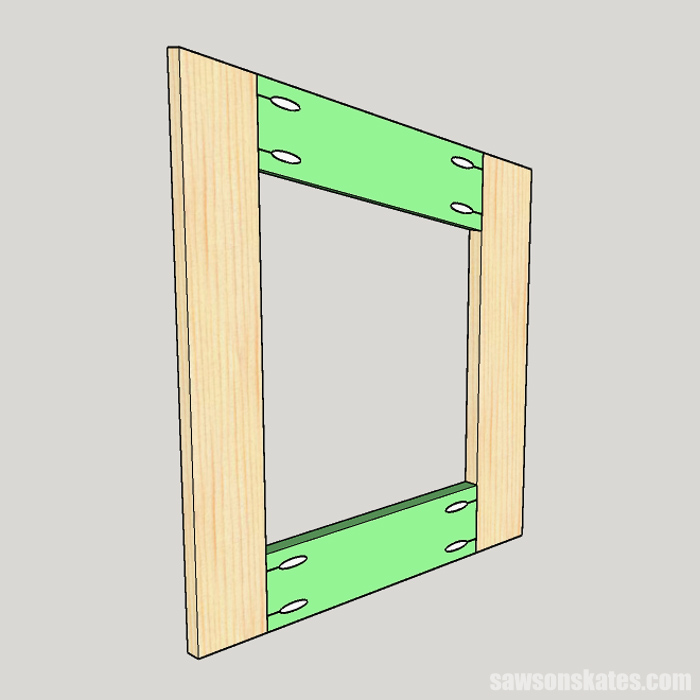
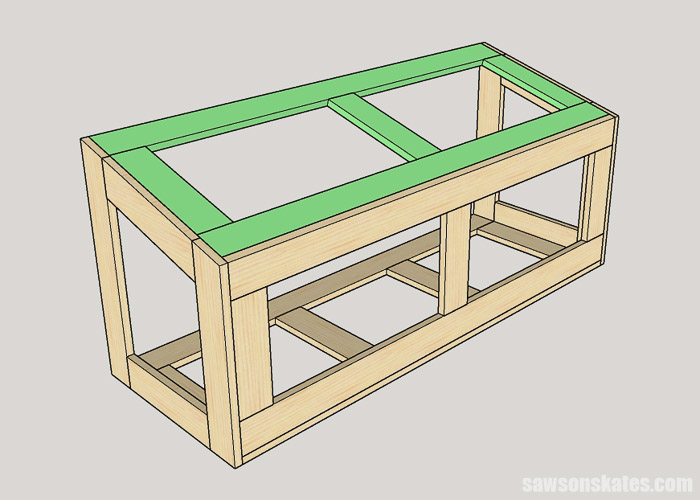
Step 1. Make the Sides
Cut two short pieces and two long pieces of wood with an angle on one end.
Cut two pieces of wood to length for the bottom and drill pocket holes in each end.
Cut two pieces of wood to length for the top with parallel angles on each end and drill pocket holes in each end.
Related: How to Use a Pocket Hole Jig
Apply glue to the ends of the top and bottom, position on the sides, and clamp. Attach using 1-¼” pocket hole screws.
NOTE: Make a left and right side, so the pocket holes face toward the inside of the hood.
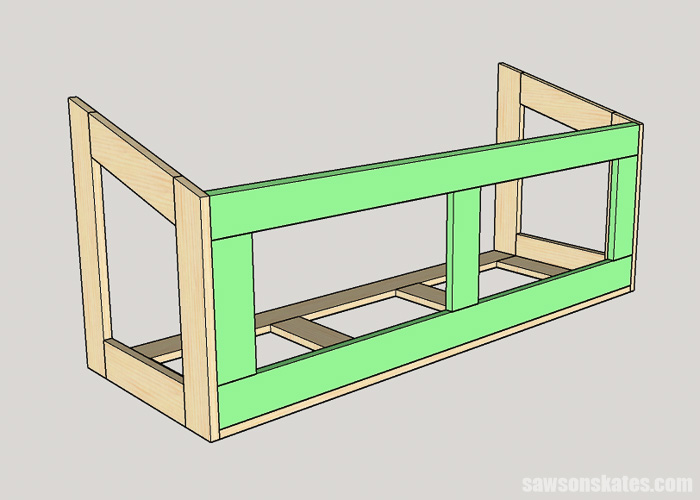
Step 2. Attach the Bottom
Cut two long pieces of wood to length and drill pocket holes in each end. These pocket holes will connect the bottom to the sides.
Cut four short pieces of wood to length and drill pocket holes in each end.
Apply glue to the short pieces, position on the long pieces, and clamp. Attach using 1-¼” pocket hole screws.
Apply glue to the ends of the bottom, position on the sides, and clamp. Attach using 1-¼” pocket hole screws.

Step 3. Attach the Back
Cut two pieces of wood to length and use a table saw to rip one with a bevel on one edge.
Related: 21 Table Saw Safety Rules (& Mistakes to Avoid)
Next, drill pocket holes in the ends of each piece. These pocket holes will connect the back to the sides
Cut three pieces of wood to length and drill pocket holes in each end.
Apply glue to the short pieces, position on the long pieces, and clamp. Attach using 1-¼” pocket hole screws.
Apply glue to the ends of the back, position on the sides, and clamp. Attach using 1-¼” pocket hole screws.
From the back, measure in on the bottom and drill several countersink holes along the bottom.
Related: How to Use a Countersink Bit
Then attach the bottom to the back using 1-¼” wood screws.
Step 4. Attach the Top
Cut two pieces of wood to length and use a table saw to rip a bevel on one edge. Next, drill pocket holes in the ends of each piece. These pocket holes will connect the top to the sides.
Cut three pieces of wood to length and drill pocket holes in each end.
Apply glue to the short pieces, position on the long pieces, and clamp. Attach using 1-¼” pocket hole screws.
Apply glue to the ends of the top, position on the sides, and clamp. Attach using 1-¼” pocket hole screws.
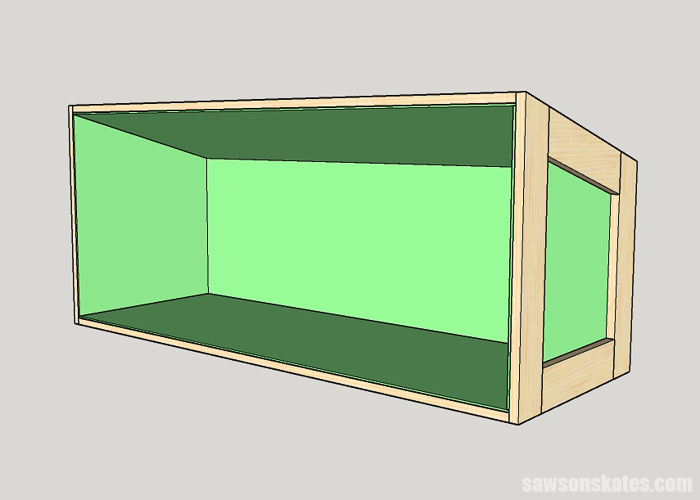
Step 5. Attach the Panels
Measure and cut the hardboard panels for the top, bottom, back, and sides. You will need either a circular saw or a jigsaw to cut the angles on the side panels.
Apply glue to the frame, position the panels, and attach using ⅝” brad nails.
Related: Pin Nailer vs Brad Nailer: Differences & Which to Use
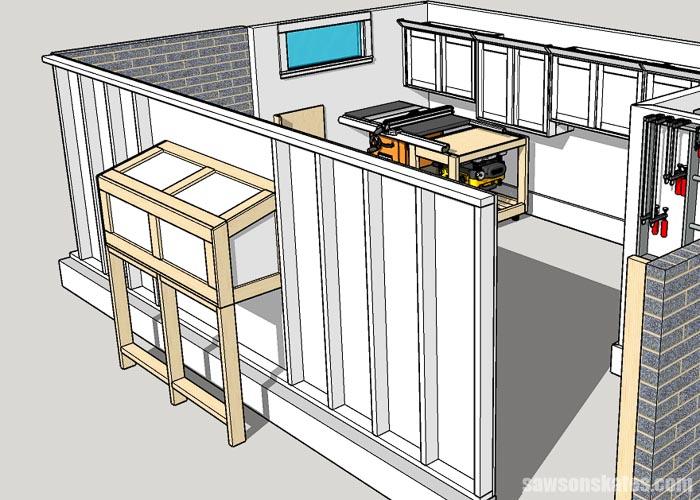
Step 6. Install the Miter Saw Dust Hood
I mounted my dust collection hood to the wall in my shop and supported the back with a simple frame made from 2×4s. Your installation method may vary. For example, you may mount the hood to your workbench rather than attaching it to the wall like I did.
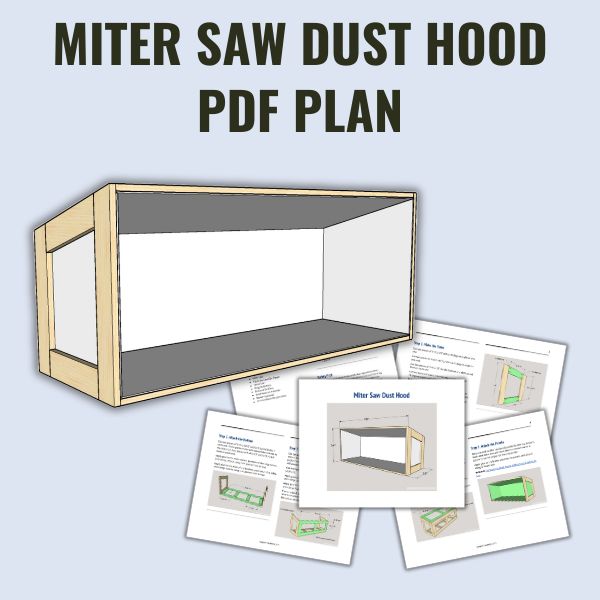
Includes:
- List of tools and materials
- Complete measurements (in inches)
- Easy-to-follow instructions
- Detailed diagrams
Final Thoughts
Miter saws are handy tools, but they produce a lot of sawdust. This DIY dust collection hood will help you manage the sawdust in your shop, garage, or shed workshop. Simply attach it to a ShopVac or dust collector, and you’re ready to go!
Get the PDF plan (including the detailed instructions and measurements) now!
Thank you for stopping by. If you enjoyed this tutorial, would you please take a moment and pin it to Pinterest? I’d really appreciate it!
Recommended For You

Pin This For Later

Hi there – I’m Scott, a woodworking enthusiast and creator of Saws on Skates, a site I started in 2015 to share easy-to-follow tutorials, space-saving shop tips, and project inspiration for DIYers at any skill level. Learn more about my woodworking journey here.
I look forward to your publications. They are always interesting and usually contain something of particular interest to me. I like the plans as they are easy and clear for any builder.
Thank you for the compliments, Frank. I appreciate it!
Scott, this looks like just what I need. I am a 69yr old “fluffy” retired nurse who loves to “build stuff”.
A few of questions.
1. It looks like you mounted this collection box OUTSIDE of your shop and cut a “window” in the wall. Or am I looking at the pic wrong?
2. Why angle the top of the box? Would it be a good idea to make the box square and use the top surface like a shelf?
3. Would painting the inside of the box w a hard satin finish allow me to skip the whiteboard work/cost?
Am planning to totally revamp my small (12×12) workshop this summer.
Thanks for all your great ideas and hard work. Youdabest!
Hi Krisby – Yes, the dust hood is actually located outside of my shop in an adjacent room. I’m not an engineer, but I made the top angled for two reasons. First, I thought it would improve the dust collector’s suction if I reduced the hood’s interior volume (an angled space is smaller than a box) and hopefully to direct the sawdust towards the dust collection fitting mounted in the bottom. I think painting will be about the same if not more work than using pre-finished white hardboard. You would still need to line the frame with a material (hardboard, plywood, etc.) and then paint it.
Great article.
I have been looking for a simple but practical design and this is perfect.
Your instruction issue clear and understandable. Thank you for sharing your knowledge and plans.
I built the miter saw stand and find it very useful when rough cutting lumber for and given project: however, due to the size and all it is somewhat difficult to find room to store it when not in use. Adding this dust hood adds a whole new dimension to the storage problem, especially when cutting long pieces for projects. I cut molding and other pieces and though the extension “wings” help considerably often time there is not nearly enough room to maneuver both the hood and the miter stand around. A thought might be to reduce the overall length yet incorporate an “V” shape to the collector. Additionally, placing two vacuum ports on each side might increase reduction in airborne micro-fine dust particles. I don’t know about your saw but, mine is a 12″ Dewalt Compound sliding miter saw, anything I can do that reduces the micro-fine dust is a bonus.