DIY Folding Workbench
Build a folding workbench with these plans. This sturdy, foldable workbench is easy to make with simple tools. Perfect for a workshop, garage or shed.
What Should I Build Next?
That's the question I help answer.
Every week, I send woodworking ideas to 17,000 DIYers who love building things.
You'd fit right in.
DIY Folding Workbench
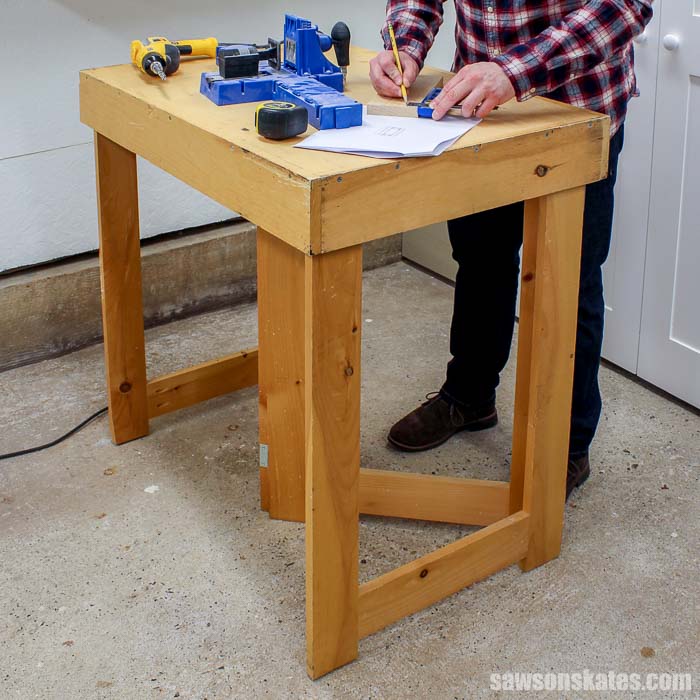
This folding workbench is perfect for DIYers with a small workshop, shed, or garage or even those DIYers without a dedicated workspace. The foldable space-saving design makes it easy to set up when you’re ready to work and fold down when you’re done. It’s collapsible, so you can move it from the shop to the yard or to a buddy’s house to help with a project. It’s easy to make with just a few tools, such as a miter saw, circular saw, pocket hole jig, and these step-by-step plans.
Originally published March 16, 2016 updated August 13, 2019
This post contains affiliate links to supplies or tools I used to complete this project. Purchases made using these links help support the Saws on Skates website and allow me to share more DIY projects. and DIY tips with you. There is no cost to you for using these links. Click here to visit my site policies.
Table of Contents
- What is a Folding Workbench?
- Why Build a Foldable Workbench?
- The Collapsible Workbench is Portable
- Is a Folding Workbench Sturdy?
- What Can You Do With a Collapsible Workbench?
- Where Can You Use a Folding Workbench?
- How to Build a DIY Folding Workbench Tutorial
- Get the Folding Workbench PDF Plan
- More Projects Like This
What is a Folding Workbench?
A folding workbench can be set up when you need a work surface or work table and then folds up when you’re done working. Think of a foldable workbench like a heavy-duty folding card table for your workshop.
Related: Folding DIY Miter Saw Station
Why Build a Foldable Workbench?
If you’re tight on workspace, a foldable workbench is a smart and practical solution for any DIY enthusiast.
Instead of taking up valuable floor space with a traditional bench, a fold-down workbench is an excellent alternative that can easily be stored away when not in use.
With its compact design and convenient folding mechanism, you can enjoy the benefits of a traditional workbench without sacrificing precious square footage.
Related: 9 Clever Ways to Make Your Small Workshop Feel Bigger
It’s also ideal for weekend warriors without a dedicated workshop tackling DIY projects in the driveway.
Related: 9 Ways to Get Into Woodworking Without a Garage
The Collapsible Workbench is Portable
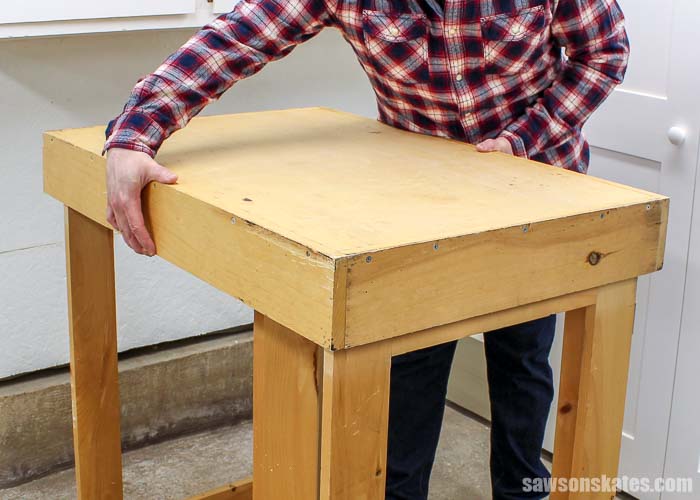
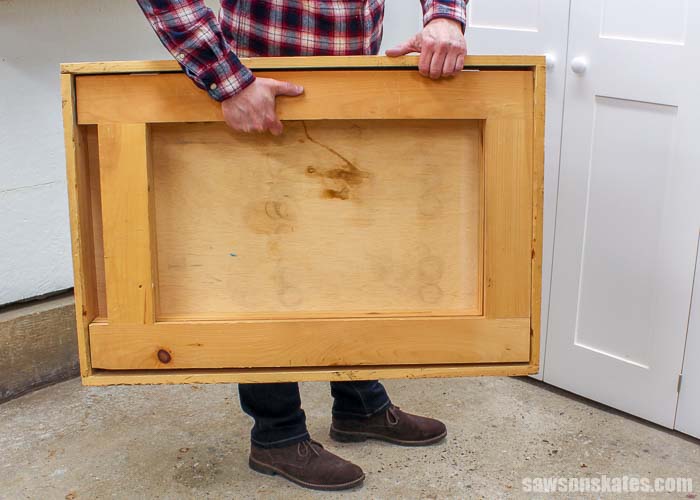
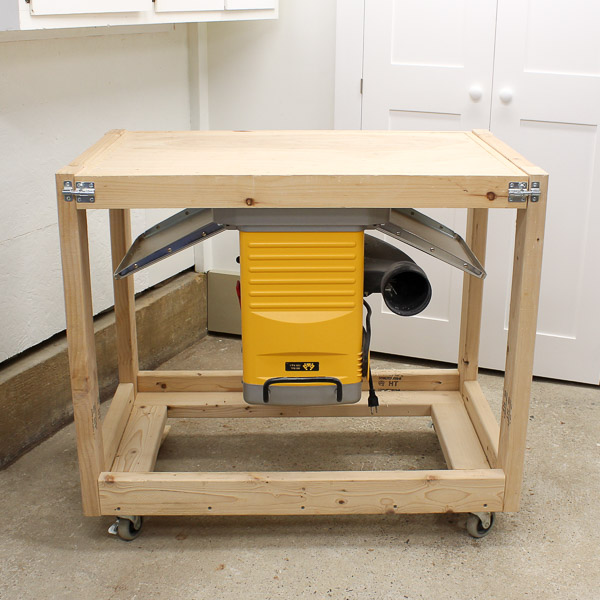
Another reason to build a collapsible workbench is that it’s compact and easy to transport. The legs of this DIY collapsible workbench tuck neatly inside the tabletop when it’s in the folded position. And it should fit in the trunk of most cars. Plus, the area inside the legs provides extra storage space while the workbench is being transported.
Is a Fold-Up Workbench Sturdy?
When it comes to stability, this folding workbench has you covered. The outside and inside legs contact the floor and provide multiple contact points for the top, ensuring that this piece is as sturdy as can be.
For added security, I recommend clamping the top to the legs, preventing them from creeping inward while you’re working, giving you a stable workspace for all your DIY projects.
Or, if you prefer, you can drill holes through the sides of the top and legs and secure them with carriage bolts.
Related: DIY Power Tool Stand (Simple and Sturdy)
What Can You Do With a Mobile Workbench?
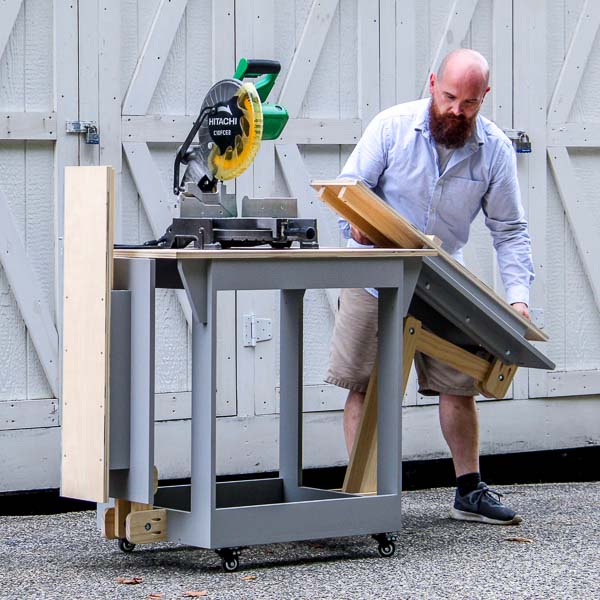
A mobile workbench can perform many of the same functions as a traditional workbench. You can use it as a miter saw stand or as a work table to build and assemble woodworking projects. The collapsible workbench is also the perfect place to use a benchtop router table.
Related: DIY Flip Top Workbench Cart
I often use it as a finishing station. First, I cover it with a drop cloth and then apply a coat of paint or stain. I even use it outside of my workshop as a grooming table for my dog and as an extra serving table at parties!

Where Can You Use a Folding Workbench?
As I mentioned earlier, a folding workbench is perfect for DIYers with a small workshop, shed, garage or even those DIYers without a dedicated workshop. I often use my folding workbench for outdoor projects in my backyard.
Related: My 12×13 Small Woodshop Layout
How to Build a DIY Folding Workbench
Printed Plan
- Get the PDF plan here (includes detailed instructions, measurements, and bonus tips).
Supplies
- Lumber (per printed plan)
- (6) 2″ Hinges
- 1-1/4″ Pocket Screws
- 1-1/4″ #8 Wood Screws
- Wood Glue
Tools
- Tape Measure
- Miter Saw
- Circular Saw
- Drill
- Kreg Jig
- Countersink Drill Bit Set
Step 1. Cut the Legs
Cut eight pieces of wood to length for the legs.
Step 2. Cut the Rails
Cut eight pieces of wood to length for the rails. Drill pocket holes in the ends of each rail.
Related: How to Use a Kreg Jig
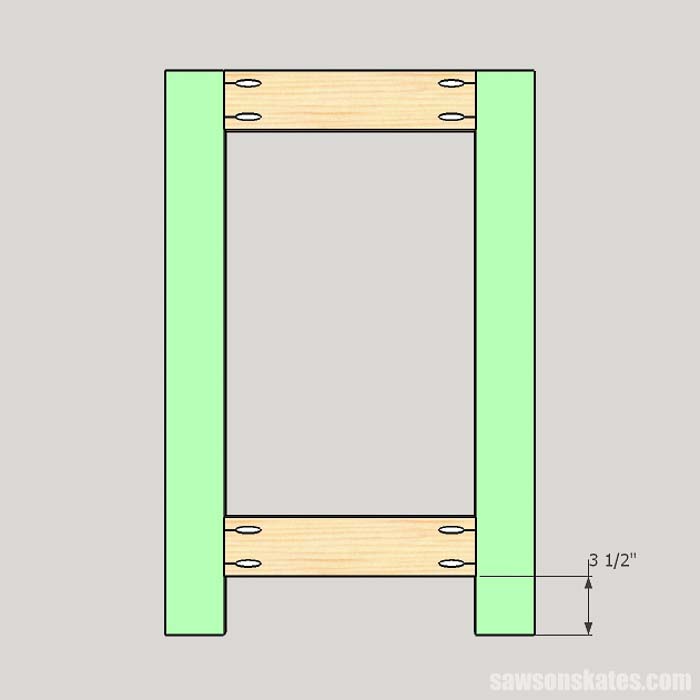
Step 3. Assemble the Legs
I clamped scrap pieces of wood to the bottom of each leg to help position the bottom rail. Apply wood glue to the ends of the rails, clamp to the legs and attach using pocket screws. Repeat for the remaining three legs assemblies.
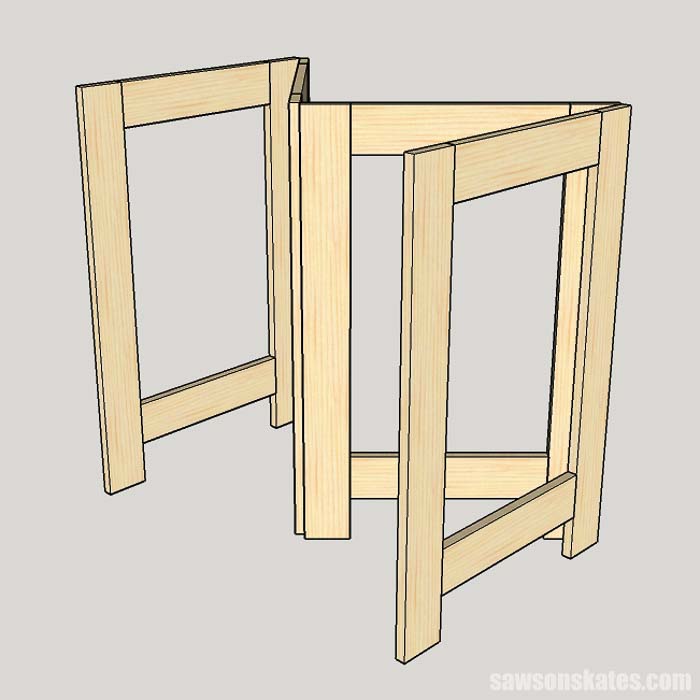
Step 4. Attach the Hardware
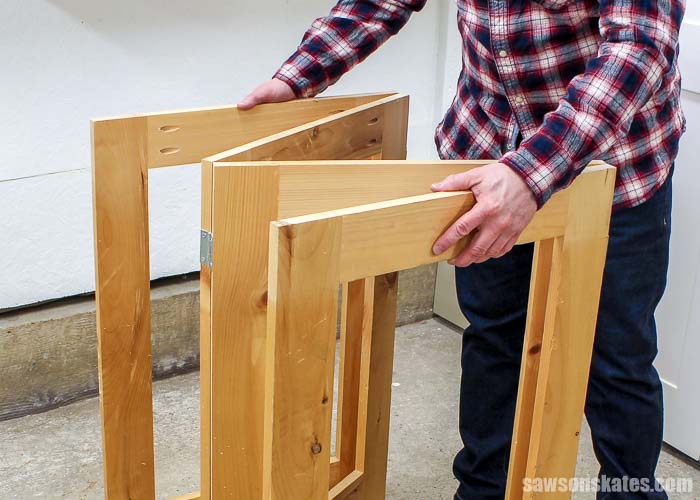
Place two legs assemblies on the workbench and attach two hinges. Next, rotate the legs so the hinges face away from you.
Then, insert one leg assembly below and one leg assembly above the set of legs that were rotated. Attach four hinges to these legs. The legs will form a “W” when complete.
Step 5. Cut the Plywood Top
Cut a piece of plywood to size for the top.
Related: 4 Ways to Make Straight Cuts with a Circular Saw
Step 6. Cut the Side Aprons
Cut two pieces of wood to length for the side aprons and drill pocket holes in each end.
Step 7. Cut the Front and Back Aprons
Cut two pieces of wood to length for the front and back aprons.
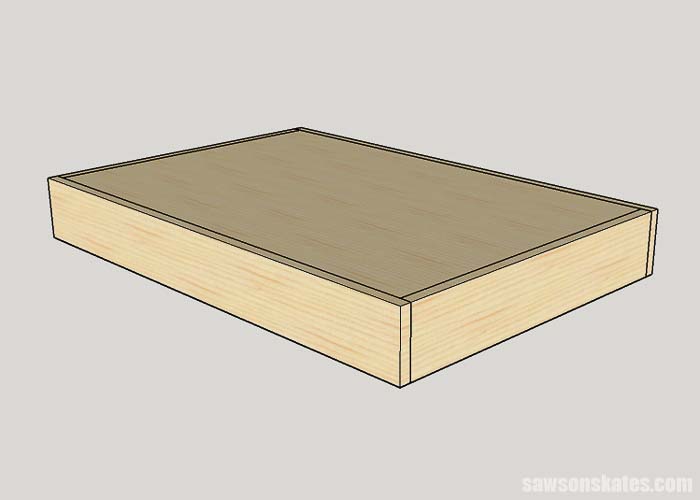
Step 8. Assemble the Table Top
Apply wood glue to the ends of the side aprons (be sure to position the aprons so you have access to all of the pocket holes), clamp to the front and back aprons, insert the plywood top and attach using pocket screws.
Flip the top assembly and make sure the top is flush with the tops of the aprons. Drill countersink holes and attach the top to the aprons using wood screws.
Related: How to Use a Countersink Bit
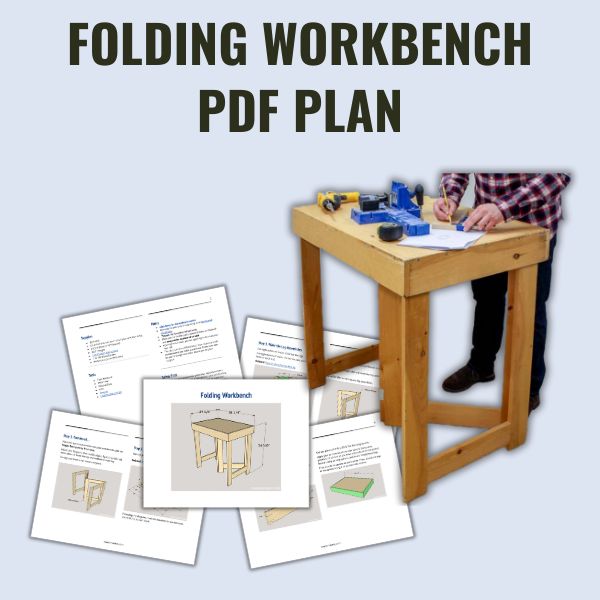
Includes:
- List of tools and materials
- Complete measurements (in inches)
- Easy-to-follow instructions
- Detailed diagrams
Final Thoughts
Build your own folding workbench with these step-by-step plans. This sturdy, foldable workbench is perfect for a workshop, garage or shed. It’s also handy to use as a serving table at parties or a grooming table for your dog!
Get the workbench plans (including the detailed instructions, diagrams, and dimensions) now!
Thank you for stopping by. If you found this information helpful, would you please pin it to Pinterest? Other DIYers would appreciate it and I would too! Thank you – Scott
Recommended For You
Pin This For Later

Hi there – I’m Scott, a woodworking enthusiast and creator of Saws on Skates, a site I started in 2015 to share easy-to-follow tutorials, space-saving shop tips, and project inspiration for DIYers at any skill level. Learn more about my woodworking journey here.
You could probably rig up some sort of pipe clamp moxon vice to fit that design. It would be easily removable so you could still fold it up for storage/transport.
Oooooohhh… I like that idea! I actually have another I want to try that will hopefully make this table even more useful. I’ll definitely share the plans if my idea works out.
These plans embody an idea I had, but I got “stuck” and could not complete the concept. To me, you are a genius! Thanks for posting this. It is “simple, yet elegant” and more than I had hoped for.
Hey Spence – Thank you for stopping by and for the compliments! I use my folding workbench all the time, in fact, I have a project sitting on mine right now. Thank you again and good luck with your folding workbench!
Hey Scott- this is a great design. I’ve been tossing up getting some saw horses but they’re still pretty big to store when I’m not using them and I thought they’d be a bit unstable. Your design lays so much flatter and looks like I could slip it down the side between a cupboard and tool shelf.
I’ve never made pocket holes before so that scares me a little. I’ve only ever done dovetail or biscuit joins or drilled dowel holes. I’m not going to the trouble of dovetail joins for this and I don’t have a biscuit cutter so I’m not sure what I’ll do. Perhaps I’ll have to buy a pocket hole jig…?
I LOVE my Kreg Pocket hole jig – I use it to build nearly all of my furniture projects! And the pocket hole jig is sooo easy to use. You could get a Mini Kreg Kit or a Jr. Kreg Pocket Hole System (both are fairly inexepensive), but once you have a pocket hole jig you’ll use it ALL THE TIME! So I would go for the K4 or K5 because they have some handy additional features. Good luck!!!
Did you happen to make any improvements to this since you initially posted this?
Also, I’m looking to build this and possibly create a video with my attempt. Lol Would you be alright with that?
Hi Chris – I haven’t made any changes to the folding workbench, but I do have some ideas in my head that I hope to implement in the future. Yes, you’re welcome to create a video. I would just ask that you include that the plans are from Saws on Skates and link to the plan. I’d love to see the video when you’re done!
i notice on your plans it shows to buy some 1by5 boards and i wonder if this is a mistake because i know that there 1by2 1by 3 1by and 1by6 but never heard of a 1by5 so where do they sell them ?
thanks
Hi Carl – Yes, 1x5s are available. I haven’t checked Home Depot, but I know they are available at my local Lowe’s store. They are usually on one of those low rolling carts on the floor, not standing up with the other wood. If you can’t find them you can always rip a 1×6 to 4-1/2″. Good luck.
thanks . i have not checked Lowe’s but will . i personally don’t like shopping at Lowe’s because there customer service sucks and you can never find anyone for help in there
Will you be doing hand work on this bench: chopping mortises, sawing or ? I guess the question deals with how much heavy work will this withstand?
Hi Larry – I’ve never chopped mortises on this folding workbench, but it is pretty sturdy. The legs support it in all four corners and in the middle. I’ve used it as an assemble table, for my miter saw, benchtop router table, as a finishing table and I even groom my dog on it once a month! I have my latest project sitting on it right now. I built it more than two years ago and it’s still going strong
Step 3 shows you using a 1×4 to space the bottom rail, putting it 3.5″ from the bottom. But in step 4, it looks more like 1″ to 1.5″. Is this another goof? Which measurement do you recommend?
Hi Bill – That is the goof. I cut the legs too long so they wouldn’t fit inside the top. I had the cut the legs, which made the rail closer to the floor. My legs work fine, but if the rail was a little taller the legs can straddle objects on the floor, you can pass cords under the legs, etc.
A few strategically placed dowels on the underside of the tabletop would keep the legs from walking inward, and may not interfere with the storage either
Hi Steve – Thank you for stopping by and for the idea!
I like your table design. When i get around to purchase a router I am thinking on making this a portable 2 in one router table with changeable tops so I can have a nice router table and a small workbench too.
Hi Mike – Thank you for stopping by. That’s a great idea to incorporate a router with this table! I’d love to see some pics when you make it!
About how much did materials cost to make this?
Hi Kim – Thank you for stopping by. This is always a tricky question because wood seems to cost more here compared to other parts of the country. I’m guessing the cost of materials would be around $90.