Farmhouse DIY Vegetable Storage Bin
This DIY vegetable storage bin is bursting with farmhouse charm! The tilt-out drawers with rustic wire mesh are the perfect way to organize your veggies.

What Should I Build Next?
That's the question I help answer.
Every week, I send woodworking ideas to 17,000 DIYers who love building things.
You'd fit right in.
DIY Vegetable Storage Bin
This farmhouse-style DIY vegetable storage bin is the perfect way to organize your veggies!
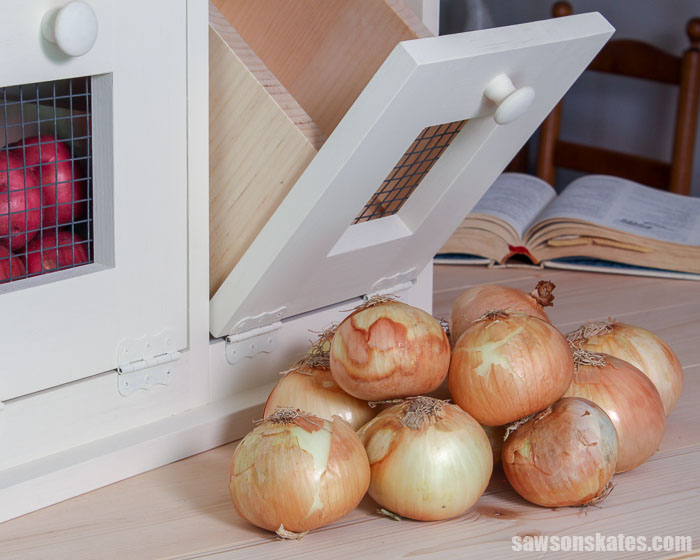
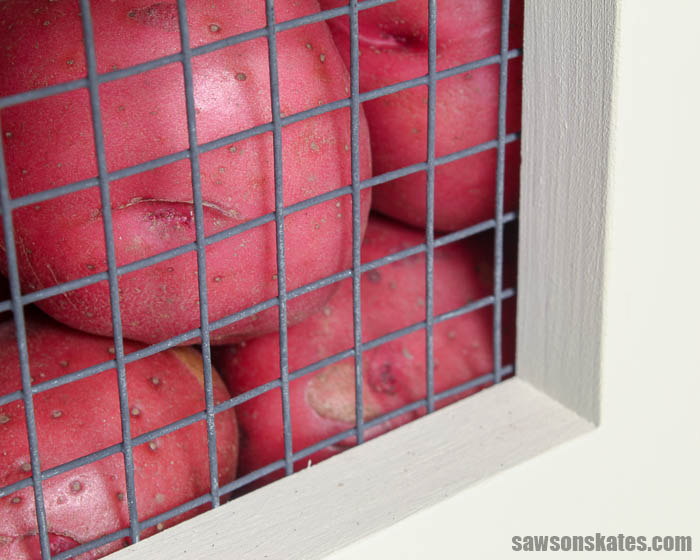
The countertop bin has two, handy tilt-out drawers with rustic wire mesh.
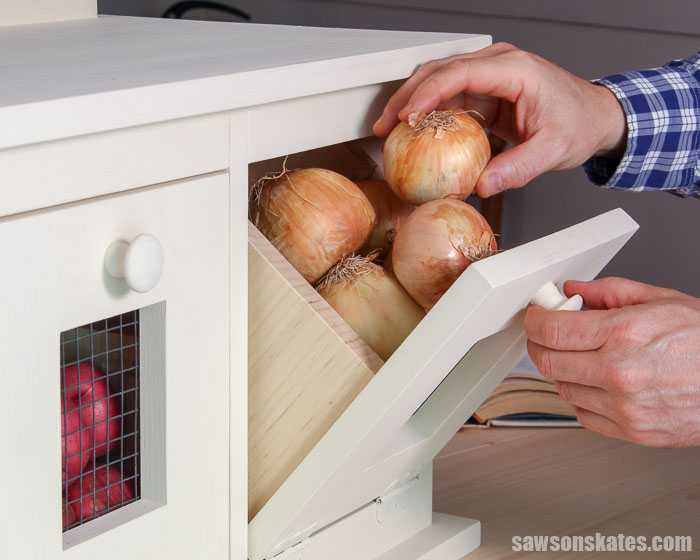
Pull the wooden knobs, and the drawers tilt forward, giving you easy access to the storage area.
The deep storage drawers have plenty of space for root vegetables like potatoes and onions.
Fresh fruits can be stored on top of the bin. A rail prevents the produce from rolling off the back.
This is an easy weekend project for DIYers of any skill level.
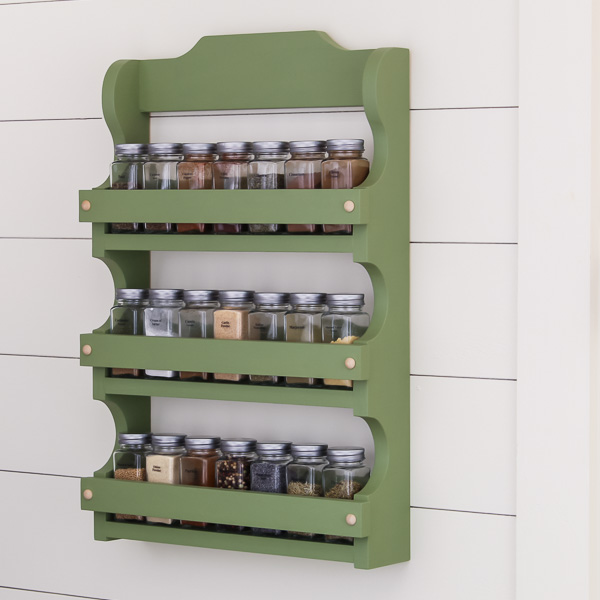
You may also enjoy this DIY Spice Cabinet plan.
This tutorial contains affiliate links to supplies and tools. Purchases made using these links help support the Saws on Skates website and allows me to share more projects and tips with you. There is no cost to you for using these links. Visit my site policies for more information.
Before we get into how to make a DIY vegetable storage bin, be sure to click the subscribe button at the bottom of this page to sign up for my FREE weekly newsletter loaded with helpful pocket hole tricks, space-saving workshop ideas, clever DIY tips and more!
Table of Contents
- What Can You Store in This DIY Vegetable Storage Bin?
- What Skills Do You Need to Build This Project?
- What Tools Do You Need?
- What Kind of Wood Do You Need?
- How Do You Make a Tilt-Out Drawer?
- How Do You FinishThe DIY Vegetable Bin?
- How to Make This DIY Vegetable Storage Bin
- Get the Free Printed Plan
What Can You Store In This DIY Vegetable Bin?
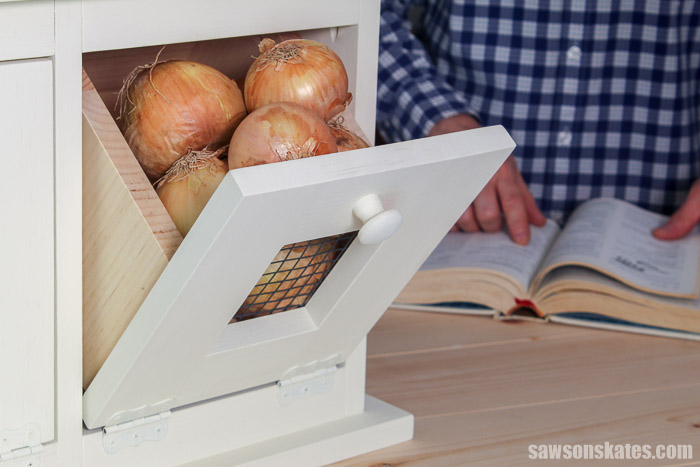
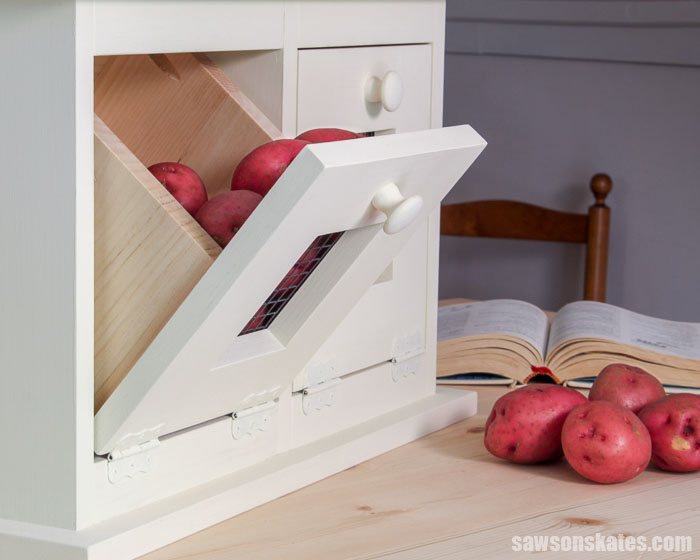
This farmhouse-style storage bin is the perfect way to organize root vegetables like potatoes and onions.
I was able to fit 4 pounds of potatoes or about 15 small/medium-sized potatoes in just one drawer.
I was able to easily fit about 5 pounds of onions or about 9 medium-sized onions in just one drawer.
Fresh fruits can be stored on top of the bin and a rail prevents the produce from rolling off the back.
What Skills Do You Need to Build This Project?
This DIY vegetable storage bin is an easy-to-make project for DIYers of any skill level.
The bin was made using simple construction methods and just a few basic tools which makes this a great project for beginners.
Related: 10 Must-Have Woodworking Tools for Beginners
Back to Table of ContentsWhat Tools Do You Need?
Many homemade veggie bins are made with plywood, which can be challenging for some do-it-yourselfers. Large plywood sheets can be cumbersome to transport and maneuver in a small workshop and must be cut with a circular saw or table saw.
Related: Table Saw vs Circular Saw (Which Should You Buy?)
I also understand many DIYers either don’t have a table saw or are not comfortable using one.
Related: How to Get into Woodworking Without a Table Saw
I designed this vegetable bin with solid wood boards rather than plywood, meaning you only need a miter saw to cut the wood for this project.
Related: 7 Miter Saw Tricks Every DIYer Should Know
It’s also important to have a right angle drill attachment. Some of the pocket hole locations on this project are almost impossible to reach with a traditional driver.
A right angle drill attachment is the perfect tool to drill in a tight spot or to drive screws in hard-to-reach places.
Related: Why You Need a Right Angle Drill Attachment
You’ll also need a few other basic tools to build this project, like Kreg Jig, a drill, and an assortment of bar clamps.
Back to Table of ContentsWhat Kind of Wood Do You Need?
As I mentioned earlier, plywood can be difficult to work with for some DIYers. This is especially true for those of us with small shops like mine.
Related: My 12×13 Small Woodshop Layout
I designed this storage bin with pine boards rather than plywood. I think smaller boards like 1×3s, 1×4s, and 1×6s are much easier to work with than large sheets of plywood.
Related: Beginner’s Guide to Wood Sizes
How Do You Make a Tilt-Out Drawer?
These tilt-out drawers are built similar to other DIY drawers. The only exception is these drawers are attached with two decorative hinges at the front of the cabinet. The hinges allow the drawer to tilt out.
Related: How to Build DIY Drawers
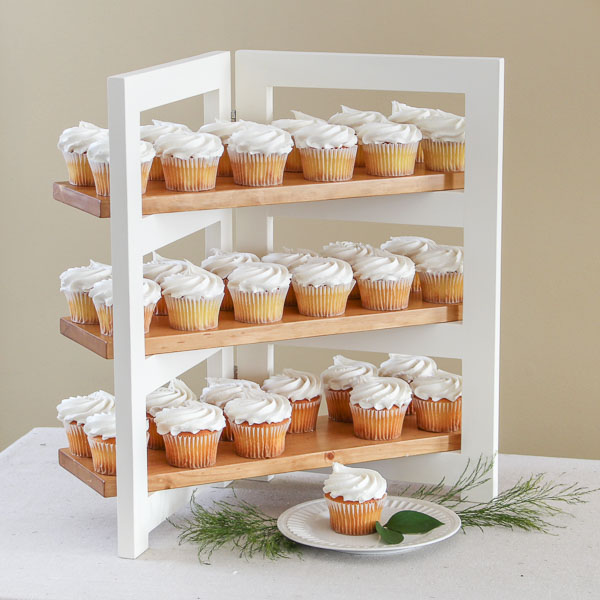
I used these hinges for my tilt-out drawers. These are the same hinges I used for the folding DIY cupcake stand and the DIY spice cabinet.
I like the decorative style of these hinges but I thought the metal looked too shiny on the front of the cabinet. I chose to paint my hinges to match the cabinet.
The paint may chip over time, but I thought the look of painted hinges better complemented the farmhouse style of this piece.
How Do You Finish the DIY Vegetable Bin?
This DIY veggie storage bin could be finished in a variety of ways. It could be painted, stained, or a combination of paint and stain.
I chose to paint my vegetable bin.
I wanted to keep this project simple so I painted the cabinet with this chalk-type paint. Unlike other types of paint, you don’t need to apply a primer to the wood before applying a chalk-type paint.

I planned to use chicken wire for this project. But I had some hardware cloth leftover from another project, so I used that instead. Chicken wire is less expensive, and would give this project an even more rustic look.
I attached the hardware cloth with washers and sheet metal screws. If you use chicken wire, it may be easier to attach it with staples and a staple gun, rather than screws.
I used a small foam roller to apply a coat of this charcoal-colored chalk-type paint on the front and back of the hardware cloth. When I built this outdoor plant stand, a few readers suggested that I paint the chicken wire black. They said it would be easier to see inside.
I tested both the bare wire mesh and painted wire mesh on the DIY spice cabinet project. I have to agree. I think it’s easier to see inside when the wire mesh is painted black.
That’s why I decided to paint the wire mesh for the veggie bin too. Skip this step if you’re concerned about having paint near your veggies.
DIY Vegetable Storage Bin
Printed Plan
- Get the FREE plan here (includes detailed instructions, measurements, and bonus tips).
Supplies
- Wood (per printed plan)
- 1-¼” Coarse-Thread Pocket Screws
- 1-¼” Fine-Thread Pocket Screw
- 1-¼” Wood Screws
- Wood Glue
- M8 Washers (from this assortment)
- #10 ½” Sheet Metal Screws
- Hardware Cloth or Chicken Wire
- Knobs
- Decorative Hinges
- Chalk-Type Paint (I used this one)
Tools
- Tape Measure
- Drill
- Kreg Jig
- Kreg Multi-Mark
- Miter Saw
- Tin Snips
- Right Angle Drill Attachment
- ¼” Drill Bit
- Countersink Drill Bit Set
Step 1. Make the Panels
Cut the wood to length for the sides. Apply glue to the edges, and clamp together to form two panels.
When the glue is dry, drill pocket holes in each end. These pocket holes will be used to attach the sides to the top and bottom.
Step 2. Make the Back Assemblies
Cut the wood to length for the back assemblies. Drill pocket holes, clamp, and attach using pocket screws.
Step 3. Assemble the Case
Apply glue to the edges of the back assemblies, clamp to the panels, and attach using pocket screws.
Cut two pieces of hardware cloth to fit the openings in the back. Center the hardware cloth on the openings, and attach using washers and screws.
You can also use chicken wire, but it may be easier to attach it with staples and a staple gun, rather than screws.
Cut four pieces of wood to length for the rails, and drill pocket holes in each end. Apply glue to the rails, clamp to the sides, and attach using pocket screws.
Step 4. Attach the Top and Bottom
Cut the wood to length for the top and bottom. Apply glue to the edges, and clamp together to form two panels.
Center the bottom on the sides, clamp, and attach using pocket screws.
Cut one piece of wood to length for the top rail. Position the rail flush against the back and in 1” from each edge. Clamp to the top, drill countersink holes, and attach using wood screws.
Step 5. Make the Drawers
TIP: The drawers need an ⅛” clearance on all sides. Adjust the measurements if necessary.
Cut four pieces of wood to length for the stiles. Cut four pieces of wood to length for the rails, and drill pocket holes in each end.
Apply to glue to the rails, clamp to the stiles, and attach using pocket screws.
Optional: Fill the pocket holes with pocket hole plugs.
For the bottom of the drawer box, cut the wood to length. Apply glue to the edges of two boards to make one wide board. Repeat for the remaining pieces. When the glue is dry, drill pocket holes on each side.
For the sides of the drawer box, cut the wood to length. Apply glue to the edges of two boards to make one wide board. Repeat for the remaining pieces. When the glue is dry, drill pocket holes in each end.
Apply glue to the bottom, clamp to the sides, and attach using pocket screws.
Cut two pieces of wood to length for the backs of the drawer, and attach using pocket screws.
Position the drawer front on the drawer box, and attach using pocket screws.
Cut two pieces of hardware cloth to size. Center the hardware cloth on the drawer opening, and attach using M8 washers #10 ½” sheet metal screws. Repeat for the other drawer.
You can also use chicken wire, but it may be easier to attach it with staples and a staple gun, rather than screws.
Step 6. Install the Tilt-Out Drawers
I used playing cards to help equally space the drawer from top to bottom and side to side.
Then, I attached the hinges to the cabinet and drawer using the screws that were included with the hinges.
Step 7. Finish the DIY Vegetable Storage Bin
See How Do You Finish the DIY Vegetable Bin? for more information.
Final Thoughts
This farmhouse-style DIY vegetable storage bin is the perfect way to organize your veggies! The deep storage drawers have plenty of space for root vegetables like potatoes and onions.
Get the free plan (including the detailed instructions and measurements) now!
Thank you for stopping by. If you enjoyed this tutorial, would you please take a moment and pin it to Pinterest? I’d really appreciate it!
Recommended For You
Pin This For Later

Hi there – I’m Scott, a woodworking enthusiast and creator of Saws on Skates, a site I started in 2015 to share easy-to-follow tutorials, space-saving shop tips, and project inspiration for DIYers at any skill level. Learn more about my woodworking journey here.