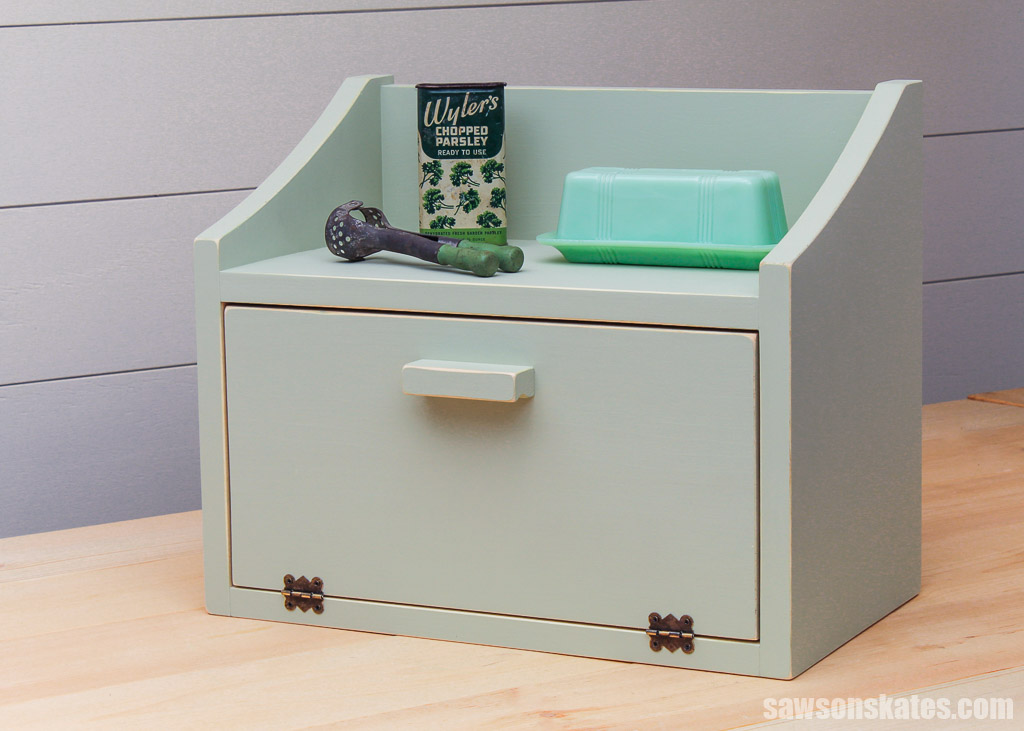
DIY Primitive-Style Bread Box with Shelf
Tidy up your kitchen with this primitive-inspired DIY bread box. Its spacious shelf and rustic design provide storage and style.
What Should I Build Next?
That's the question I help answer.
Every week, I send woodworking ideas to 17,000 DIYers who love building things.
You'd fit right in.
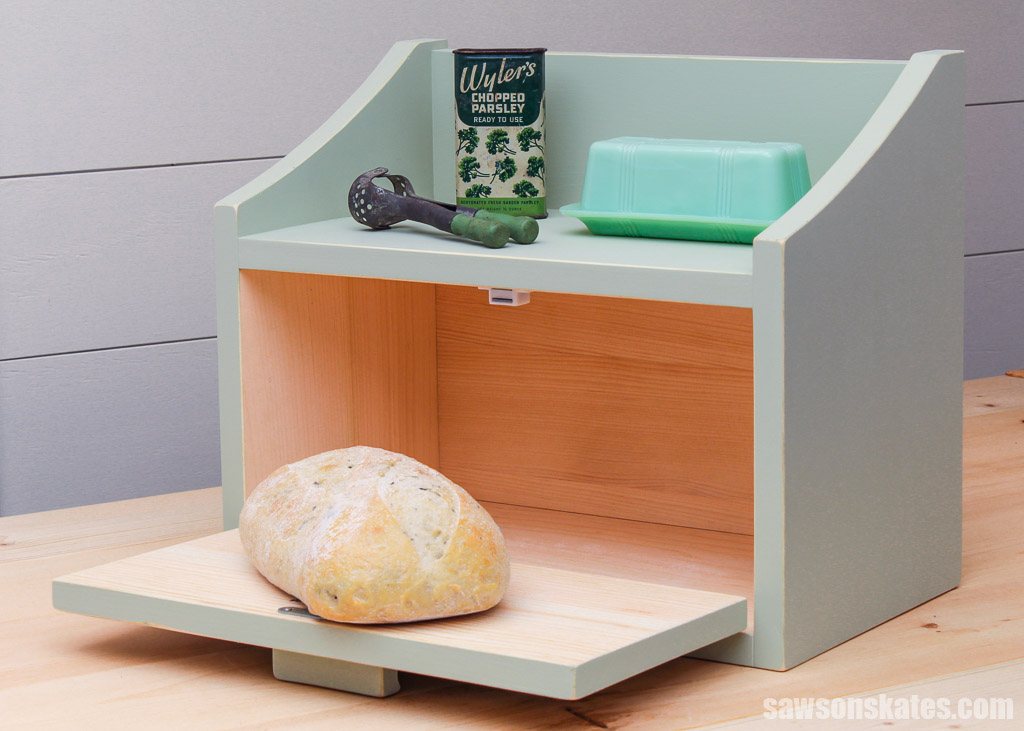
Tired of cluttered countertops? This primitive-style bread box is the perfect way to keep your loaves organized while offering a spacious shelf for your kitchen essentials. Made from simple materials, this handcrafted piece adds organization and rustic charm to any kitchen.
Table of Contents
This article contains affiliate links. If you purchase from these links, I may earn a small commission at no additional cost to you. Visit my site policies for more information.
Inspiration for This Project
You may have read me rave about my friend Colleen at Life on Kaydeross Creek’s amazing taste in home decor. Well, she’s done it again. This time, she stumbled upon a charming rustic bread box that sparked my creativity.
I put my own spin on it, slightly adjusting its size and shape. It’s the perfect spot to store your baked goods, and the top shelf is great for keeping your kitchen essentials like spices within easy reach.
What Wood Should You Use?
I used off-the-shelf 1x lumber from my local home improvement store, but you could use almost any wood to make your bread box.
Related: Beginner’s Guide to Wood Sizes
What Tools Do You Need?
I used five tools to make my bread box:
- Miter saw
- Table saw
- Scroll saw or jigsaw
- Pocket hole jig
- Drill
Optional tools:
I used a portable spindle sander to smooth the sides’ curves, but you could use sandpaper instead.
I used my router table and a cove bit to make the door’s handle.
How to Make a DIY Primitive-Style Bread Box
Printed Plan
Get the PDF plan here (includes detailed instructions, measurements, and bonus tips)
Materials
- Wood (per the printed plan)
- Wood Glue
- 1-¼” Pocket Hole Screws
- (2) Hinges (I used these)
- Magnetic Cabinet Door Catch
Tools
- Tape Measure
- Kreg Multi-Mark
- Miter Saw
- Scroll Saw or Jigsaw
- Table Saw
- Portable Spindle Sander (optional)
- Drill
- Right Angle Drill Attachment
- Pocket Hole Jig
- Router Table and ⅜” Cove Bit (optional)
Step 1. Make the Side Panels
NOTE: I began building the bread box but realized it was bigger than I wanted, so I disassembled it and redesigned it to be more compact. The assembly photos show the larger size; however, the steps are the same, and the printed plan reflects the updated measurements.
I made my side panels from several boards.
For the best results, I recommend squaring or jointing the edges of your boards before gluing them together, ensuring a tight fit and preventing gaps.
I used a table saw for this, but a jointer is the best option if you have one. And for full disclosure, I sometimes skip the jointing step if my boards’ edges are already reasonably square.
Related: 21 Table Saw Safety Rules (& Mistakes to Avoid)
To make the panels, I started by cutting four boards to length (about a ½” longer than required) and squaring their edges using my table saw.
Related: How I Square Edges Without a Jointer (for Panels and Table Tops)
TIP: Gluing boards to form wider panels can sometimes lead to uneven or misaligned edges. If you have a sliding miter saw (capable of handling wider cuts than a standard one), here’s a helpful trick I use:
- Cut your boards slightly longer: When cutting individual boards, I cut them at least ¼ to ½” inch longer than the final desired length.
- Square up after drying: Once the glue dries, I use my miter saw to trim both ends of the assembled panel, ensuring perfectly square edges for my project.
If you’re using a standard miter saw, one that doesn’t slide:
- Cut to final length: Since the wider panel will be too large to cut in one pass for squaring after glue-up, cut each board to its final dimension before assembly.
- Careful Clamping: During glue-up, pay close attention to maintaining squareness while clamping.
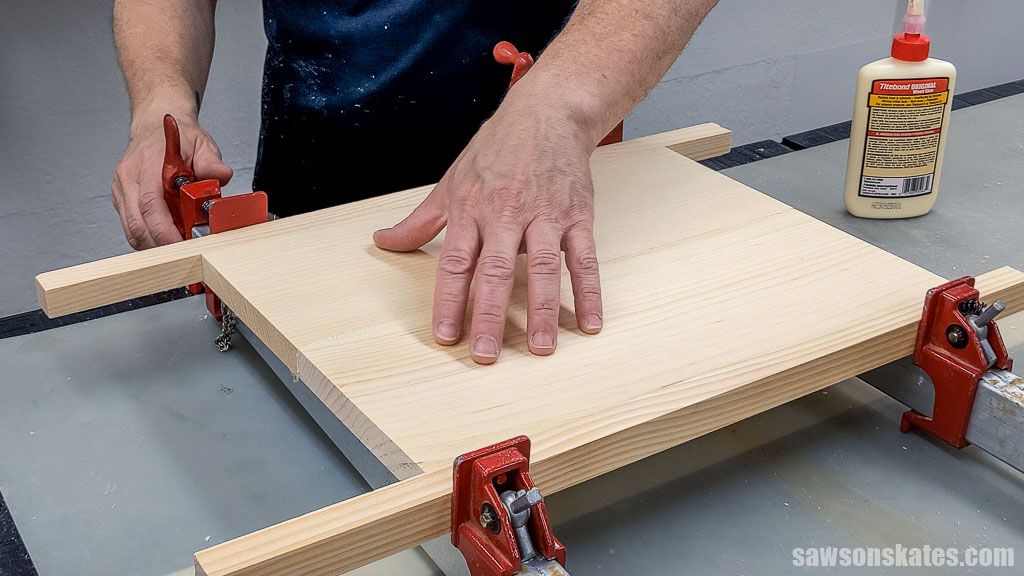
I applied glue to their edges and clamped them to form two panels. When the glue was dry, I cut them to their final length. First, I’ll trim one end, measured, and then cut the second.
Related: Why Can’t I Make Accurate Cuts? (& How to Fix It!)
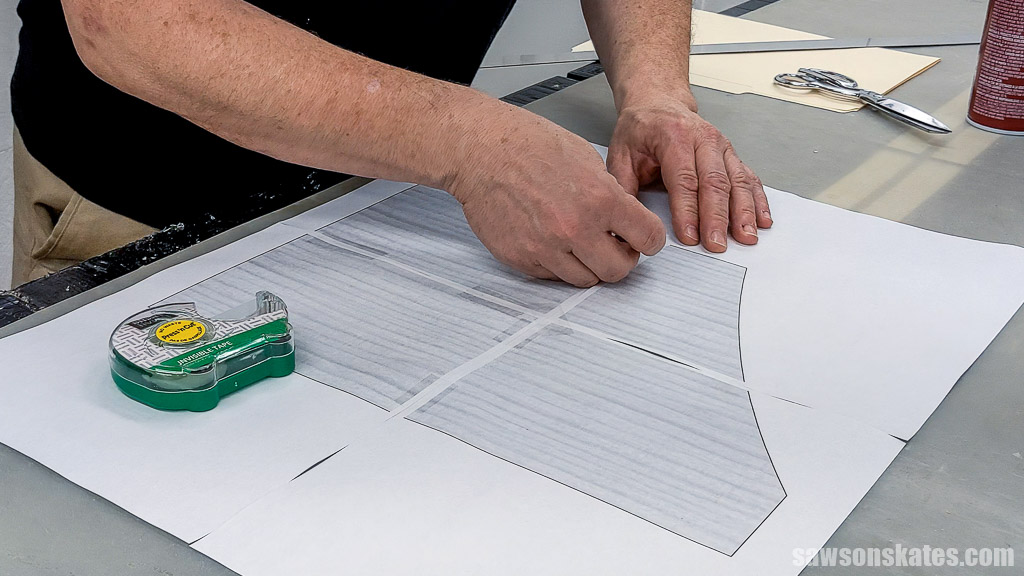
I prepared the side template while the glue was drying.
TIP: When printing the template, make sure the scale is set to 100% (usually found under “more settings”).
The sheets have a white border around them, but they need to be joined together at the edges.
Using a metal ruler, I ensured the straight lines were positioned correctly.
I joined them using tape once the sheets were in the correct position.
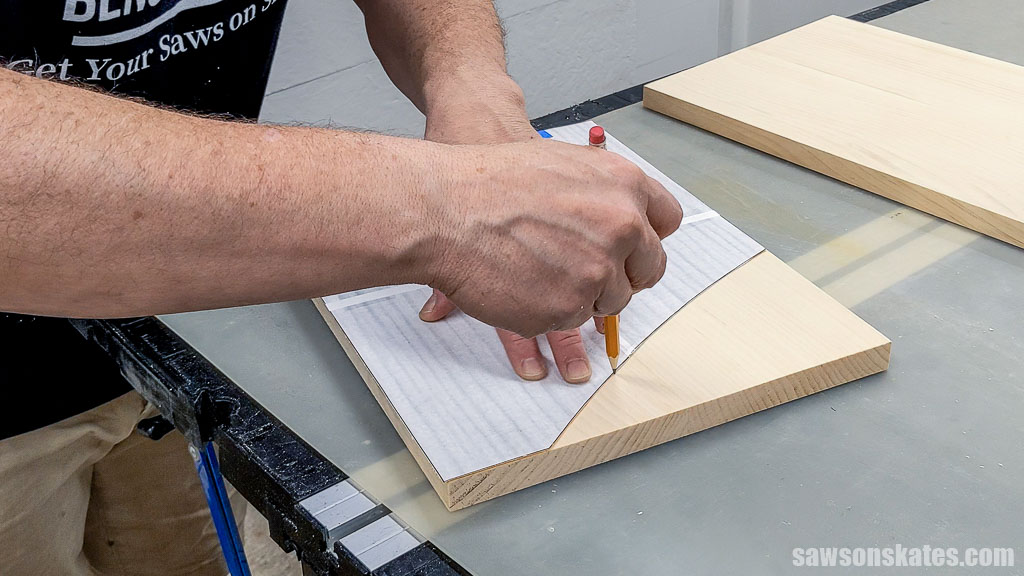
You can use carbon paper to transfer the pattern, placing it between the template and the wood, dark side down, and tracing the lines with a pen or pencil.
However, for easier and more accurate tracing, I prepare my templates by attaching them to a manila folder using spray adhesive.
I prefer this method because the folder’s edge provides a handy lip for the pencil to follow.
Using scissors, I cut out the template.

I positioned the template on the panel and traced it using a pencil.
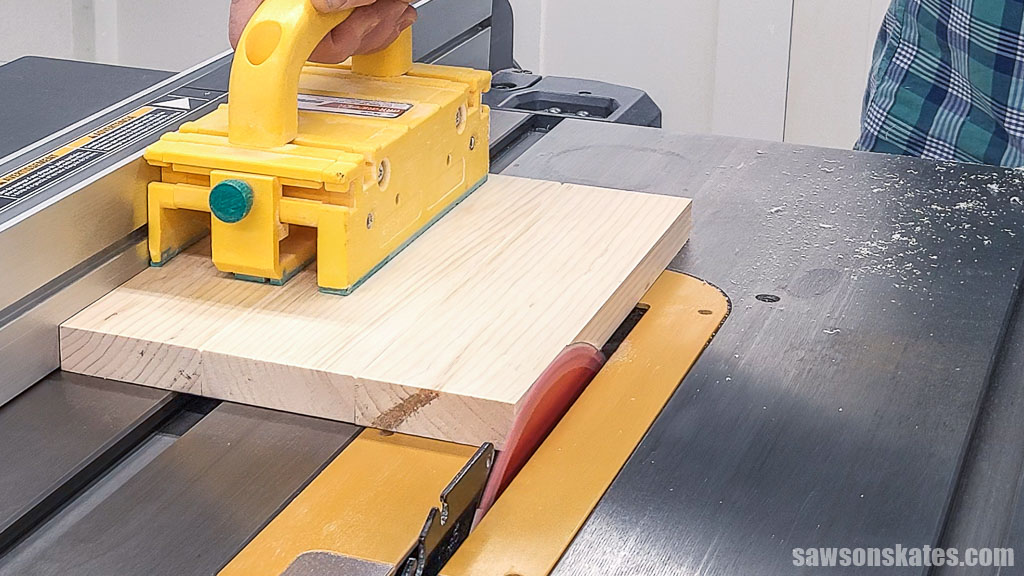
I cut the shape using a scroll saw, but a jigsaw will do the trick if you don’t have one. What’s my secret for perfect curves? I cut just beyond the pencil line, then sand, removing the saw marks and refining the shape.
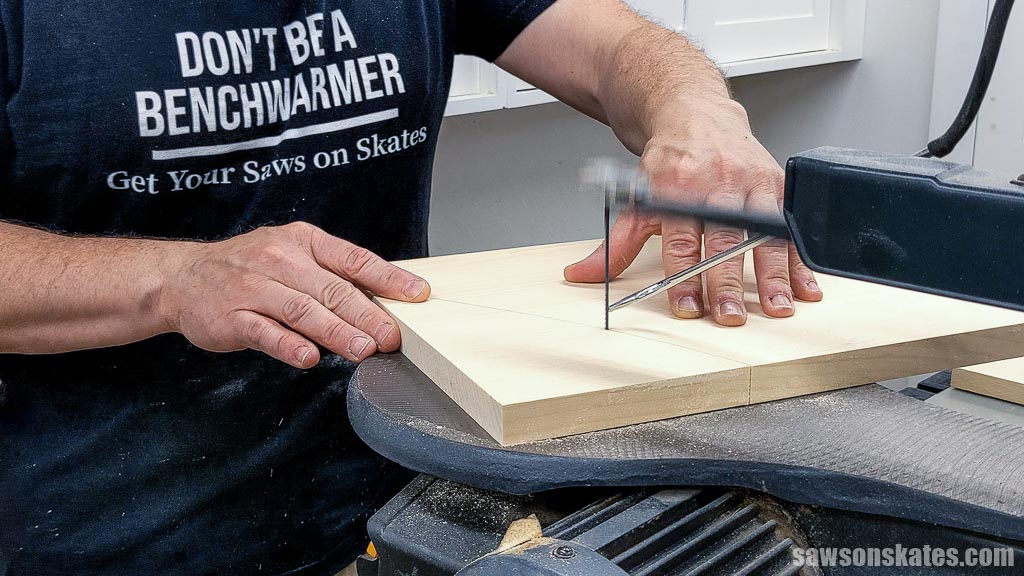
A portable spindle sander is my go-to tool for sanding inside curves.

Step 2. Attach the Shelves
I made the shelves following the same method as the side panels, cutting four boards to length (½” longer than required) and squaring their edges using my table saw.
I applied glue to their edges and clamped them to form two panels. When the glue was dry, I cut them to their final length. First, I’ll trim one end, measured, and then cut the second.
The top shelf needs to be narrower to make clearance for the back. Using my table saw, I ripped one shelf to width.
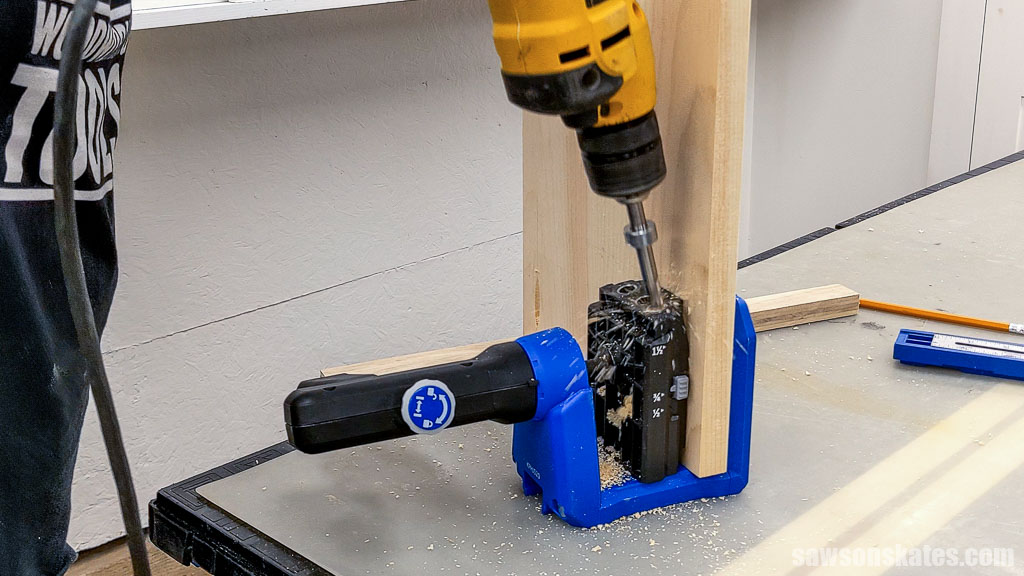
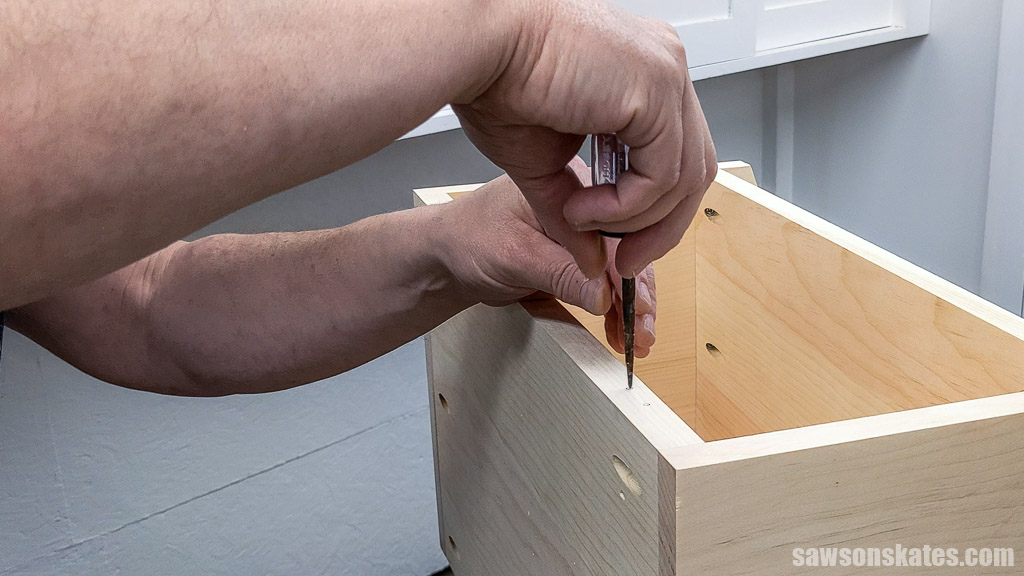
Following the diagram in the printed plan, I marked the locations for pocket holes. and drilled one at each mark.
Related: How to Use a Pocket Hole Jig
To help position the shelf, I cut several pieces of scrap wood to length and clamped them to the sides.
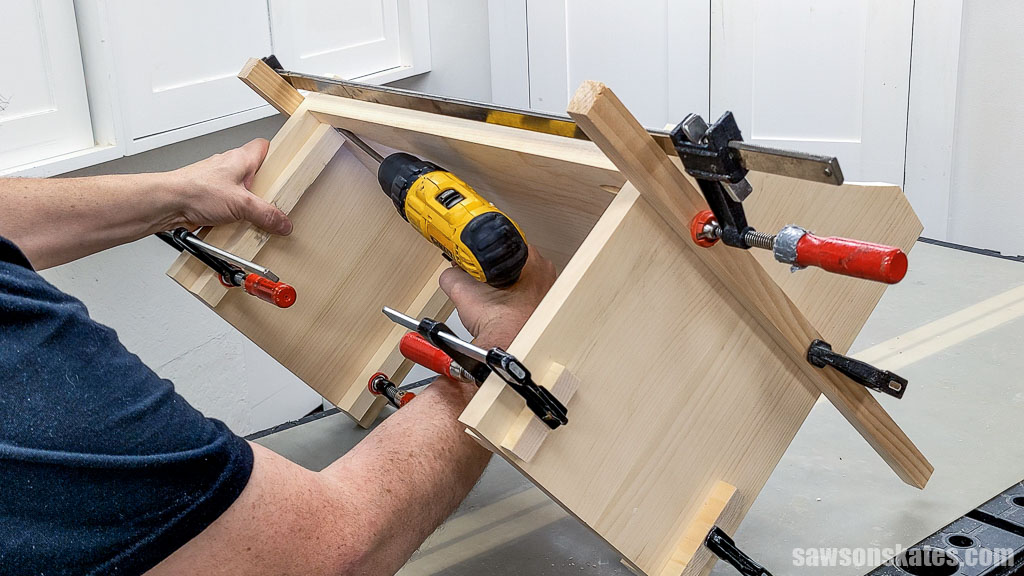
I placed the upper shelf above the scrap wood spacers, flushed it with the front, and clamped it in position.
Attach using pocket hole screws.
NOTE: Earlier, I mentioned that the first bread box was larger than I wanted, so I made it smaller. It’s not pictured here, but I need to use a right angle drill attachment to reach these pocket holes when assembling the smaller version.
Following the diagram in the printed plan, I marked the locations for pocket holes on the lower shelf and drilled one at each mark.
I positioned the lower shelf and clamped it in place. Attach using pocket hole screws.
Step 3. Attach the Back
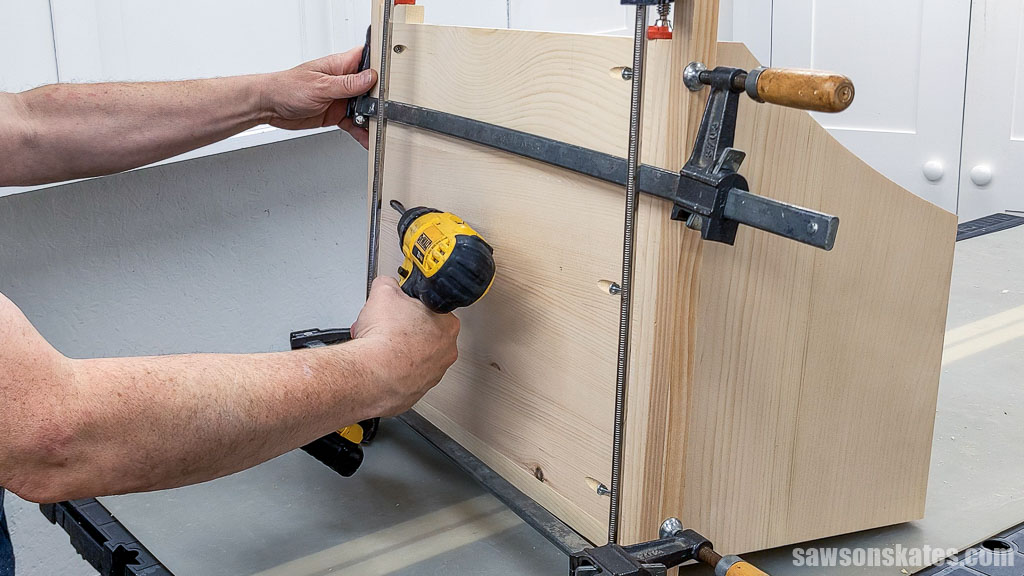
I made the back following the same method as the sides and shelves, cutting four boards to length (½” longer than required) and squaring their edges using my table saw.
I applied glue to their edges and clamped them to form two panels. When the glue was dry, I cut them to their final length. First, I’ll trim one end, measured, and then cut the second.
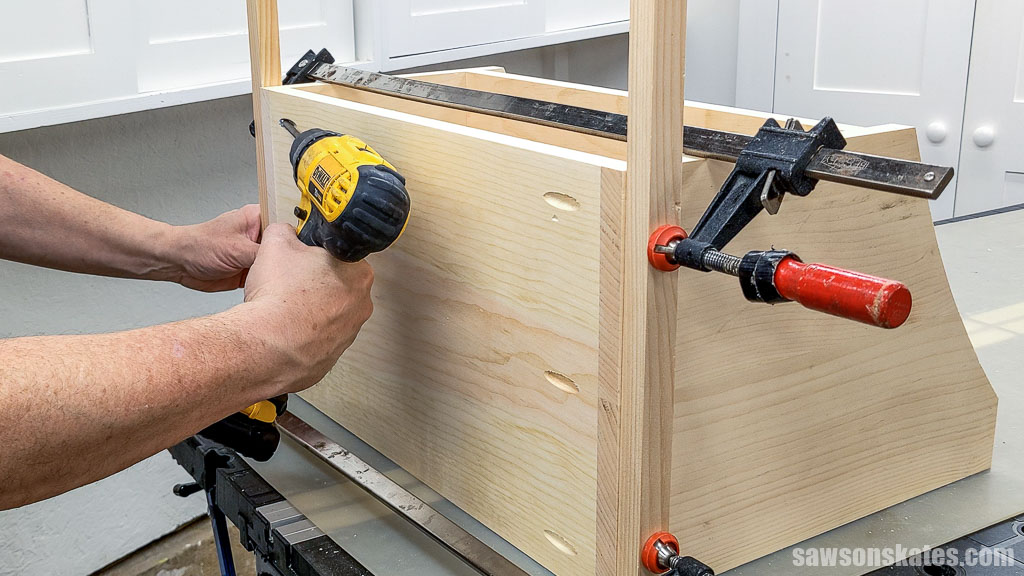
Following the diagram in the printed plan, I marked the locations for pocket holes and drilled one at each mark.
I positioned the back, clamped it in place, and attached it using pocket hole screws.
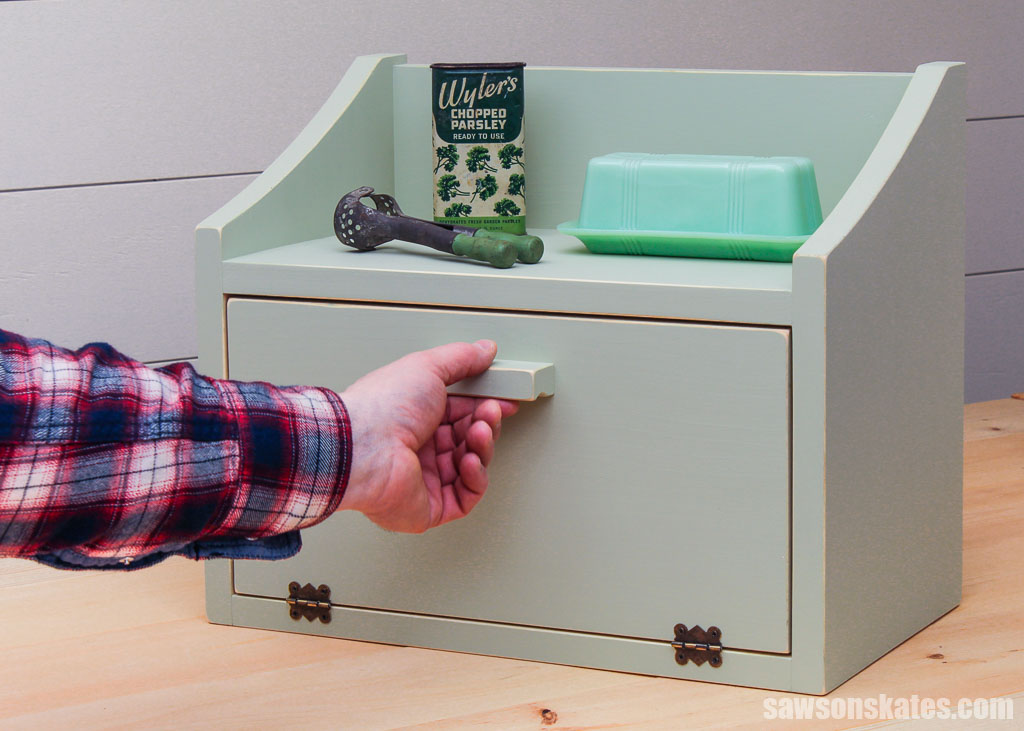
Step 4. Make the Door
I made the door following the same method as the sides, shelves, and back, cutting two boards to length (½” longer than required), squaring their edges using my table saw, and ripping them to width.
I applied glue to their edges and clamped them to form a panel.
I wanted the door panel slightly wider than required because the door needs ⅛” clearance on each side. Instead of aiming for precision right away, I took a gradual approach to “sneak up” on the perfect fit.
With my table saw unplugged, I placed the panel next to the blade and gently snugged the rip fence next to it. This method allowed me to shave off a thin amount of material. I flipped and repeated this process on the other side.
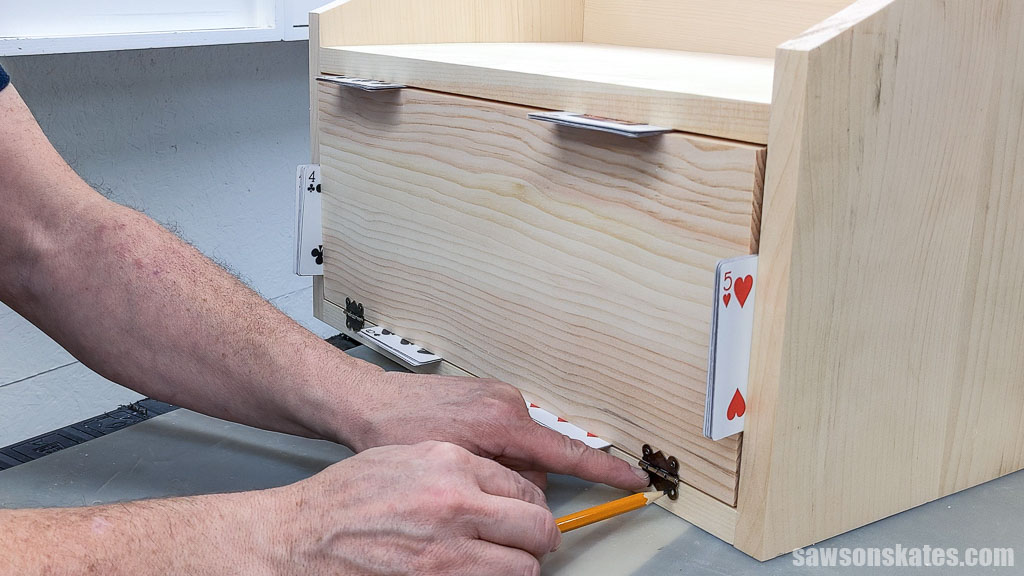
I continued flipping and shaving, test fitting in the opening after each pass until eight playing cards fit snugly between the top and bottom of the door.
Following the same method, I cut the door to length using my miter saw until eight playing cards fit snugly between the left and right sides of the door.
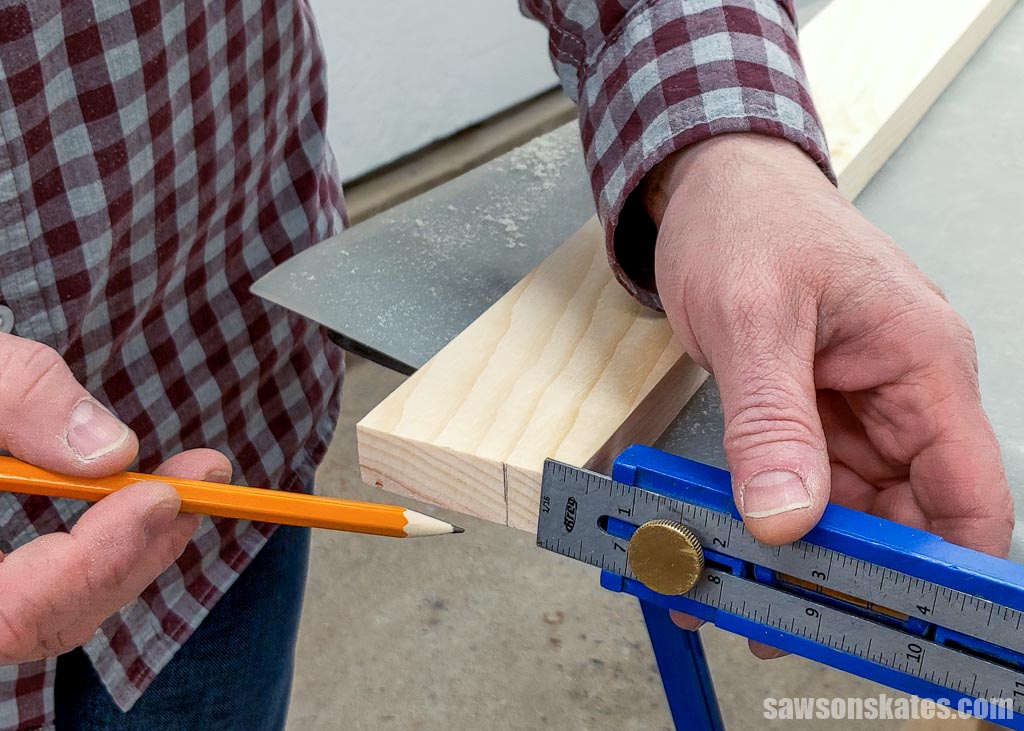
I positioned the hinges 1″ from the sides of the doors using my Kreg Multi-Mark.
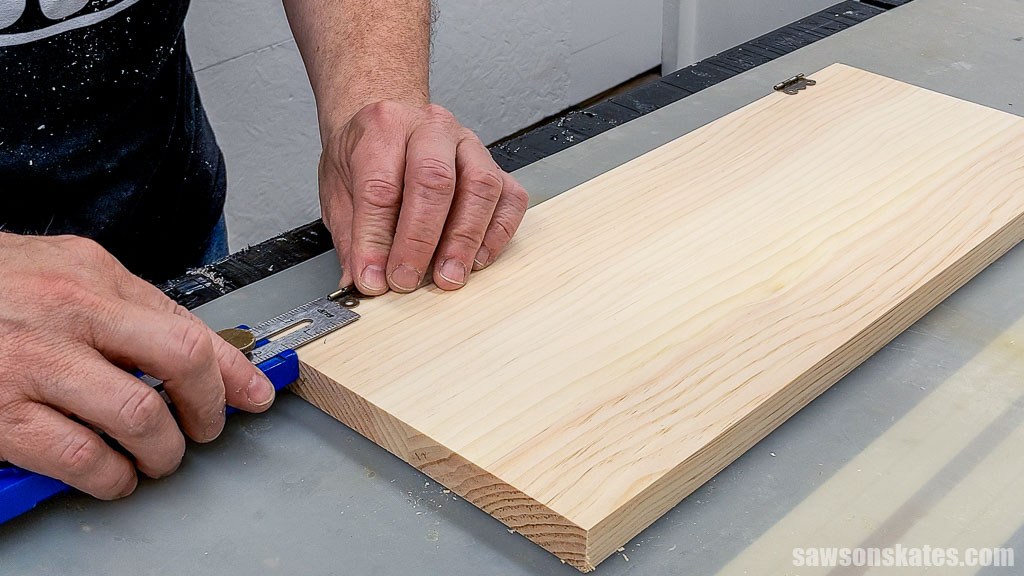
Using a pencil, I marked their hole locations on the door.

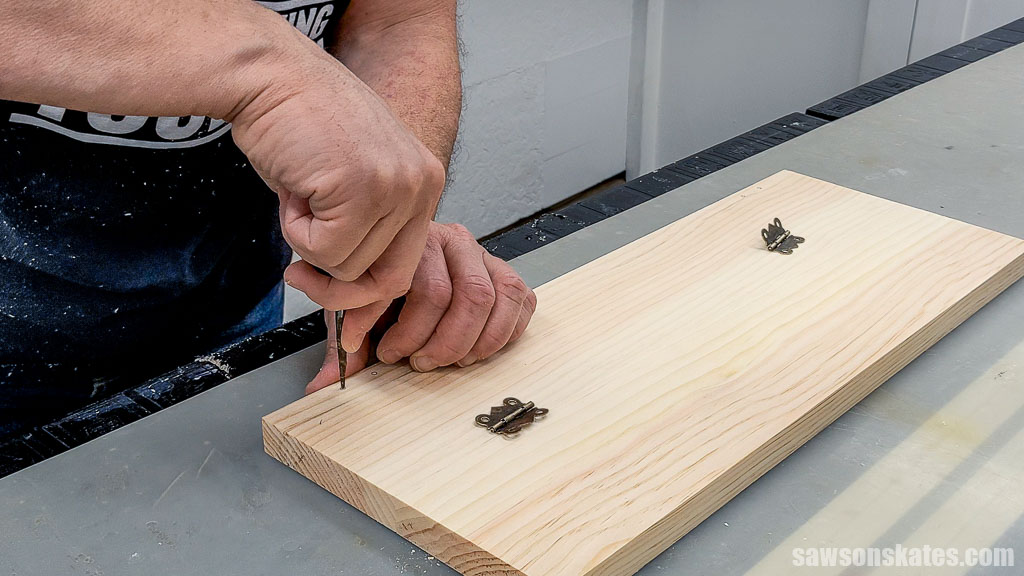
I made a starting point for the drill bit using an awl.
Related: What is an Awl? (& How to Use It)
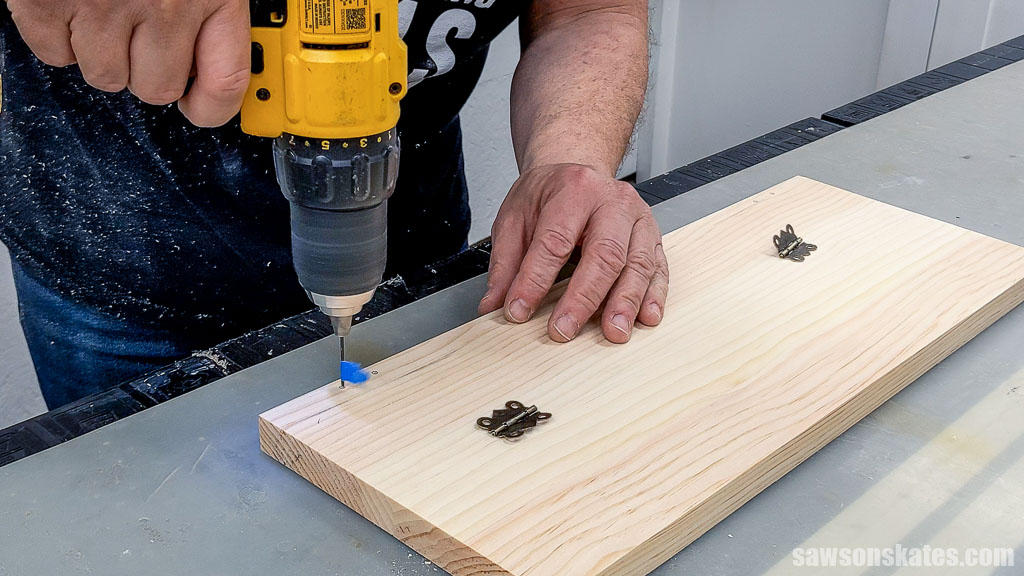
Using a drill bit, I made a pilot hole for the screws.
Related: How to Drill Pilot Holes (Why, When & Correct Size)
I attached the hinge to the door using the screws that came with them.
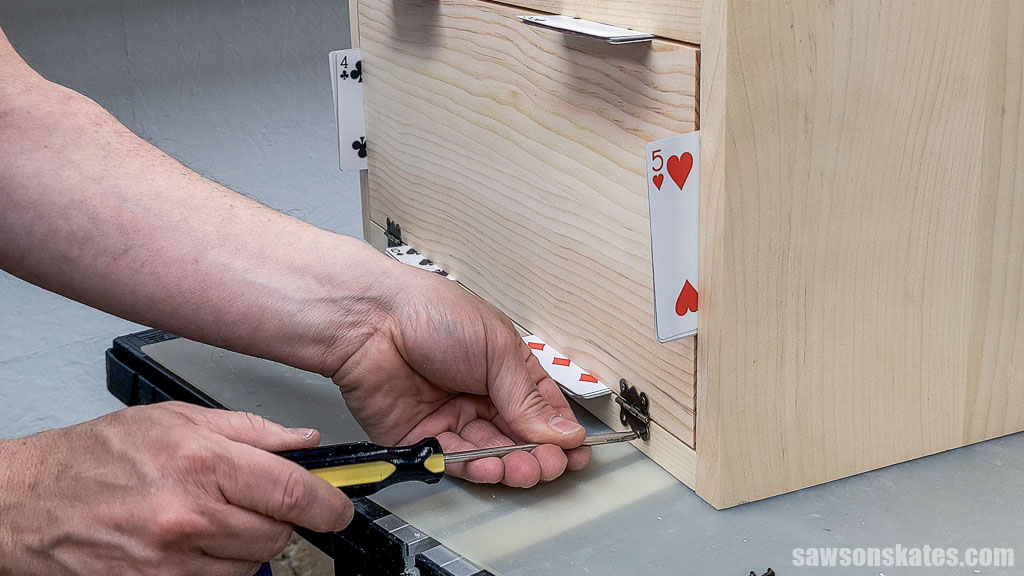
Again, using playing cards, I positioned the doors in the opening and marked their hole locations on the face frame using an awl.
Using a drill, I made pilot holes for the screws.
And I attached the hinges to the frame.
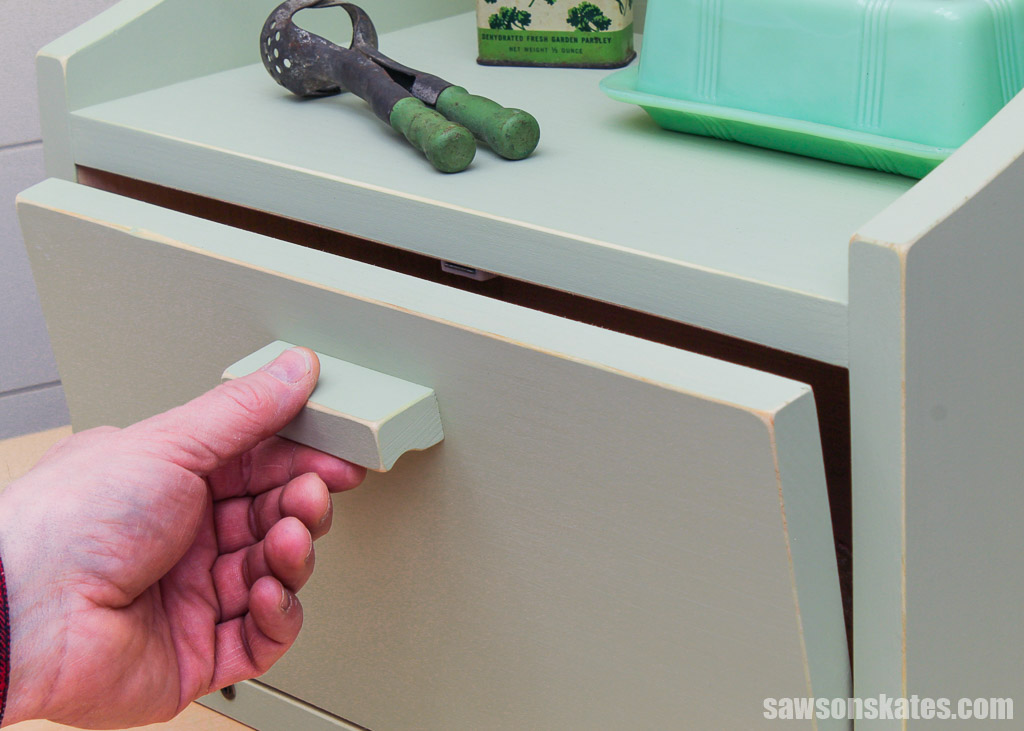
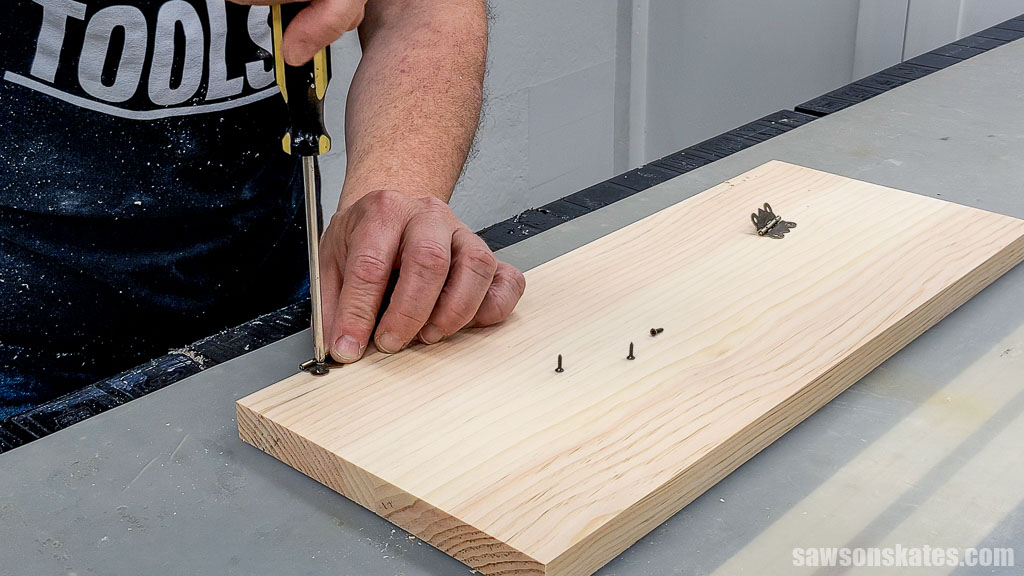
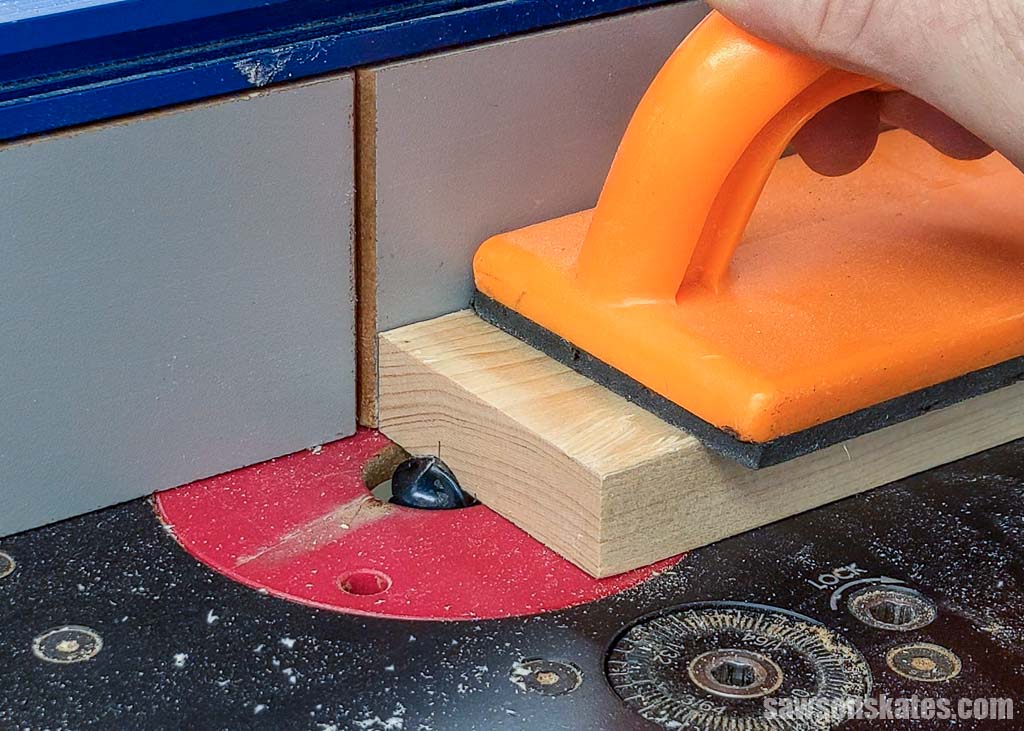
You can use a store-bought knob or handle, but I opted to make my own using a piece of scrap wood ripped to width with my table saw.
NOTE: I forgot to photograph the handle-making process, so I’m using photos from my key holder project to illustrate the steps. Keep in mind that the dimensions may vary, but the technique is the same.
Using my Kreg Multi-Mark, I made a reference line from the board’s edge.
I installed a cove bit in my router table and set its depth.
Related: How to Use a Router Table for Beginners
I adjusted the router table’s fence so the pencil mark was centered over the middle of the bit and used a push block to feed the material.
Using a miter saw, I cut the handle to length.
On the front, following the diagram in the printed plan, position the handle on the door, centered from side to side, and clamp it in place.
On the back, following the diagram in the printed plan, mark the location for countersink holes.
Using an awl, make a starting point for the drill bit. Drill a hole at each mark using a countersink bit.
Related: How to Use a Countersink bit
Attach using wood screws.
To finish up, I installed a magnetic cabinet door catch to keep the door closed.
Video
Watch now, and I’ll show you step-by-step how I made the bread box.
Includes:
- List of tools and materials
- Complete measurements (in inches)
- Easy-to-follow instructions
- Step-by-step photos
- Detailed diagrams
Final Thoughts
You can make this stylish and functional bread box with a few simple tools and materials. This project is a great way to add a touch of rustic charm to your kitchen while decluttering your countertops.
Don’t wait. Get your PDF plan (including the detailed instructions and measurements) now!
Thank you for stopping by. If you enjoyed this tutorial, would you please take a moment and pin it to Pinterest? I’d really appreciate it!
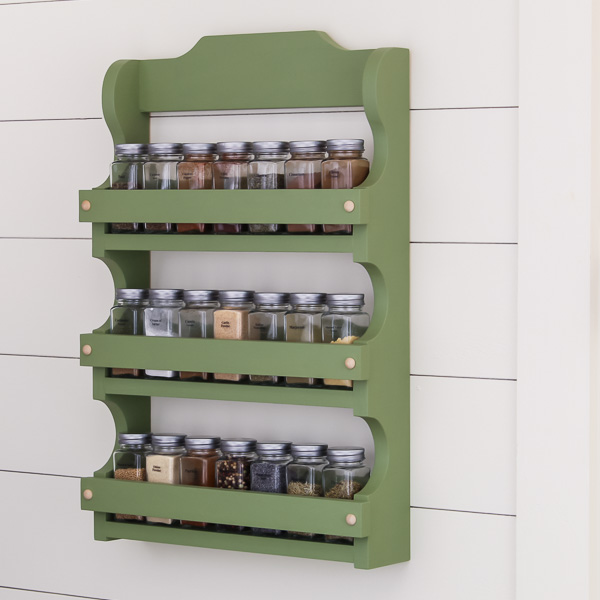
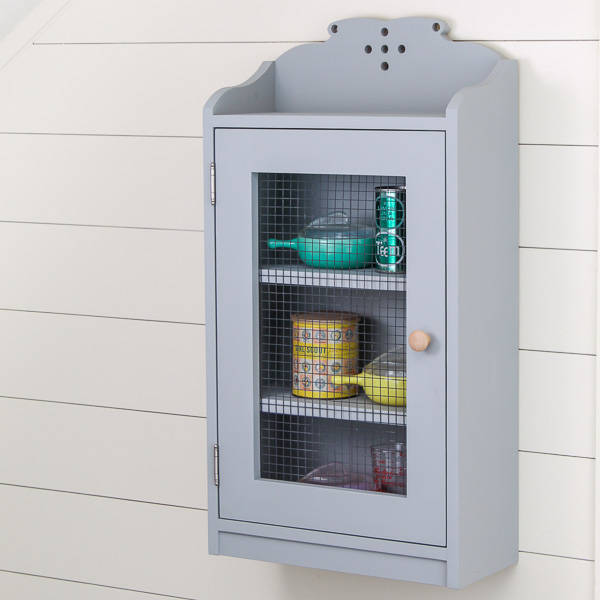
Recommended For You
Pin This For Later

Hi there – I’m Scott, a woodworking enthusiast and creator of Saws on Skates, a site I started in 2015 to share easy-to-follow tutorials, space-saving shop tips, and project inspiration for DIYers at any skill level. Learn more about my woodworking journey here.