DIY French Cleat Circular Saw Holder
Are you struggling to find a good storage spot for your circular saw? A French cleat holder could be the perfect solution! I’ll show you how to build this easy, space-saving DIY storage rack to keep your saw off your workbench and within easy reach.

What Should I Build Next?
That's the question I help answer.
Every week, I send woodworking ideas to 17,000 DIYers who love building things.
You'd fit right in.
Table of Contents
This article contains affiliate links. If you purchase from these links, I may earn a small commission at no additional cost to you. Visit my site policies for more information.
Inspiration for This Project
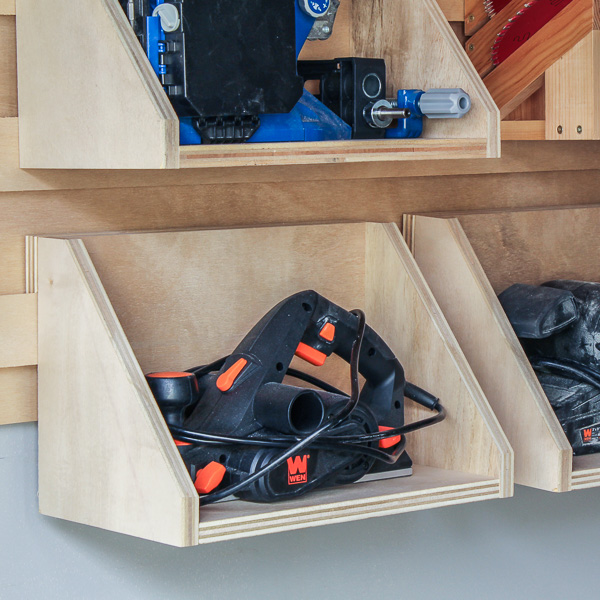
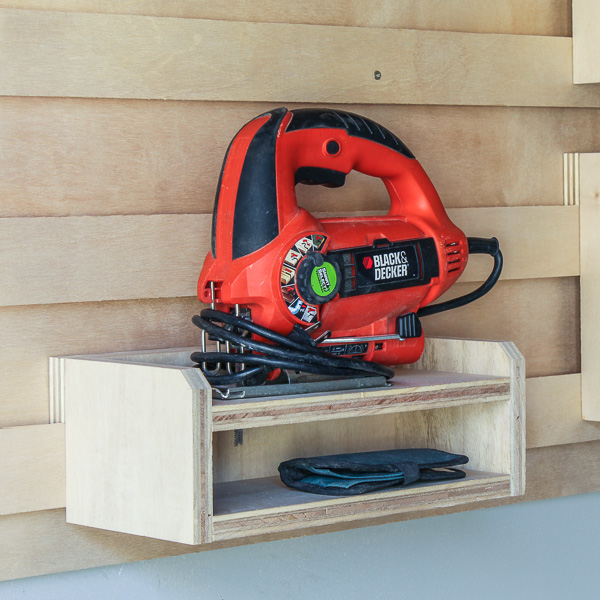
I recently installed a French cleat wall in my garage and have been moving tools I don’t often use from my workshop to this new storage area.
So far, I’ve made holders for my jigsaw, router, planer, and belt sander.
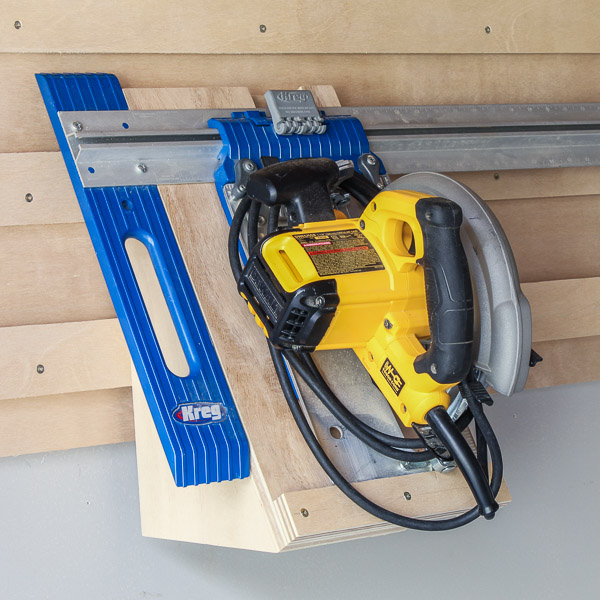
Now, I’m turning my attention to my Ryobi circular saw. I got it along with a masonry blade to cut through some cinder blocks for my garage renovation. The baseplate is pretty scuffed from sliding across the blocks, so I’m concerned it might damage any workpieces I use for my woodworking projects.
My buddy Doug has a saw he only uses for cutting up nail-ridden boards, weathered lumber, or anything that could mess up his good circular saw, calling it his “eat crap” saw. I liked the idea, so I’m giving my Ryobi this designation, too.
This new circular saw rack is similar to the tabletop version I made a while back. That tabletop holder was more upright, so it would fit inside my workshop storage cabinet, but I noticed the saw sometimes wanted to tip away from the rack. I went with a lower angle for this new version, improving the stability. And of course, I added a French cleat to the back.

What Wood Should You Use?
Plywood isn’t typically my first choice for projects, but I had some leftovers from building my garage’s French cleat storage wall, which I used to make this circular saw holder.

What Tools Do You Need?
I used five tools to make my circular saw storage rack:
- Table saw
- Circular saw
- Miter saw
- Pocket hole jig
- Drill
TIP: I used my table saw to rip the plywood to width, but you could use a circular saw and Kreg Rip-Cut instead.

How to Make a DIY French Cleat Circular Saw Holder
Printed Plan
Get the PDF plan here (includes detailed instructions, measurements, and bonus tips)
Materials
- Wood (per the printed plan)
- 1-¼” Pocket Hole Screws
- 1-¼” Wood Screws
- 1-¾” Wood Screws
- Double-sided Tape
Tools
- Tape Measure
- Kreg Multi-Mark
- Table Saw
- Circular Saw
- DIY Crosscut Guide
- Pocket Hole Jig
- Drill
- Countersink Drill Bit
Step 1. Make the Sides
I need three sides, one for the left and right and one for the middle. Using my table saw and a push block (I used this one), I ripped a piece of plywood to width, allowing me to cut two sides from one piece.
Related: 21 Table Saw Safety Rules (& Mistakes to Avoid)

I cut two pieces to length using my sliding miter saw. I need three sides, but keep in mind I can cut two from a single piece.
I marked the width on the board.

I’ll use my circular saw and a DIY crosscut jig to cut the side’s angle. This jig helps you make precise, straight cuts and usually consists of a base and a fence to guide the saw.
Since there isn’t enough space to clamp the jig to the board, I came up with a clever solution: applying double-sided tape on the area that will become the side.

I aligned the jig with my pencil mark and the corner of the board and pressed it in place.

I used my circular saw to cut the side, then repeated the process for the other two sides.

Following the diagram in the printed plan, I marked the location for pocket holes that will connect the sides to the left and right bases.
TIP: I like my shop builds to look as polished as my furniture projects, so I always try to hide pocket holes when I can. For this holder, I made two left sides and one right, ensuring the pocket holes are hidden on the interior.

I drilled one pocket hole at each mark using my pocket hole jig.
Related: How to Use a Pocket Hole Jig

Step 2. Assemble the Left Side
Using my table saw, I ripped a piece of plywood to width. At the miter saw, I cut it to length. I positioned the side on the base and attached it using pocket hole screws.
TIP: Clamps are important for preventing pocket hole joints from shifting. While I skipped using them on this angled piece, I recommend them for furniture projects where accuracy is essential.

Following the diagram in the printed plan, I positioned the second side on the base using my Kreg Multi-Mark.

I attached it using pocket hole screws.

Step 3. Assemble the Right Side
The right side base, stretcher, and saw support are the same width. I ripped enough plywood to width for these parts using my table saw.
I cut one piece to length for the right side base using my miter saw. I positioned the side on the base and attached using pocket hole screws.

Step 4. Attach the Stretcher
I cut a piece of material left over from Step 3 to length for the stretcher using my miter saw. I drilled two pocket holes in each end using my pocket hole jig.
I clamped the stretcher between the left and right sides and attached it using pocket hole screws.
NOTE: The assembly isn’t fully supported at this point, so it may be a bit wobbly.

Step 5. Attach the Saw Support
I cut a piece of material left over from Step 3 to length for the saw support using my miter saw.
Following the diagram in the printed plan, I marked the location for countersink holes.
TIP: Instead of screws, you can attach the saw support using glue and brad nails.
Using an awl, I made a starting point for the drill bit.
Related: What is an Awl? (& How to Use It)

I clamped the saw support to the assembly and drilled a countersink hole at each mark.
Related: How to Use a Countersink Bit

I attached it using wood screws.

Step 6. Attach the French Cleat
I cut a French cleat to length and positioned it on the sides.
Related: How to Make a French Cleat
I marked the locations for countersink holes and used an awl to make a starting point for the drill bit.
Then, I used a countersink bit to drill a hole at each mark.
I attached the cleat using wood screws.
TIP: Plywood can split when driving screws through the edge, so drilling pilot holes first helps avoid this.
Video
Watch now, and I’ll show you step-by-step how I made the circular saw rack.

Includes:
- List of tools and materials
- Complete measurements (in inches)
- Easy-to-follow instructions
- Step-by-step photos
- Detailed diagrams
or get the best value:
Final Thoughts
This French cleat circular saw holder is a quick DIY project that saves space and is an easy way to organize your workspace.
Thank you for stopping by. If you enjoyed this tutorial, would you please take a moment and pin it to Pinterest? I’d really appreciate it!
Recommended For You

Hi there – I’m Scott, a woodworking enthusiast and creator of Saws on Skates, a site I started in 2015 to share easy-to-follow tutorials, space-saving shop tips, and project inspiration for DIYers at any skill level. Learn more about my woodworking journey here.