DIY Writing Desk With Storage
Make your own simple, functional DIY writing desk with this step-by-step plan that doesn’t require any fancy tools or skills.
What Should I Build Next?
That's the question I help answer.
Every week, I send woodworking ideas to 17,000 DIYers who love building things.
You'd fit right in.
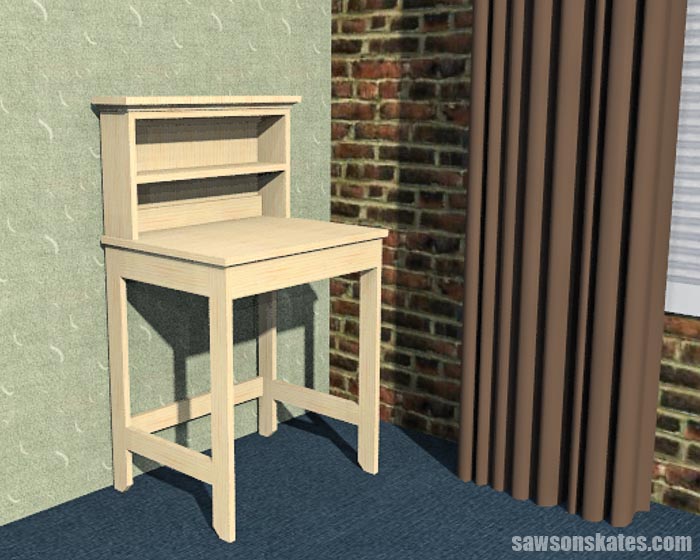
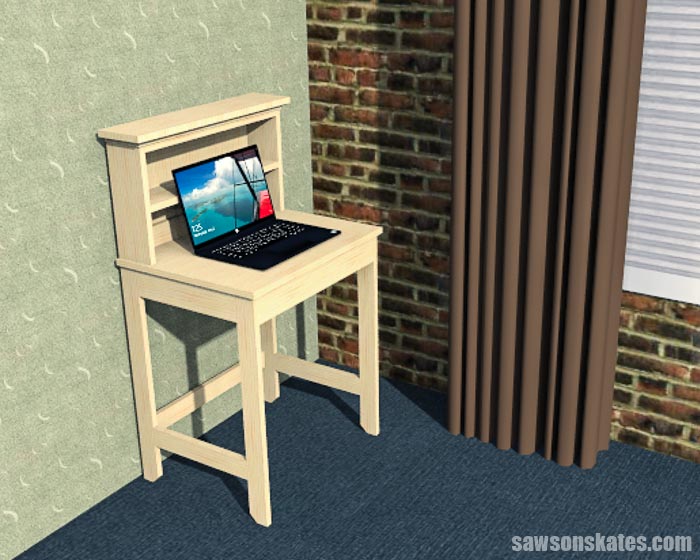
Do you need a place to work but don’t have the space for a big desk? Then this small DIY writing desk is perfect for you! There’s plenty of room to write or use a full-size laptop, and there’s a storage area to keep your most-used office supplies within easy reach.
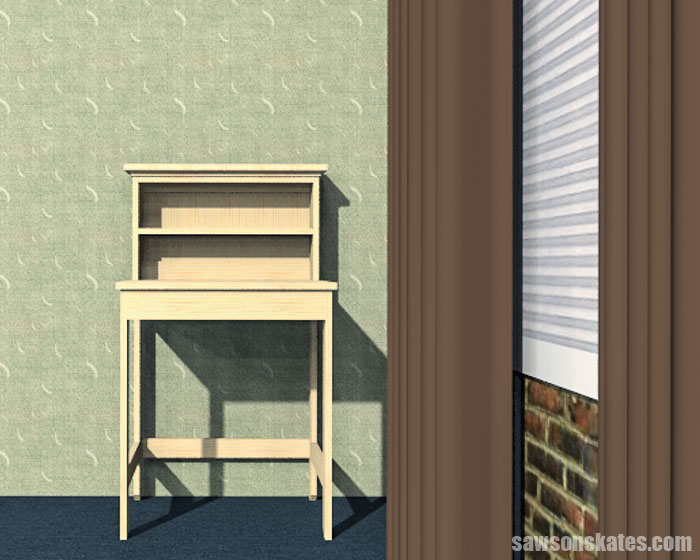
It’s ideal for a home office and small enough to tuck in the corner of a bedroom, living room, dining room, or kitchen.
The free step-by-step plan includes all of the measurements, easy-to-follow instructions, and detailed diagrams.
This tutorial contains affiliate links to supplies and tools. Purchases made using these links help support the Saws on Skates website and allows me to share more projects and tips with you. There is no cost to you for using these links. Visit my site policies for more information.
Table of Contents
- Inspiration for This DIY Writing Desk with Storage
- What Tools Do You Need to Make a Writing Desk?
- What Wood Should You Use?
- Customize Your Writing Desk Plans
- How Do You Finish the Writing Desk?
- How to Make a DIY Writing Desk with Storage Tutorial
- Get the Free Printed Plan
Inspiration for This DIY Writing Desk with Storage
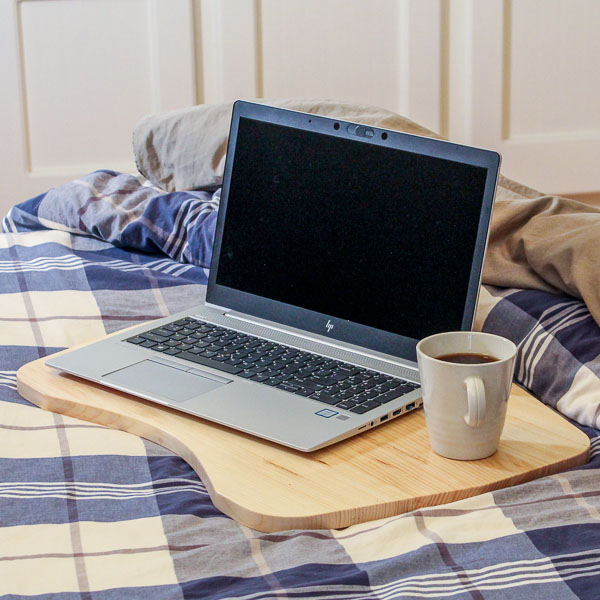
I love the idea of a home office, but I don’t have enough room in my little house for one. Instead, I often use my laptop on my dining room table or a lap desk like this.
At the very least, I want a dedicated workspace. So I searched for some small desk options and discovered this little repurposed desk on My Repurposed Life. I liked the tiny footprint and storage options, but I didn’t have any parts needed to make it. So, rather than copying it exactly, I took inspiration and designed my own version using new materials.
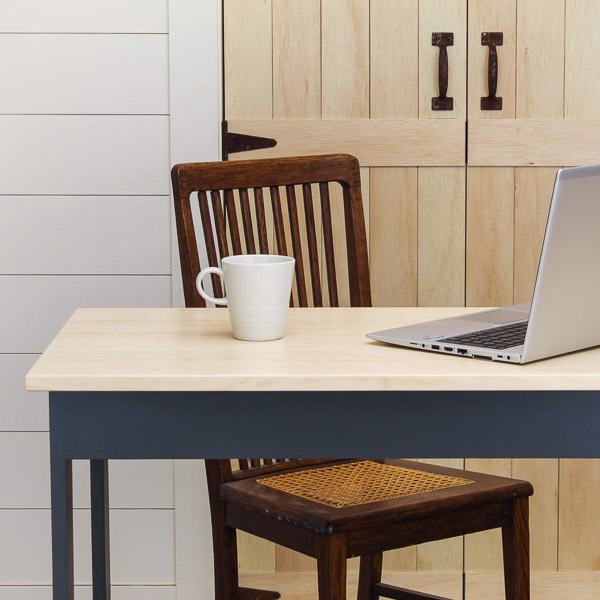
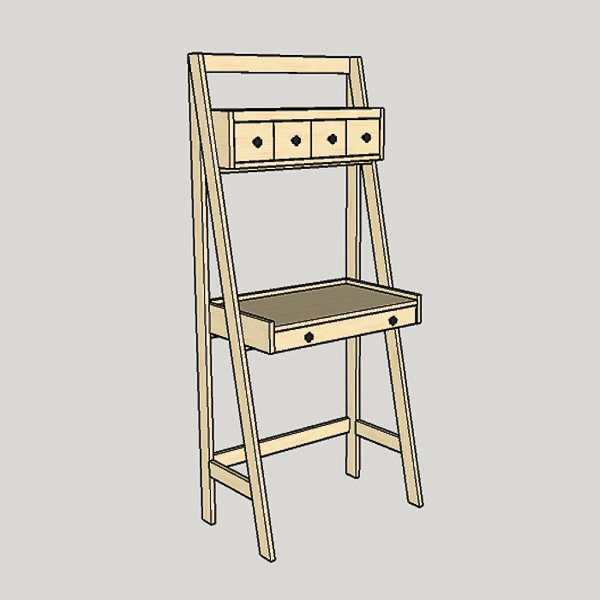
Here’s what I came up with: a DIY writing desk with enough room to write or use a full-size laptop, as well as a storage area with shelves for your frequently used office supplies.
This compact writing desk is ideal for a small home office, and it wouldn’t take up too much space in the corner of a bedroom, living room, dining area, or kitchen.
Need a larger desk? Check out the plans for this library table-style DIY desk.
What Tools Do You Need to Make a Writing Desk?
This simple DIY writing desk is easy for anyone to make. It’s a straightforward weekend project that requires only basic woodworking skills and common woodworking tools like a miter saw, pocket hole jig, and a drill.
You’ll also need an additional saw to cut the hardboard for the back of the desk. It’s also handy to have a brad nailer if you want to add cove molding to the storage area, but you could use a hammer instead.
Related: 9 Beginner Woodworking Tools (That Won’t Break the Bank)
Miter Saw
All of the components for this project may be cut to length with a miter saw.
Related: 7 Miter Saw Tricks Every DIYer Should Know
Pocket Hole Jig
I designed this project to be assembled using pocket hole joinery. You may drill the pocket holes with whatever pocket hole jig you have.
Related: Which Kreg Pocket Hole Jig Should You Buy?
Drill
You will need a drill to make the pocket holes and drive the pocket hole screws that connect the pieces together.
Related: Impact Driver vs Drill: What’s the Difference?
It might be difficult to reach the pocket screws that connect the top to the sides of the storage unit with a standard driver, so it’s helpful to have a right angle drill attachment as well.
A right angle drill attachment is ideal for drilling in tight spaces or driving screws in hard-to-reach locations.
Related: How to Screw in Hard-to-Reach Places
Additional Saw
You’ll need a small piece of hardboard to cover the back of the storage area. You could cut this piece with a table saw, circular saw, or even a jigsaw since the cuts don’t need to be precise.
Related: 4 Ways to Make Straight Cuts with a Circular Saw
Brad Nailer
I included cove molding at the top of the storage area to add a bit of visual interest. A brad nailer makes it easy to attach this trim.
Related: Pin Nailer vs Brad Nailer: Differences & Which to Use
What Wood Should You Use?
I designed this project so you could make it with off-the-shelf lumber like 1×2s, 1×3s, 1×4s, and cove molding. You’ll also need a small piece of hardboard for the back of the storage area. Hardboard is frequently located near the plywood section in most home improvement stores.
Related: Beginner’s Guide to Wood Sizes
One thing you’ll want to think about is the type of wood that you use for the desktop. Pine is relatively inexpensive and easy to work with, but it’s a softwood. Softwoods like pine are easily dented, which means if you plan to use this as a writing desk, pens or pencils will leave indentations in the wood. You may want to consider hardwoods like oak or poplar to make the desktop instead.
Back to Table of ContentsCustomize Your Writing Desk Plans
There are several ways to customize your writing desk, including adjusting the dimensions and adding a drawer.
Dimensions
You could make the desktop bigger by increasing the width of this project. The shelves are about 6″ tall, so you could increase the height to store taller items if desired.
Drawer
Since this is a simple desk, I designed it without a drawer. You could easily attach drawer slides to the sides and make a drawer box to provide additional storage for your project.
Related: How to Build DIY Drawers
How Do You Finish the Writing Desk?
The possibilities for finishing this desk are endless. It may be left natural, painted, stained, or a combination of the two.
For this library table desk I built for a friend, I painted the desk frame and applied a clear finish on the desktop. You may want to paint the desk frame of this writing desk too.
The bottom rails are connected to the legs using pocket holes. To conceal these holes, I recommend filling them with pocket hole plugs and filling any gaps around the plugs with Ready Patch.
Related: How to Make Pocket Hole Plugs
After the paint has been applied, it’s nearly impossible to see the locations of the pocket holes. You could also fill any gaps with a stainable wood filler if you plan to stain your project.
Related: Does Stainable Wood Filler Really Work? (Here’s the Answer)
You can learn more about how I finished the library table desk here.
Back to Table of ContentsDIY Writing Desk with Storage
Printed Plan
- Get the FREE plan here (includes detailed instructions, measurements, and bonus tips).
Supplies
- Wood (per the printed plan)
- 1-¼” Pocket Screws
- Wood Glue
- ½” Brad Nails
- 1” Brad Nails
- (3) 2” Mending Plates
- Table Top Expansion Brackets
- #8 x ½” Truss Head Screws
Tools
- Tape Measure
- Drill
- Kreg Jig
- Kreg Multi-Mark
- Miter Saw
- Jigsaw, Circular Saw, or Table Saw
- Brad Nailer or Hammer
- Right Angle Drill Attachment
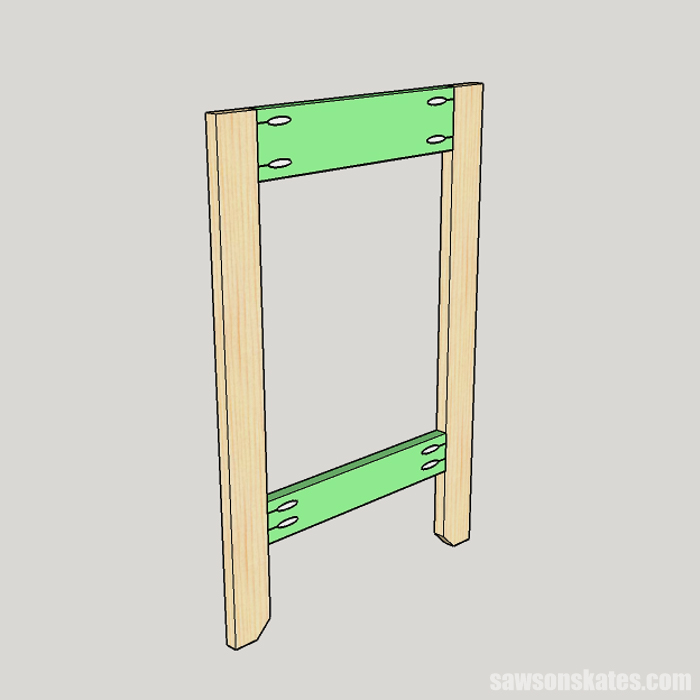
Step 1. Make the Leg Assemblies
Cut four pieces of wood to length for the legs. Use the diagram in the printed plan to cut a 45-degree angle at the bottom of each leg.
Cut four pieces of wood to length for the rails and drill pocket holes in the end.
Related: How to Use a Kreg Pocket Hole Jig
To help position the bottom rail, cut two pieces of scrap wood and clamp one piece to the bottom of each leg.
Apply glue to the ends of the rails, position on the legs, and clamp. Attach using 1-¼” pocket hole screws.
You might want to fill the visible pocket holes with pocket hole plugs to conceal them.
Related: How to Make Pocket Hole Plugs
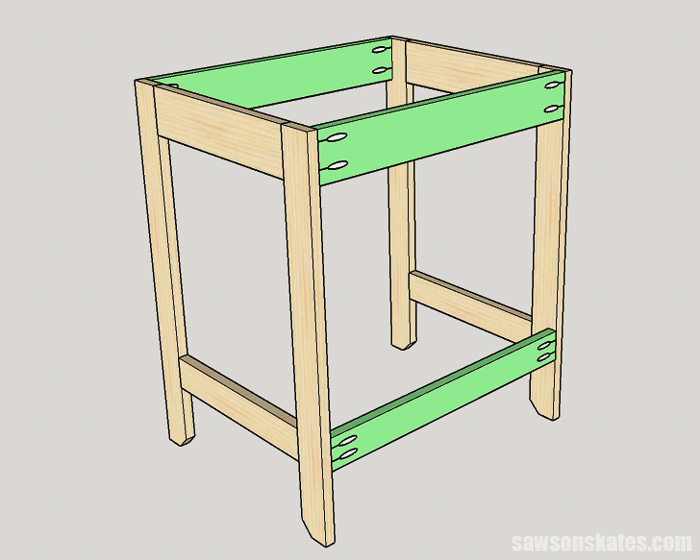
Step 2. Attach the Rails
Cut three pieces of wood to length for the rails and drill pocket holes in each end.
To help position the bottom rail, cut two pieces of scrap wood and clamp one piece to the bottom of each leg.
Apply glue to the ends of the rails, position on the legs, and clamp. Attach using 1-¼” pocket hole screws.
Step 3. Attach the Desktop
Use the diagram in the printed plan to mark the locations for the tabletop expansion brackets on the top of the legs.
The expansion brackets will attach the top to the legs. The brackets also allow the top to expand and contract with seasonal changes. The desktop could crack if this movement is limited or restricted.
Related: Mistakes with Wood Can Cause Your DIY Furniture to Crack
I also used these brackets to attach the top on this nightstand. I placed the holes in the tops of the brackets, so they were oriented in the same direction, as shown below.
Wood expands the most across its width, which means this desktop will expand from front to back. The top of the desk will be free to move from front to back when the holes are oriented as they are in the nightstand example below.
Related: How to Attach a Table Top to a Base (The Right Way)
Cut eight pieces of wood to length for the top. Use the diagram in the printed plan to mark the locations for pocket holes, apply glue, clamp, and attach using 1-¼” pocket hole screws.
Related: How to Edge Join with Pocket Holes
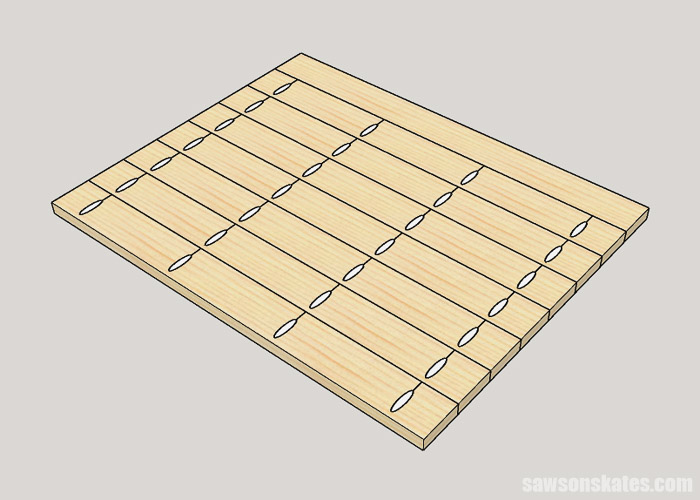
Position the top on the leg assembly, flush against the back, and attach through the expansion brackets using these screws.
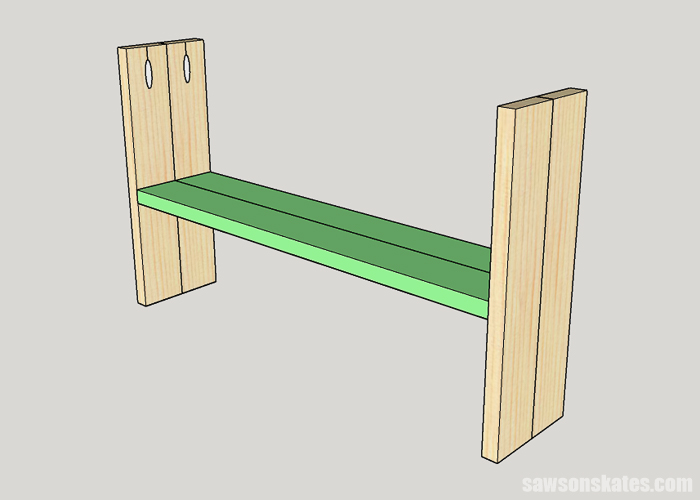
Step 4. Make the Storage Unit
Cut two pieces of wood to length for the shelf. Apply glue to the edge and clamp to form a panel. When the glue is dry, use the diagram in the printed plan to drill pocket holes in each end.
Cut four pieces of wood to length for the sides. Apply glue to the edge and clamp to form two panels. When the glue is dry use the diagram in the printed plan to drill pocket holes in one end.
Cut two pieces of scrap wood and clamp to the bottom of each side. Be sure the pocket holes are facing up and towards the inside of the storage unit.
Apply glue to the ends of the shelf, position on the sides, and clamp. Attach using 1-¼” pocket hole screws.
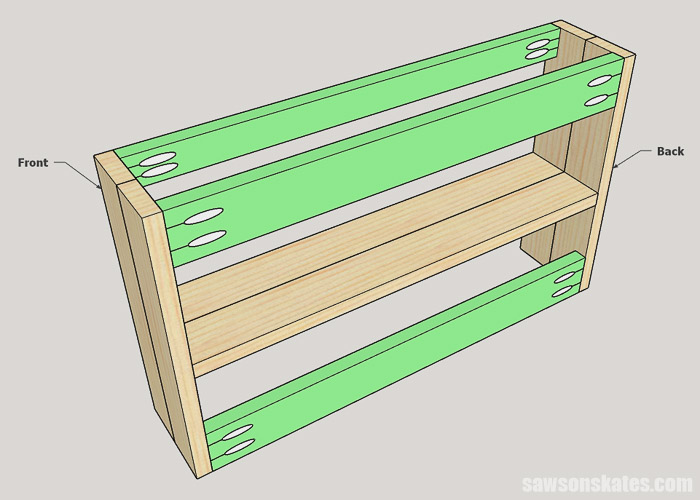
Cut three pieces of wood to length for the rails and drill pocket holes in each end.
Apply glue to the ends of the rails, position on the sides, clamp, and attach using 1-¼” pocket hole screws.
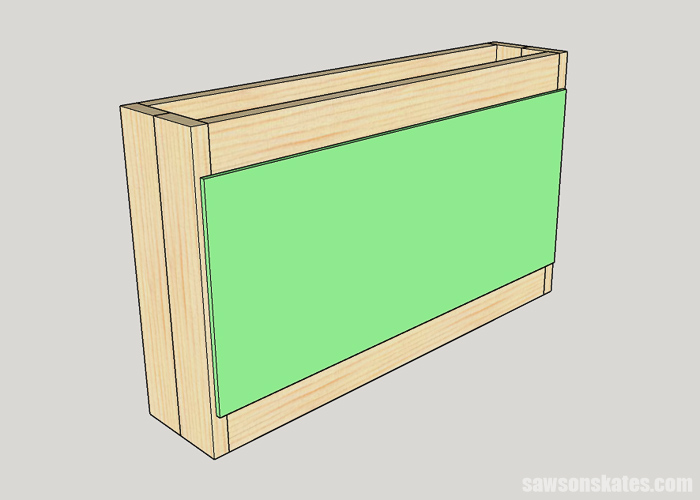
Use a jigsaw, circular saw or table saw to a piece of hardboard to size for the back.
Related: 4 Ways to Make Straight Cuts with a Circular Saw
Center on the opening and attach using ½” brad nails.
Related: Brad Nailer vs Finish Nailer: Which to Use & Why
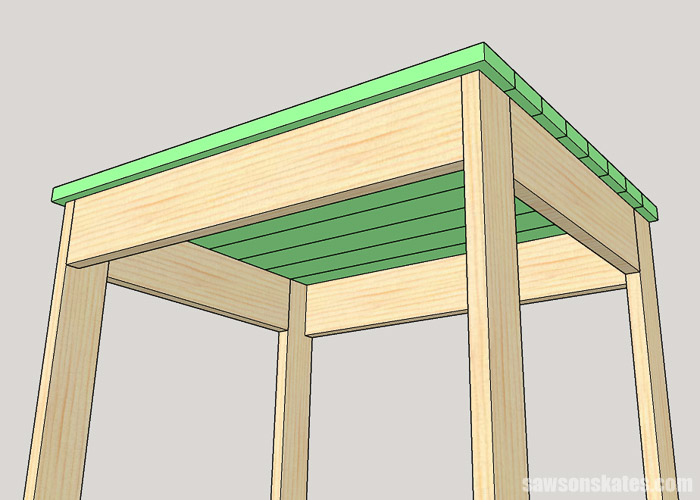
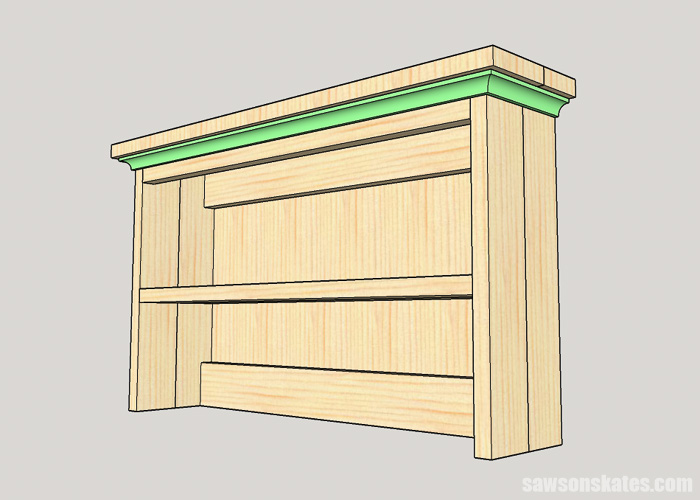
Cut two pieces of wood to length for the top. Apply glue to the edge and clamp to form a panel.
When the glue is dry, center the top on the sides and clamp. It may be difficult to access the pocket screws that join the top to the sides. A right angle drill attachment is an excellent tool for reaching these screws. Attach using 1-¼” pocket screws.
📝 NOTE: The top can be attached using pocket hole joinery rather than expansion brackets because the wood grain on the top and sides runs in the same direction. The top and sides will both expand from front to rear, and there are no fasteners or cross members that would prevent this movement.

Cut the cove molding, position beneath the top, and attach using 1″ brad nails.
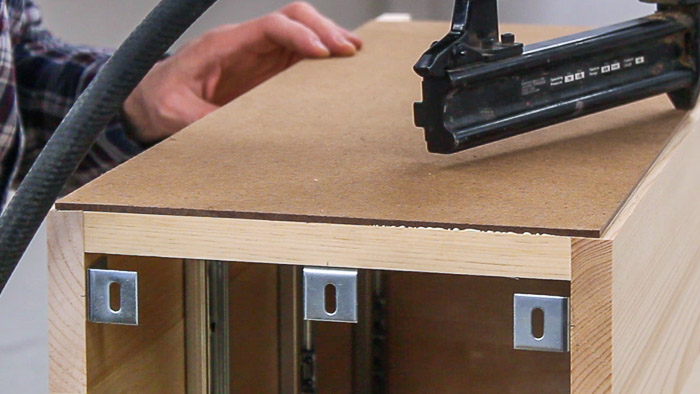
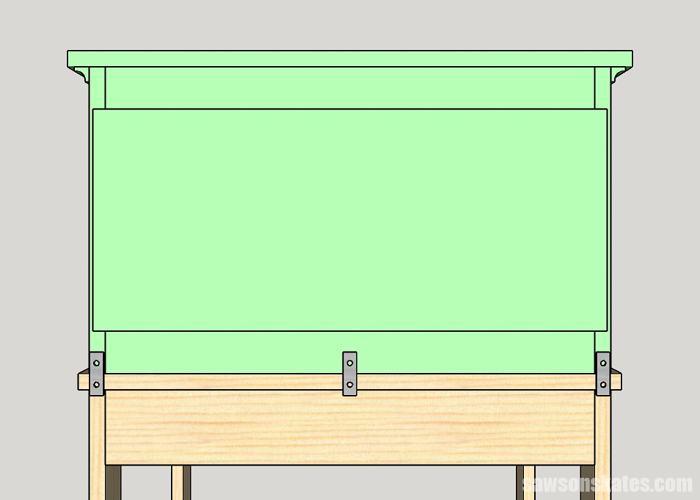
Step 5. Attach the Storage Unit
Center the storage unit on the desktop and attach using 2″ mending plates and screws.
Step 6. Finish the DIY Writing Desk
See How Do You Finish the Writing Desk for more information.
Final Thoughts
This small DIY writing desk is ideal for anyone who doesn’t have the room for a big workstation but still needs somewhere to get their work done. There’s plenty of space to write or use a full-size laptop, and there’s also a storage area for your most-used office supplies.
Get the free plan (including the detailed instructions and measurements) now!
Thank you for stopping by. If you enjoyed this tutorial, would you please take a moment and pin it to Pinterest? I’d really appreciate it!
Recommended For You
Pin This For Later

Hi there – I’m Scott, a woodworking enthusiast and creator of Saws on Skates, a site I started in 2015 to share easy-to-follow tutorials, space-saving shop tips, and project inspiration for DIYers at any skill level. Learn more about my woodworking journey here.